EvTrack Connect links this system to access control equipment on your own network through the Connect agent: a small program you install on a computer inside your network. The agent keeps a secure, encrypted connection to this system and passes commands to your on-site access control system, so this system never needs a direct network route to that equipment.
Each agent is one integration app. This page explains how to add one, install its configuration on the agent computer, read its status, and use the Provisioning tab to recover, refresh or retire it.
Before you start
- An administrator account that can manage integration apps.
- A computer inside your network for the agent, with the Connect agent software installed and its dashboard reachable in a browser on that computer.
- Network access from the agent computer to this system.
Add an EvTrack Connect app
Step 1: Choose EvTrack Connect
Open Configuration > System Settings > Apps and click Add. Choose EvTrack Connect as the type, enter a name for the agent (for example the site it serves) and leave Enabled ticked. Click Next.
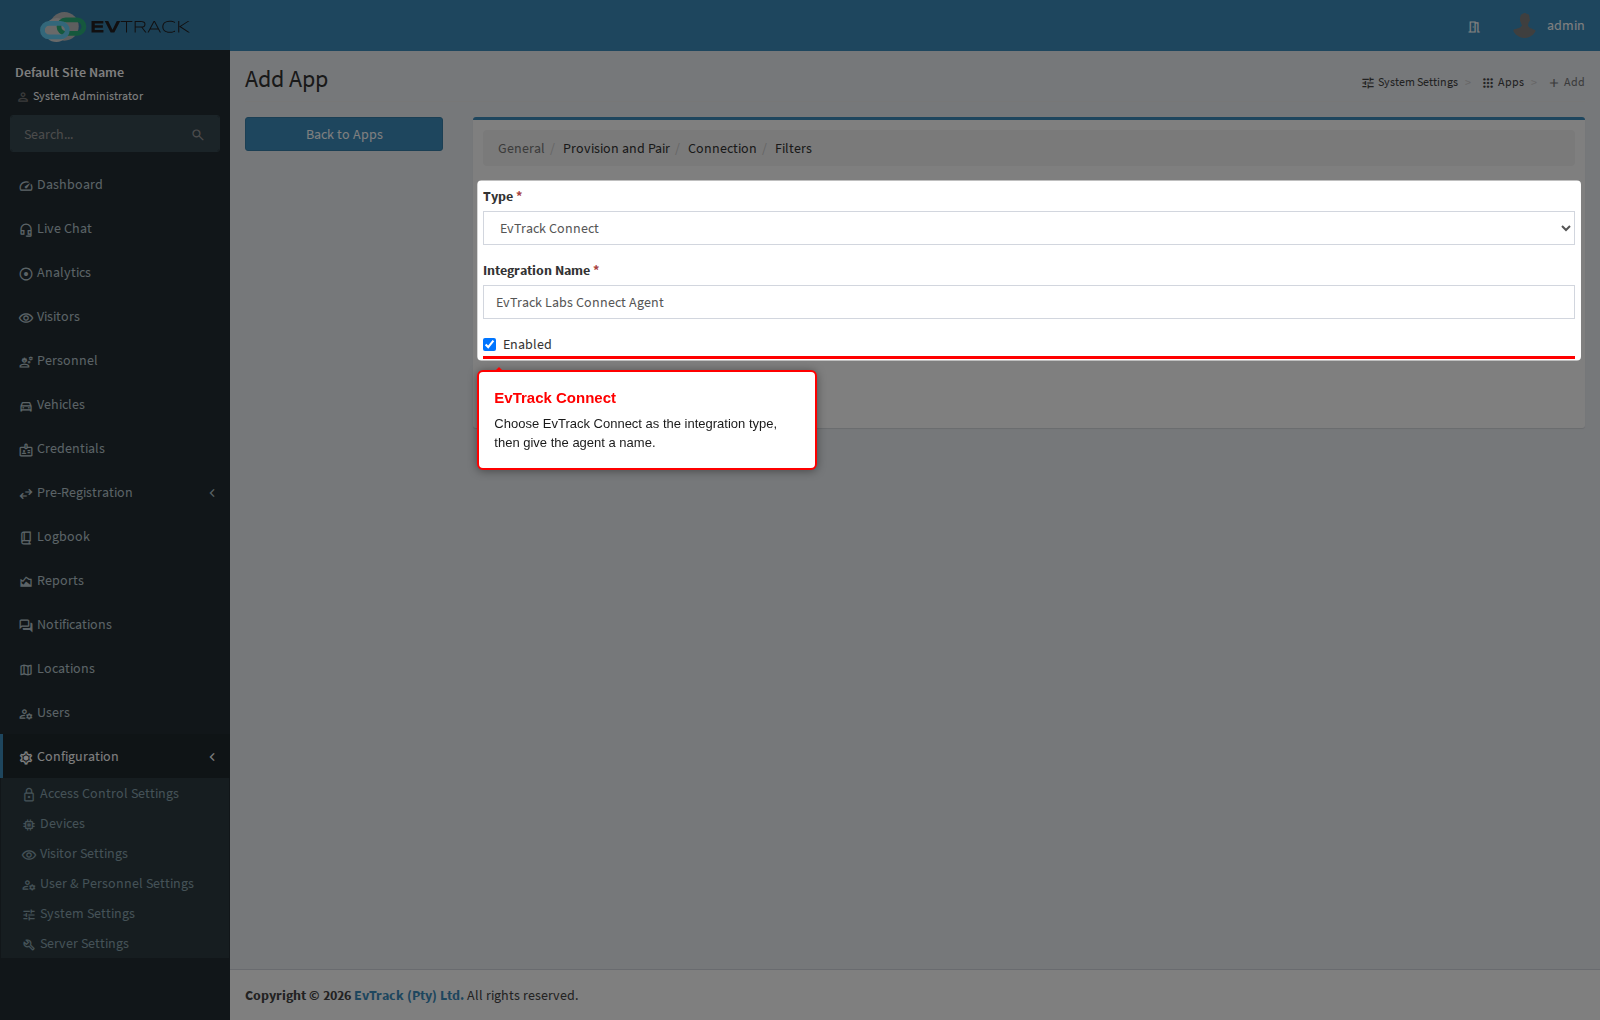
Clicking Next saves the app straight away and moves to Provision and Pair. From here on the app appears in your Apps list, so you can close the wizard and finish the setup later from the app’s Edit page. The app remains Disabled until the wizard finishes: with Enabled ticked, Finish enables it once the agent has connected. If you finish the setup later, enable the app on its General tab after the agent has connected.
Step 2: Download the agent configuration
The Provision and Pair step provisions the agent on its own: it creates the security certificate and secret key the agent needs and shows Provisioned. Click Download Configuration to save the agent’s configuration file (a .zip file).
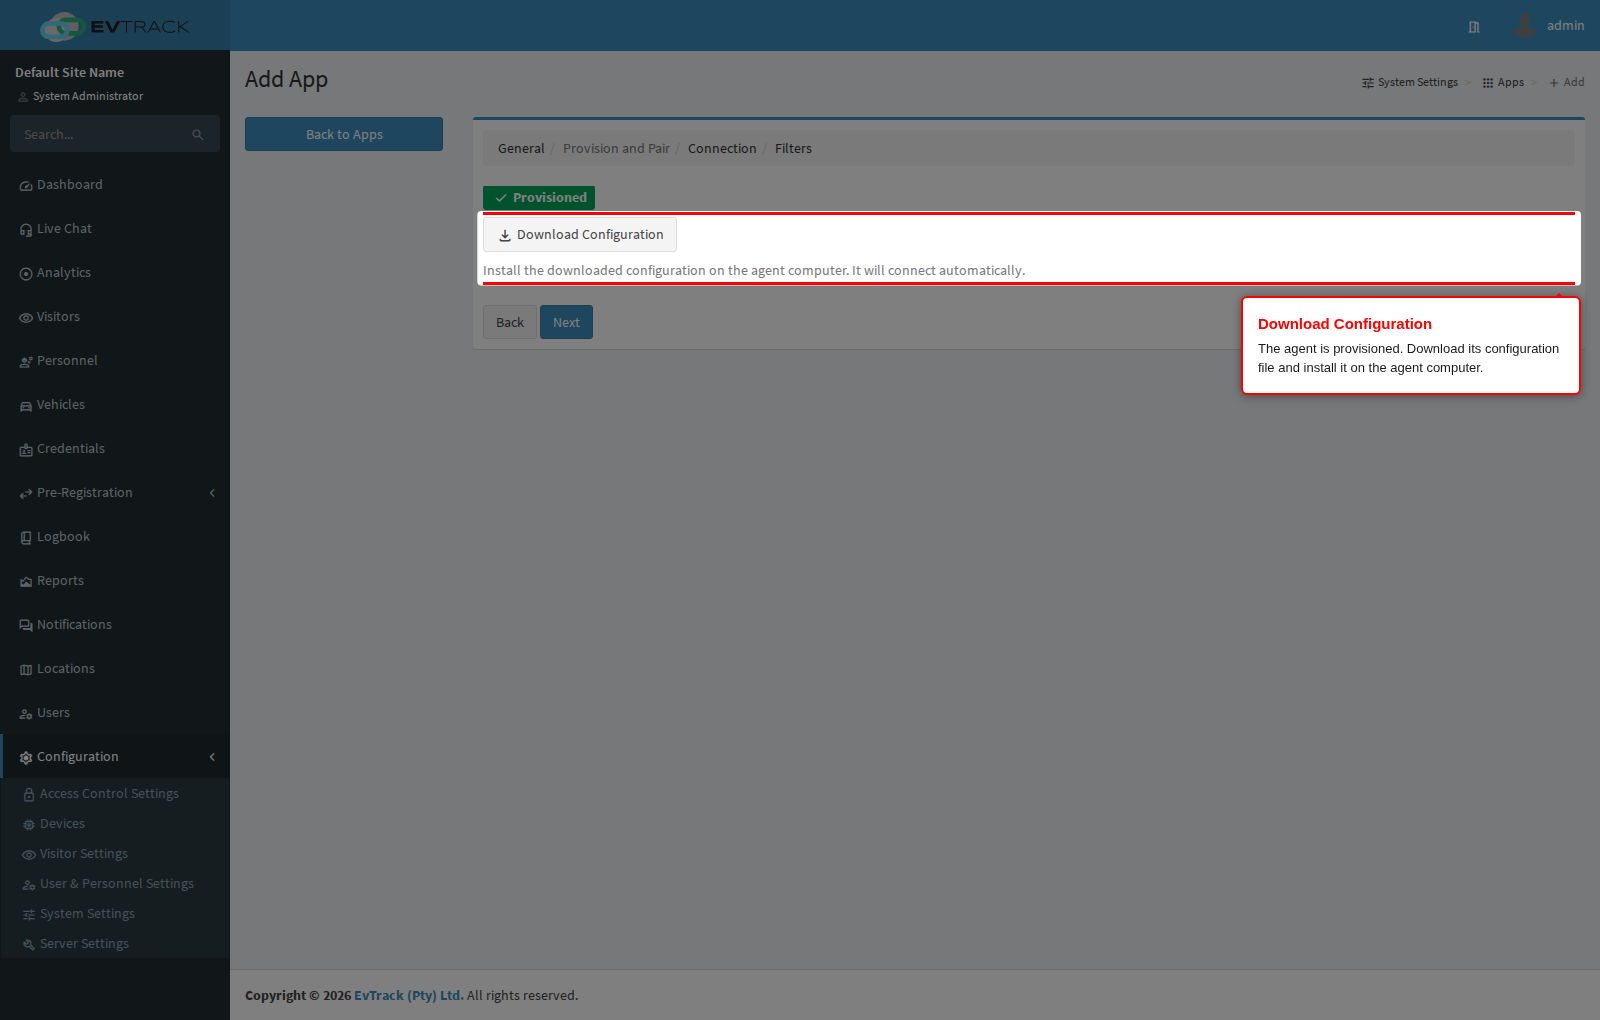
After the download the wizard shows Waiting for the agent to connect… and checks for the agent every 10 seconds for up to 5 minutes.
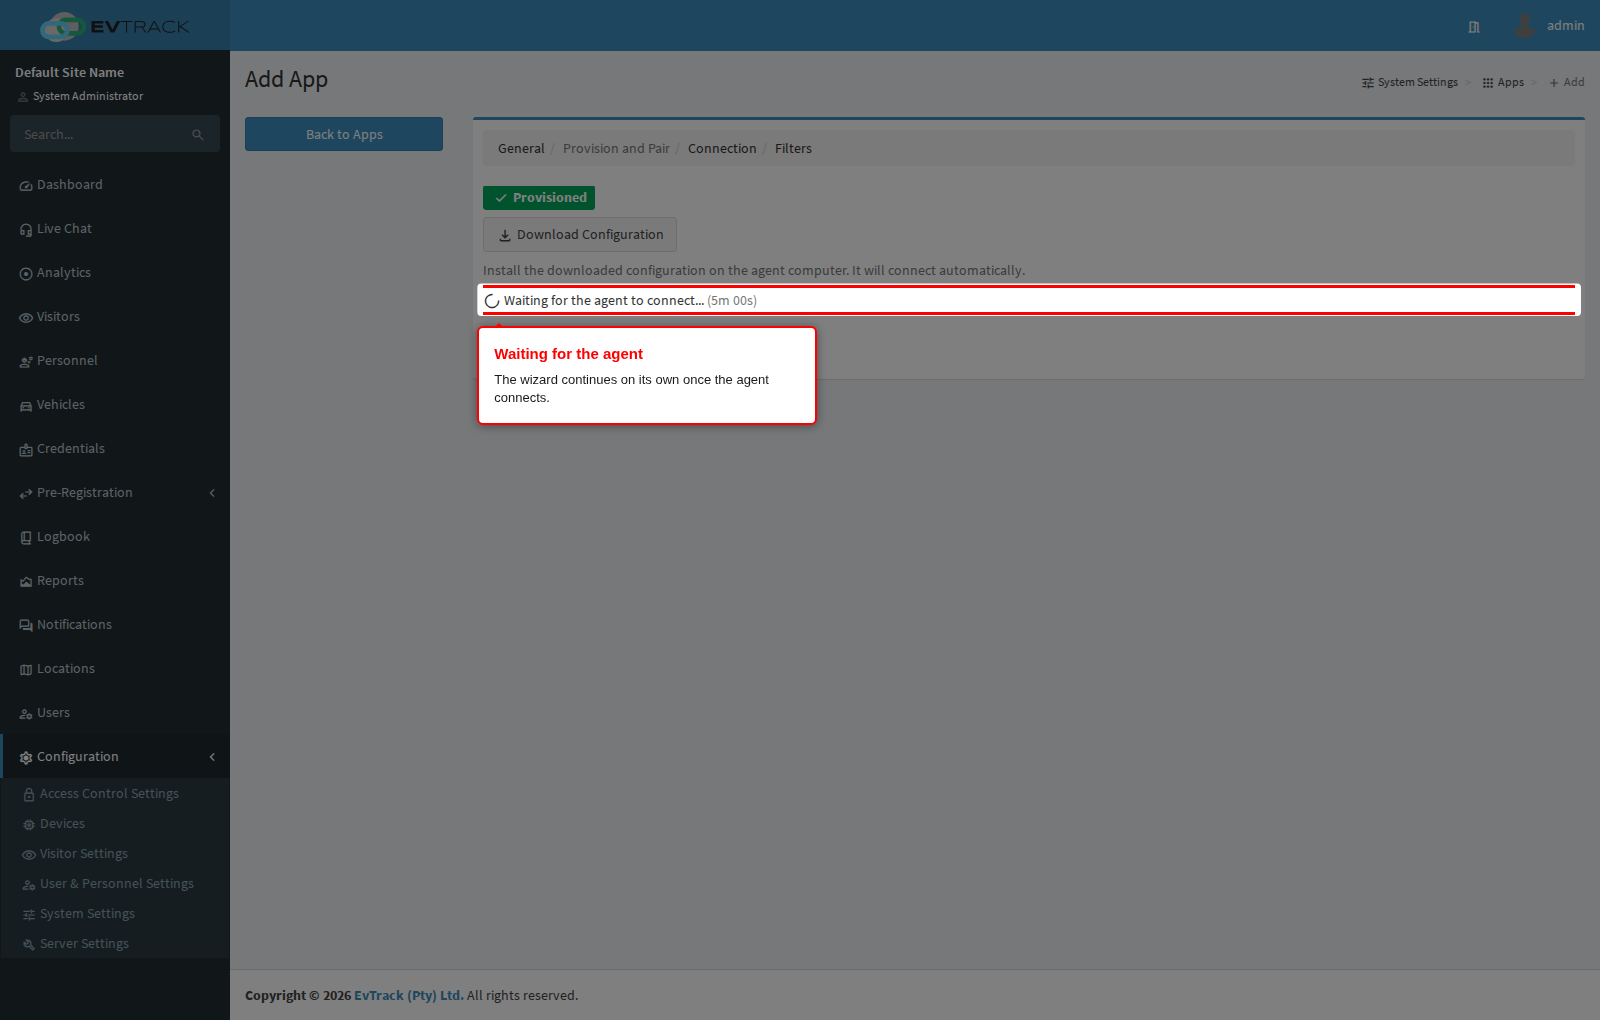
Keep the configuration file safe: it lets the agent connect to this system. Do not share it or keep copies of it on other computers.
Step 3: Install the configuration on the agent computer
On the agent computer:
- Open the agent’s dashboard in a browser and log in.
- Open Upload Config.
- Drag the downloaded .zip file onto Upload Configuration Bundle, or click to browse for it, and upload it.
The agent applies the configuration and connects on its own. Back in the wizard, the step then reports Agent connected, checks the agent for its vendor type and capabilities, and moves on to Connection and Filters, where you complete the settings for your access control system. If the agent does not connect within 5 minutes, the wizard offers Retry and Finish setup later; the app remains saved either way.
Read the agent status
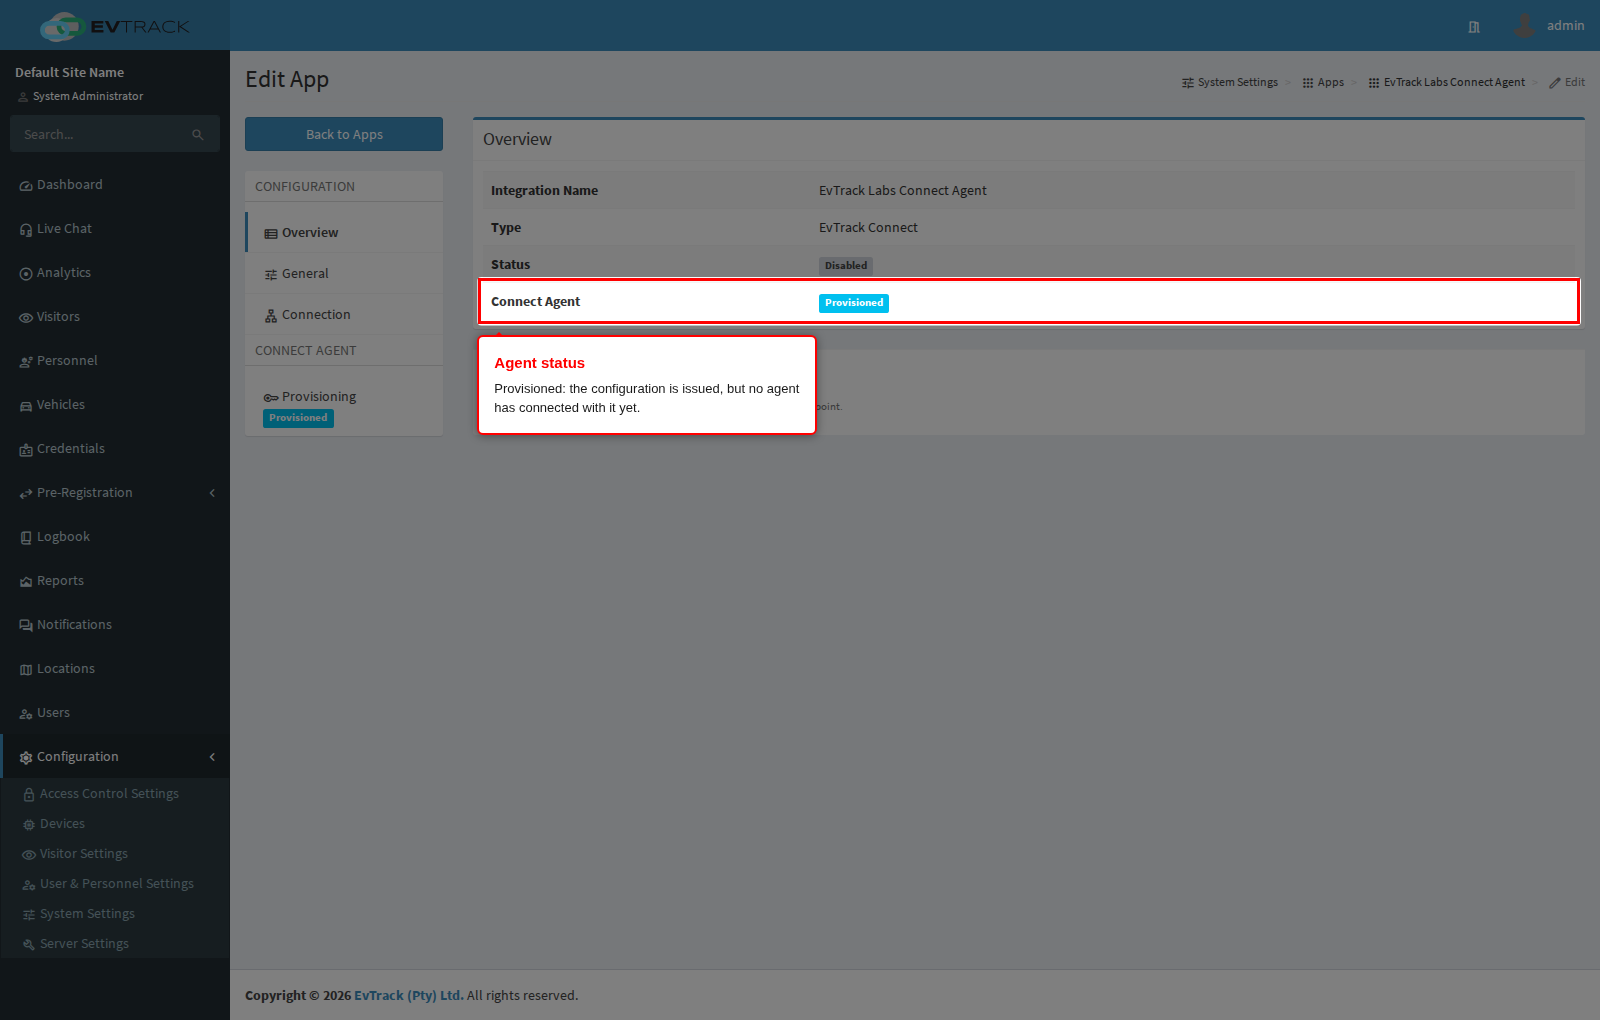
Open the app from the Apps list. The Overview tab shows the agent’s status in the Connect Agent row, and the Provisioning item in the side menu carries the same status badge.
| Status | Meaning |
|---|---|
| Not Provisioned | No configuration has been issued yet. Click Provision. |
| Provisioned | A configuration has been issued, but no agent has connected with it yet. |
| Connected | The agent is connected with its current configuration. |
| Disconnected | The agent was connected but has not been heard from recently. |
| Revoked | The agent was revoked and cannot connect. Click Provision to set it up again. |
The status is read when the page opens. Reload the page to see a change, for example after you install the configuration on the agent computer. Once the agent has connected, the Overview tab also shows when it was last connected.
The screenshots on this page come from an app whose agent has not been installed yet, so they show Provisioned (and the app’s own status Disabled, because its wizard has not finished).
The Provisioning tab
Open Provisioning in the side menu. Each action has a short explanation beside it, and every action that changes the agent’s credentials asks you to confirm it first.
Provision
Provision creates the security certificate and secret key and marks the agent ready to connect. The wizard does this for you, so you need it only for an agent that was revoked (or one that was never provisioned). For an agent that already has a configuration, Provision changes nothing: use Re-pair agent to replace it.
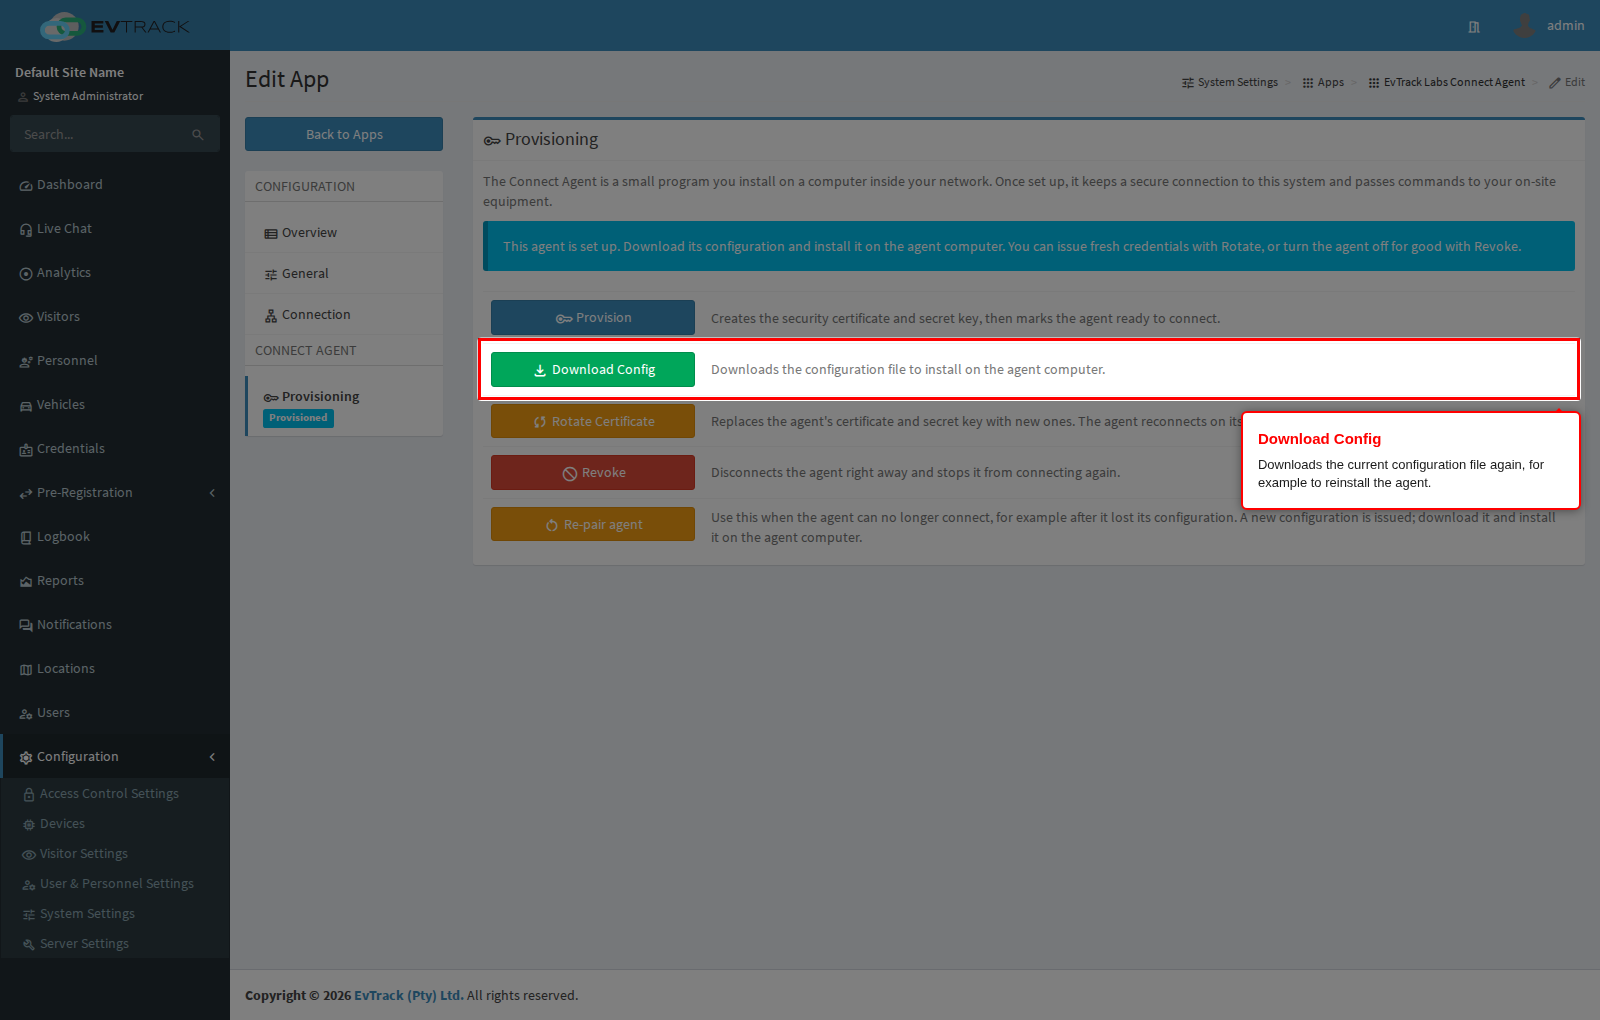
Download Config
Download Config downloads the agent’s current configuration file again, for example to reinstall the agent on the same computer. Install it the same way as in Step 3.
Re-pair agent
Use Re-pair agent when the agent can no longer connect: the agent computer was rebuilt or replaced, the agent was reinstalled, or its configuration was lost or deleted. Re-pair issues a new configuration, disconnects the current agent, and the old configuration stops working at once, wherever a copy of it still exists.
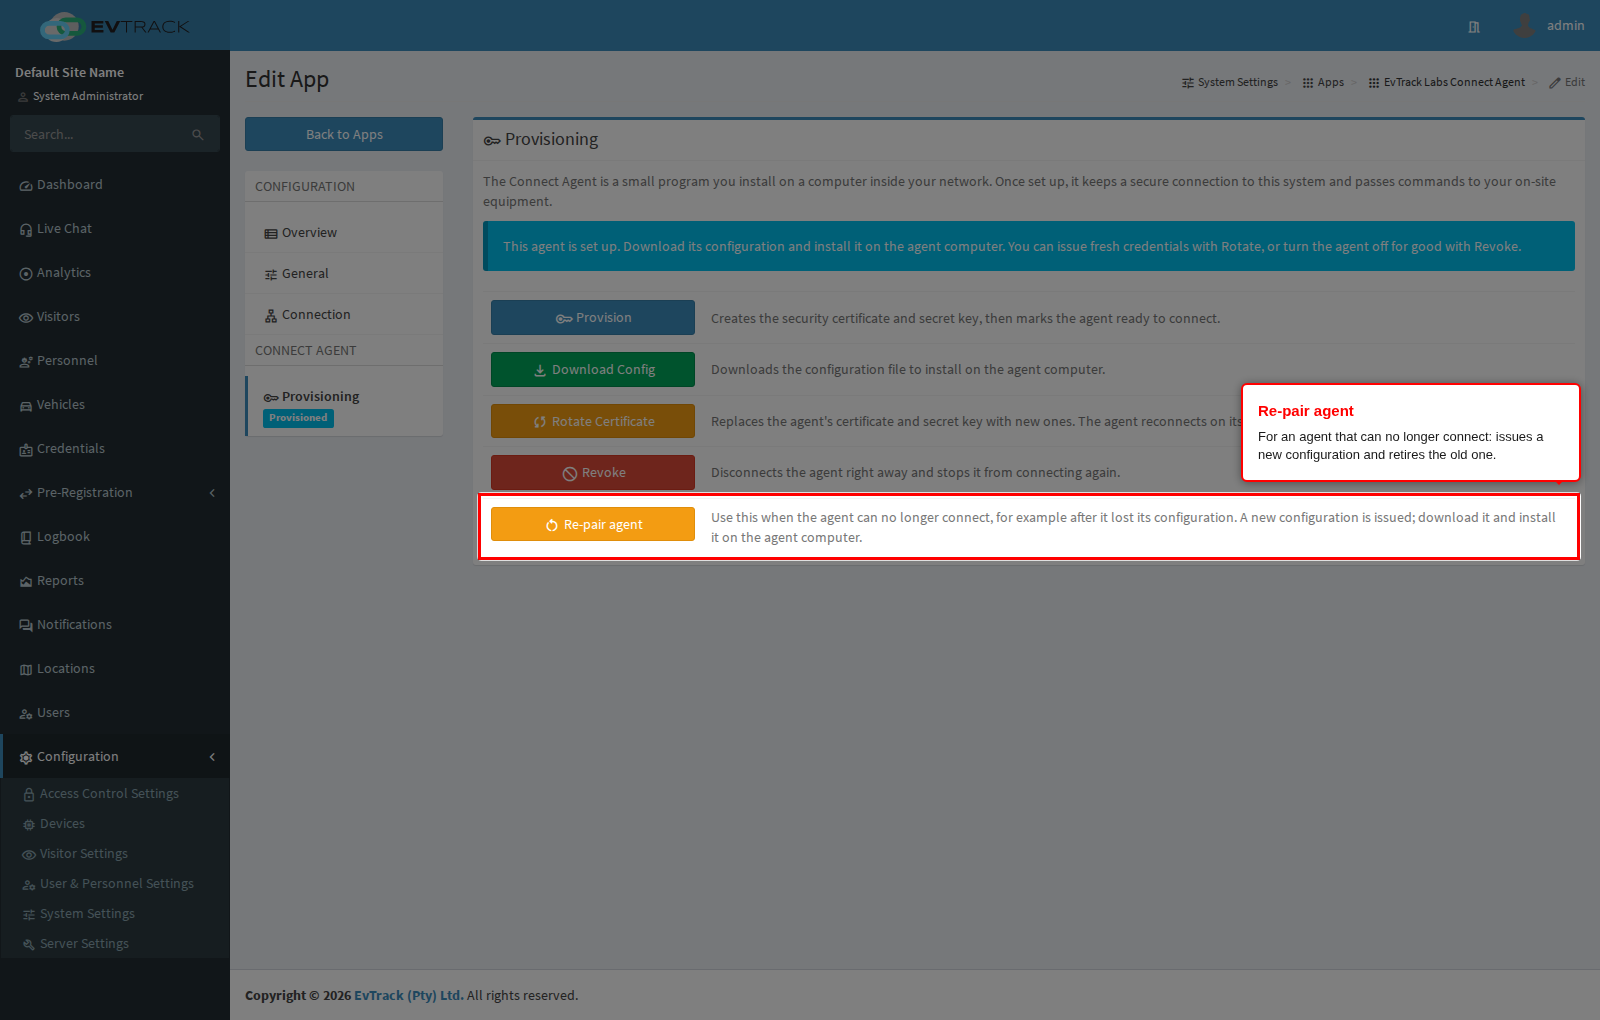
Click Re-pair agent and confirm.
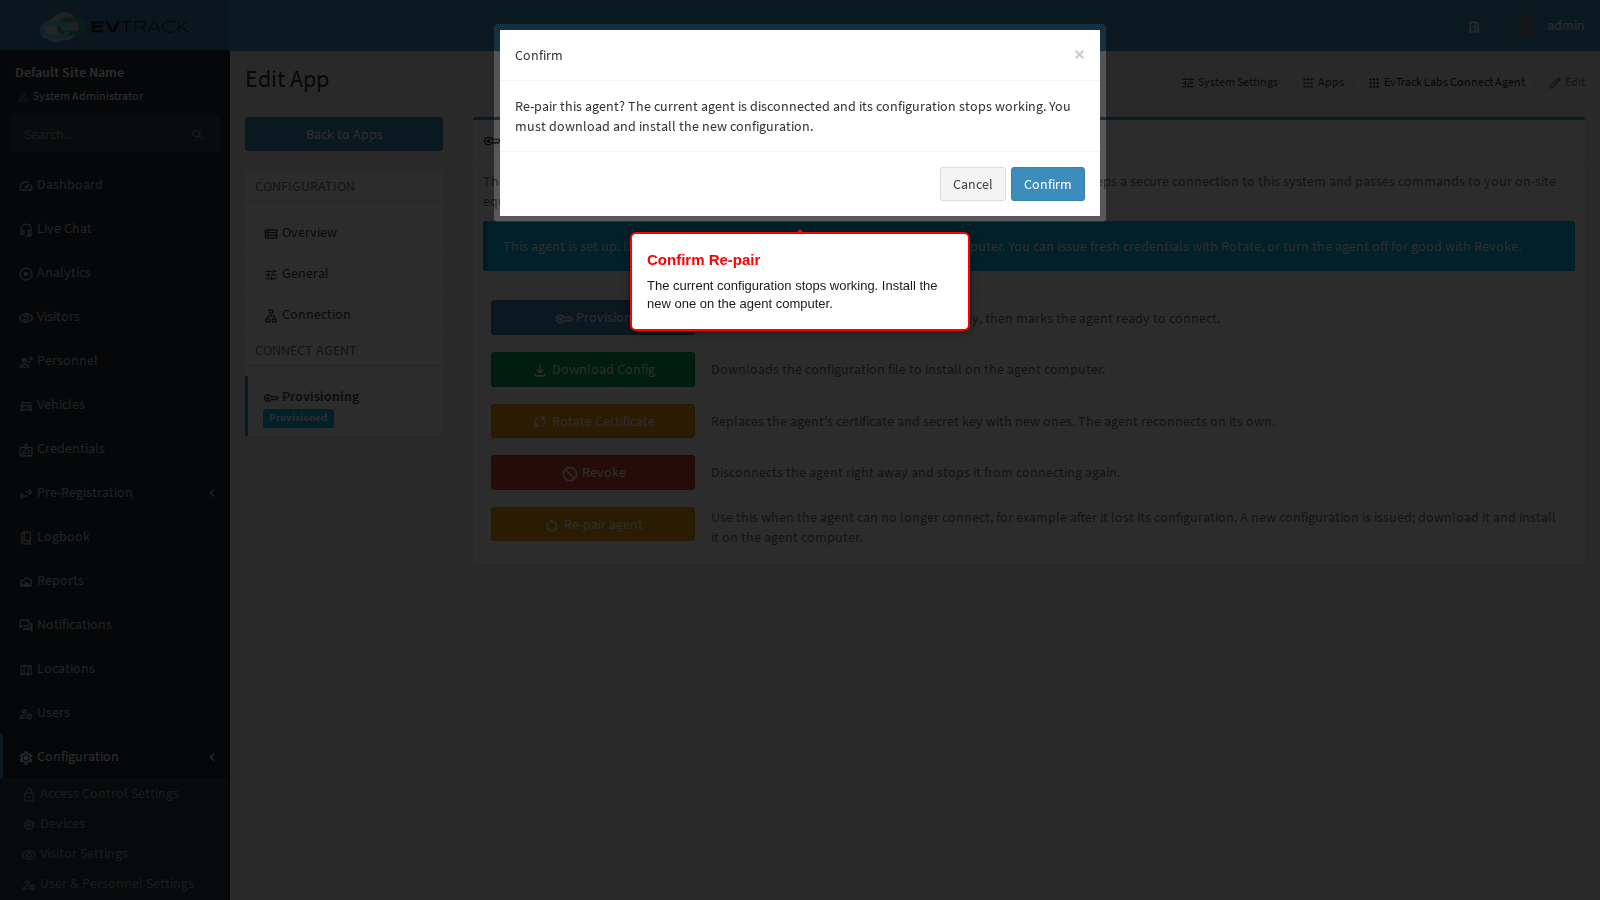
Then click Download Config and install the new configuration on the agent computer (see Step 3). Until you do, the agent cannot connect. Reload the app’s page to see the status change to Connected once the agent is back.
Rotate Certificate
Rotate Certificate replaces the agent’s certificate and secret key with new ones, for example as part of a regular security routine. A connected agent receives the new credentials over its existing connection, briefly disconnects and reconnects on its own, so there is nothing to install on the agent computer.
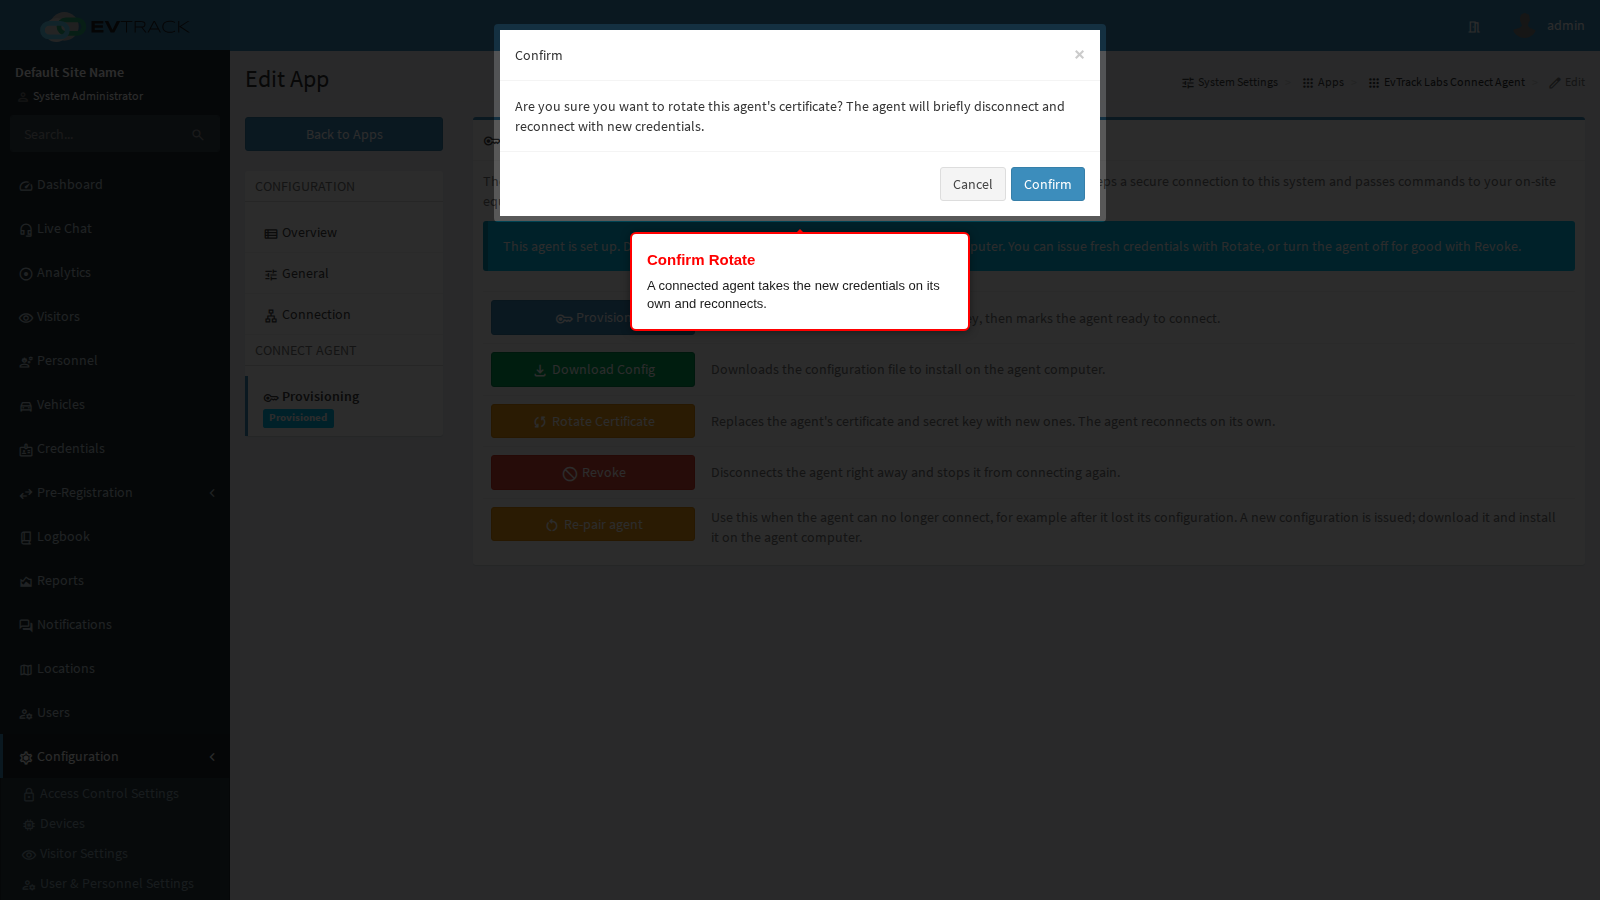
Because the new credentials travel over the agent’s connection, rotate only while the status reads Connected; for an agent that cannot connect, use Re-pair agent instead. An agent’s certificate can be rotated once every 24 hours.
Revoke
Revoke disconnects the agent right away and stops it from connecting again, for example when the agent computer is retired or you suspect its configuration was copied. Confirm the dialog to revoke.
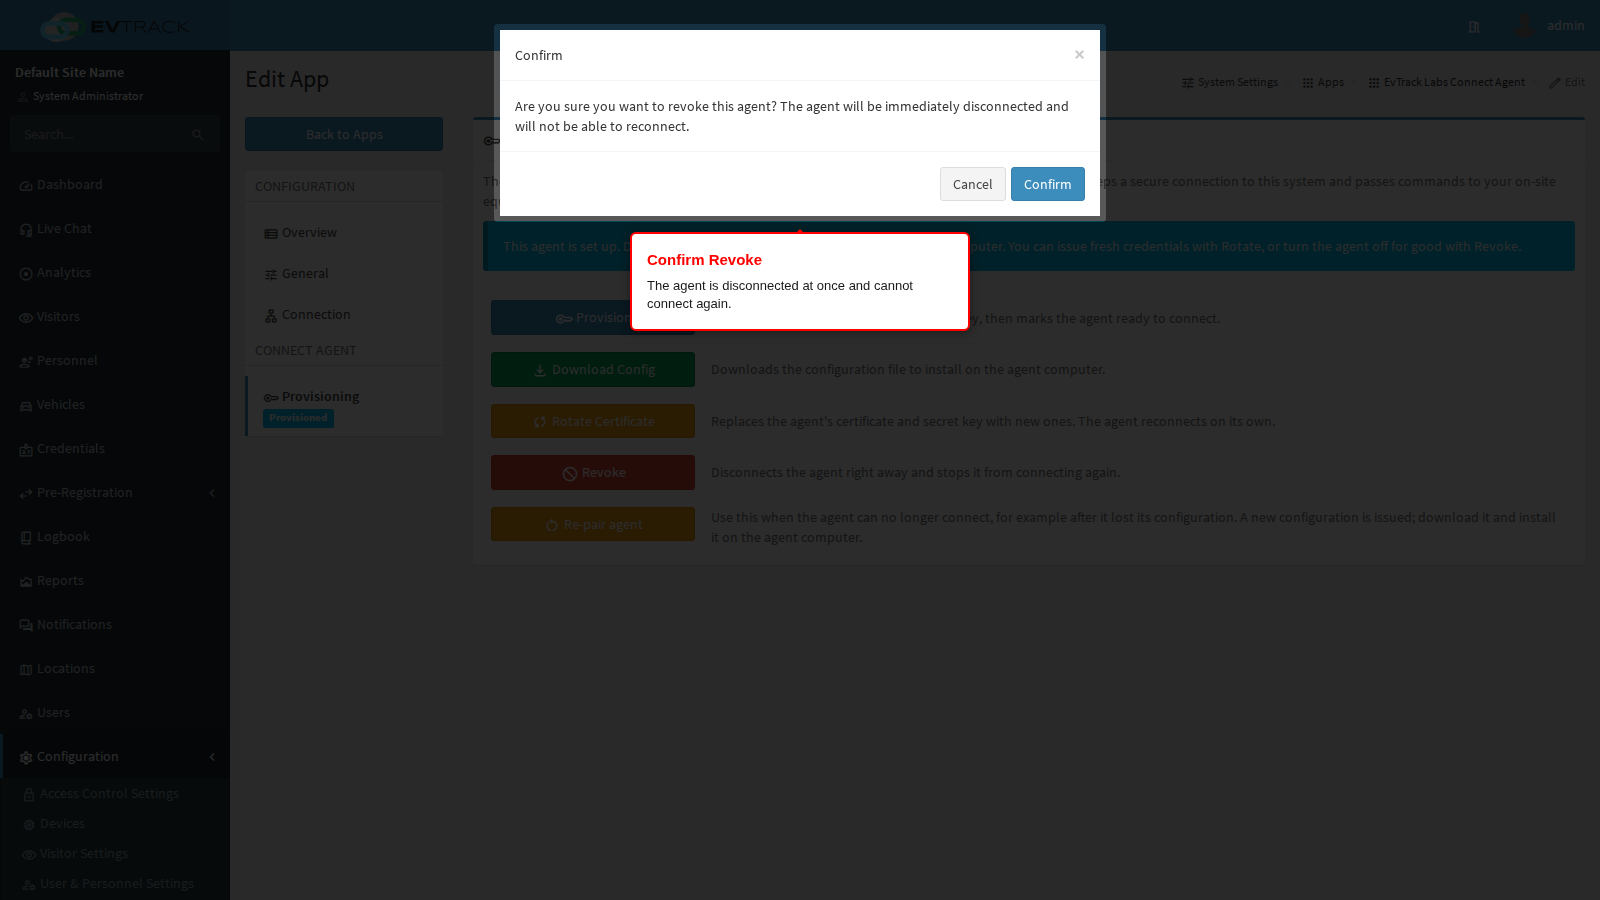
The status then reads Revoked, and the explanation on the Provisioning tab tells you how to bring the agent back.
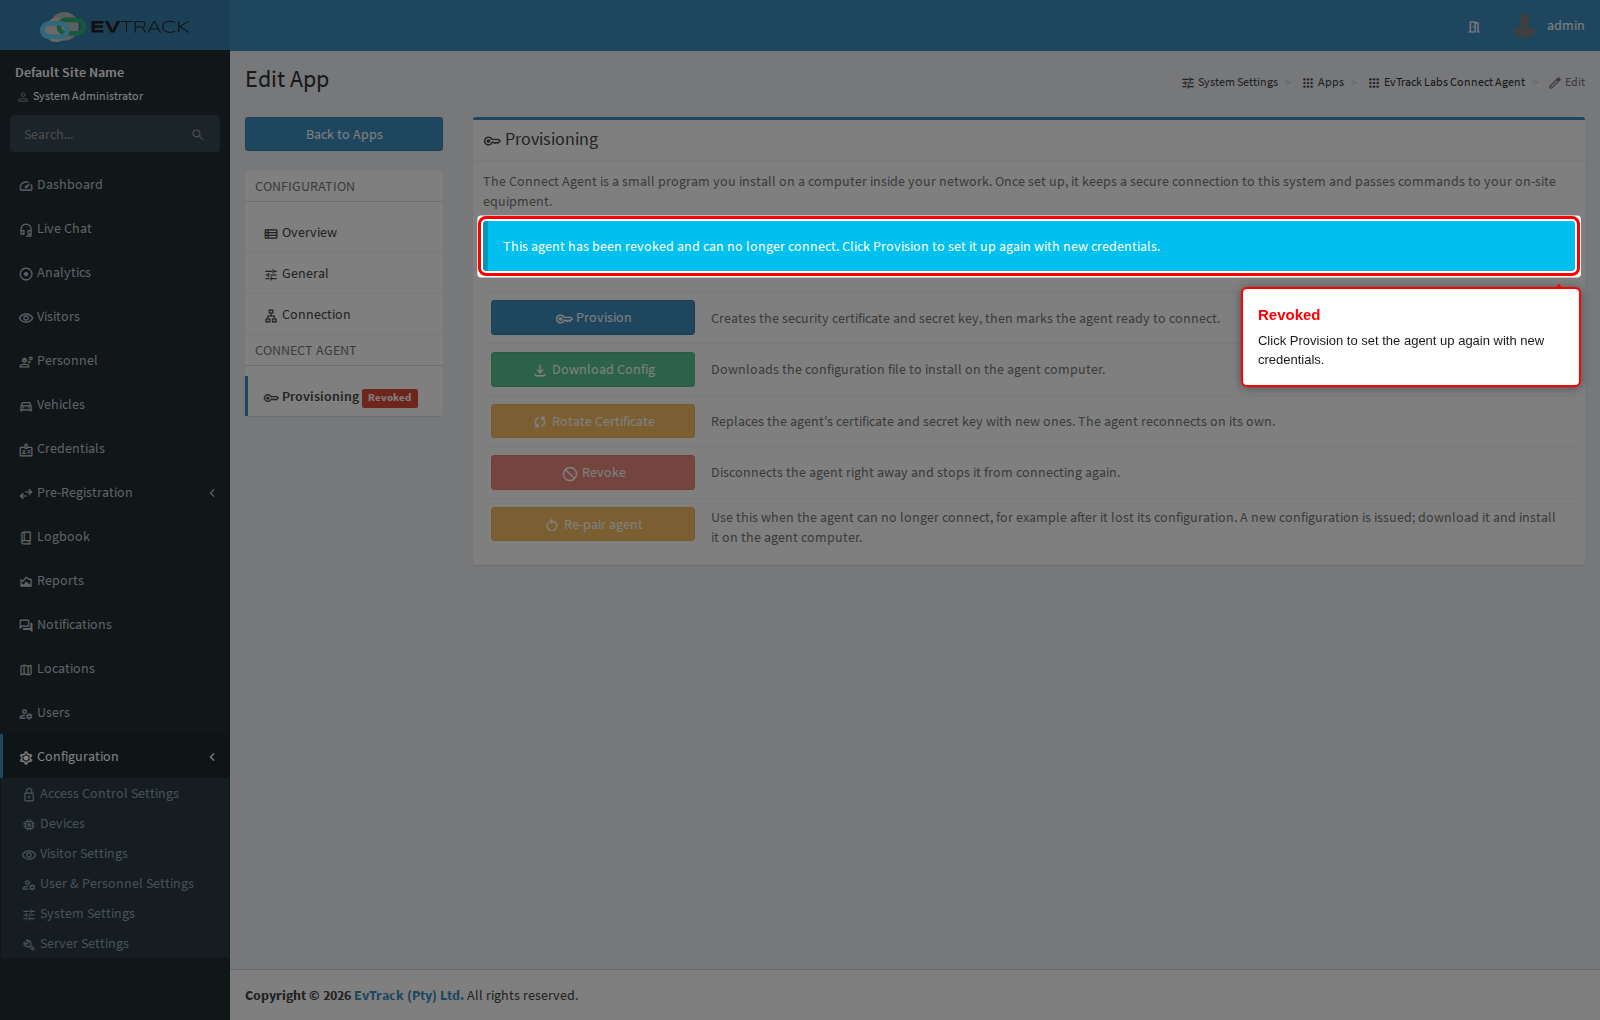
To use the agent again, click Provision, then Download Config, and install the new configuration on the agent computer.
Permitted virtual readers
An agent can report credential reads from your access control system as reads on an EvTrack virtual reader device. This system accepts such a read only from the virtual readers you permit for that agent.
Open the app’s Connection tab and select the readers in Permitted Virtual Readers, then save the tab. Until the agent has connected for the first time, the tab shows a general form (as in the screenshot below); once it has connected, it shows the agent’s own connection settings, with Permitted Virtual Readers among them. Reads the agent reports for any other virtual reader are refused. The list offers the virtual reader devices set up under Devices; when there are none, it shows No virtual readers configured, which cannot be selected.
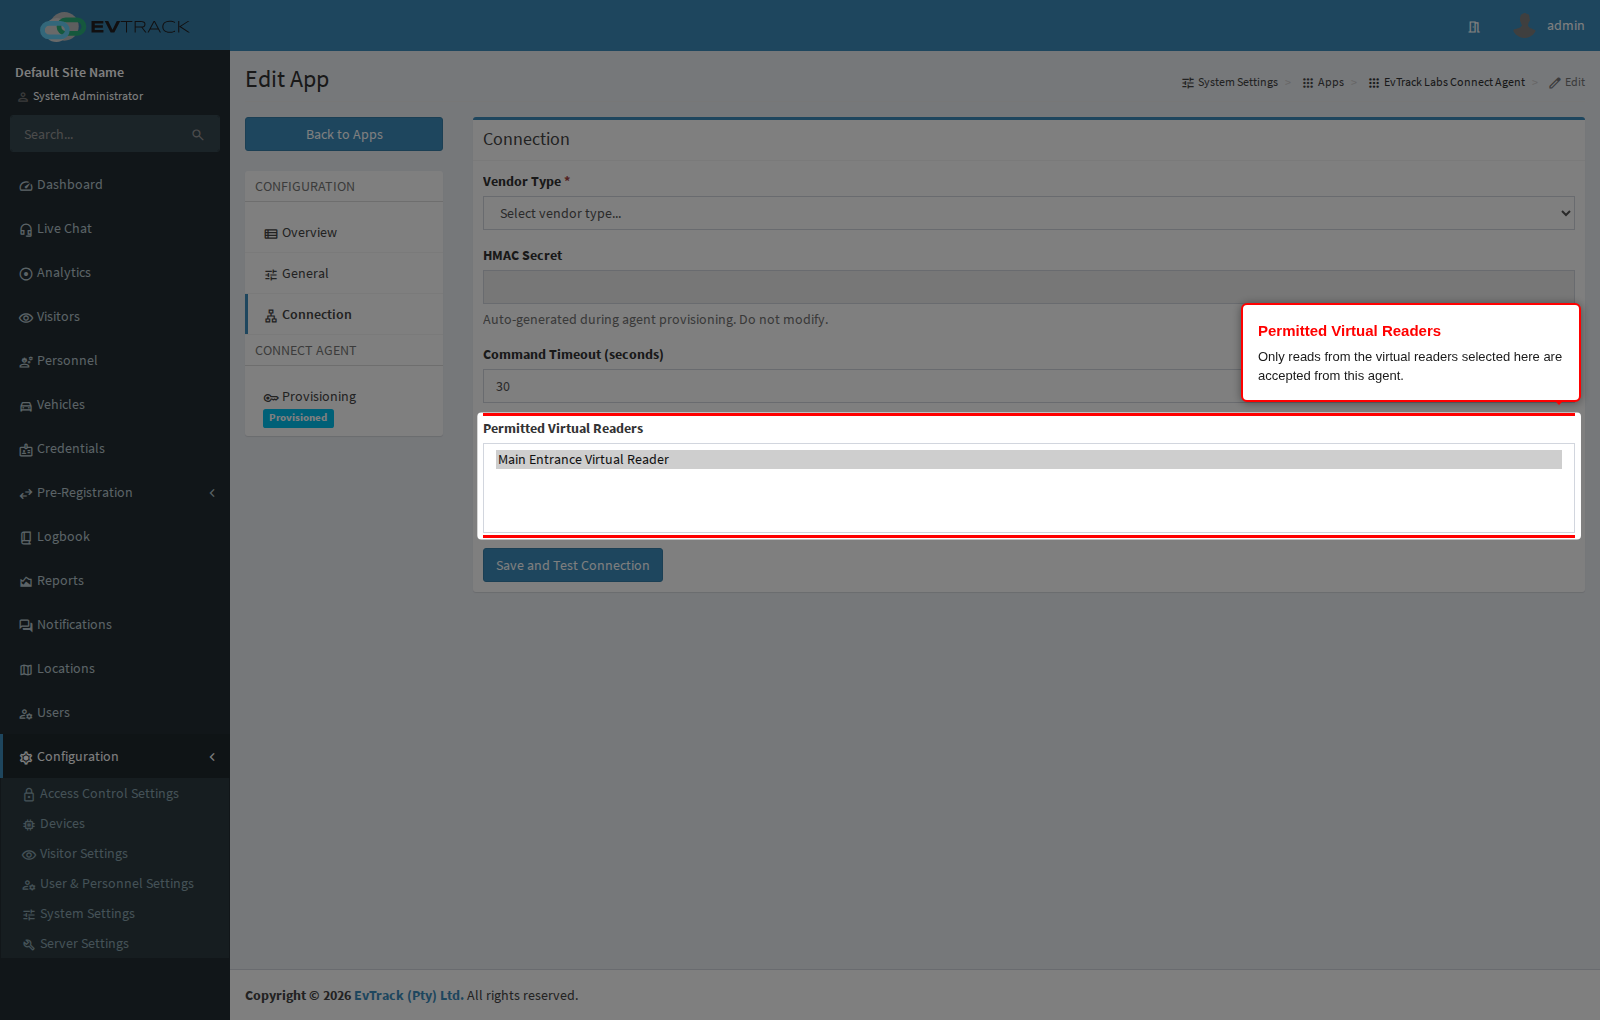
Saving the Connection tab sends the new settings to the agent, so save it while the agent is connected. The Configuration tab, with the settings for your access control system, appears once the agent has connected and reported them.