The User Registration Fields page decides what the public self-registration form asks a new user or staff member for. It does two separate jobs, and it is worth being clear about which one you need before you start:
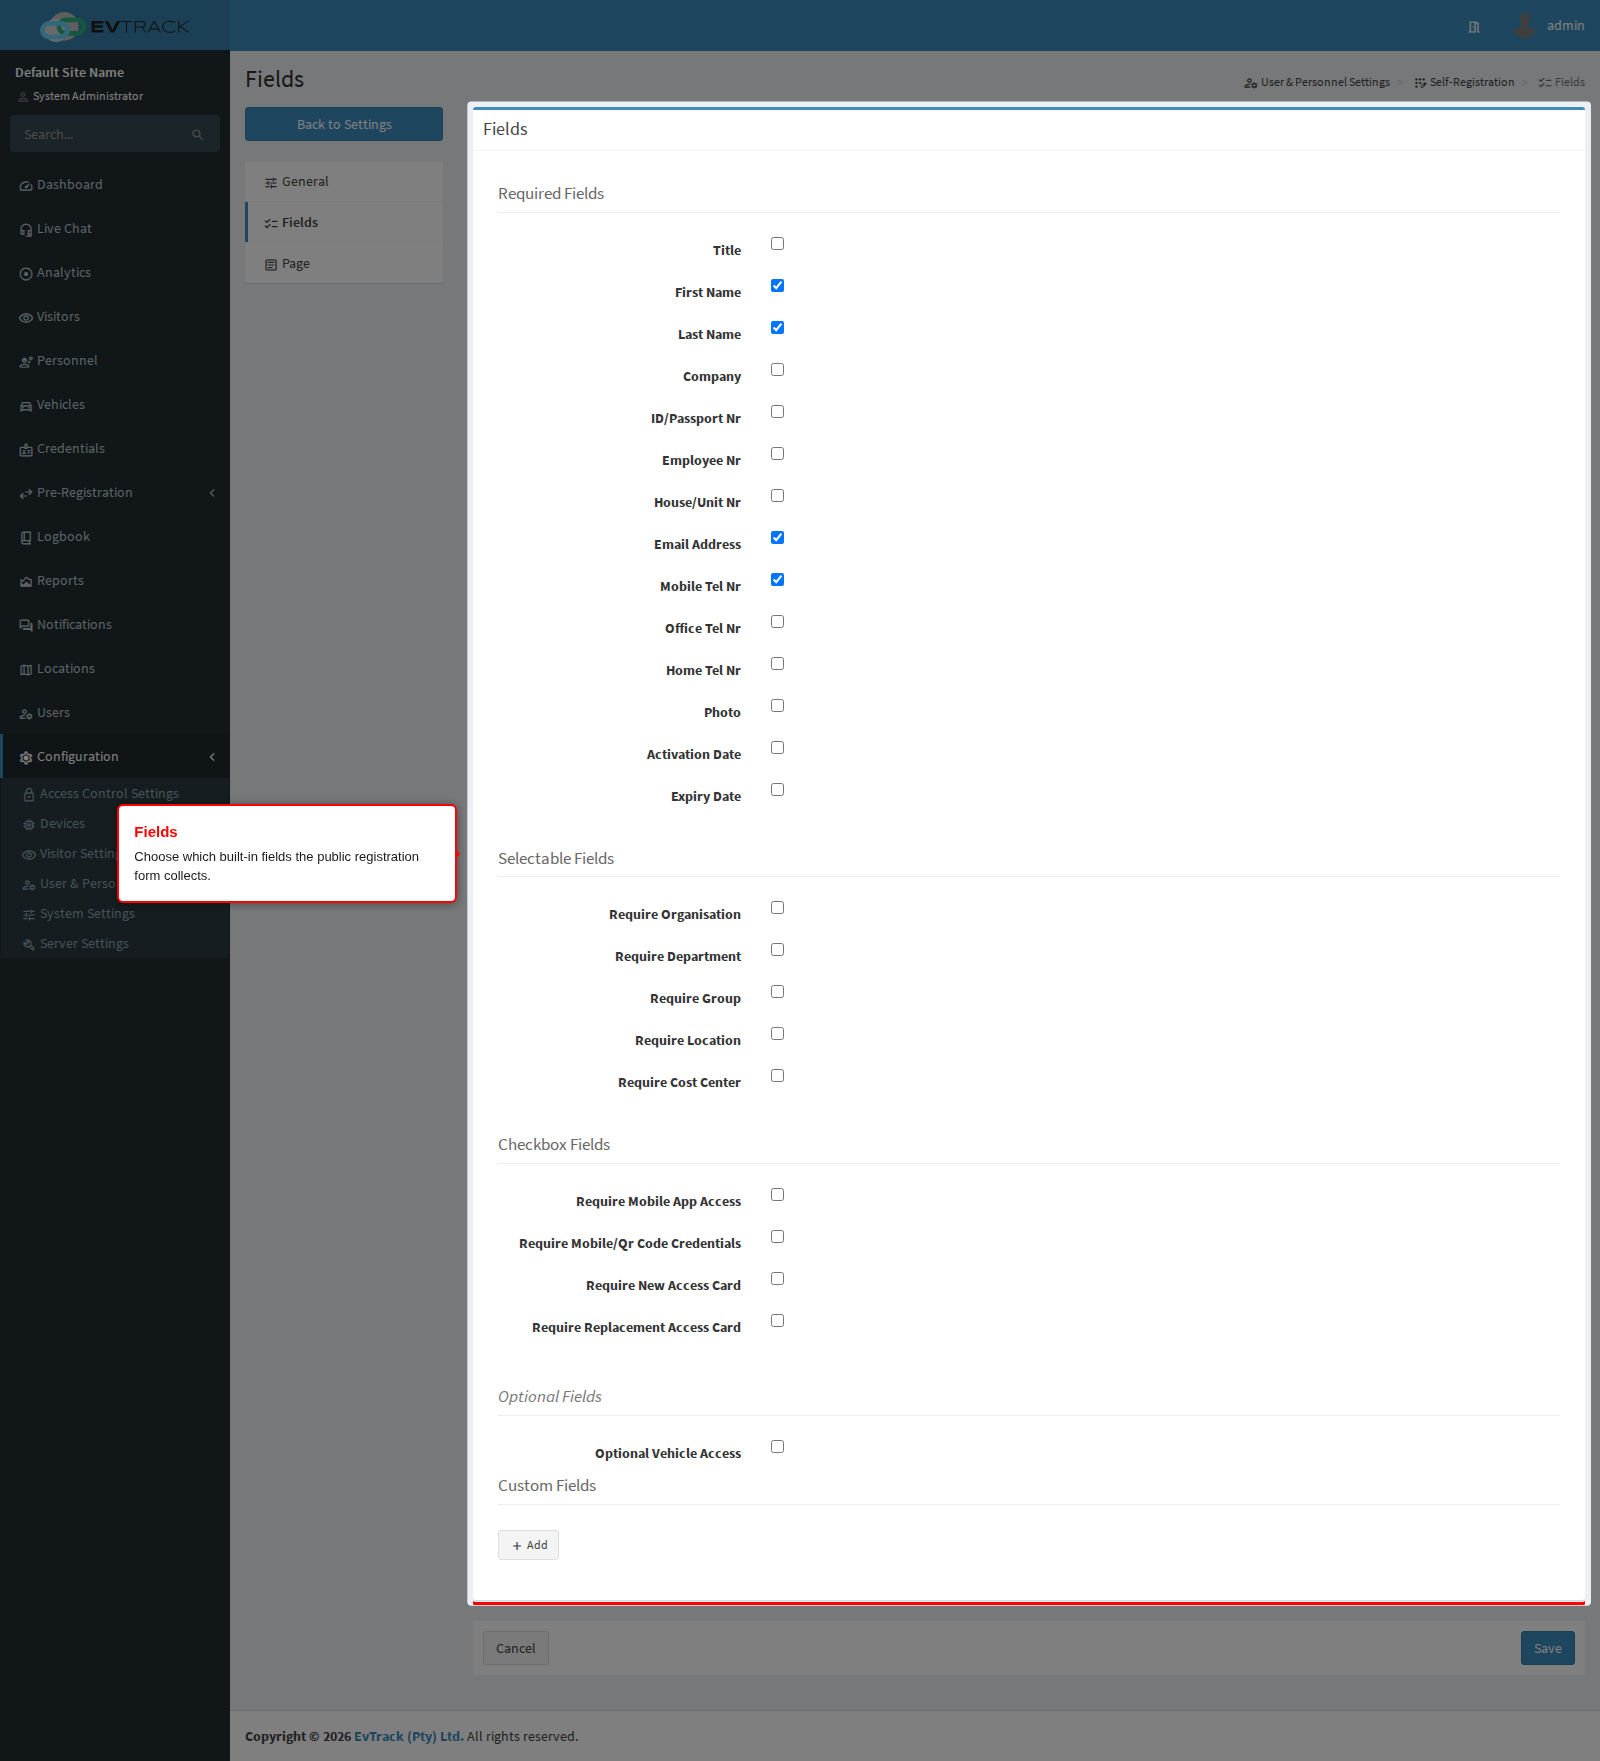
- Required Fields, Selectable Fields, Checkbox Fields and Optional Fields switch the product’s own, built-in fields on and off (first name, company, photo, cost center, and so on). You cannot rename them and you cannot invent new ones here.
- Custom Fields is a small form builder for your own extra questions. Anything the built-in fields do not cover - a shift pattern, an emergency contact, a signed induction certificate - is added here and appears on the public form underneath the built-in fields.
Readers often confuse the two. The rule of thumb: if the information you want already has a name in the list of built-in fields, tick its checkbox. If it does not, add a custom field.
Open the page via Configuration > User & Personnel Settings > Self-Registration, then the Fields tab in the left-hand list.
Before you start
- You need permission to edit settings. If the Configuration menu is missing, ask an administrator to grant your role the settings-editing permission.
- The public form must be switched on before anyone can use it. That switch, and the link and QR code you share, live on the General tab: see User Registration.
- Everything on this page is system-wide. There is no per-user variation of the self-registration form.
Built-in fields
Required Fields - tick a checkbox to make that personal detail mandatory on the registration form:
- Title - requires the registrant to supply a title (Mr, Ms, Dr, and so on).
- First Name - requires the registrant’s first name.
- Last Name - requires the registrant’s last name.
- Company - requires a company name; useful when contractors and service providers register through the same form.
- ID/Passport Nr - requires a national ID or passport number for positive identification.
- Employee Nr - requires an employee number; enable it when registrations must map to payroll or HR records.
- House/Unit Nr - requires a house or unit number; typically used in residential estates.
- Email Address - requires an email address so the system can reach the person after registration.
- Mobile Tel Nr - requires a mobile telephone number.
- Office Tel Nr - requires an office telephone number.
- Home Tel Nr - requires a home telephone number.
- Photo - requires the registrant to upload a photo, for badge printing and visual verification at the checkpoint.
- Activation Date - requires a date from which the registration becomes active.
- Expiry Date - requires a date on which the registration expires; enable it when access must always be time-limited.
Selectable Fields - each toggle adds a mandatory dropdown to the form:
- Require Organisation - the registrant must pick an organisation.
- Require Department - the registrant must pick a department.
- Require Group - the registrant must pick a group.
- Require Location - the registrant must pick a location.
- Require Cost Center - the registrant must pick a cost center, so the registration can be attributed for billing or reporting.
Checkbox Fields - each toggle adds a request checkbox to the form:
- Require Mobile App Access - lets the registrant request access to the mobile app.
- Require Mobile/Qr Code Credentials - lets the registrant request a mobile or QR code credential.
- Require New Access Card - lets the registrant request a new physical access card.
- Require Replacement Access Card - lets the registrant request a replacement for a lost or damaged access card.
Optional Fields:
- Optional Vehicle Access - adds an optional section where the registrant can request vehicle access and capture their vehicle details. Vehicle details such as the license plate number are only required if the registrant ticks the vehicle-access request.
Click Save to apply your changes, or Cancel to discard them.
Custom fields
Custom fields are your own questions. You give each one a type, a label and a required flag; the form builder keeps them in a list, and everything in that list is rendered on the public form in the order shown.
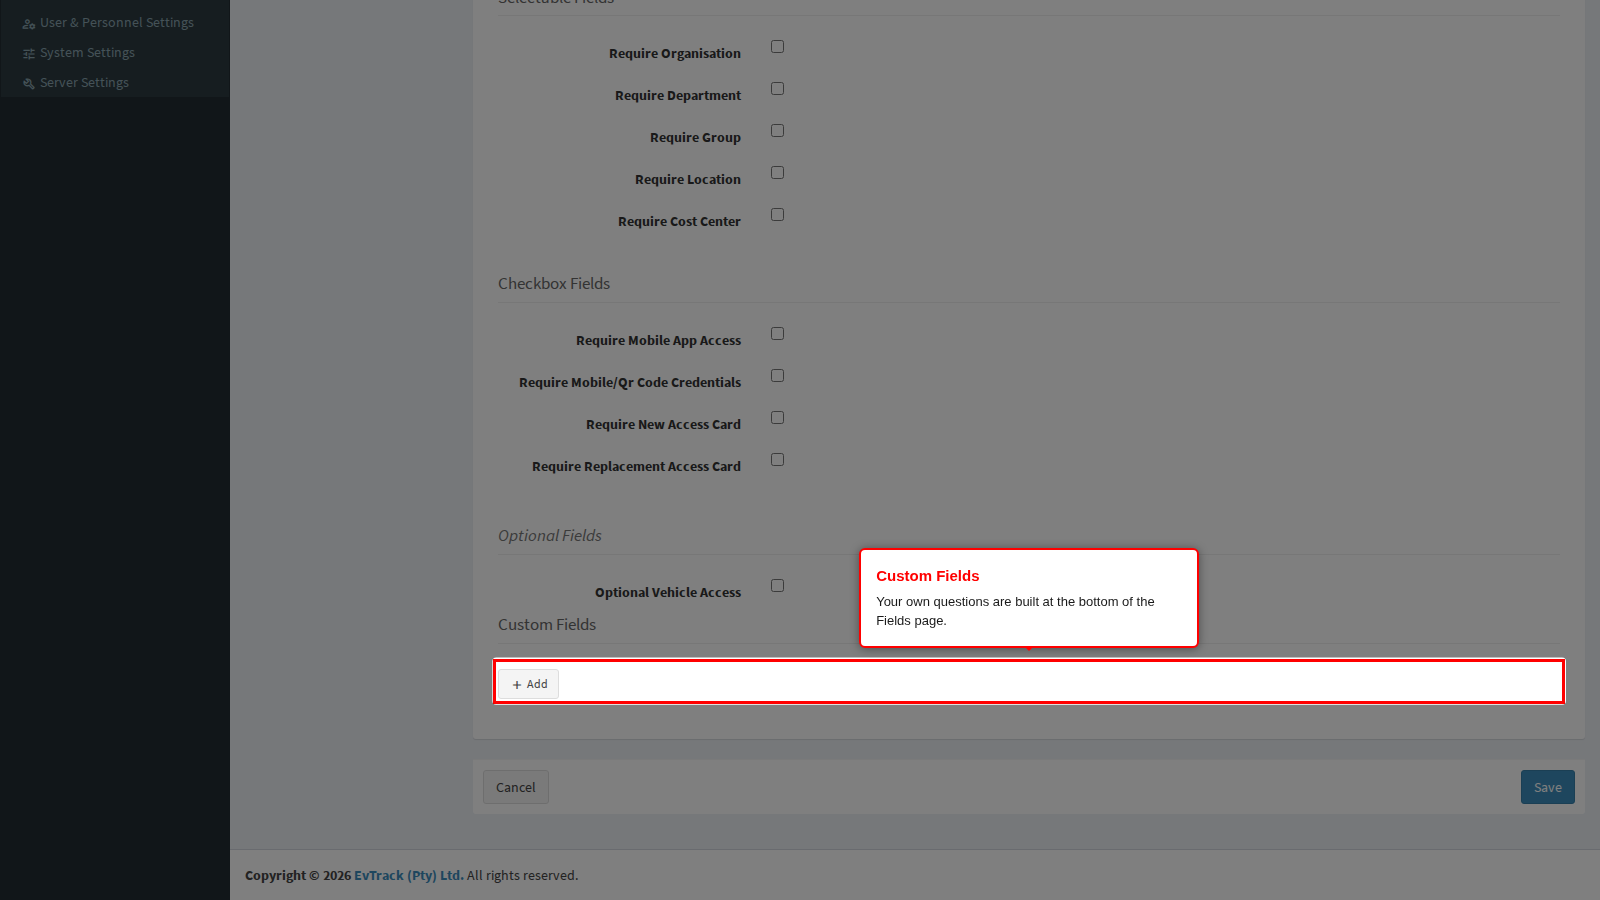
The builder sits at the very bottom of the Fields tab, under the Custom Fields heading. On a system that has never used custom fields it is just an Add button.
Step 1: Add a question
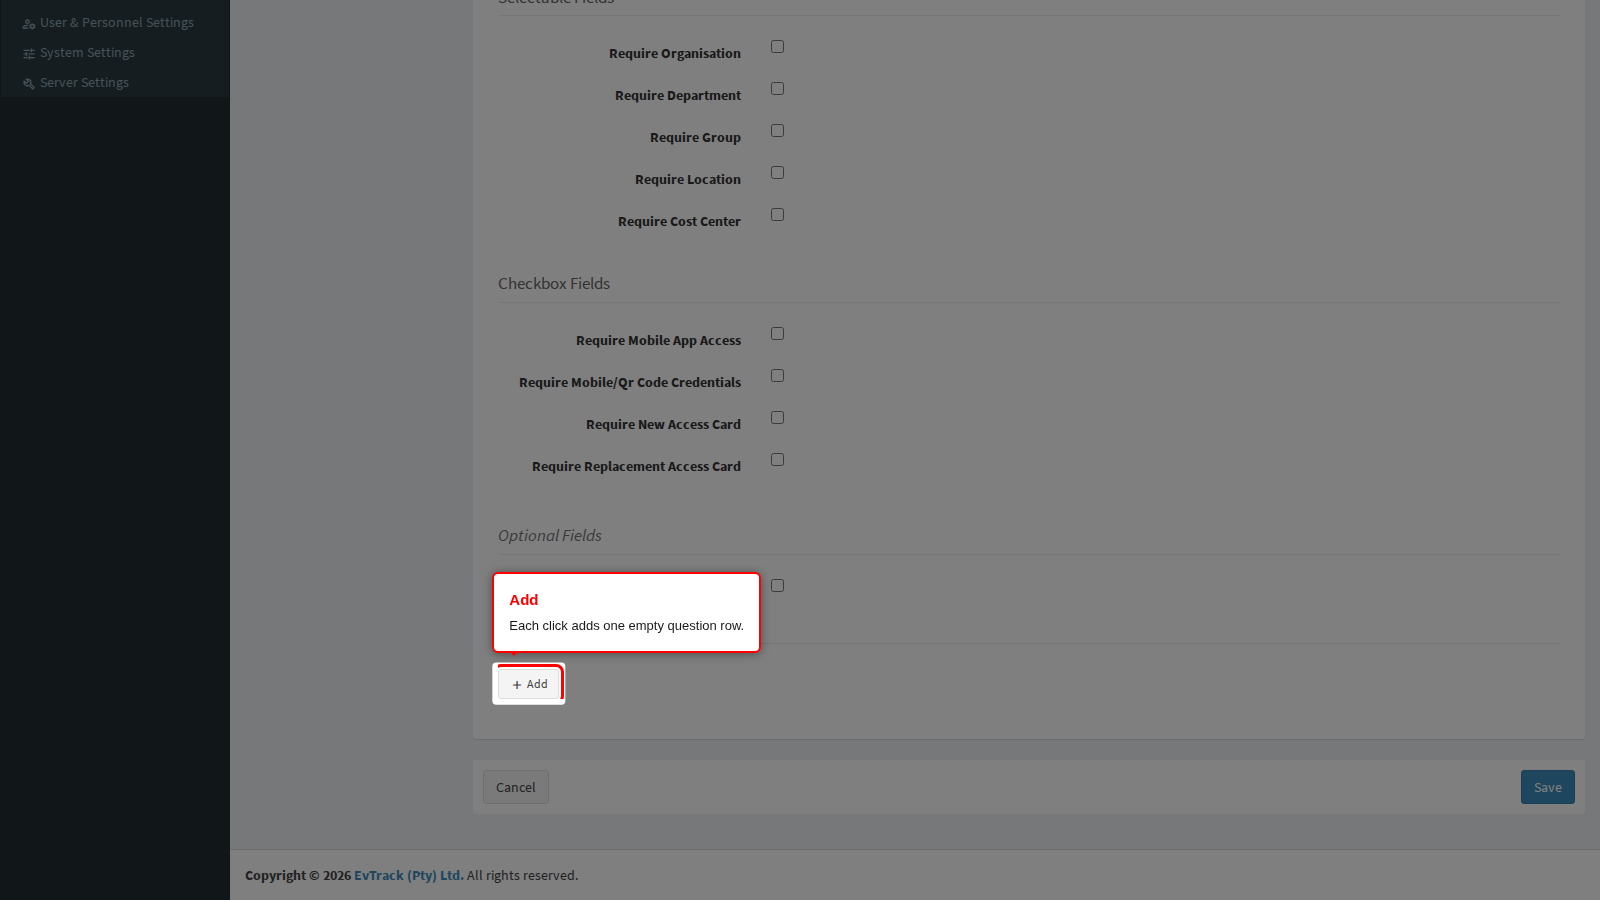
Scroll to Custom Fields and click Add.
End state: an empty question row appears, with a Type list, a Custom Field Label box, an Is Field Always Required? tick box and a row of small buttons on the right.
Step 2: Choose the question type
Open the Type list and pick what you want to collect. The type decides what the applicant actually sees on the form.
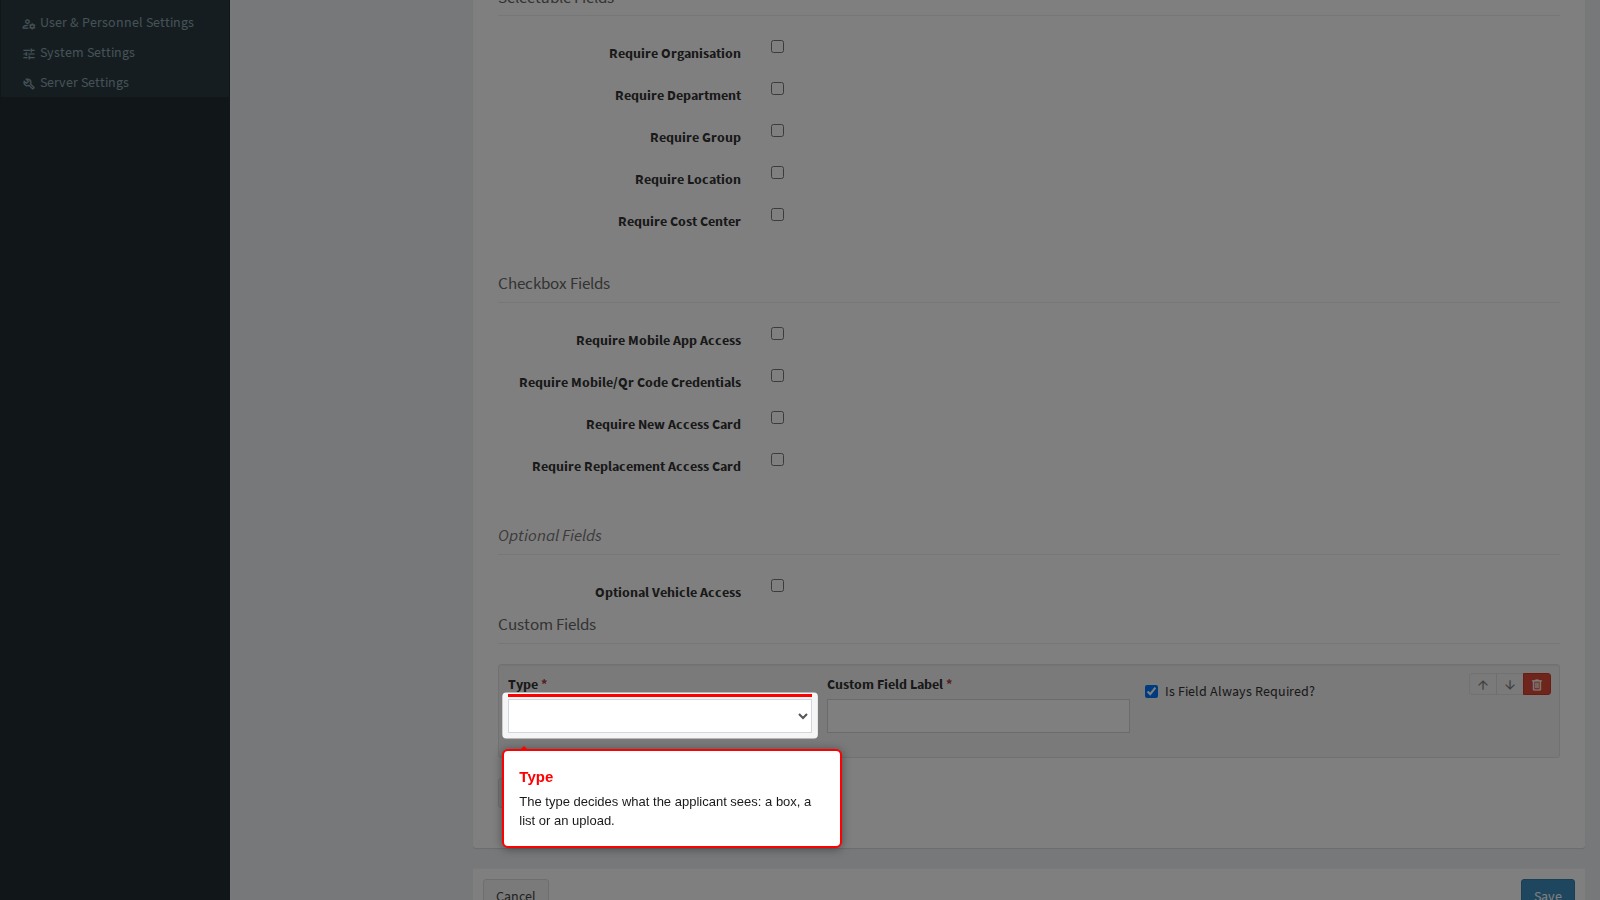
The types offered on this page are:
| Type | What the applicant sees | Use it for |
|---|---|---|
| Text Field | A single-line box | Short free text: an emergency contact, a supervisor’s name, a locker number |
| Number | A box that accepts numbers only | Counts, reference numbers, quantities |
| Photo | An upload panel that accepts images | A second photo you need beyond the badge photo, for example a vehicle or a uniform |
| File | An upload panel that accepts a document | Certificates, signed declarations, proof of qualification |
| Drop Down | A list of values, one answer allowed | A single choice from a fixed set: shift pattern, contract type |
| Checkboxes | A list of values, several answers allowed | Several choices from a fixed set: site inductions completed, equipment issued |
| Text Area | A multi-line box | Longer free text: a description, a reason, notes |
Always pick a type. A question saved with a label but no type is stored and then never rendered on the form, so nobody can answer it.
End state: the row shows the chosen type, and for Drop Down and Checkboxes a Values list appears further down the row.
Step 3: Label the question and decide whether it is mandatory
Type the wording the applicant should read into Custom Field Label. This is the only text they see, so write it as a question or a clear instruction, for example “Emergency Contact Name”. Keep it short: on the public form the label of a text, number, text area or drop-down question is shown as the prompt inside the field itself rather than as a separate caption above it.
Is Field Always Required? is ticked by default. Leave it ticked to force an answer, or untick it to make the question optional.
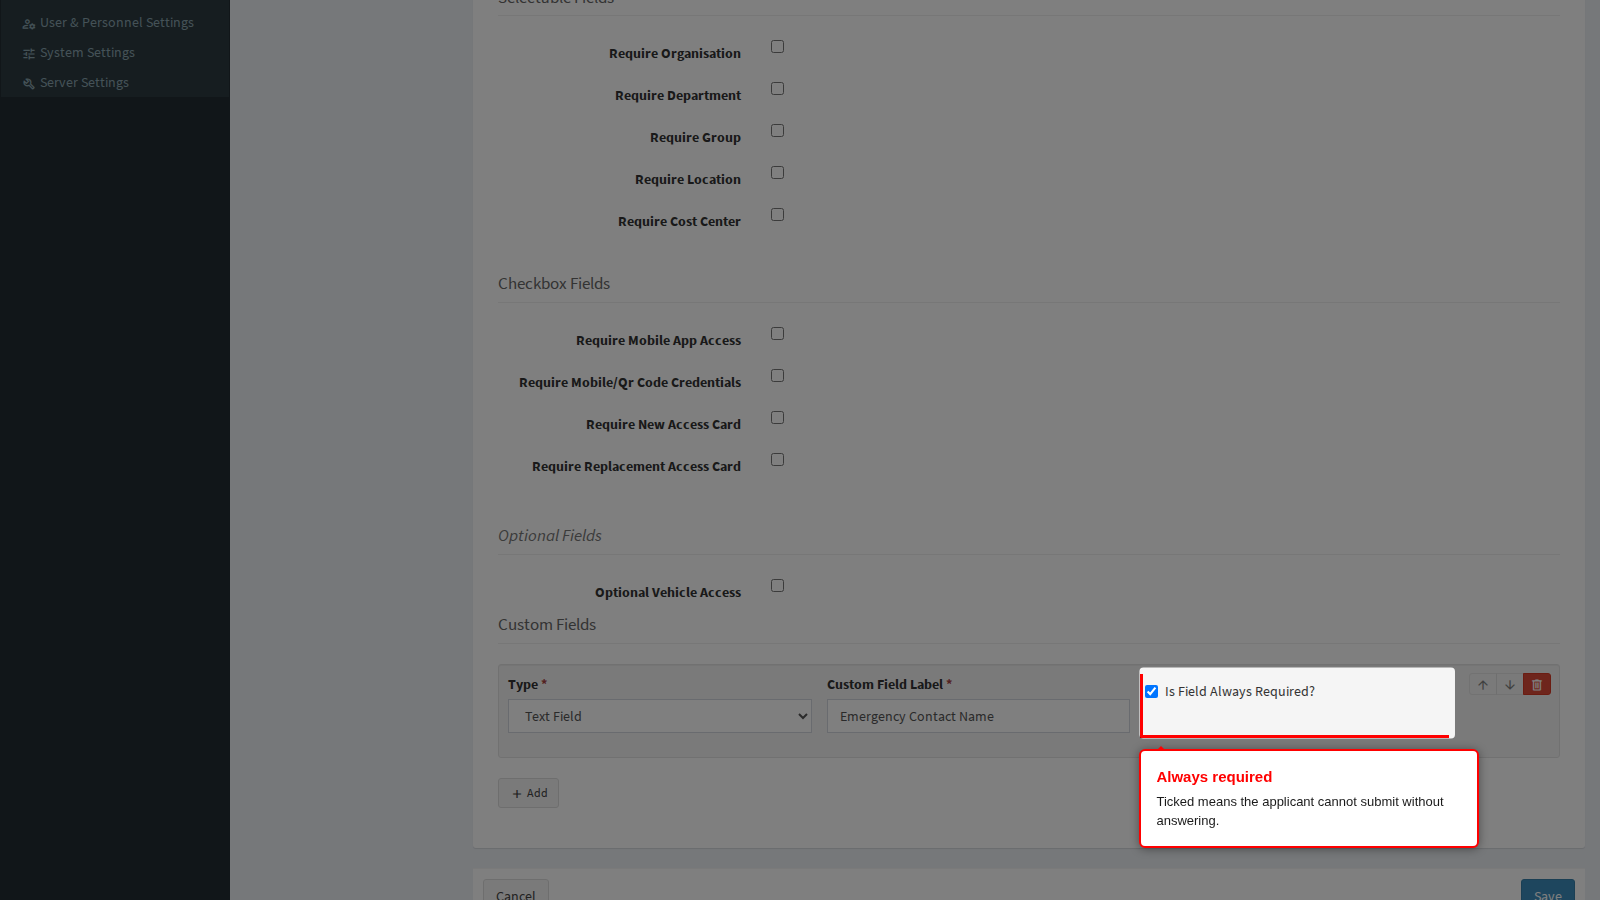
End state: the row reads as a finished question: type, label, and the required flag in the state you want.
Step 4: Define the values of a choice question
Add a second question, set its type to Drop Down (or Checkboxes), and label it. A Values list appears. Click its Add button once per choice and type the choice into the box that appears.
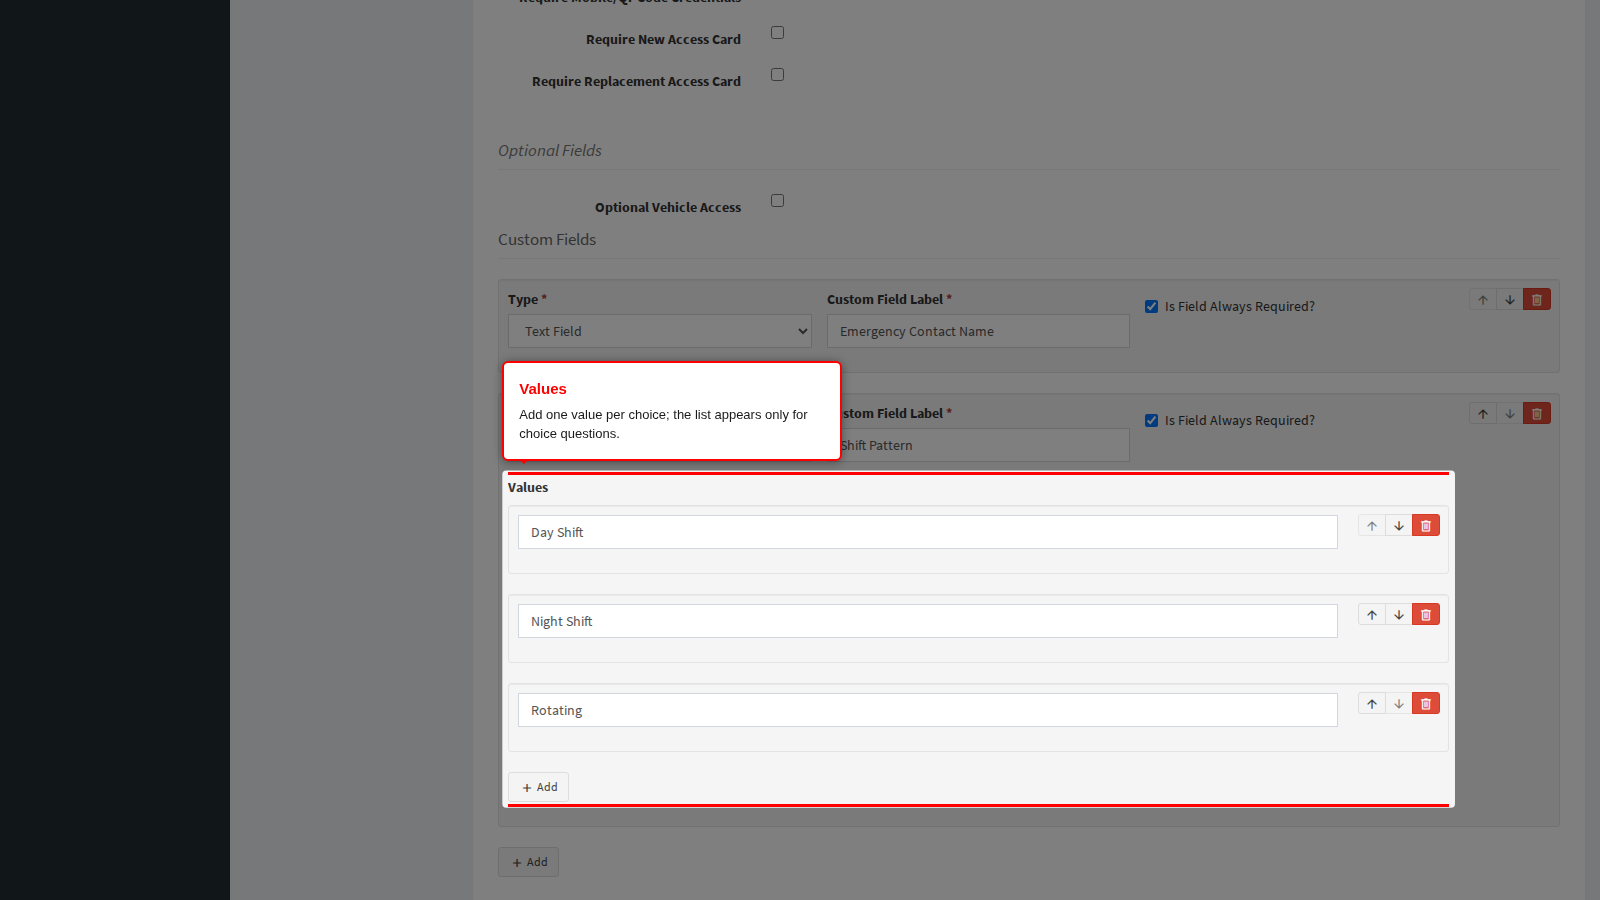
- The values are shown to the applicant exactly as you type them, in the order listed.
- Blank value boxes are discarded when you save, so an accidental empty row is harmless.
- The Values list is hidden for every other type. If you change a question from Drop Down to Text Field, the list disappears.
End state: the choice question lists every value the applicant will be offered.
Step 5: Reorder or remove a question
Every question row carries its own small buttons on the right:
- Move up and Move down change the order of the questions. The order in the builder is the order on the public form, so group related questions together.
- Remove (the red button) deletes the question from the list.
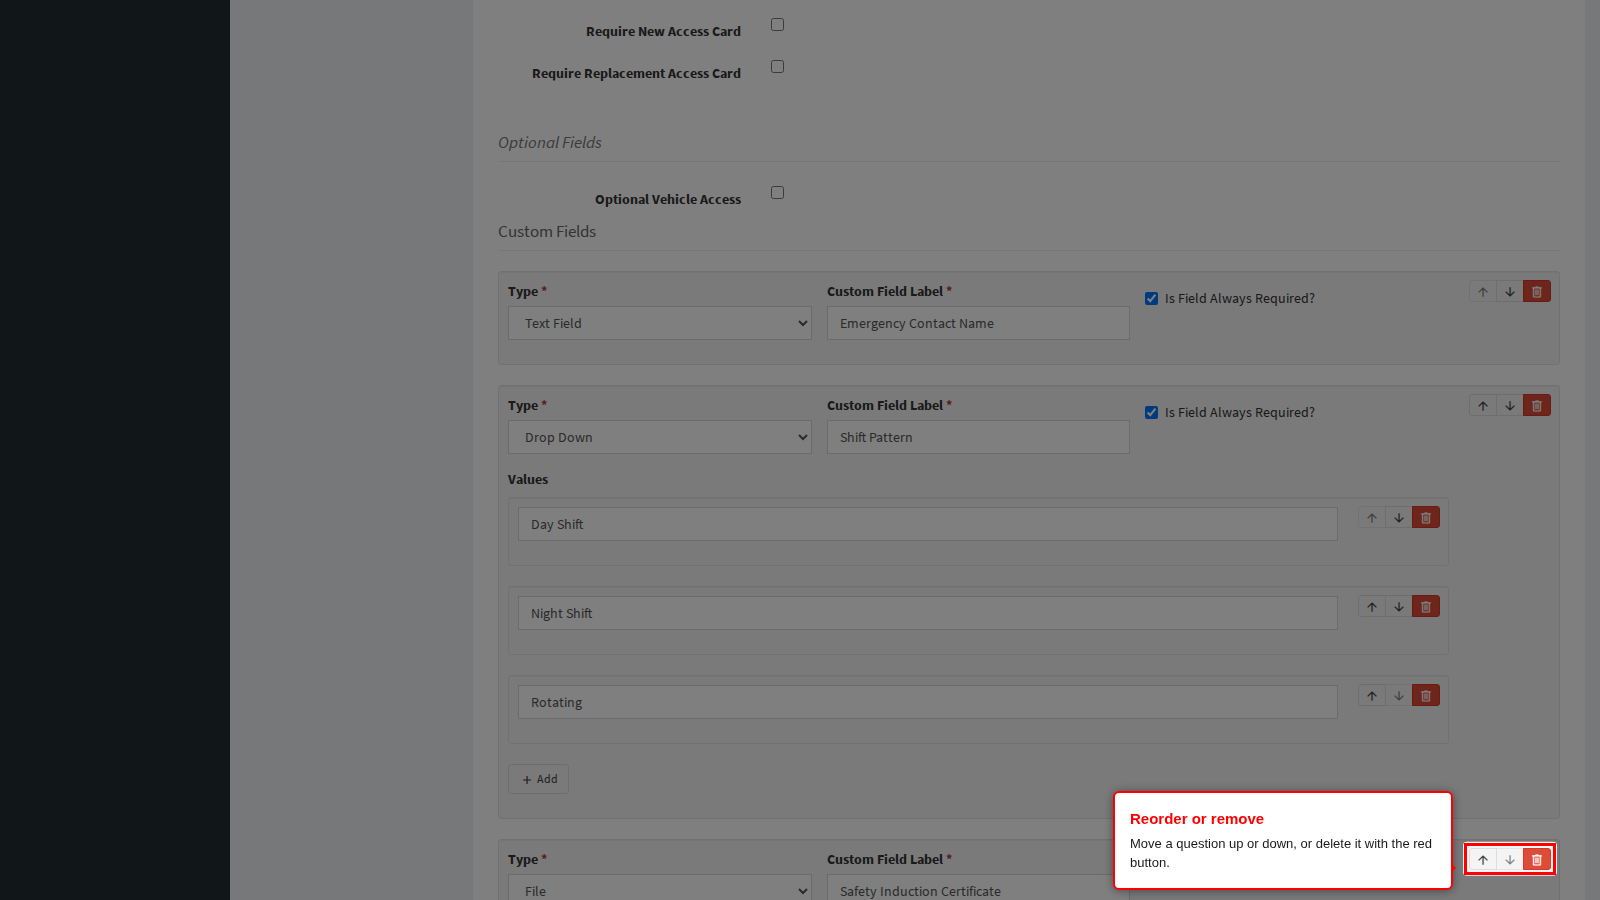
A question row that has no label at all is dropped when you save, which is the quickest way to abandon a row you started by mistake.
End state: the questions appear in the order applicants will answer them.
Step 6: Save
The builder has no save button of its own. Click Save at the bottom of the Fields page to store the built-in switches and the custom questions together. Reload the page to confirm: the saved questions come back in their stored order.
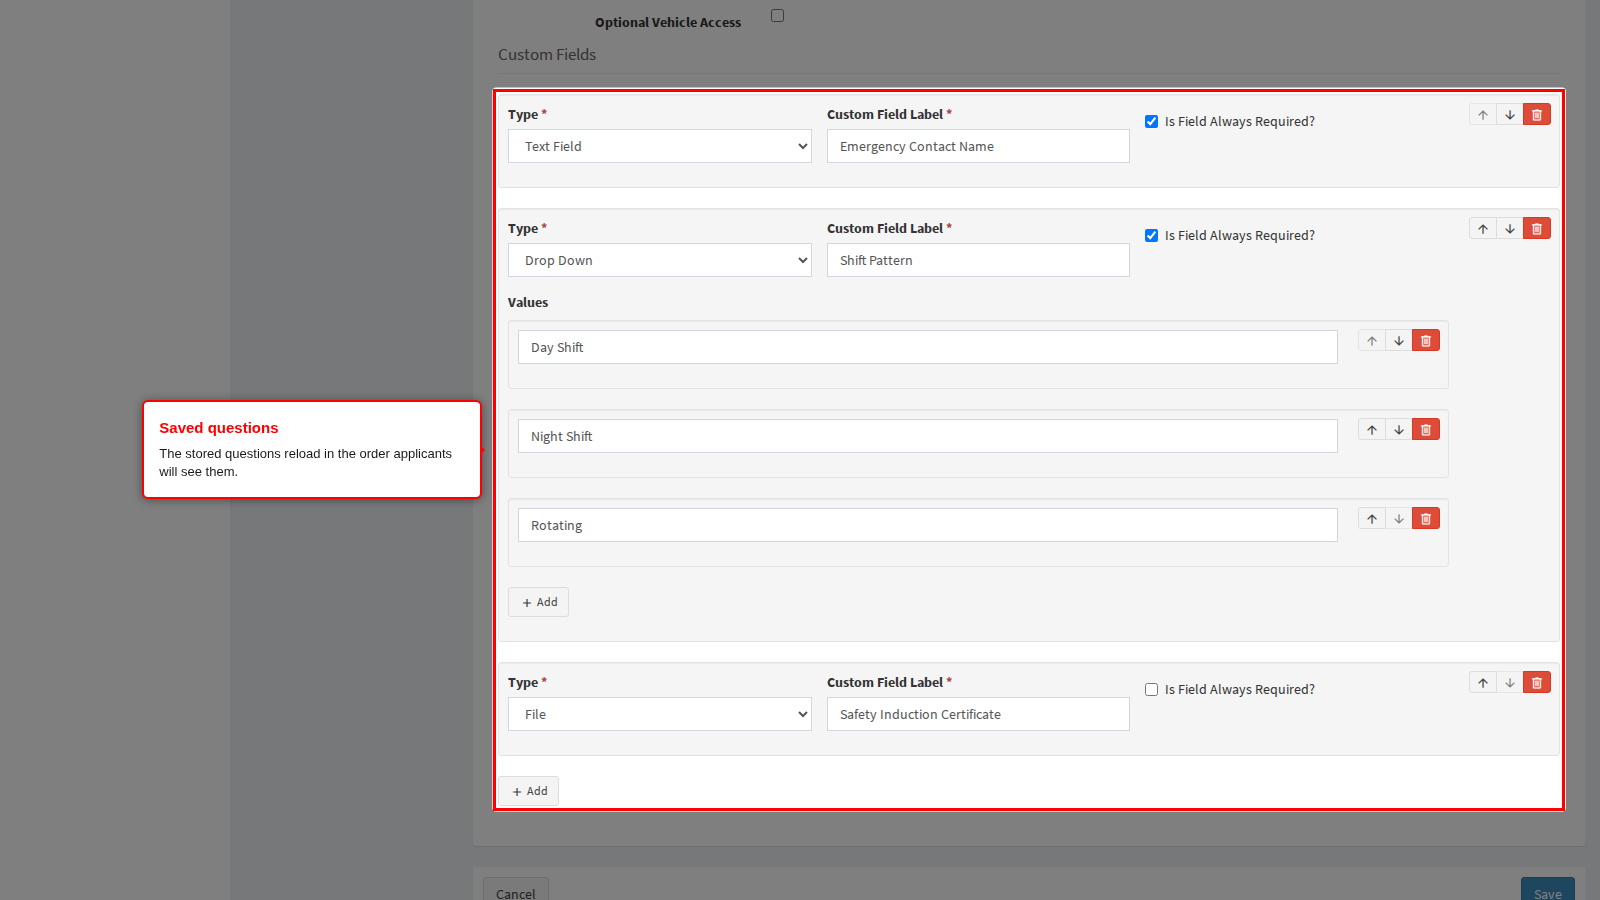
End state: a green confirmation is shown and the questions are live on the public registration form.
Removing a question does not delete answers already given. Requests submitted before the change keep the answers they were given; they simply stop being asked of new applicants.
What the applicant sees
Custom questions are rendered on the public self-registration form below the built-in fields, in the order you defined. A required question is enforced before the form can be submitted; an optional one can be left blank.
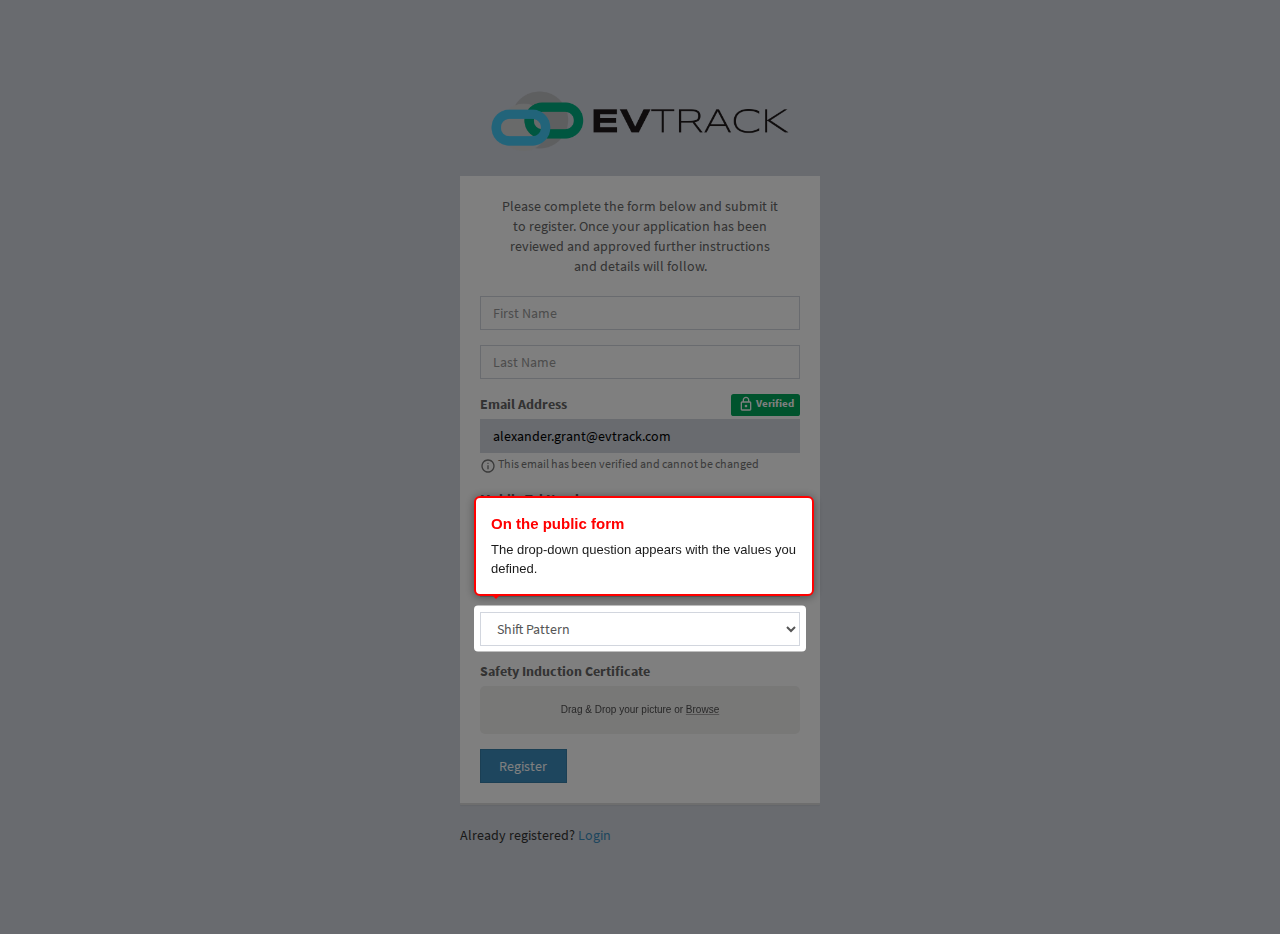
Photo and file questions are shown as upload panels. The uploaded image or document is stored with the request and remains available to the administrator who processes it.
Where the answers appear
Submitted requests wait under Pre-Registration in the sidebar (there is one list for users and one for personnel).
- Open the list and click the applicant’s name, company or email in the row. A summary opens showing everything they submitted, including every custom question and its answer. Photo and file answers appear as a Download link.
- Click Add User (or Add Personnel) on the row to turn the request into a record. The add form opens pre-filled with the submitted details, and the text-style custom answers are appended to the new record’s Comments field (users) or Notes field (personnel), each on its own line as “label: answer”.
- Answers to a Checkboxes question are appended as one line with the chosen values separated by semicolons.
Photo and file answers are deliberately not copied into that text. Open the summary in step 1 and download them before you finish processing the request if you need to keep them on file.
See Add a User and Add Personnel for the rest of the processing flow.
Notes
- Requests that have no dedicated field on the record - the vehicle license plate and the credential and app request checkboxes - are appended to the same Comments or Notes text as the custom answers. Read that text before issuing credentials so no requested item is missed.
- Custom questions are asked once, at registration. They are not re-asked when the person is later edited, and they are not part of the person’s ongoing profile.
- Visitors have their own, separate custom-field builder with a slightly different set of types. See Self-Registration for the visitor equivalent, and do not expect a question defined here to appear on a visitor form.