When none of the built-in badge layouts fit your badge stock or corporate identity, design your own: badges are rendered from SVG templates, and both the Personal Template (personnel and users) and the Visitor Template offer a Custom Template 1 slot that accepts your own SVG design.
The workflow
- Open the Badge Printing settings. Go to Configuration > System Settings > Badge Printing. Scroll to the template family you want to customise - Personal Template for personnel and users, Visitor Template for visitors; the Custom SVG Template 1 slot is the last option in each family’s list.
- Download a starter template. The help text directly beneath the Custom SVG Template 1 slot links Template (Landscape) and Template (Portrait) - each downloads an SVG that already contains the photo, logo and QR code placeholders plus example text markers. Starting from a starter template is strongly recommended: the placeholder wiring is already correct.
- Edit the SVG. The same help text links a free online SVG Editor; desktop tools such as Inkscape work equally well. Move, restyle or remove elements, add fixed artwork, and place text markers where dynamic values should print. Save your work as an SVG file.
- Upload the saved SVG into the Custom Template 1 upload zone (drag and drop or browse; SVG files only, up to 2 MB). When the upload completes, the file name appears in the upload zone.
- Select Custom Template 1 and click Save at the bottom of the page - uploading alone does not switch templates, and neither does selecting without saving. After saving, the page reloads with a confirmation and all badges generated from then on use your design.
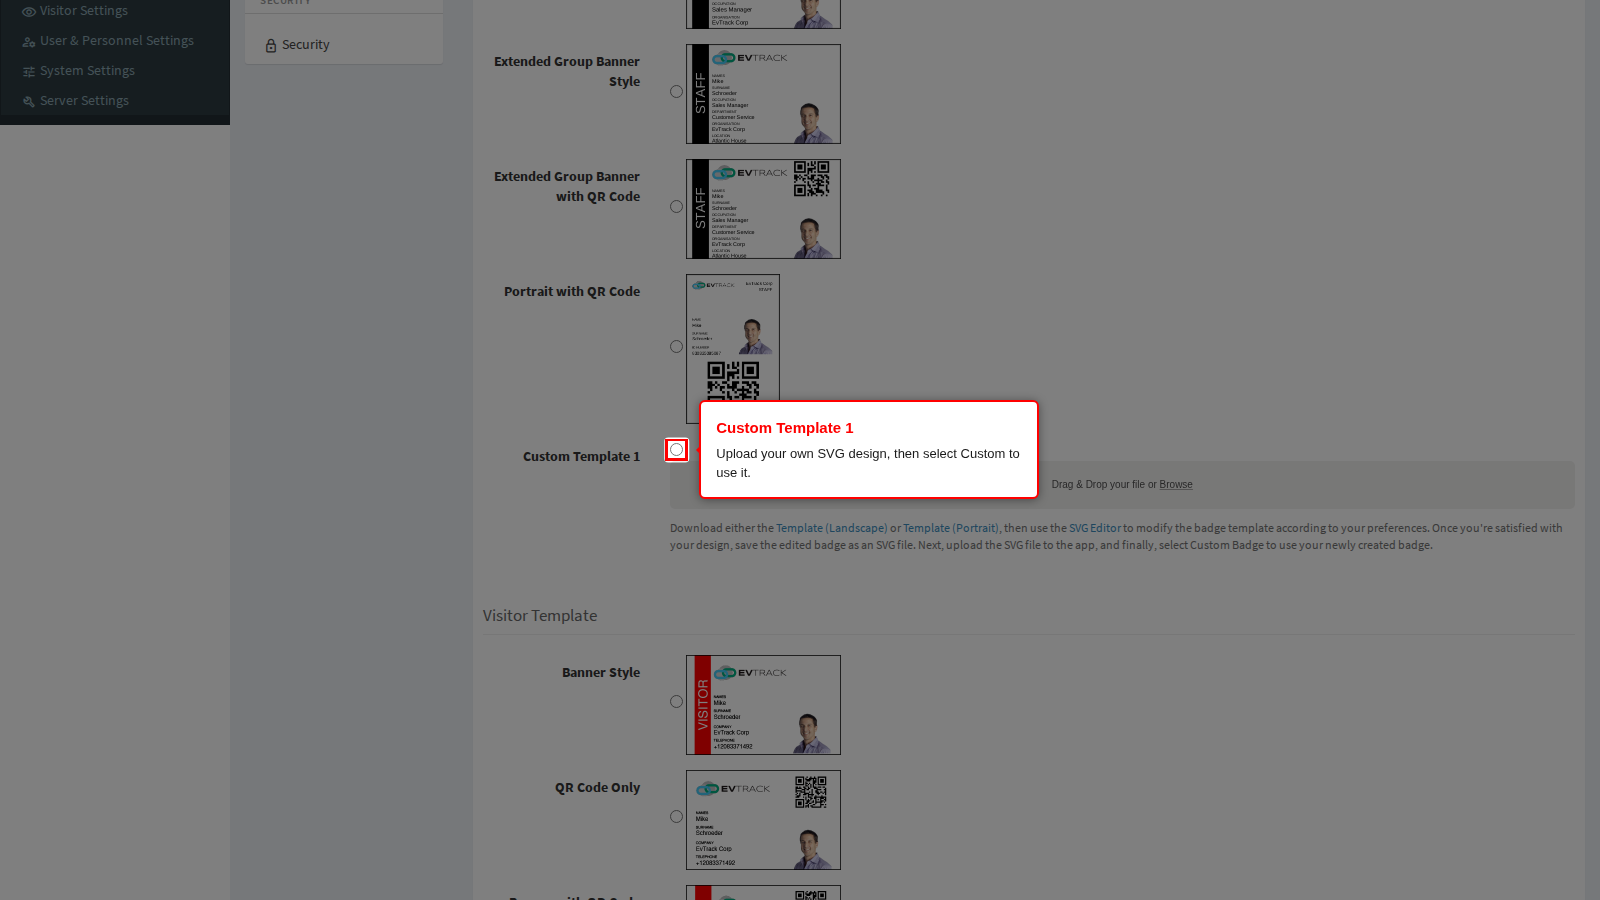
There is one custom slot per badge family - one custom personal design and one custom visitor design can be stored at a time. Uploading a new SVG replaces the stored one. The selection applies system-wide. If the custom slot is selected but empty, badges fall back to the default built-in layout.
A badge generated from a custom SVG
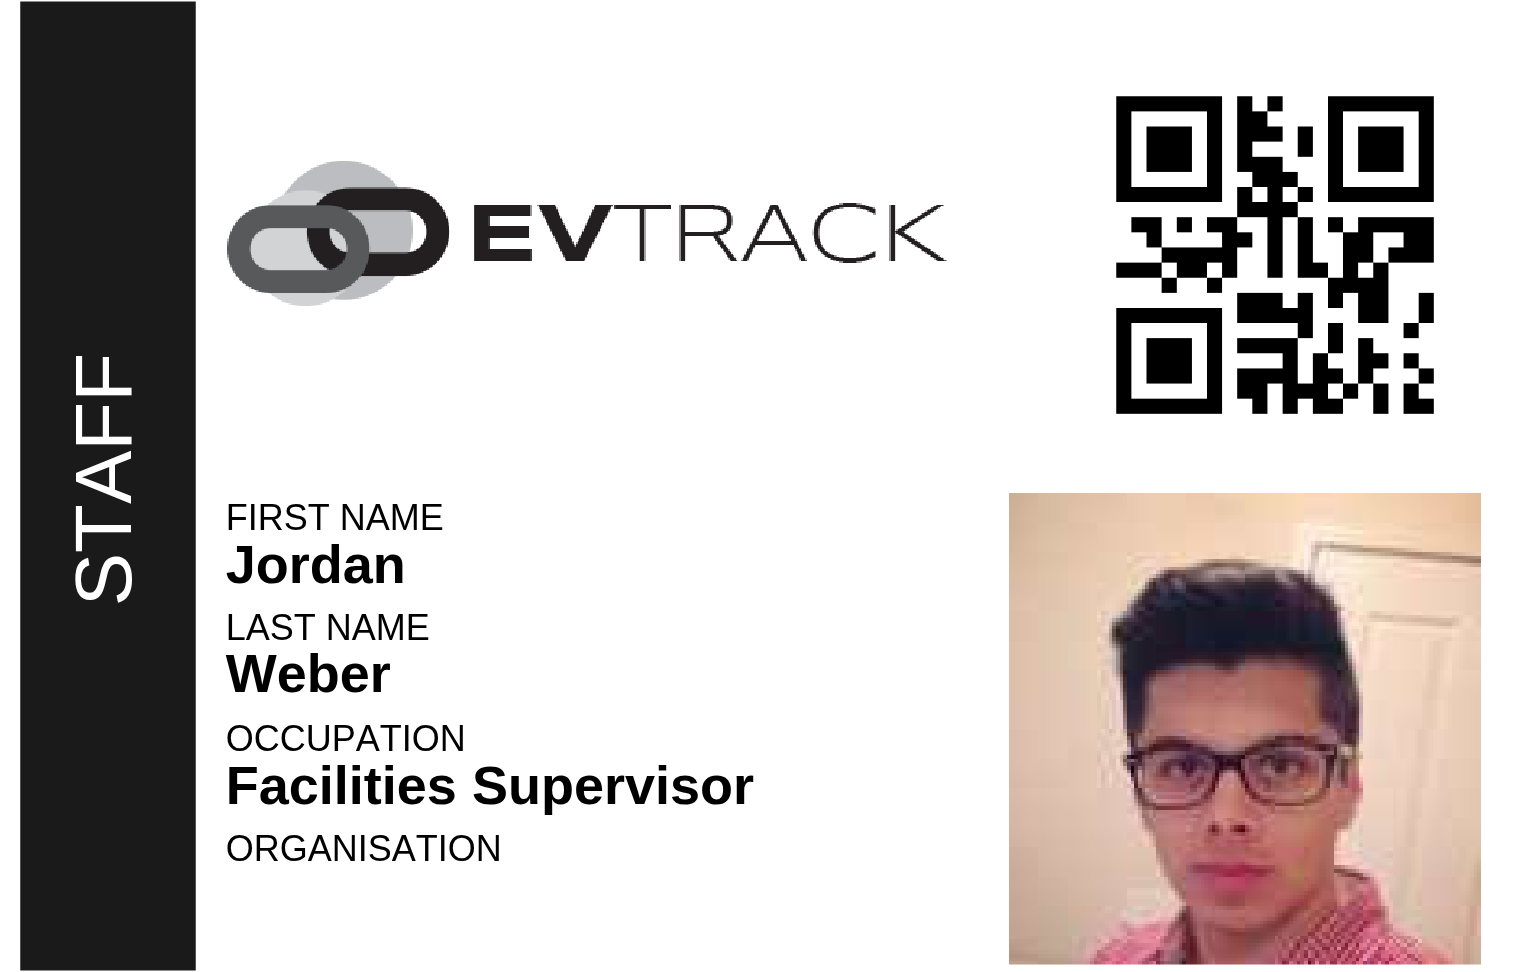
Image placeholders
Three SVG element IDs are reserved. Give an image element one of these IDs and the generator replaces its content at print time:
| Element ID | Replaced with |
|---|---|
logo | The badge logo uploaded on the Badge Printing settings page (or the built-in default when none is uploaded) |
photo | The profile photo of the person, user or visitor the badge is generated for |
qr_code | The generated QR code image for the badge holder’s access credential |
If the value is unavailable - for example the person has no photo - the placeholder element is removed from the badge entirely, so position surrounding elements with that in mind.
Text markers
Place a marker as the text content of an SVG text element - for example a text element containing ${first_name}. At print time each marker is replaced by the badge holder’s value; markers are matched case-insensitively, values are XML-escaped automatically, and a marker with no value prints as empty text.
Identity
| Marker | Prints |
|---|---|
${first_name} | First name |
${last_name} | Last name |
${names} | Full name (first and last name combined) |
${id_number} | Identity or passport number |
${identity_number} | Same as ${id_number} |
${employee_number} | Employee number |
${uuid} | The badge holder’s unique record reference |
${uuid_32} | The same reference in compact 32-character form |
Organisation
| Marker | Prints |
|---|---|
${organisation} | Organisation (for visitors: the visitor’s company) |
${department} | Department |
${group} | Group (user badges print STAFF when no group is set) |
${occupation} | Occupation or job title |
${cost_center} | Cost center |
${location} | Location name |
Contact
| Marker | Prints |
|---|---|
${telephone} | Phone number (visitors: mobile; users: mobile; personnel: office) |
${email} | Email address |
Visit details (populated on visitor badges)
| Marker | Prints |
|---|---|
${purpose_of_visit} | Purpose of the visit |
${host_name} | Host’s full name |
${host_number} | Host’s mobile number |
${active_date} | Visit start date and time |
${expiry_date} | Visit end date and time |
${pass_number} | Pass number |
Credential
| Marker | Prints |
|---|---|
${qr_code} | The credential value as text (the scannable image uses the qr_code element ID instead) |
${otp} | The credential PIN |
Compliance validity (populated when the badge holder’s profile carries these dates)
| Marker | Prints |
|---|---|
${medical_active_date} | Medical clearance valid from (date) |
${medical_expiry_date} | Medical clearance valid to (date) |
${medical_active_datetime} | Medical clearance valid from (date and time) |
${medical_expiry_datetime} | Medical clearance valid to (date and time) |
${induction_active_date} | Induction valid from (date) |
${induction_expiry_date} | Induction valid to (date) |
${induction_active_datetime} | Induction valid from (date and time) |
${induction_expiry_datetime} | Induction valid to (date and time) |
Attributes
| Marker | Prints |
|---|---|
${first_nations} | First Nations attribute |
${people_of_determination} | People of Determination attribute |
Date and time values print in the system’s configured timezone.
Design tips
- Match your badge stock. Set the SVG document size to your physical badge dimensions so the PDF prints at the correct scale without cropping.
- Test with real records. Generate a badge for a person with long names and a full profile - text does not auto-shrink, so leave generous space around markers.
- Keep fonts simple. Text renders with standard fonts at generation time; convert decorative type to paths in your editor if exact typography matters.
- Keep a master copy. Store your edited SVG outside EvTrack as well - the currently stored custom SVG can be downloaded back from the settings page, but version history is up to you.
See also: Badge Printing settings, Badges for Personnel and Badges for Users.