A visitor registration often arrives with paperwork that is not the visitor’s identity document: a contractor insurance certificate, a signed waiver, a method statement, a work permit. Supporting documents let the operator attach any of these to the registration itself, so the paperwork travels with the request - through review and approval, onto the resulting visit pass, and into the visitor’s record.
Before you start
- Supporting documents are switched off by default. An administrator turns them on under Visitors > Settings > Required Fields.
- Have each file ready as a PDF, JPG, PNG, DOCX or XLSX of up to 10 MB.
- Viewing, uploading and deleting documents are three separate permissions. If the Supporting Documents panel, or its Upload or Delete button, is missing, ask an administrator to extend your role.
Step 1: Switch the feature on
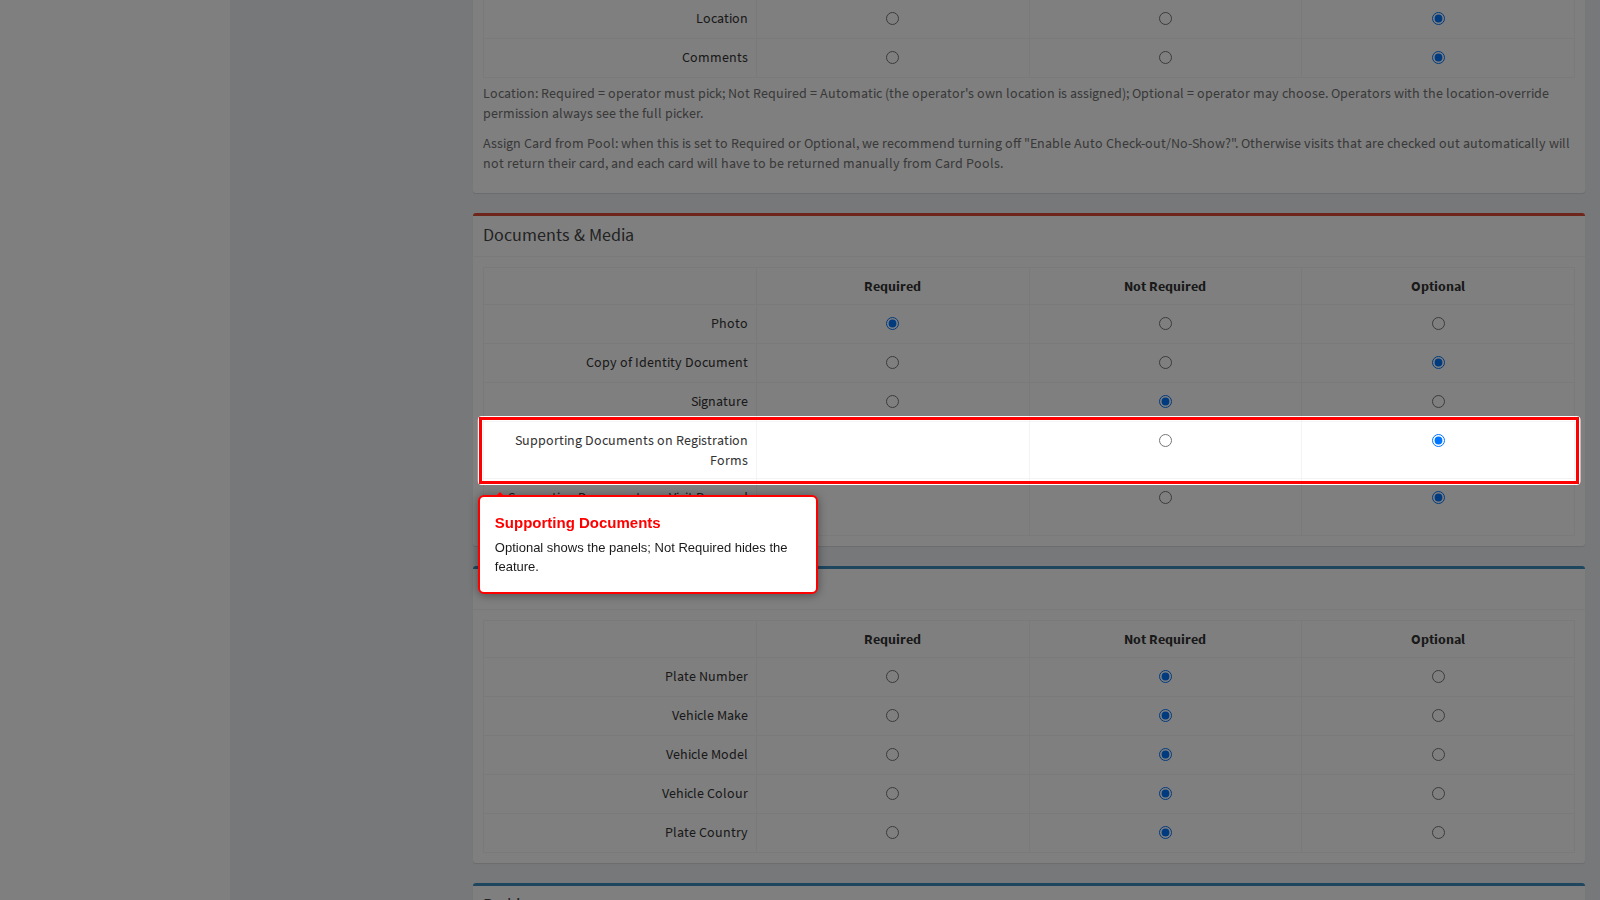
Open Visitors > Settings > Required Fields and find the Documents & Media section. Two settings control supporting documents:
- Supporting Documents on Registration Forms - shows the upload panel on the registration add, edit and processing screens. Documents are always optional; a registration never requires one.
- Supporting Documents on Visit Pass and Visitor Profile - shows the attached documents on the visit pass details screen and in the visitor’s Documents tab.
Set each to Optional to switch it on, or Not Required to hide it. Save the form.
Step 2: Attach documents while registering
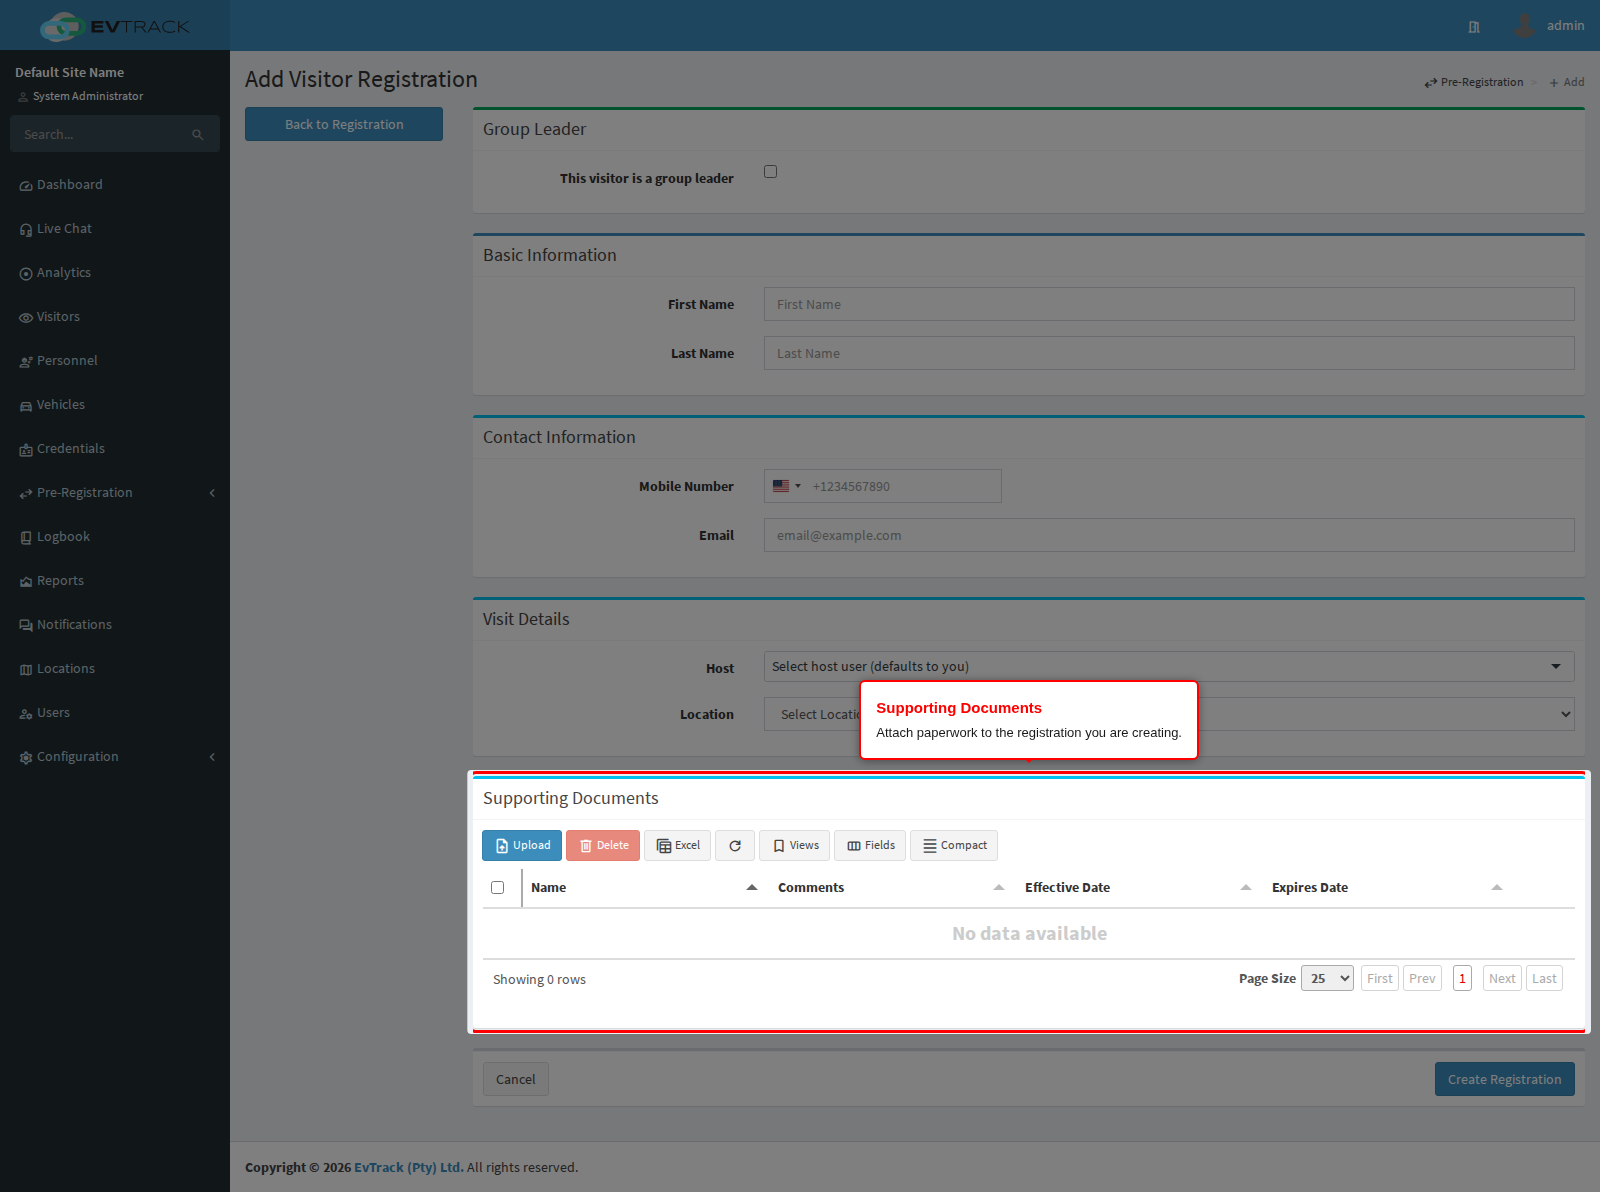
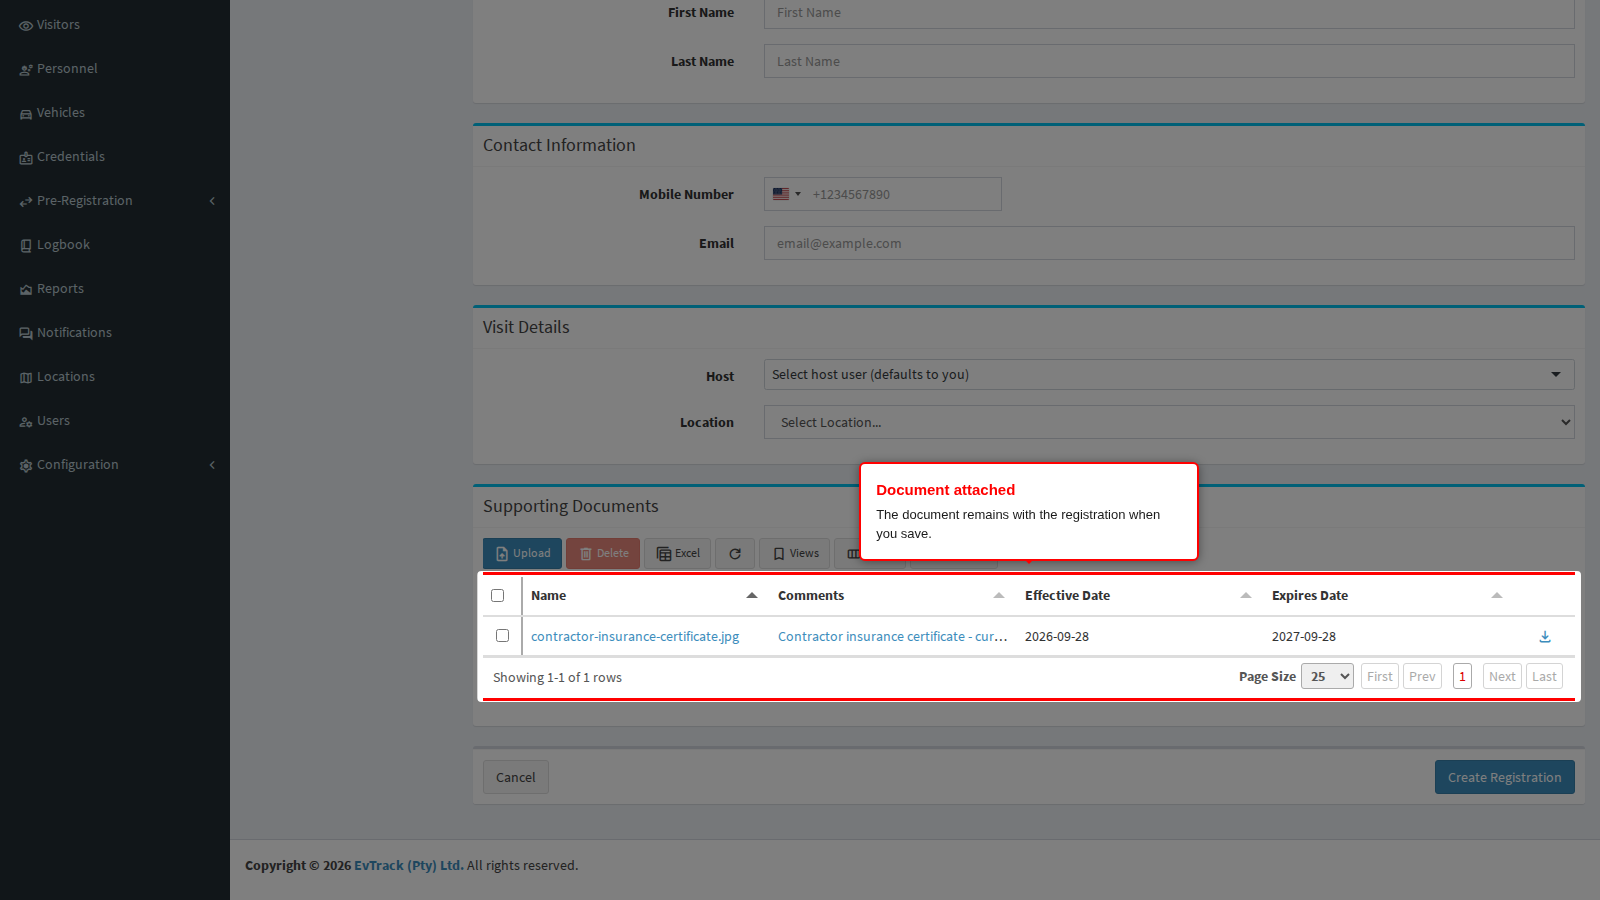
On Visitors > Registrations > Add, a Supporting Documents panel appears below the registration form. Documents uploaded here are held for the registration you are busy creating and stored with it when you save. If you leave without saving, they are discarded automatically.
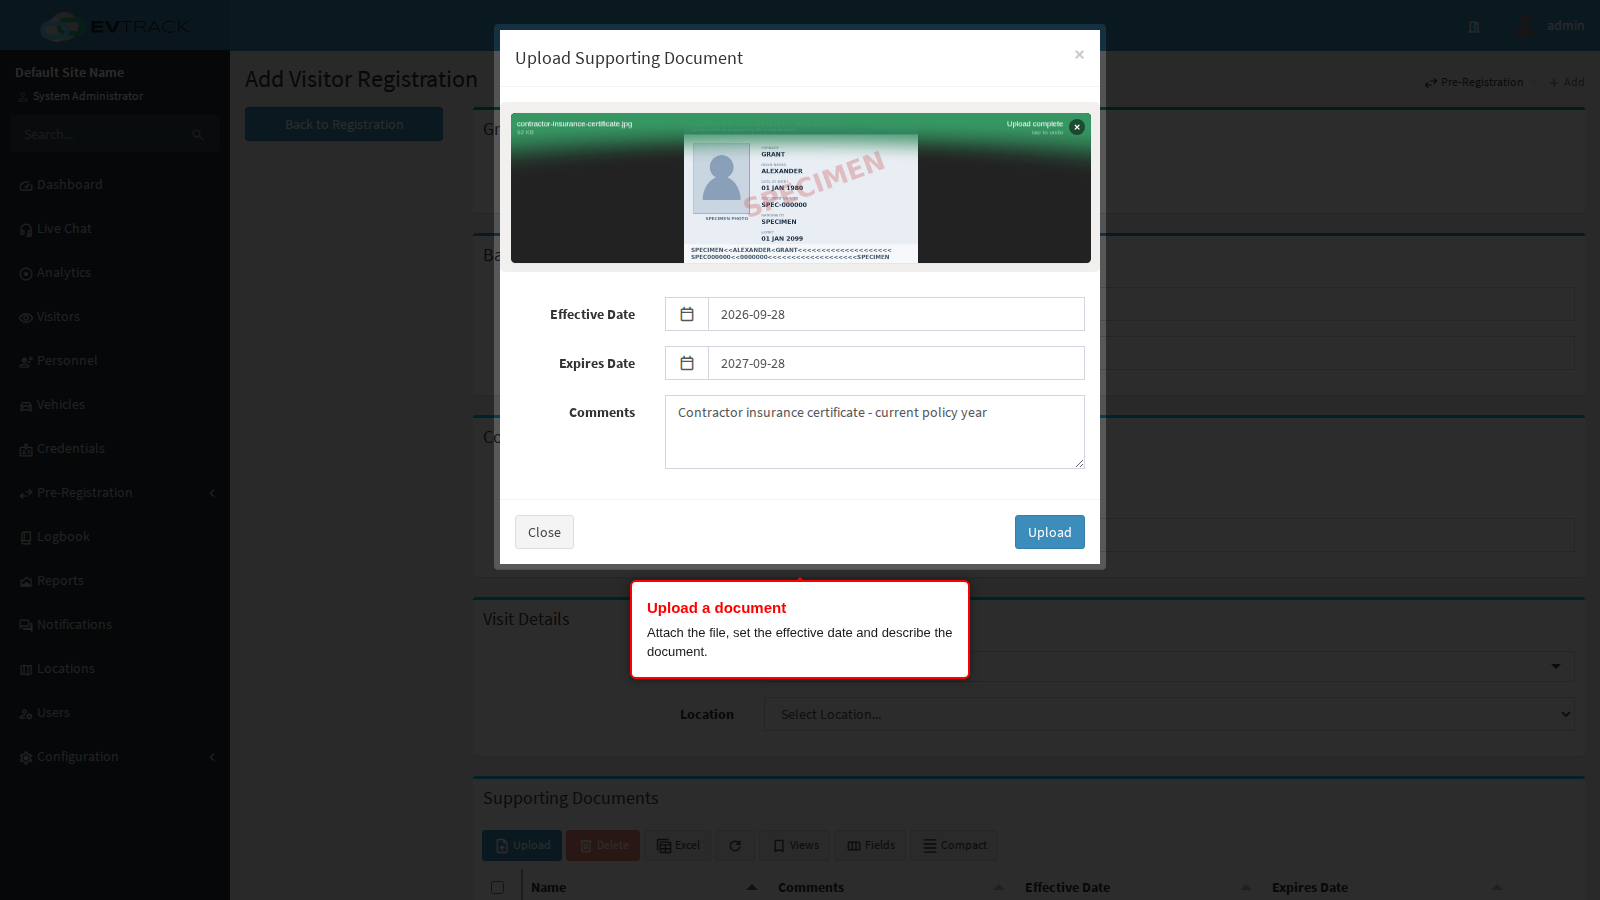
Click Upload, attach the file, set the effective date, and describe the document so reviewers know what they are looking at.
The document appears in the panel’s list with its name, description and dates. The same panel, with the same behaviour, is available later on the registration’s edit screen.
Step 3: Review documents while processing
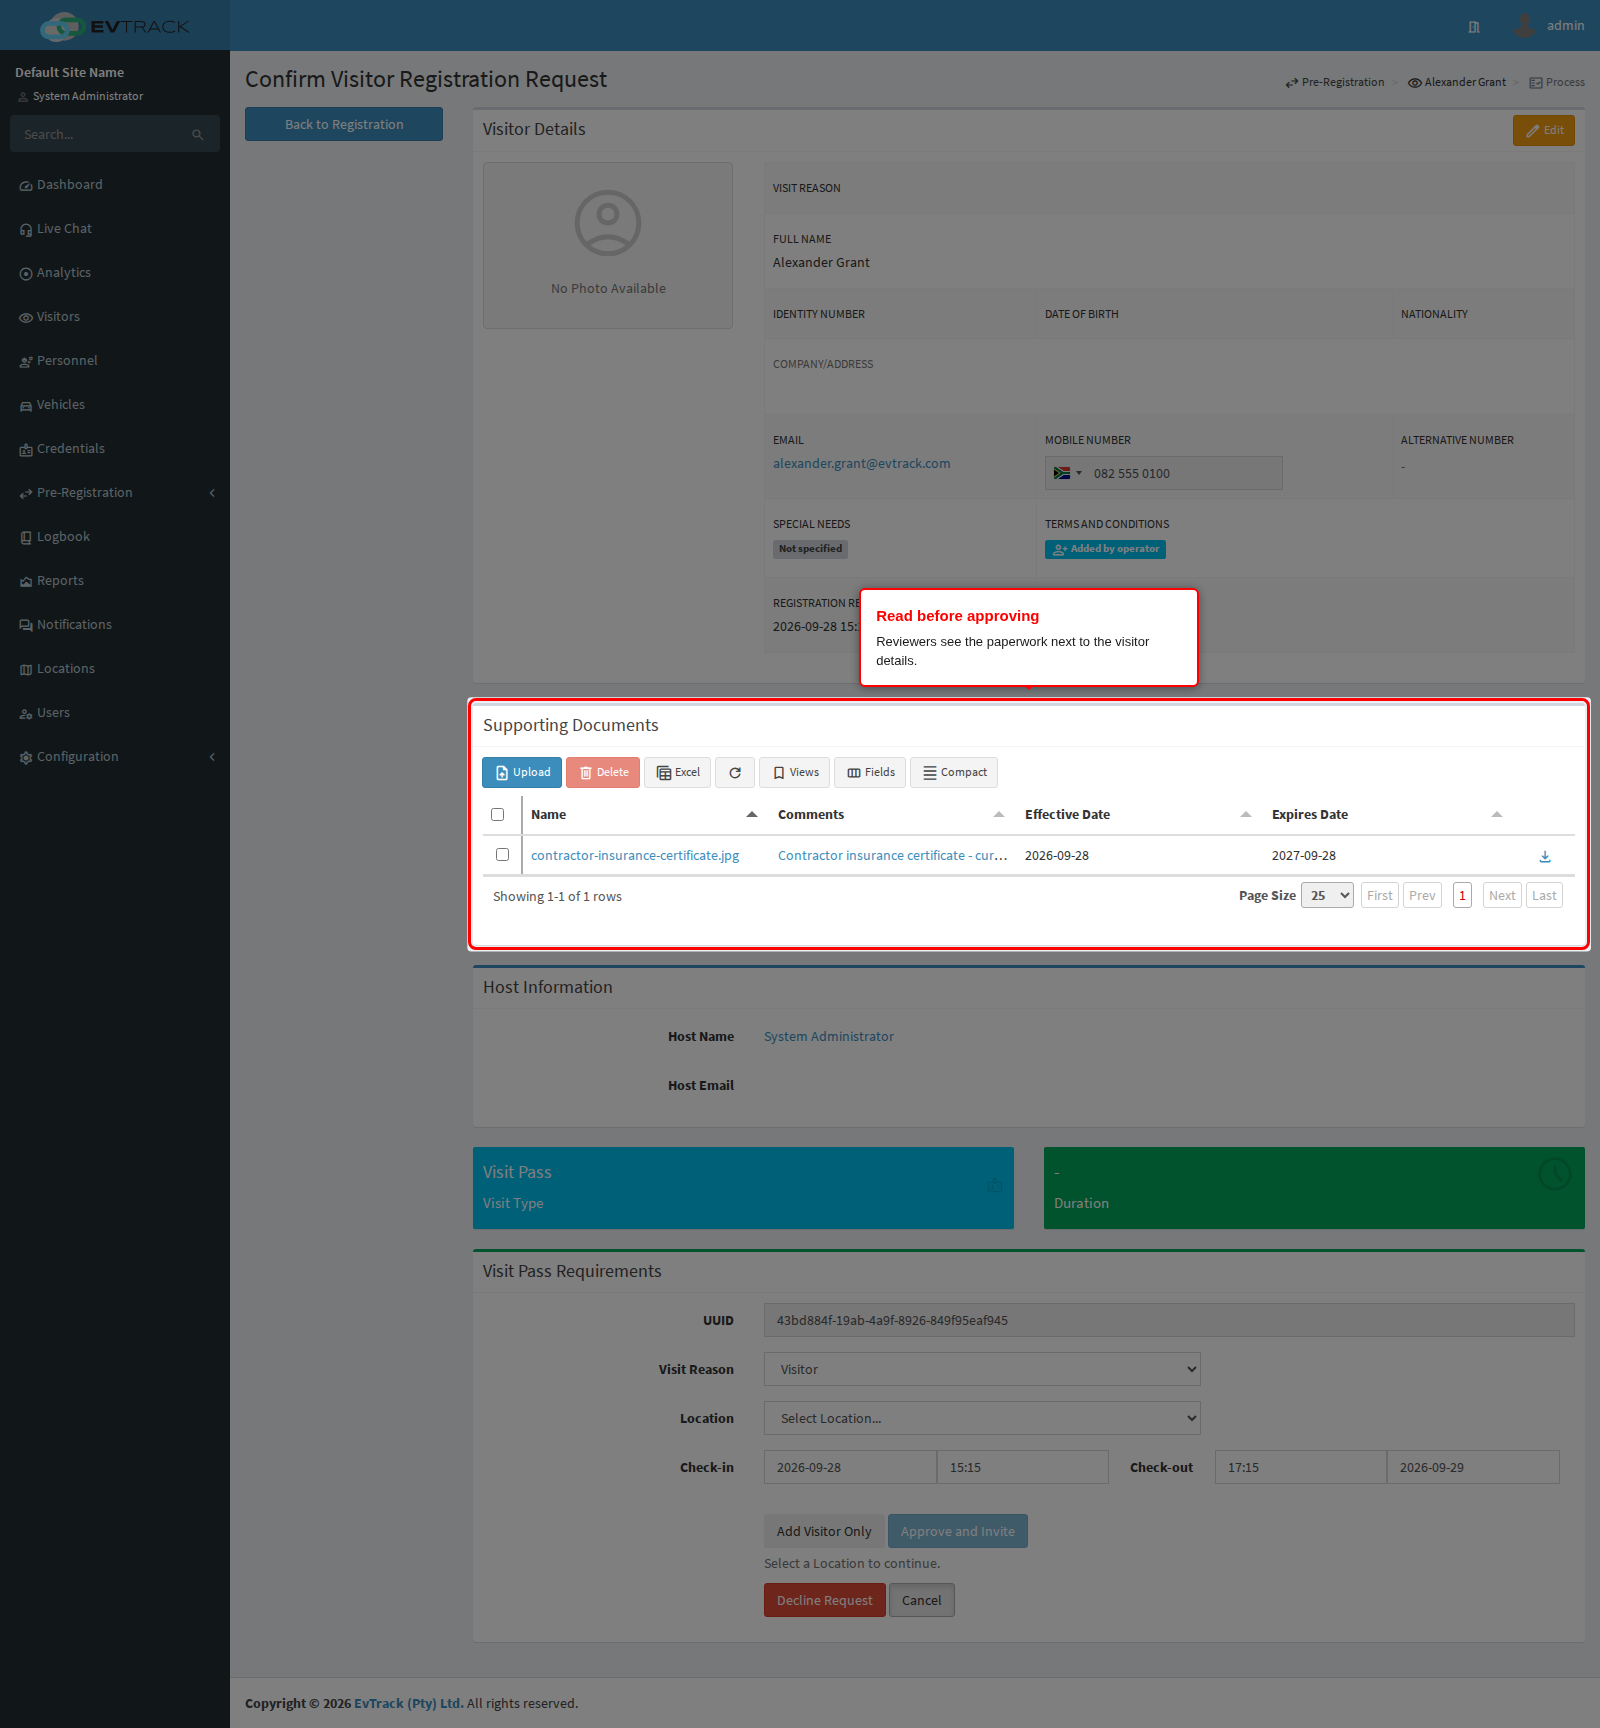
The processing screen shows the registration’s supporting documents alongside the visitor’s details, so the person deciding on the request can read the paperwork before approving. Documents can also be added here - useful when the paperwork arrives by email while the request is already in review.
Step 4: The documents follow the visit pass
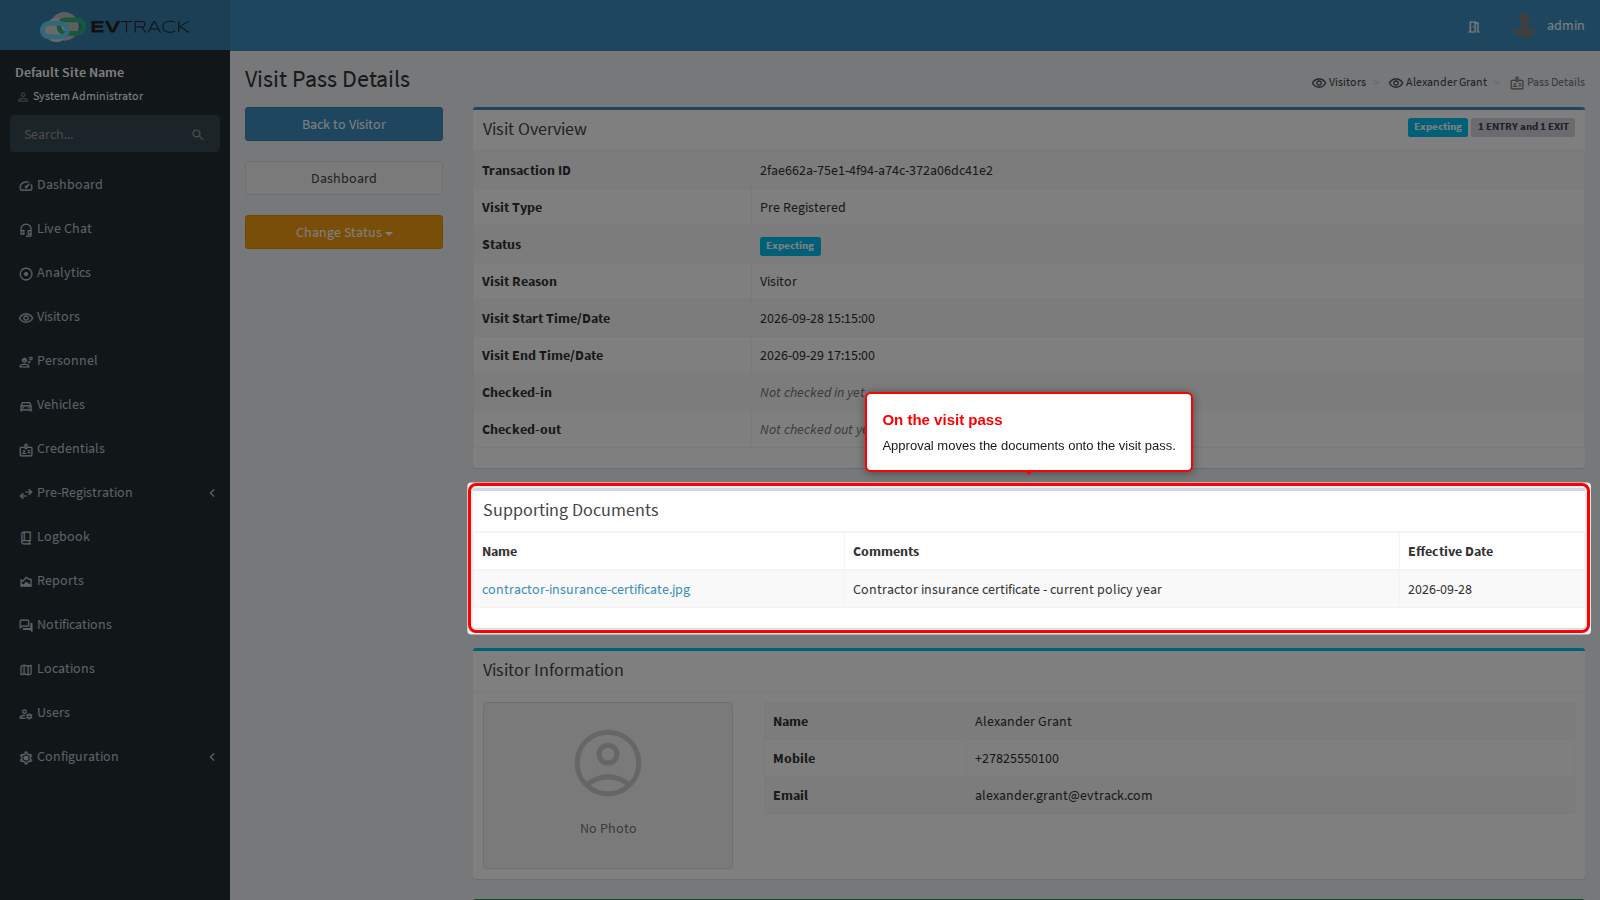
When the registration is approved, its supporting documents move onto the visit pass that approval creates. The visit pass details screen lists them with download links.
Step 5: Everything in one place on the visitor
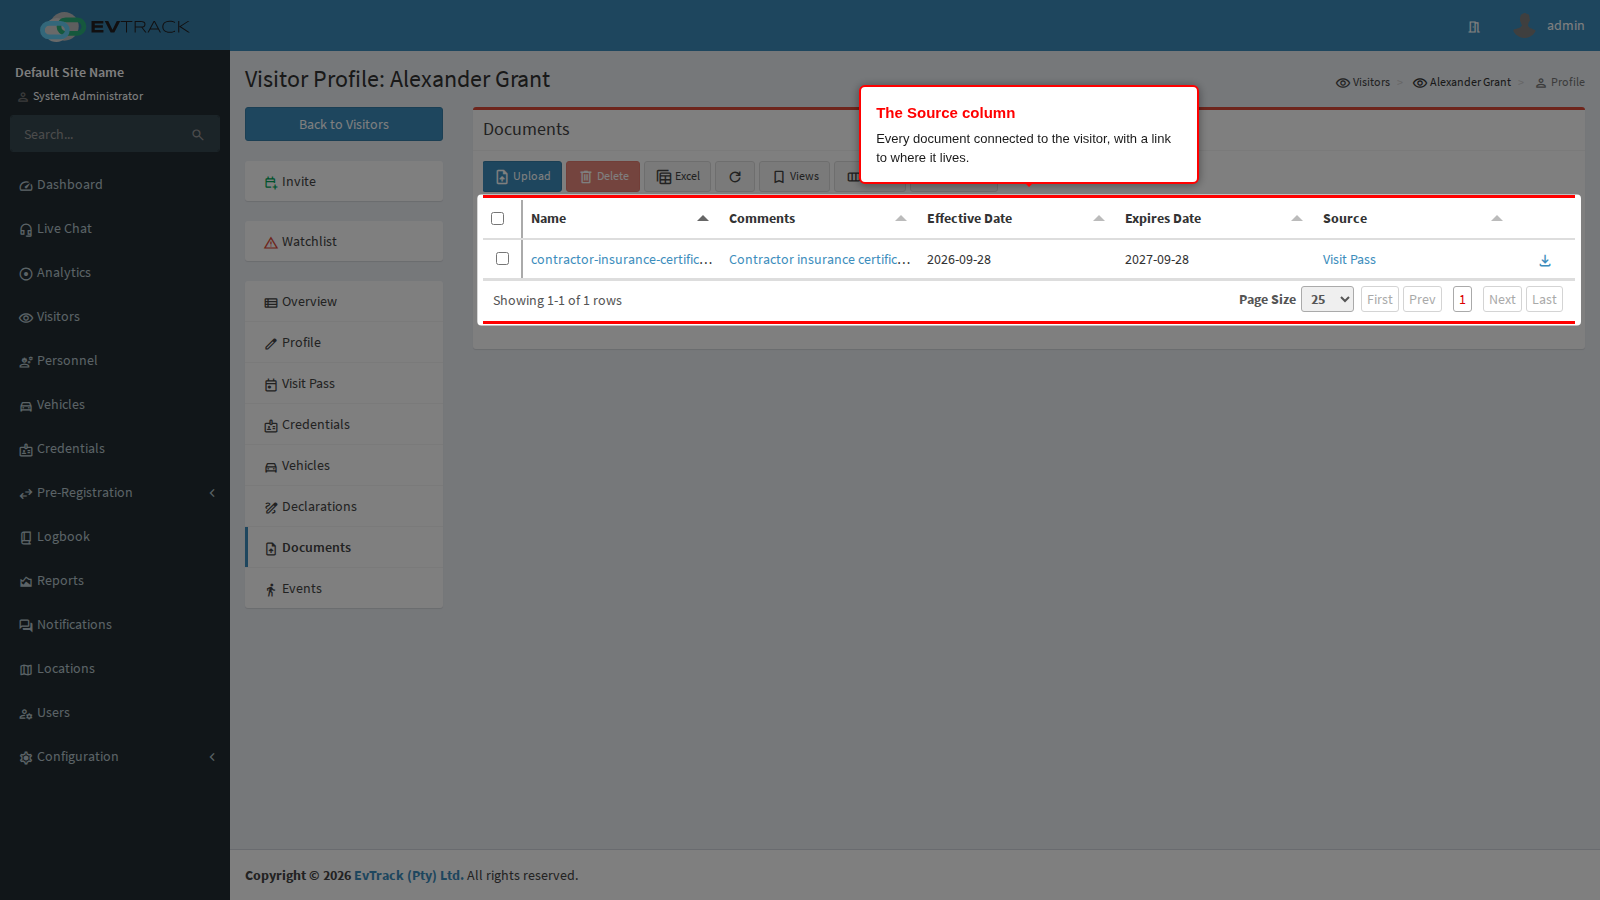
The visitor’s Documents tab shows every document connected to that visitor: documents stored directly on the visitor profile, and the supporting documents of each visit pass and each still-pending registration. The Source column shows where each document lives and links back to it. Documents that belong to a visit pass or a registration are downloaded here but managed on their own screen.