A card pool is a batch of physical cards that the system keeps stock control of. Instead of typing a card number by hand every time you hand a badge over the counter, you record the batch once and then issue cards from it: the pool always knows which cards exist, which are free, who is holding each one and when it went out.
Use a card pool wherever the same physical cards are handed out and taken back again:
- Visitor loan badges at reception, issued at check-in and collected at check-out.
- Contractor badges issued for the day and returned at the end of a shift.
- Spare and replacement cards held in a drawer, so a lost card can be swapped without ordering new stock.
- Stock you have bought but not issued yet, imported in one go from the supplier’s card list.
A card in a pool is stock, not access. It records that you physically own the badge and who has it. The badge only opens something once it is a credential: either the check-in screen assigns a pool card to a visitor (which issues it as that visitor’s credential for the visit), or an administrator adds the same number by hand on a person or user record. See RFID Card Credentials (Personnel) and RFID Card Credentials (Users).
Before you start: you need an account whose role may manage credentials and card pools. If the Card Pools menu entry, the Add button or the Import button described below is missing, ask an administrator to extend your role. To offer pool cards on the visitor check-in screen, Assign Card from Pool must also be set to Required or Optional under Required Fields.
Step 1: Open Card Pools
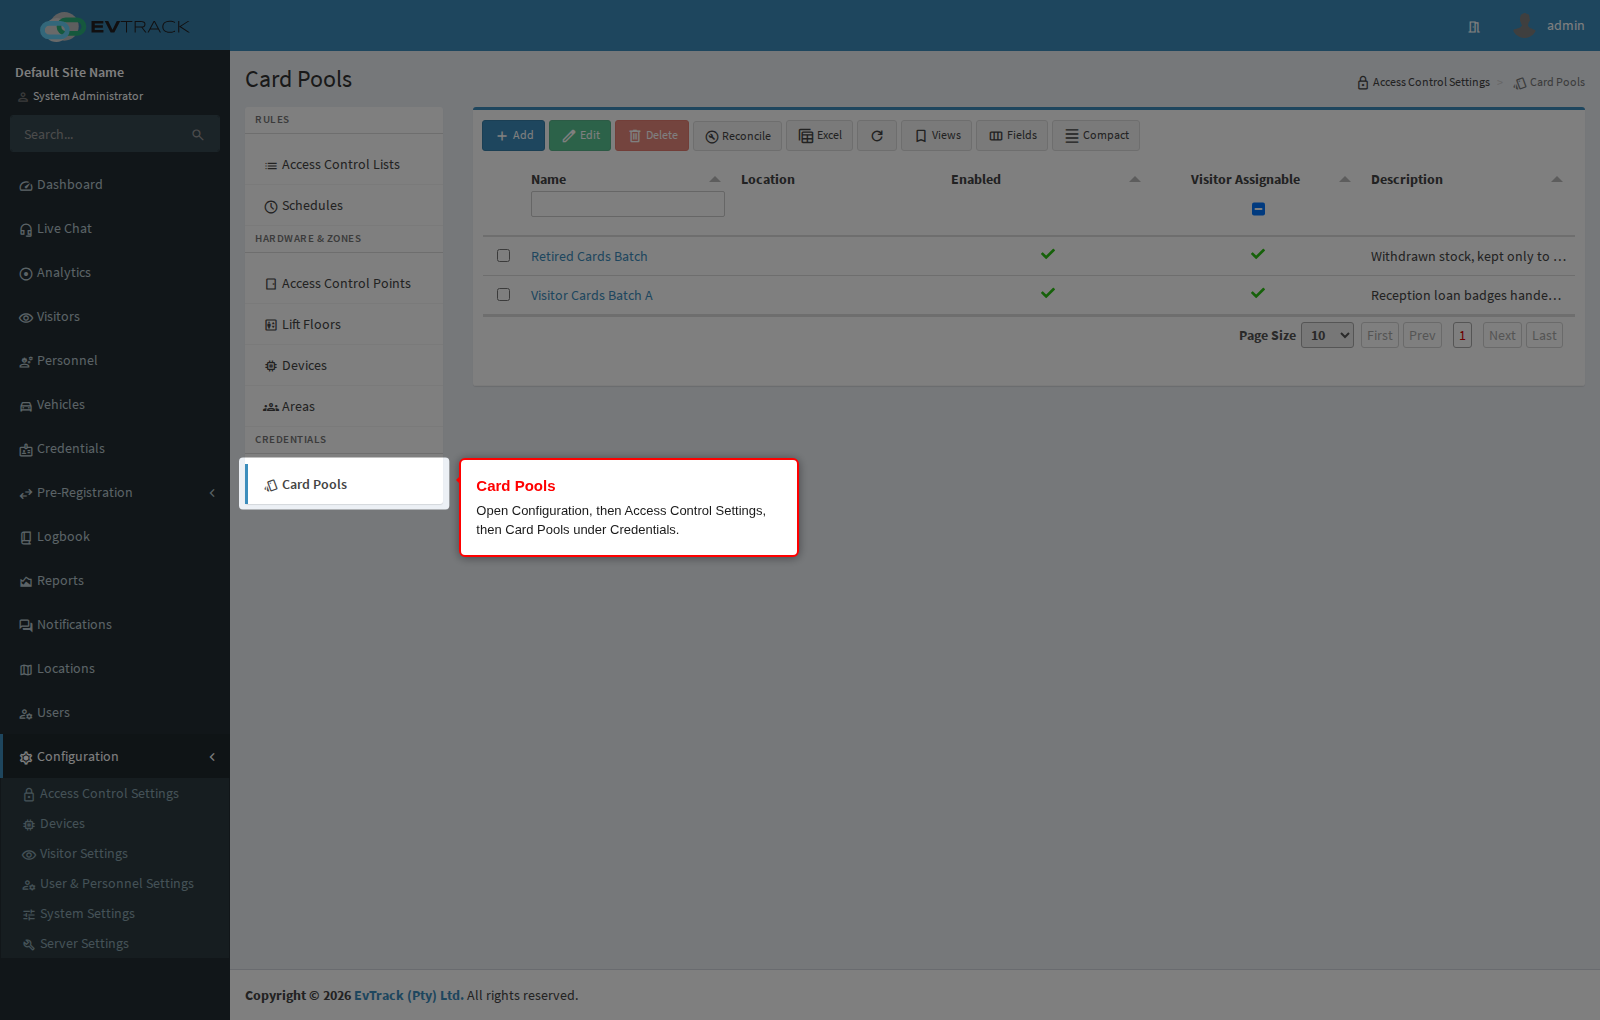
In the left sidebar open Configuration, then Access Control Settings. In the settings menu on the left, click Card Pools under the Credentials heading. The card pool list opens.
Step 2: Review the pools
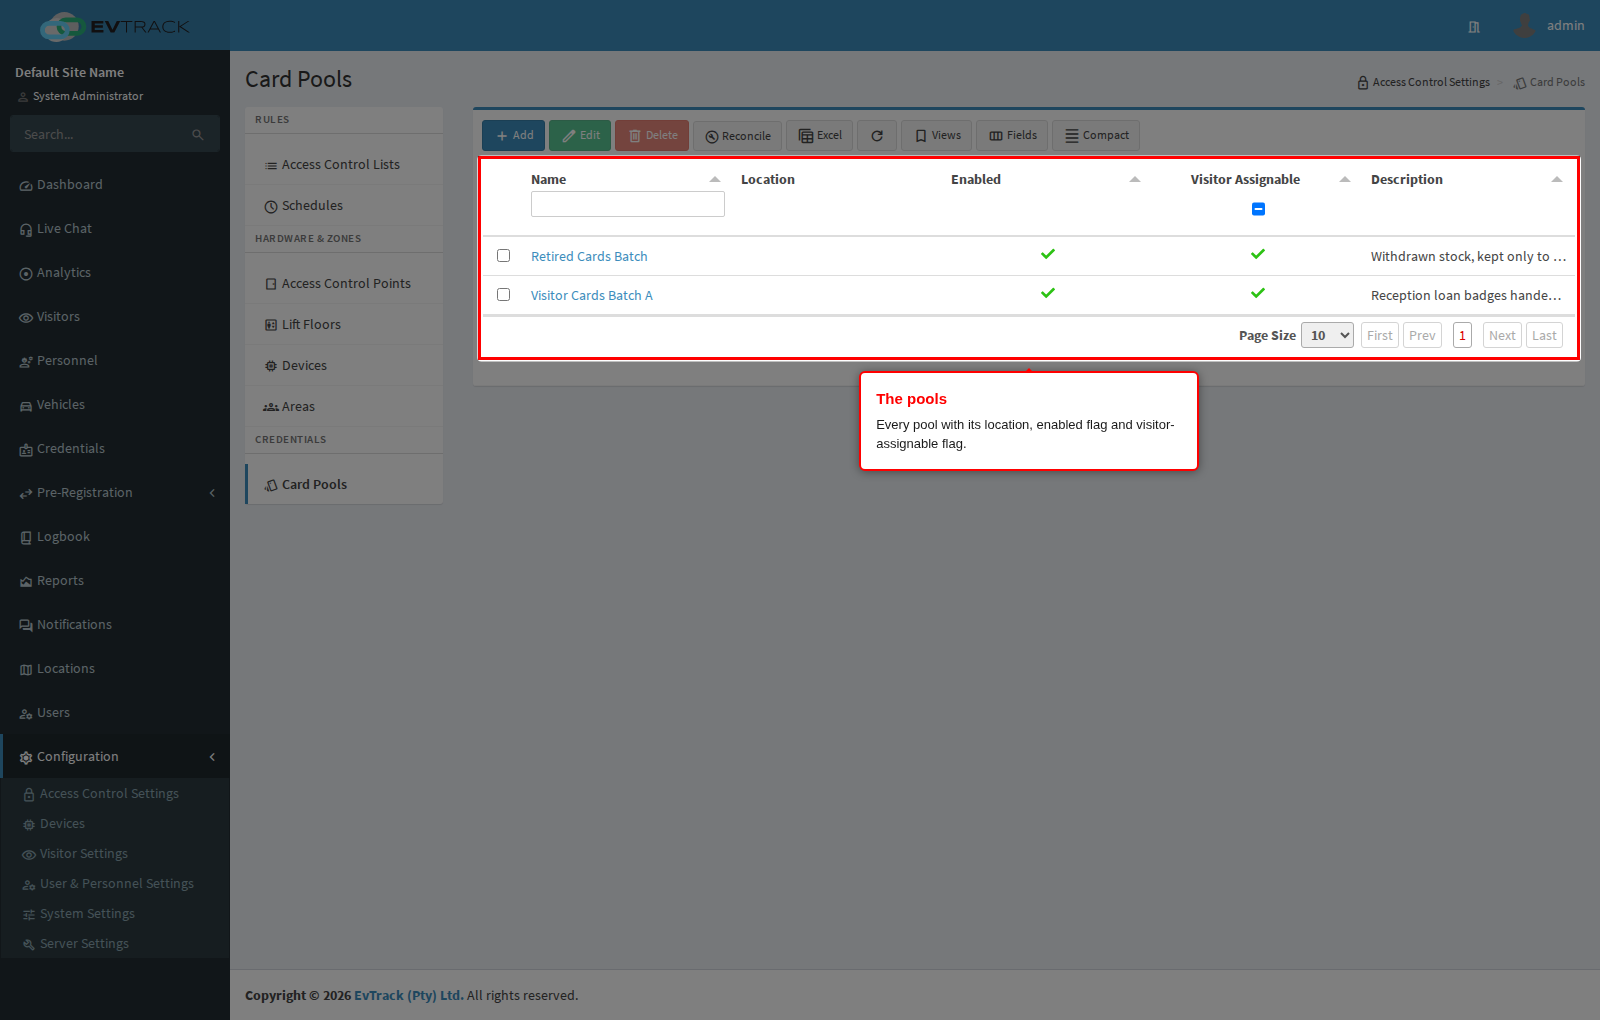
The table lists every pool with:
- Name - click it to open the pool.
- Location - the site the pool belongs to, or blank when it is available everywhere.
- Enabled - a tick means the pool may issue cards.
- Visitor Assignable - a tick means its cards appear in the check-in card picker.
- Description - your own note about what the batch is for.
The toolbar above the table holds Add, Edit, Delete, Excel (downloads the visible list) and Refresh. Edit and Delete only become available once exactly one row is selected.
Step 3: Click Add
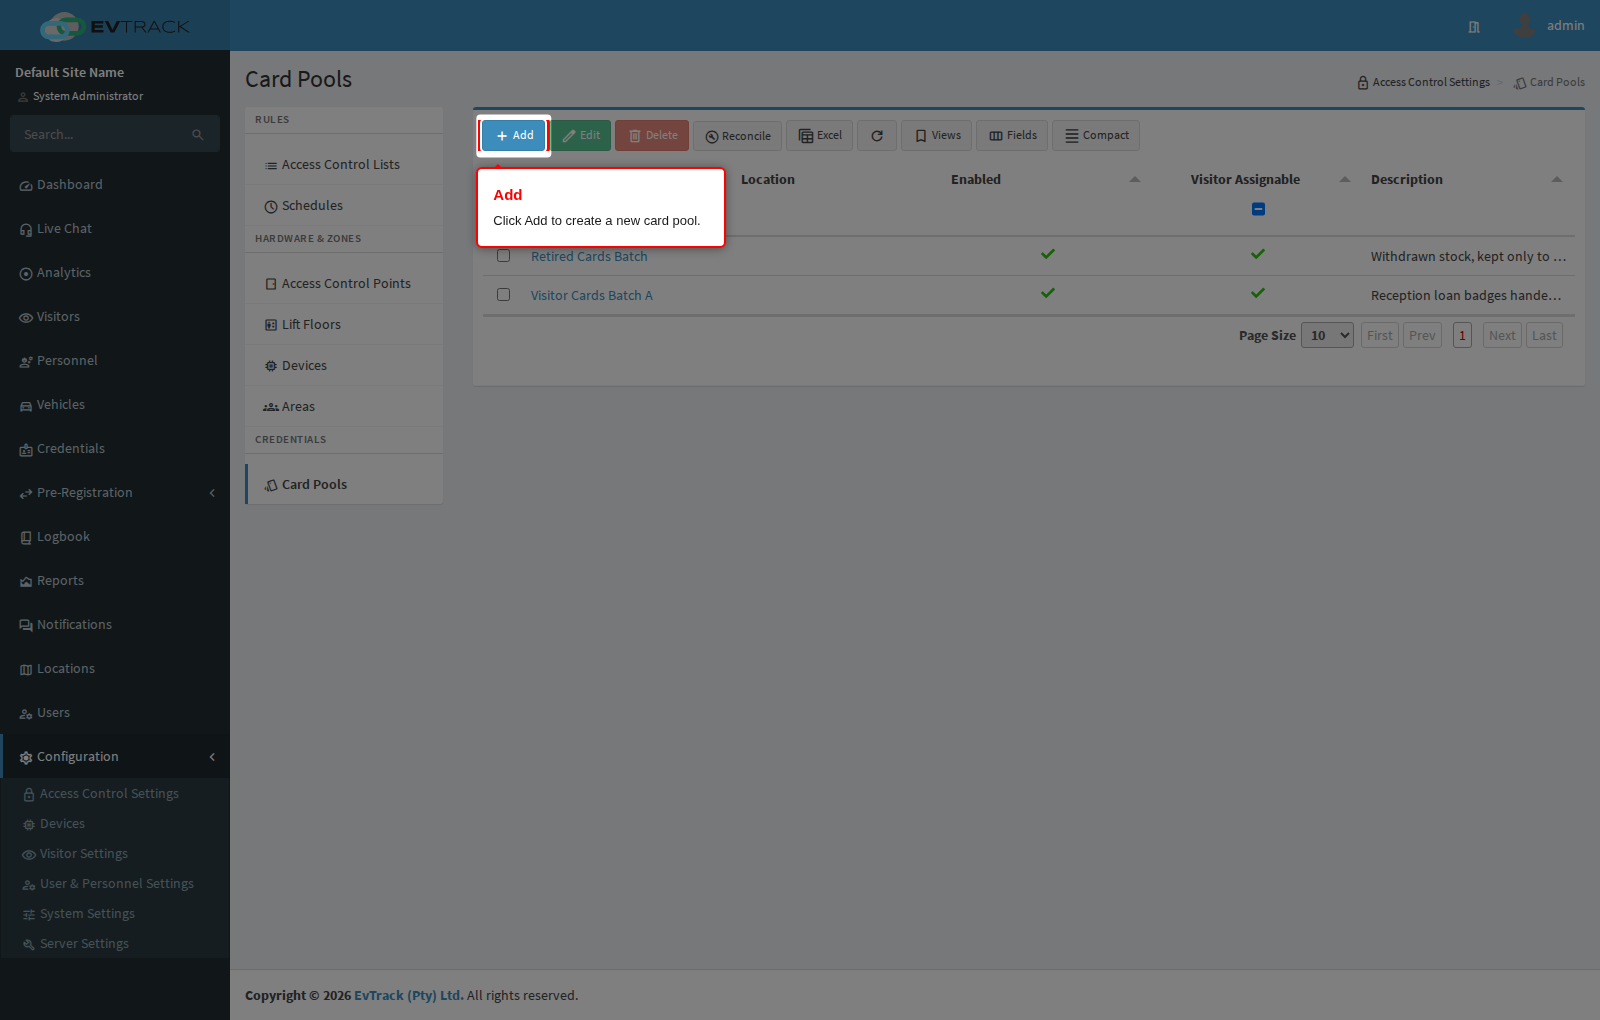
Click the Add button above the table. The new card pool form opens.
Step 4: Name and describe the pool
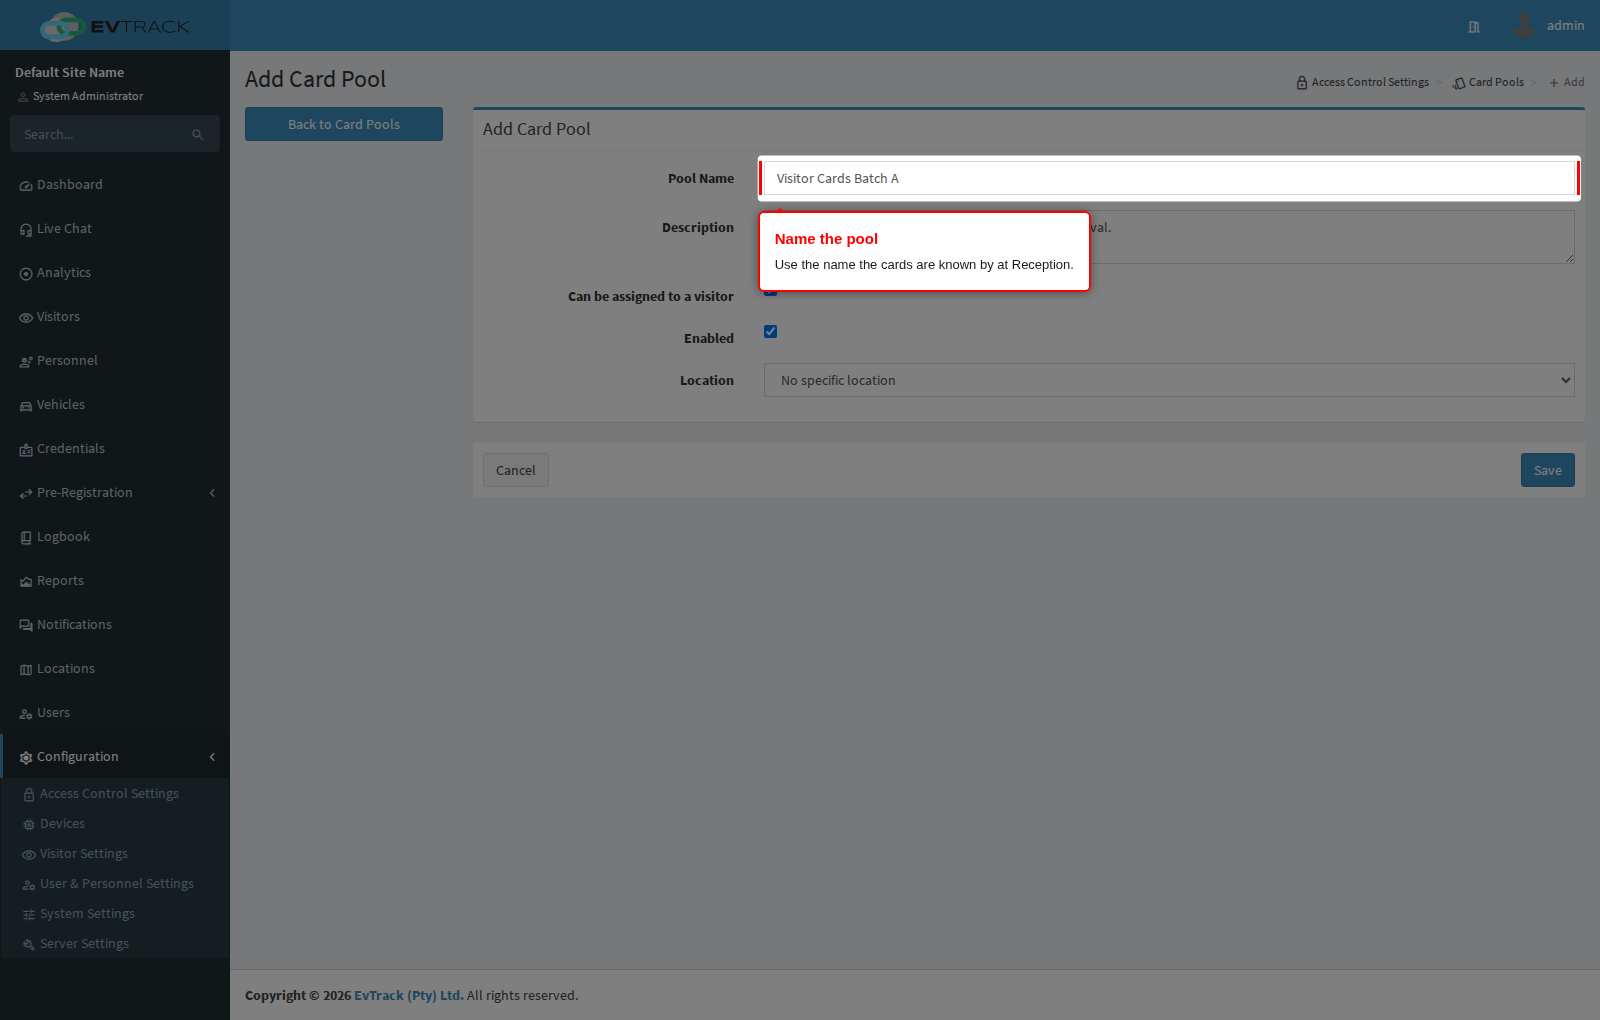
Type a Pool Name Reception will recognise, for example “Visitor Cards Batch A”. Use Description for the detail that will not fit in the name, such as where the cards are kept or which supplier delivered them. Both are free text; the name is what appears in the list and in the check-in card picker.
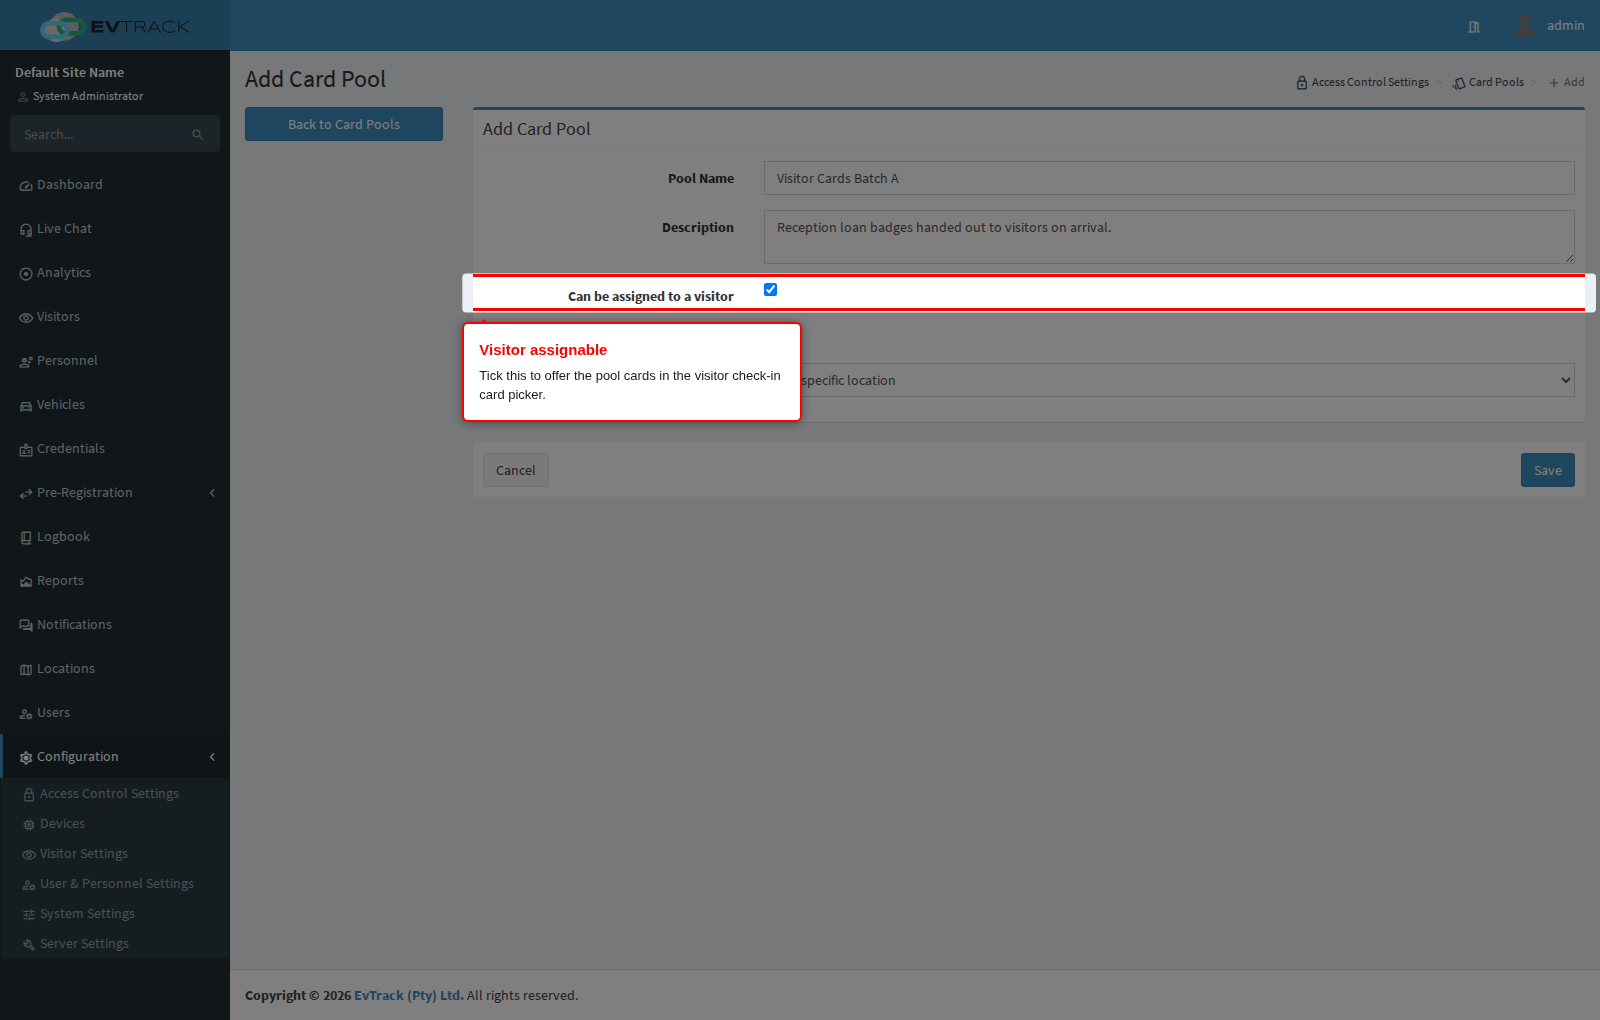
Step 5: Can be assigned to a visitor
Tick Can be assigned to a visitor when reception should be able to hand these cards to visitors. It is what puts the pool’s available cards into the card picker on the check-in screen. Leave it clear for pools that are administrator-only stock, for example replacement cards for staff, so a receptionist cannot issue them by accident.
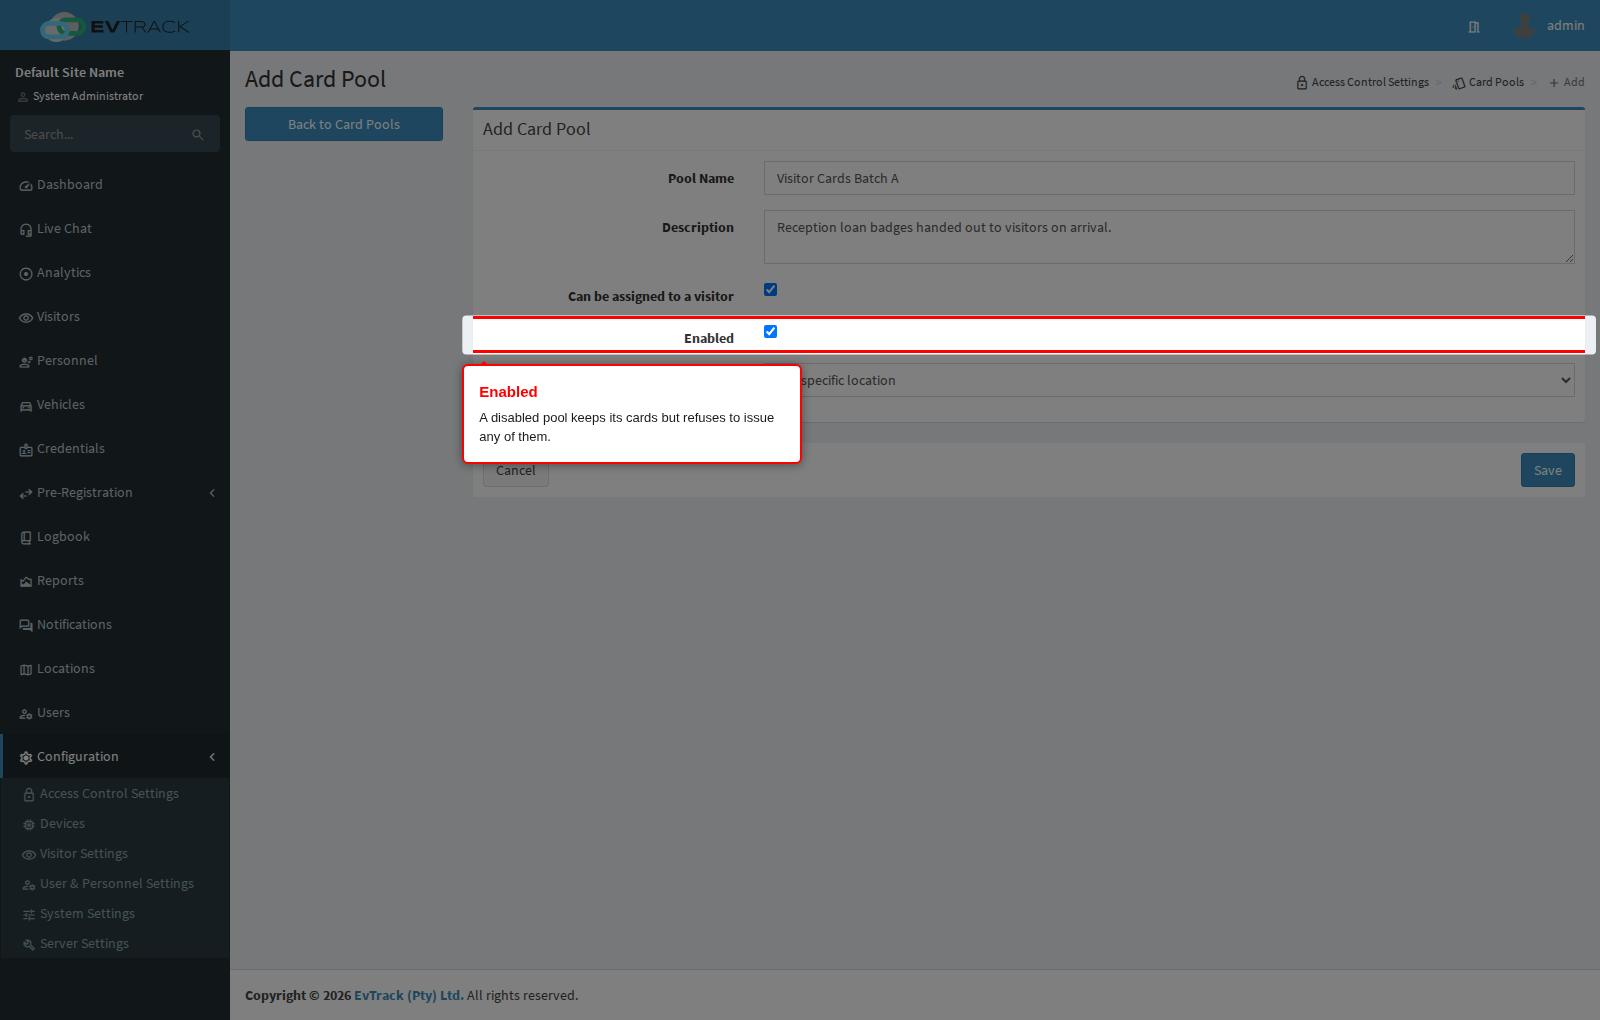
Step 6: Enabled
Tick Enabled to allow the pool to issue cards. A pool that is not enabled keeps all of its cards and its whole history, but every attempt to check a card out of it is refused with “This card pool is disabled and cannot issue cards.” Clear this box when a batch is withdrawn from service (recalled stock, a cancelled contractor project) instead of deleting it, so the record of who held what survives.
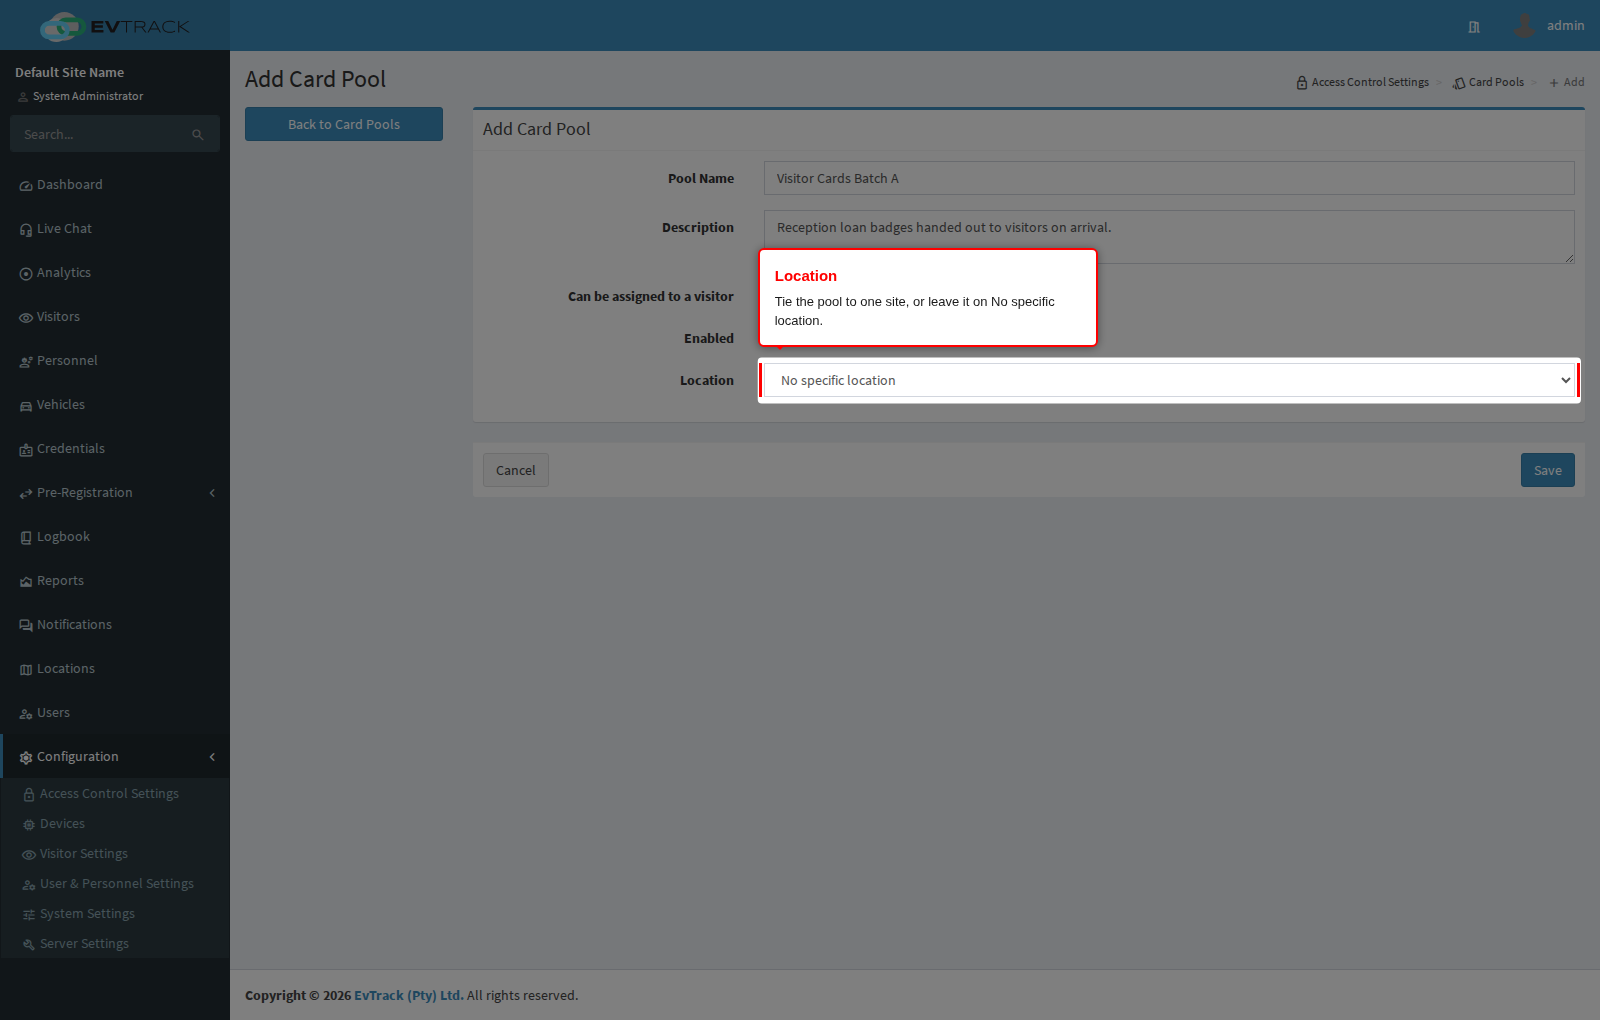
Step 7: Location
Choose the Location the batch belongs to, or leave it on No specific location to make the pool available everywhere. Set it when different sites keep their own drawer of badges and you want each site’s list to remain short and unambiguous.
Click Save. The pool is created and its own page opens.
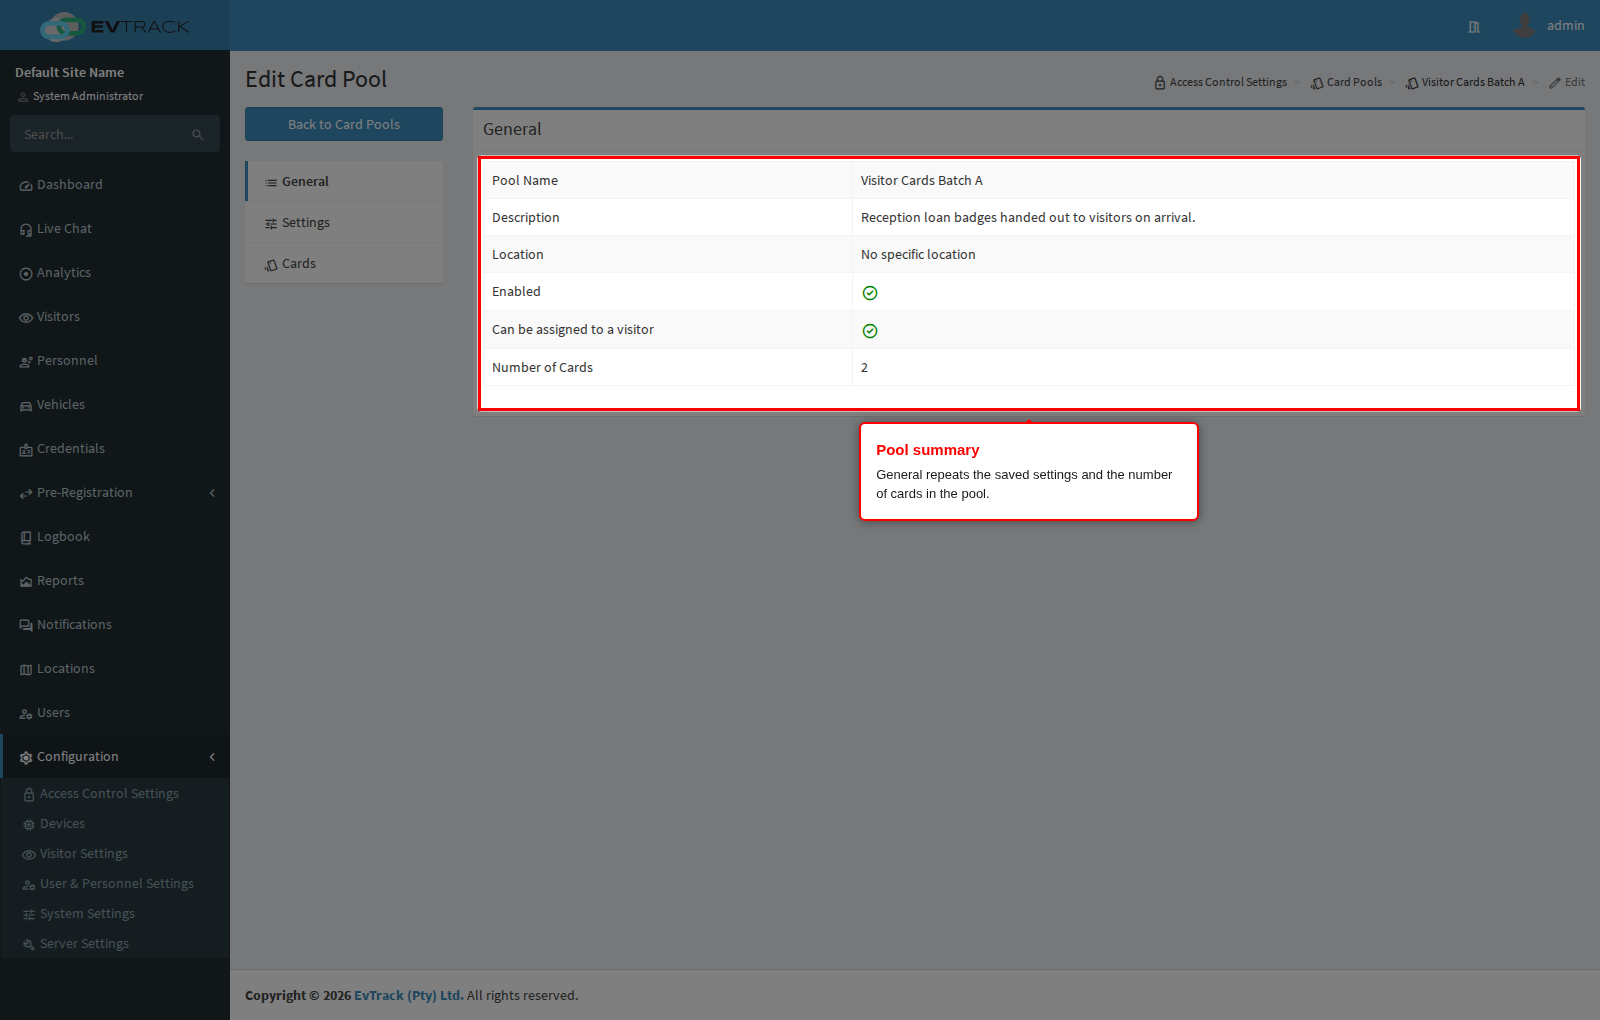
Step 8: The General panel
A saved pool opens on General. This is a read-only summary: the pool name, description, location, the enabled and visitor-assignable flags, and Number of Cards, which is the running count of cards recorded in the pool.
Step 9: The Settings panel
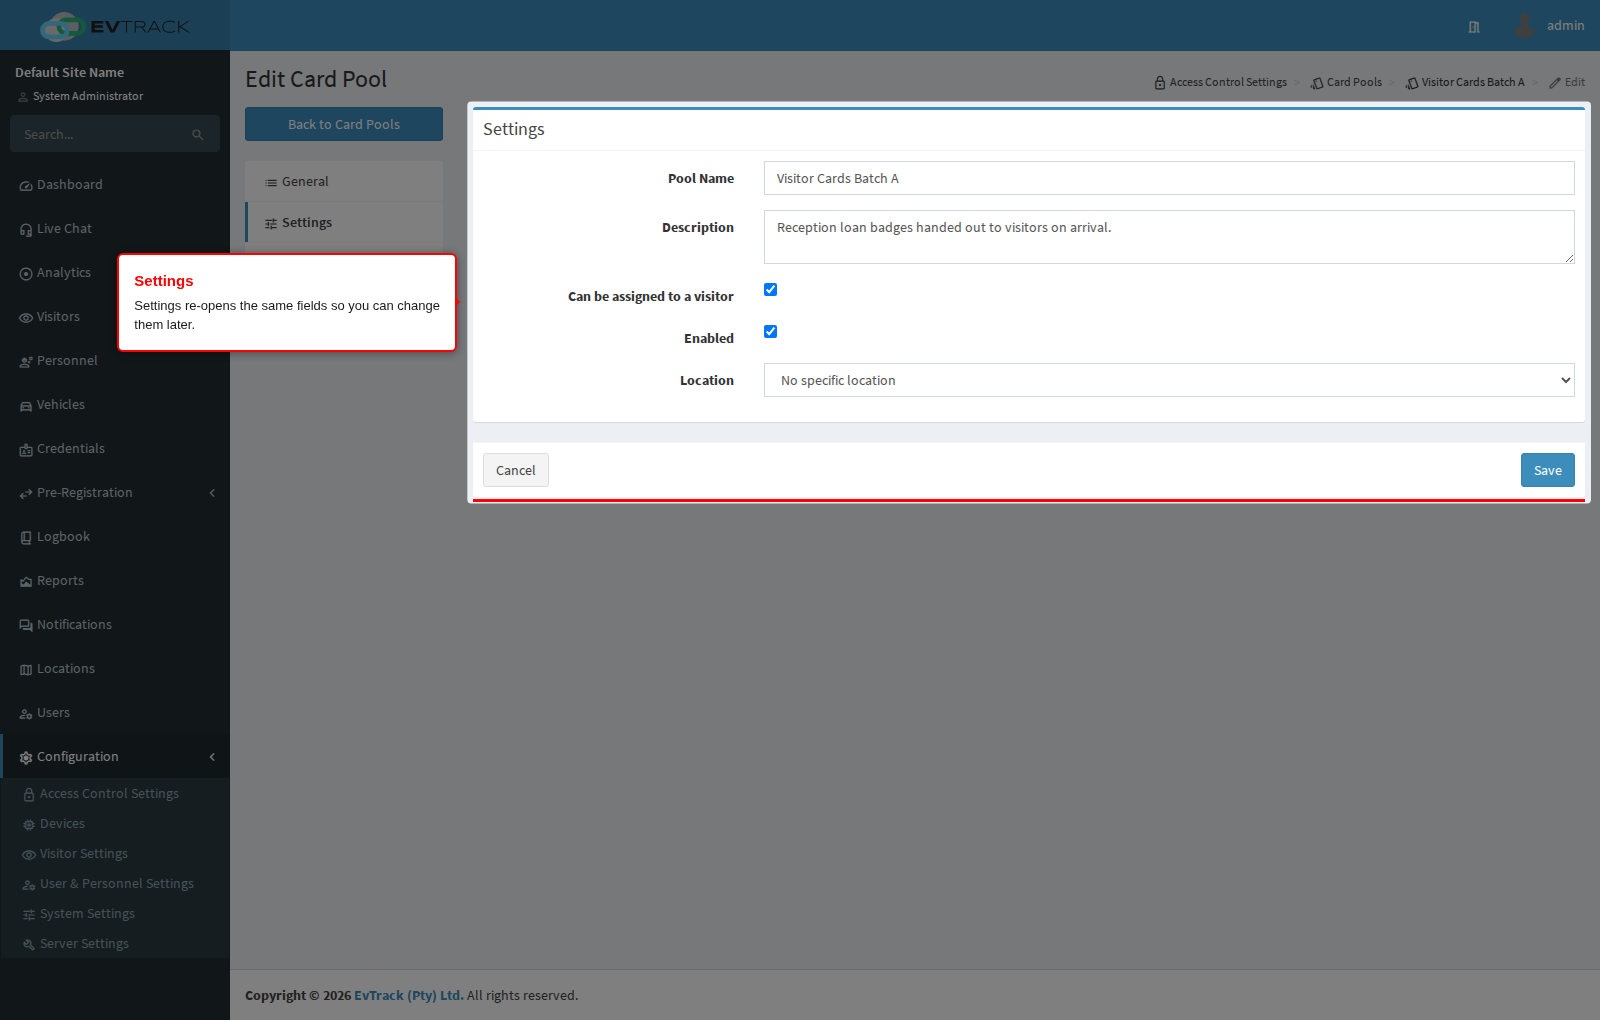
Click Settings in the pool’s left menu to re-open the same fields you filled in on the add form. Change what you need and click Save; you remain on the pool.
Step 10: Open the Cards panel
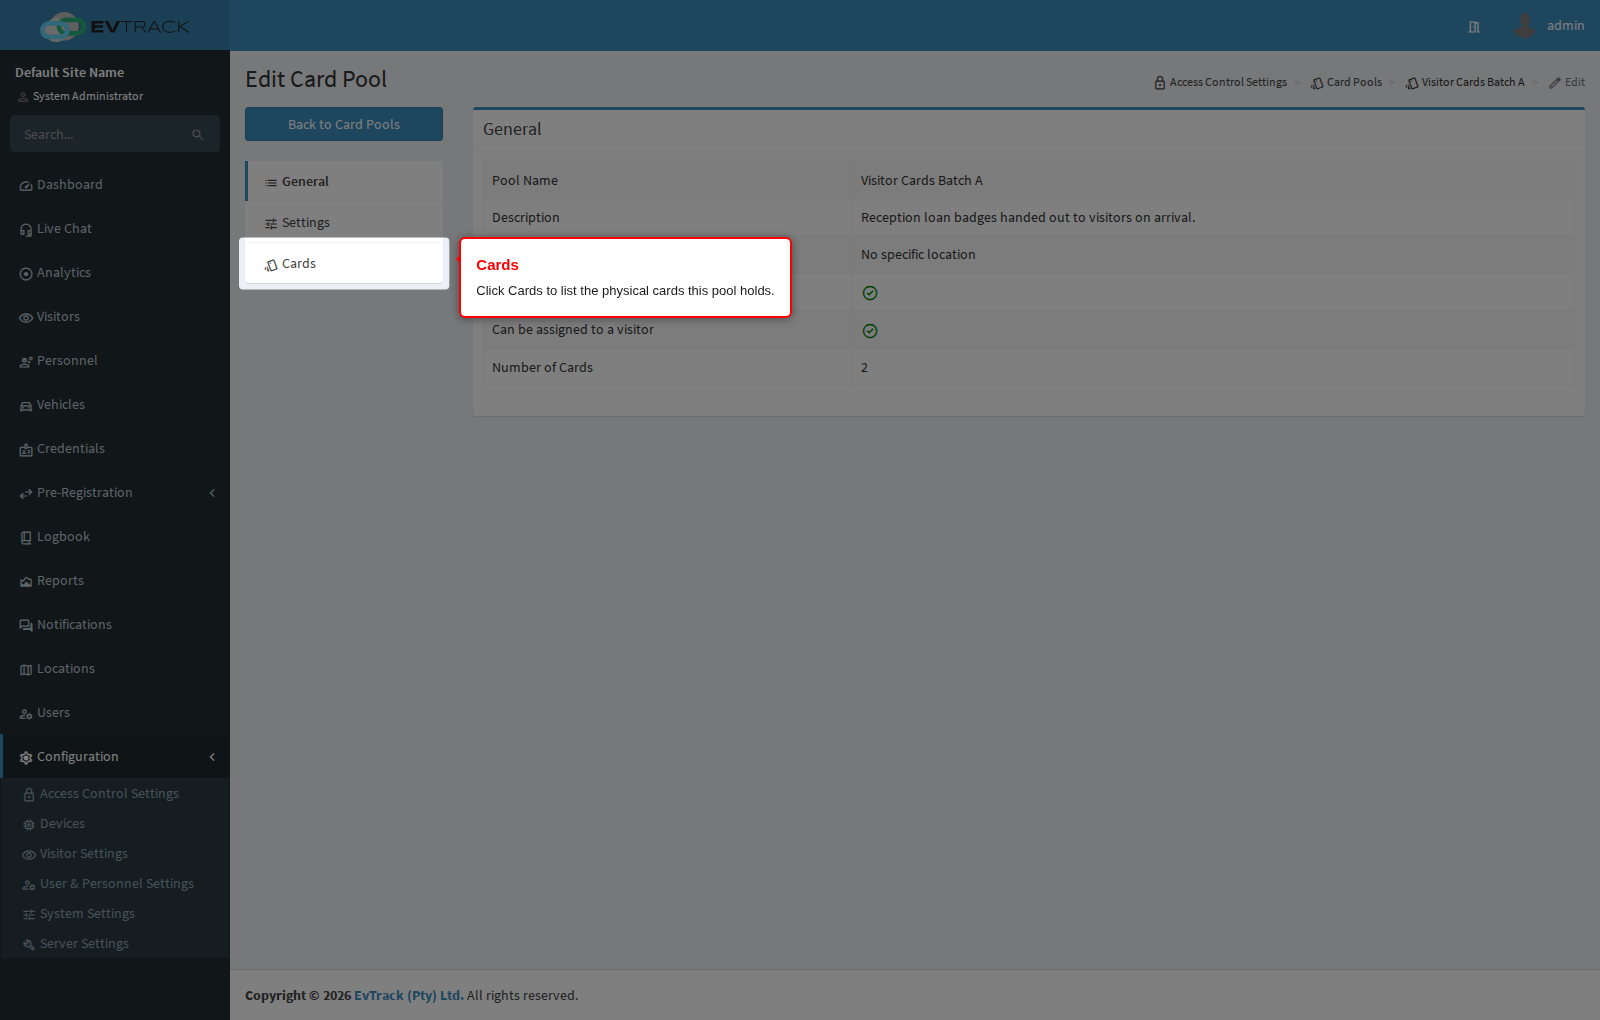
Click Cards in the pool’s left menu. This is where the individual physical cards live.
Step 11: Add a card
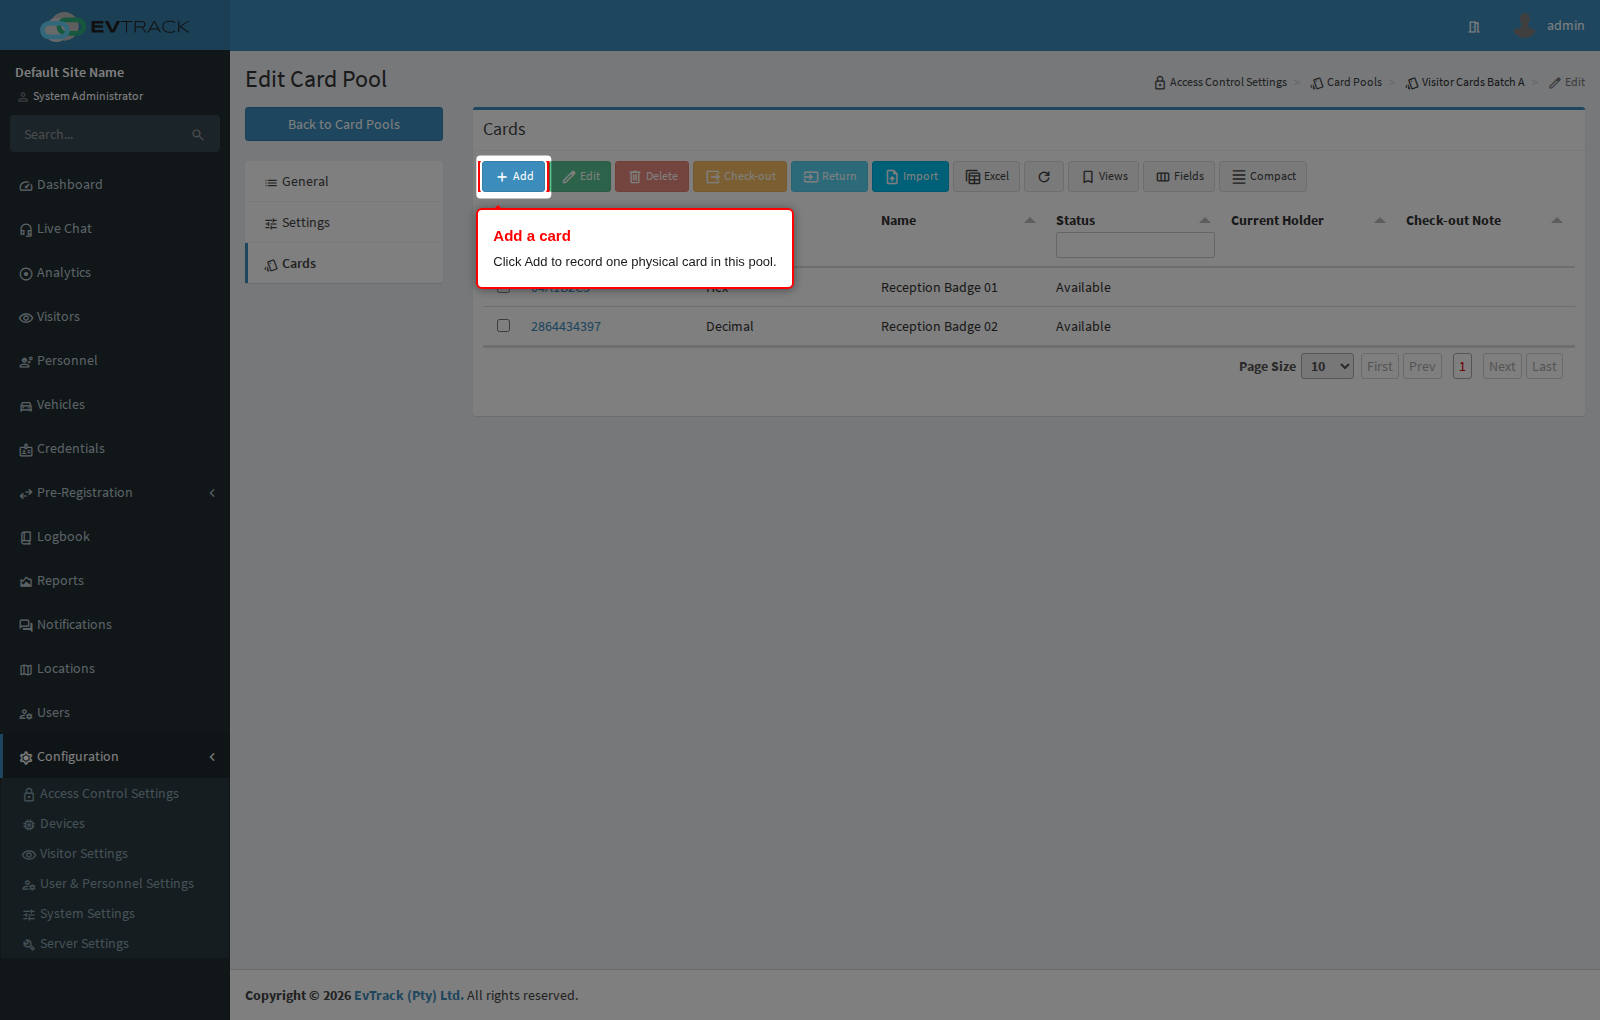
The Cards panel shows the pool’s cards with a toolbar above them: Add, Edit, Delete, Check-out, Return, Excel, Refresh and Import. Everything except Add, Excel, Refresh and Import needs exactly one selected row, and Check-out and Return also depend on the selected card’s status.
Click Add. The new card form opens.
Step 12: Card Name and Card Number
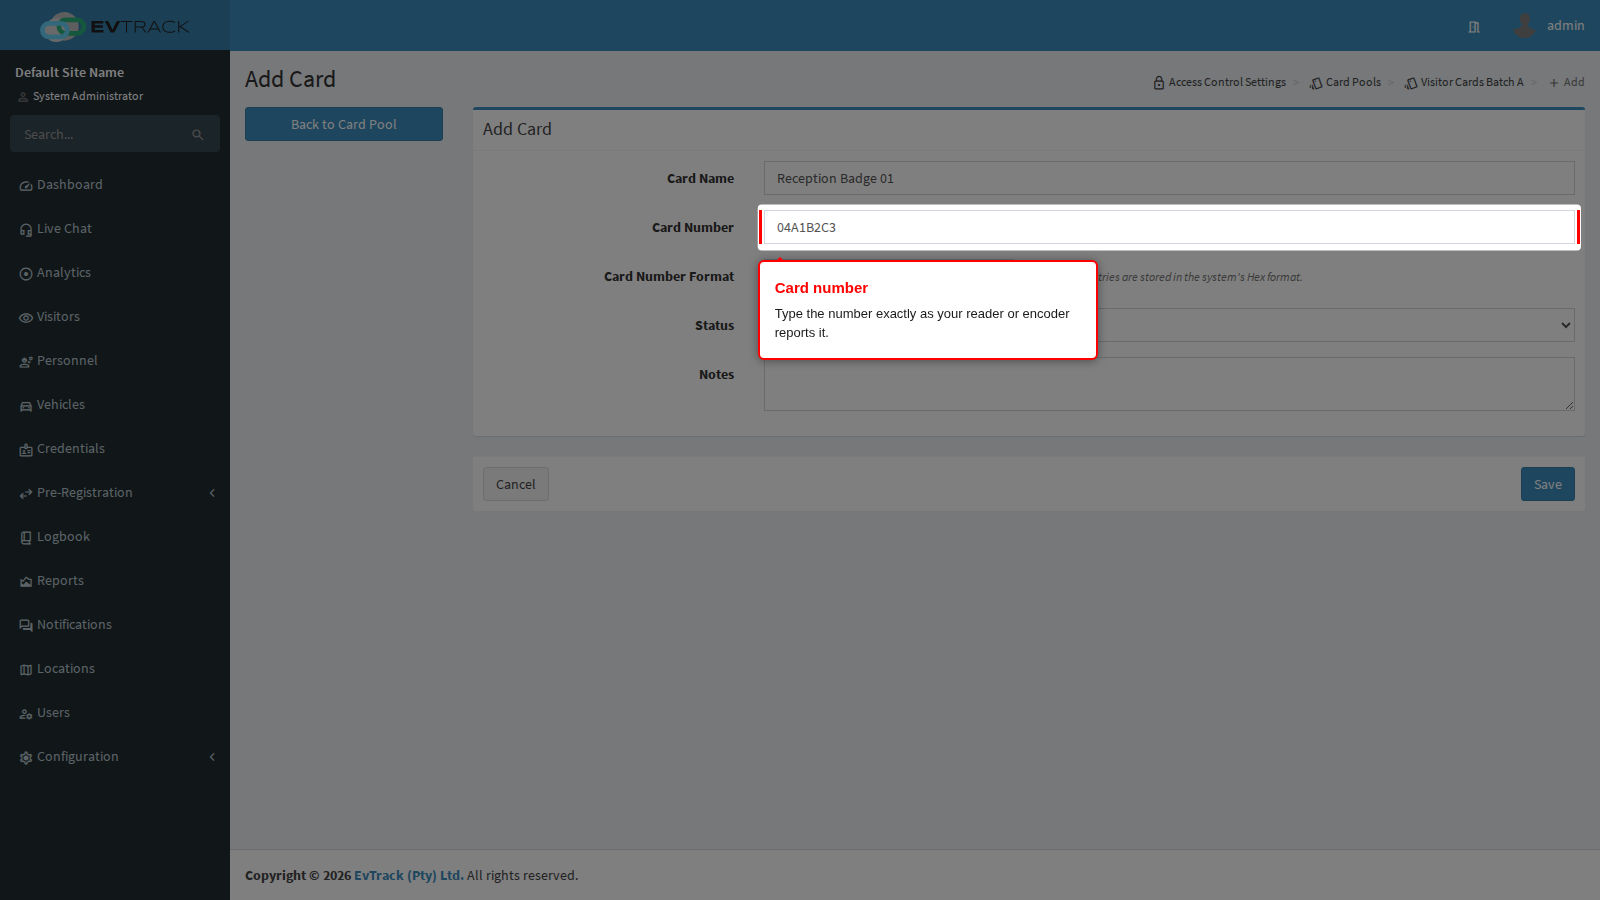
Card Name is your label for the physical badge, for example “Reception Badge 01” or a slot number in the drawer. It is optional but makes the list far easier to work with.
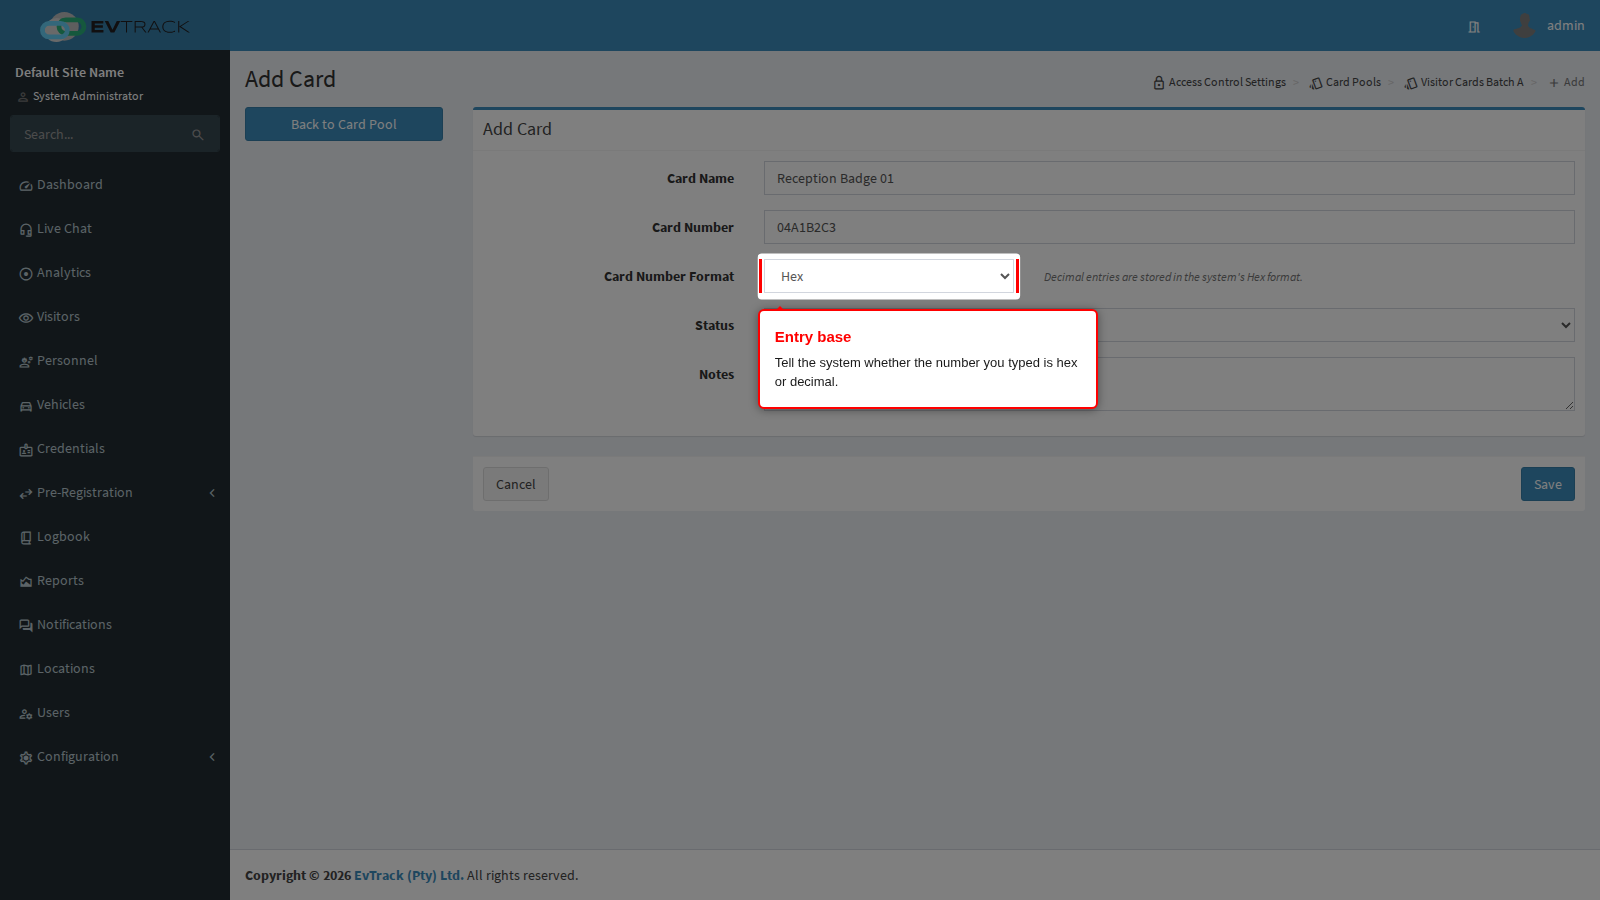
Card Number is the serial the reader will report. Type it exactly as your reader, encoder or card list gives it to you, then set the entry base in the next field so the system knows how to read what you typed.
Step 13: Card Number Format (hex or decimal)
Card Number Format tells the system which base the number you just typed is written in. It has two values:
- Hex - base 16, digits
0-9and lettersA-F, for example04A1B2C3. - Decimal - ordinary base 10, for example
2864434397.
This is not a display preference. It changes what gets stored, and choosing it wrongly produces a card that never matches at the checkpoint.
How the two bases are stored
Card numbers are stored in one canonical form: hex. The format field records the base you entered.
- A Hex entry is stored exactly as typed. Leading zeros survive, so
04A1B2C3remains04A1B2C3. - A Decimal entry is converted to hex on save, and rendered back to decimal everywhere the number is shown afterwards: in the cards list, on the card form when you re-open it, and in the check-in card picker. An operator who works in decimal never has to look at a hex value.
- Conversion produces the shortest hex form, with no padding. Decimal
255becomesFF, not000000FF. - Duplicate detection happens on the stored hex value, so the same physical card cannot slip in twice under two different bases. Adding
2864434397as Decimal and thenAABBCCDDas Hex is the same card, and the second one is refused as a duplicate. - A Decimal entry must be a whole, non-negative number. A stray letter, an embedded space or a minus sign is rejected with “Card number does not match the selected format.” A Hex entry is accepted as typed, because historical card values are not always clean hex; the flag simply records that no conversion applies.
- The Card Number search box in the cards list matches either form, so you can search for a card by the decimal on its back or by the hex your reader reports.
Why the wrong base issues a card that opens nothing
A reader presents one specific serial to the system. Access is granted when the stored credential value matches that serial. If you tell the system the wrong base, it stores a different number, and no amount of presenting the card will ever match it.
Worked example. A badge is printed with 2864434397 on the back.
- Correct: type
2864434397and set the format to Decimal. It is stored asAABBCCDD, which is exactly what the reader reports. - Wrong: type
2864434397and leave the format on Hex. The digits are taken as a hex string, so the system stores the literal2864434397, a serial roughly ten times larger than the card actually carries. The card is issued, the visitor is checked in, and the reader denies them, with nothing in the card record looking obviously wrong.
The mirror-image mistake fails more safely: typing AABBCCDD with the format set to Decimal is refused immediately, because AABBCCDD is not a valid decimal number.
Converting between the two
| Serial | Hex | Decimal |
|---|---|---|
| 2-byte legacy serial | FFFF | 65535 |
| 3-byte legacy serial | FFFFFF | 16777215 |
| 4-byte Mifare serial | 04A1B2C3 | 77705923 |
| 4-byte Mifare serial | AABBCCDD | 2864434397 |
Any calculator with a programmer mode converts between the two. Two things worth knowing:
- Leading zeros do not change the value.
04A1B2C3and4A1B2C3are the same number, and both give77705923in decimal. They are not the same stored string though, and readers that report a fixed 8-character value expect the padded form, so keep the padding when you enter a hex value. - A 4-byte (32-bit) Mifare serial is 8 hex characters, or up to 10 decimal digits. A decimal value longer than 10 digits is not a 32-bit card.
Which base does your supplier use?
There is no universal rule, so do not guess:
- Encoder and card-personalisation software normally quotes the serial in hex.
- The long number printed on the back of a pre-printed badge is normally decimal.
- Card lists delivered as a spreadsheet can be either, and a column of values containing any letter
A-Fis a strong hint that the column is hex.
Confirm before you record a whole batch: enter one card, present it at a reader, and compare the value the system logs with the value you typed. Once one card is proven, the rest of the batch follows the same base.
How this relates to the RFID credential chapters
RFID Card Credentials (Personnel) and RFID Card Credentials (Users) ask for a 32-bit HEX value, 8 hex characters. That is the same number in the same canonical base this page describes; those forms simply have no entry-base selector, so they expect hex directly. Two consequences:
- If a pool card was recorded in decimal and you want to type it into a credential form by hand, convert it to hex first.
- If a pool card is issued to a visitor by the check-in card picker, no conversion is needed: the picker always hands over the stored hex value, whichever base the card was originally captured in.
Step 14: A new card starts as Available
There is no status field on the new-card form: every card you record starts as Available, free to issue. Status is the card’s lifecycle state, and it moves in exactly two ways:
- The system moves it between Available and Checked-out when a card is issued and returned. You never set Checked-out by hand.
- You move it to Lost, Damaged or Retired (and back to Available) with the lifecycle actions on the card’s own page, described under Editing a card below. That takes a card out of circulation without deleting it or losing its history.
Add Notes if you want a free-text remark on the card, then click Save. The card appears in the pool’s Cards panel.
Step 15: The cards list
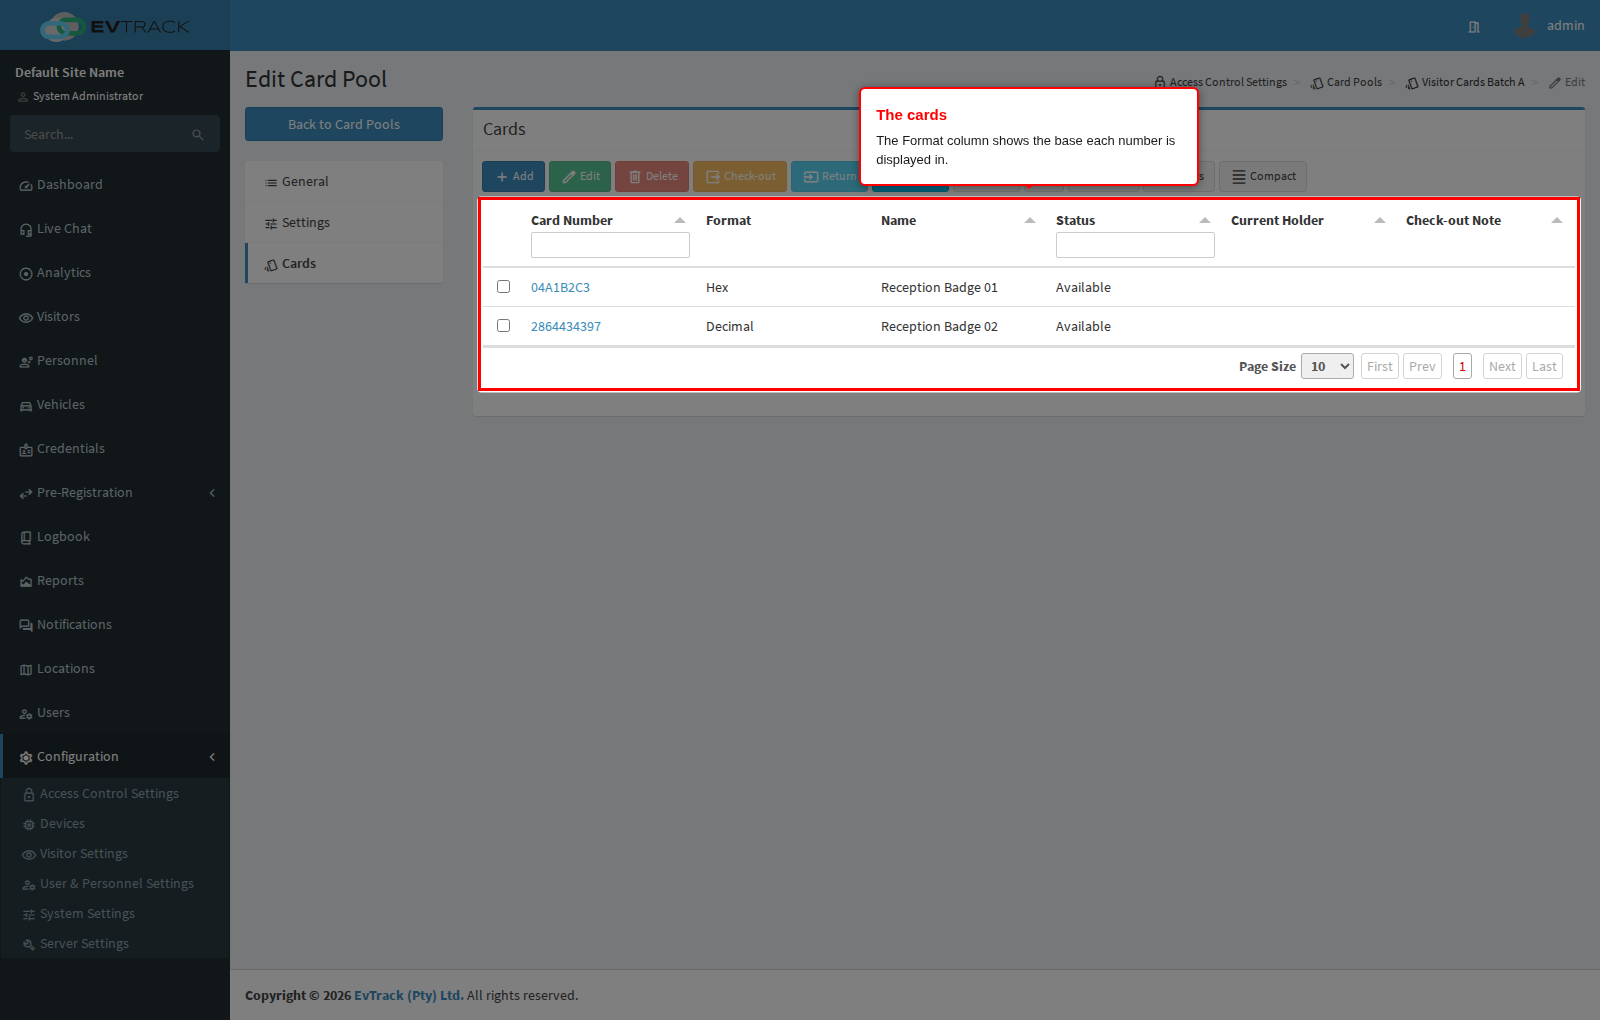
The Cards panel lists Card Number, Format, Name, Status, Current Holder and Check-out Note. The Format column is the entry base from Step 13, so a decimal card shows its decimal value and reads “Decimal”, while a hex card shows its hex value and reads “Hex”. Click any card number to open that card.
Step 16: Check a card out
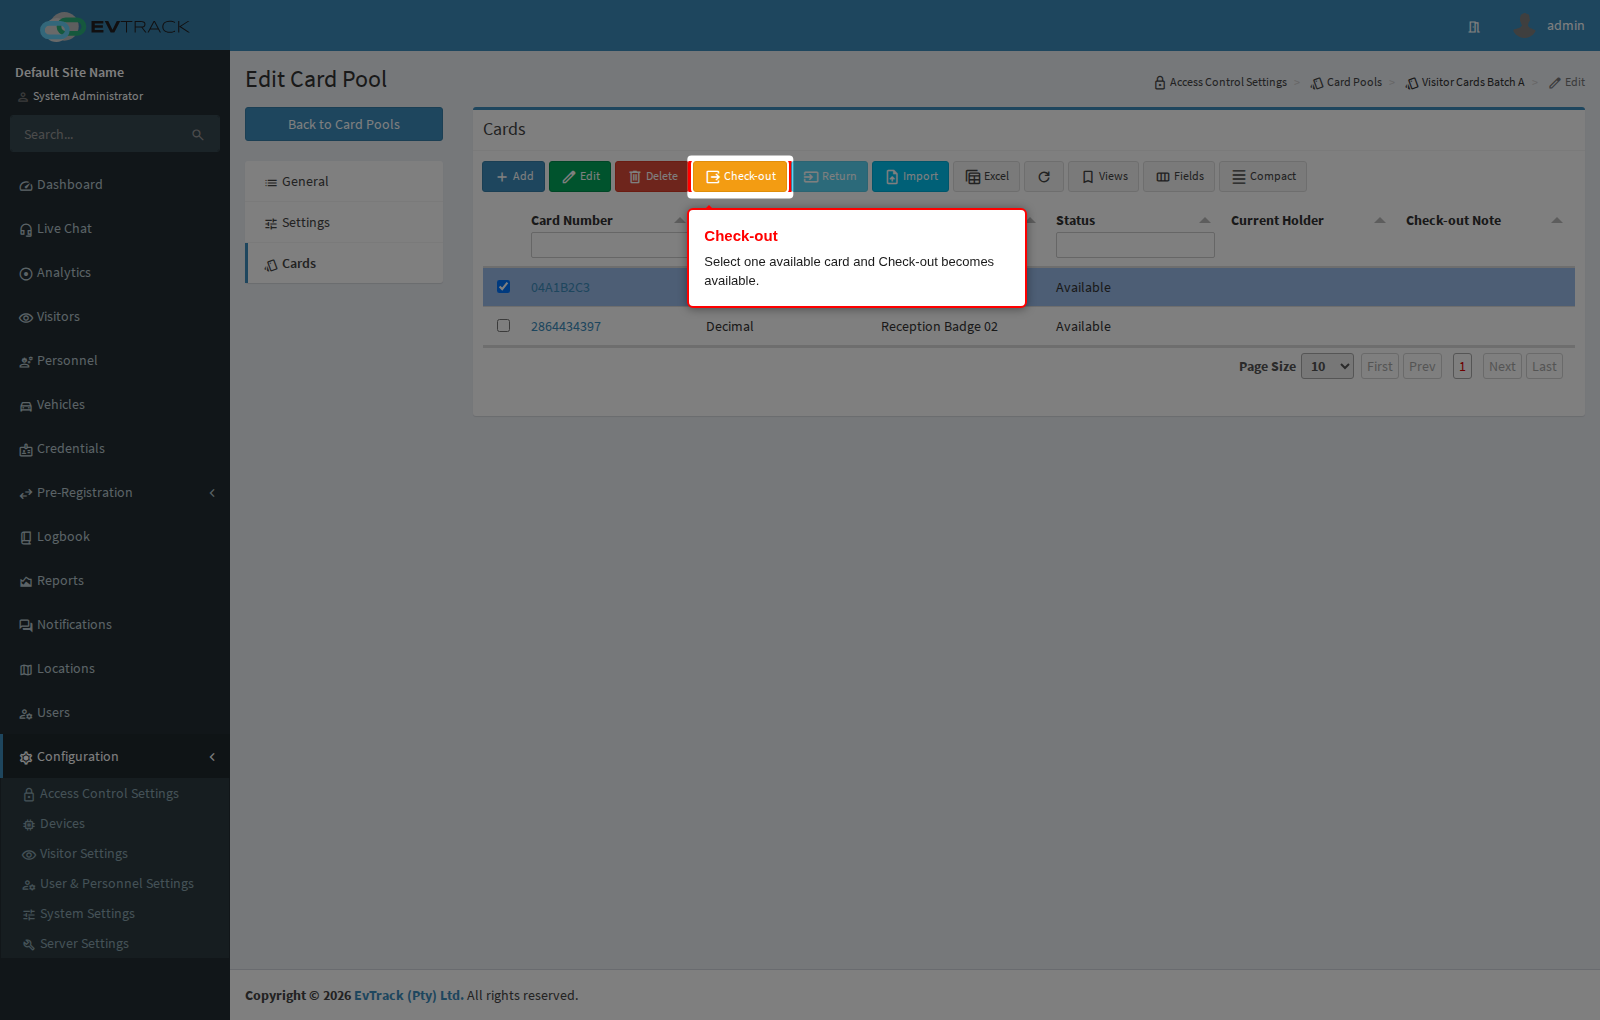
Select the row of an available card by clicking the tick box in its first column. Check-out becomes available; it remains greyed out for any card that is not Available, and for a card in a pool that is not enabled.
Step 17: Record who is taking the card
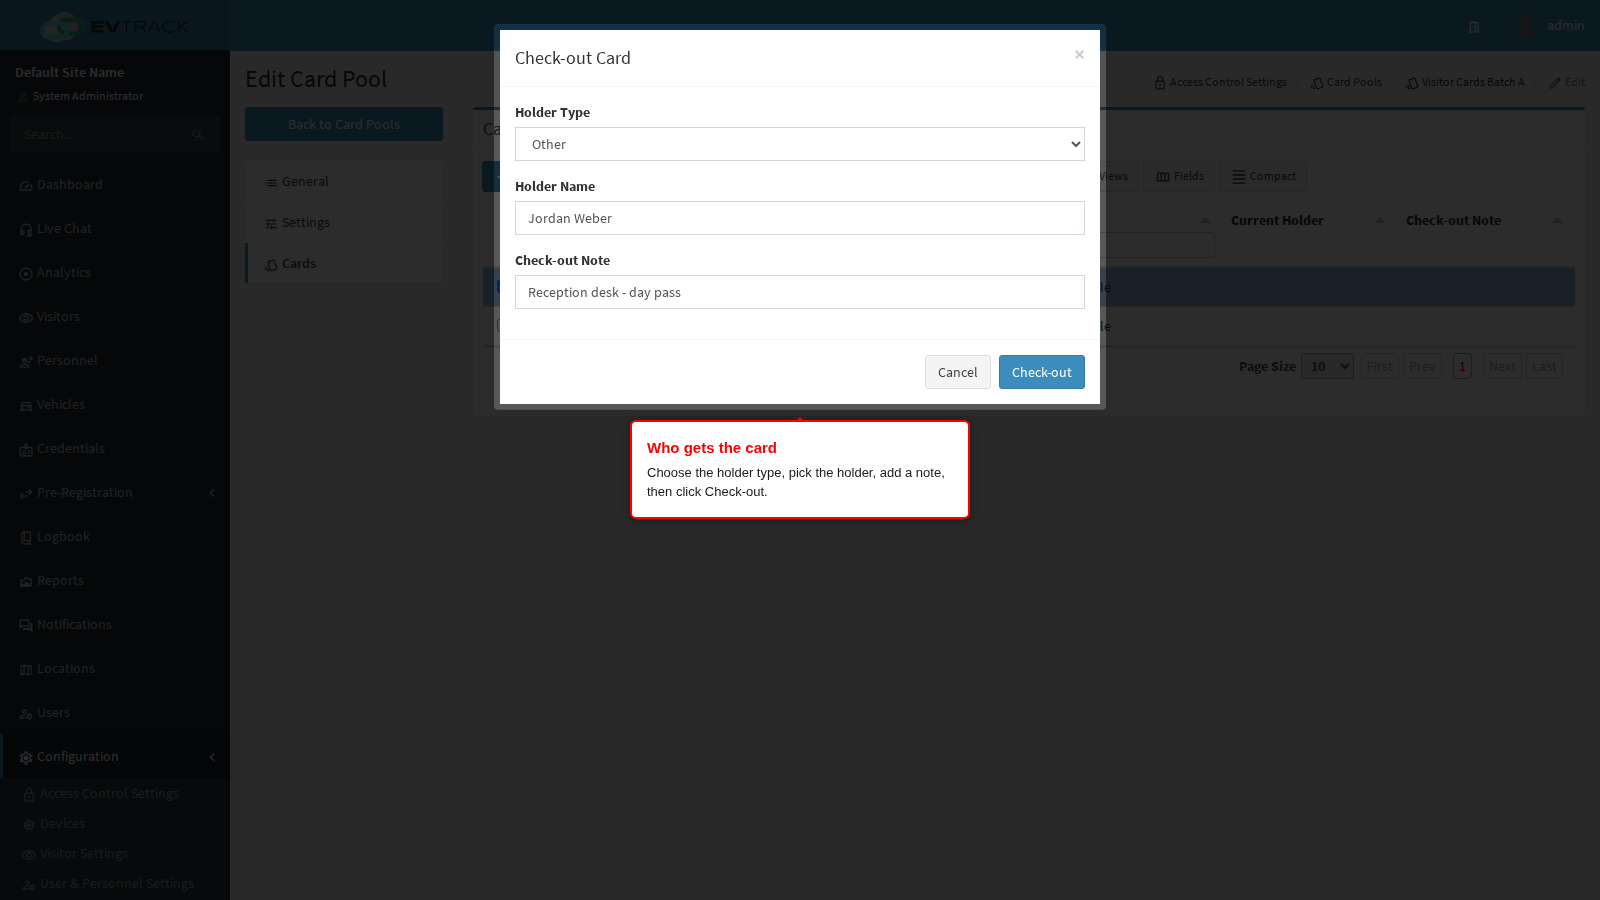
Click Check-out. The dialog asks for:
- Holder Type - Visitor, User, Person or Other. The first three search the matching records, so the card is tied to a real record and shows up in that person’s history. Other replaces the search with a free-text box for anyone who has no record in the system, for example a courier.
- Holder Name - start typing and pick the match from the list (or type the name directly for Other). A holder is compulsory: submitting without one is refused.
- Check-out Note - optional free text, for example the reason or the drawer slot the card came from.
Click Check-out. The dialog closes and the cards list refreshes.
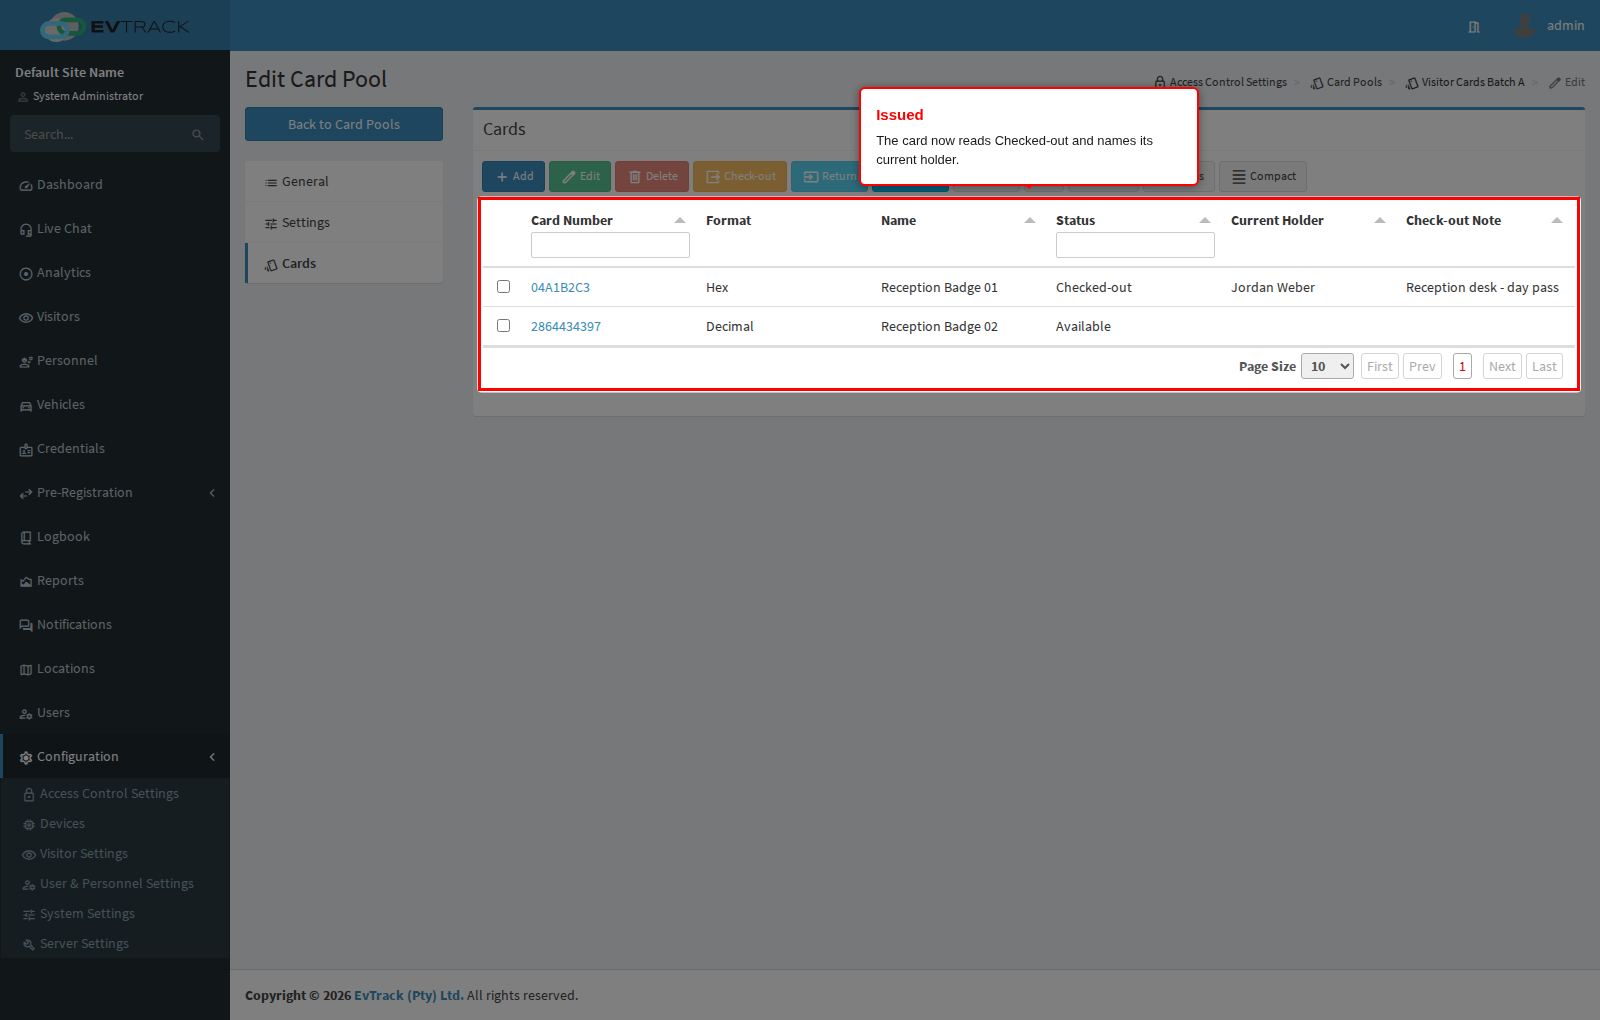
Step 18: The issued card
The card’s Status now reads Checked-out, Current Holder names the holder and Check-out Note shows your note. The card no longer appears in the check-in card picker, so it cannot be issued twice.
Step 19: Take the card back
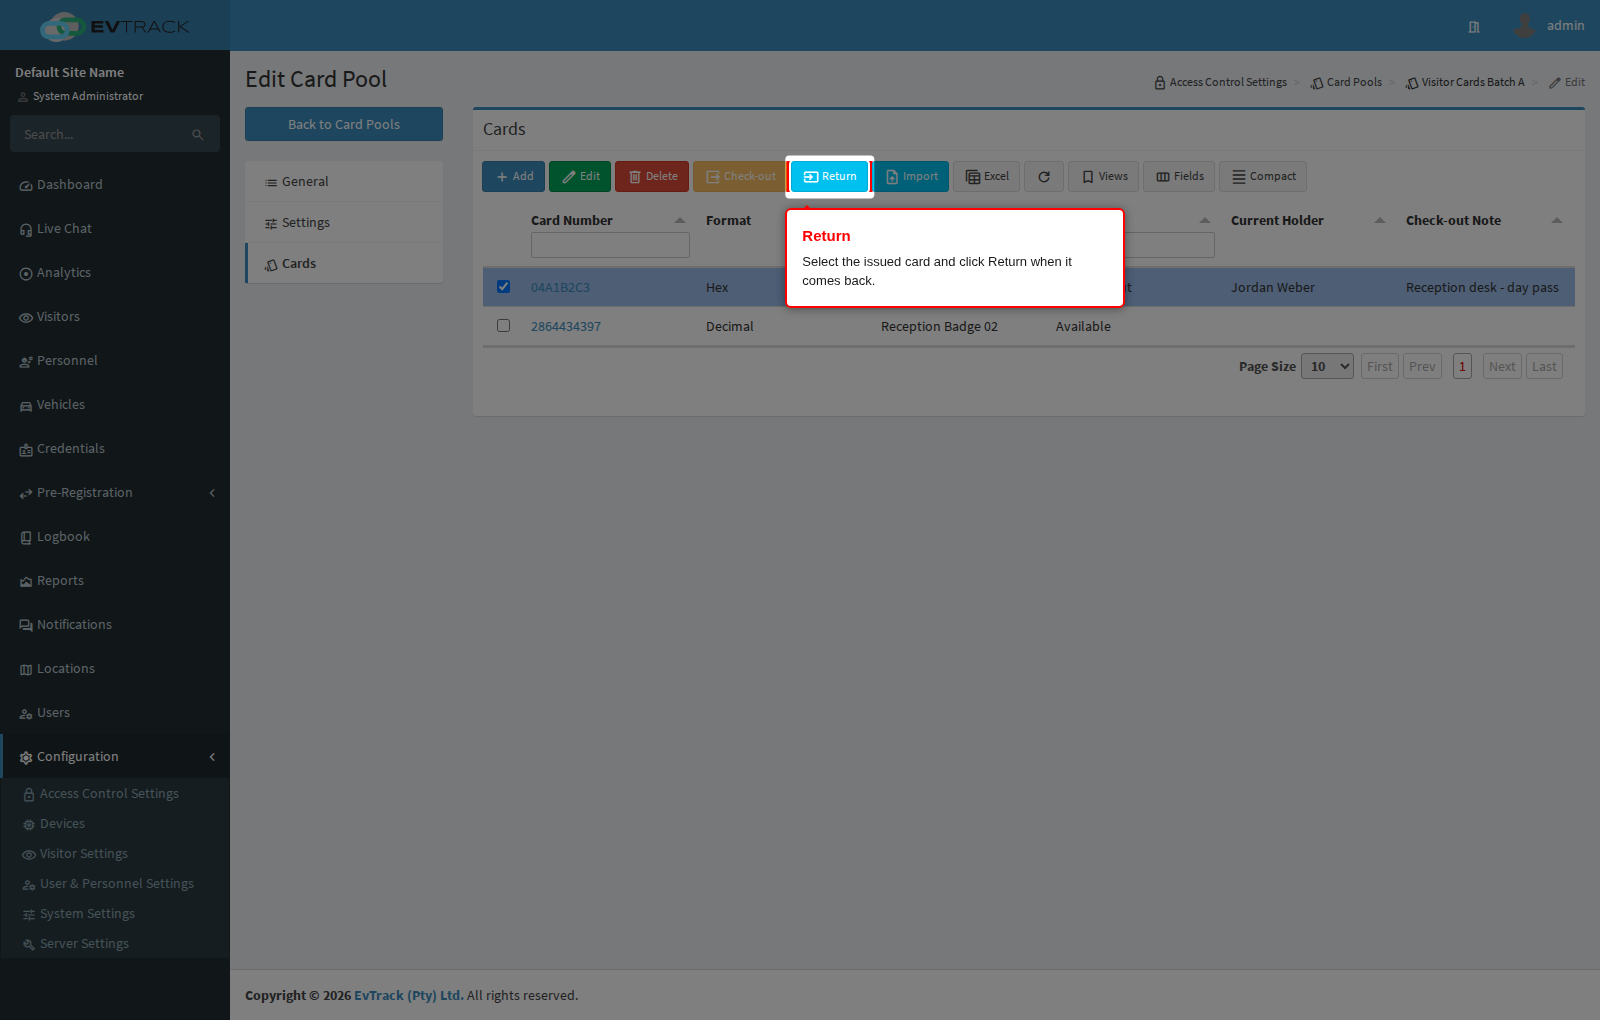
When the card comes back, select its row again. Return becomes available (it is greyed out for anything that is not checked out). Click it.
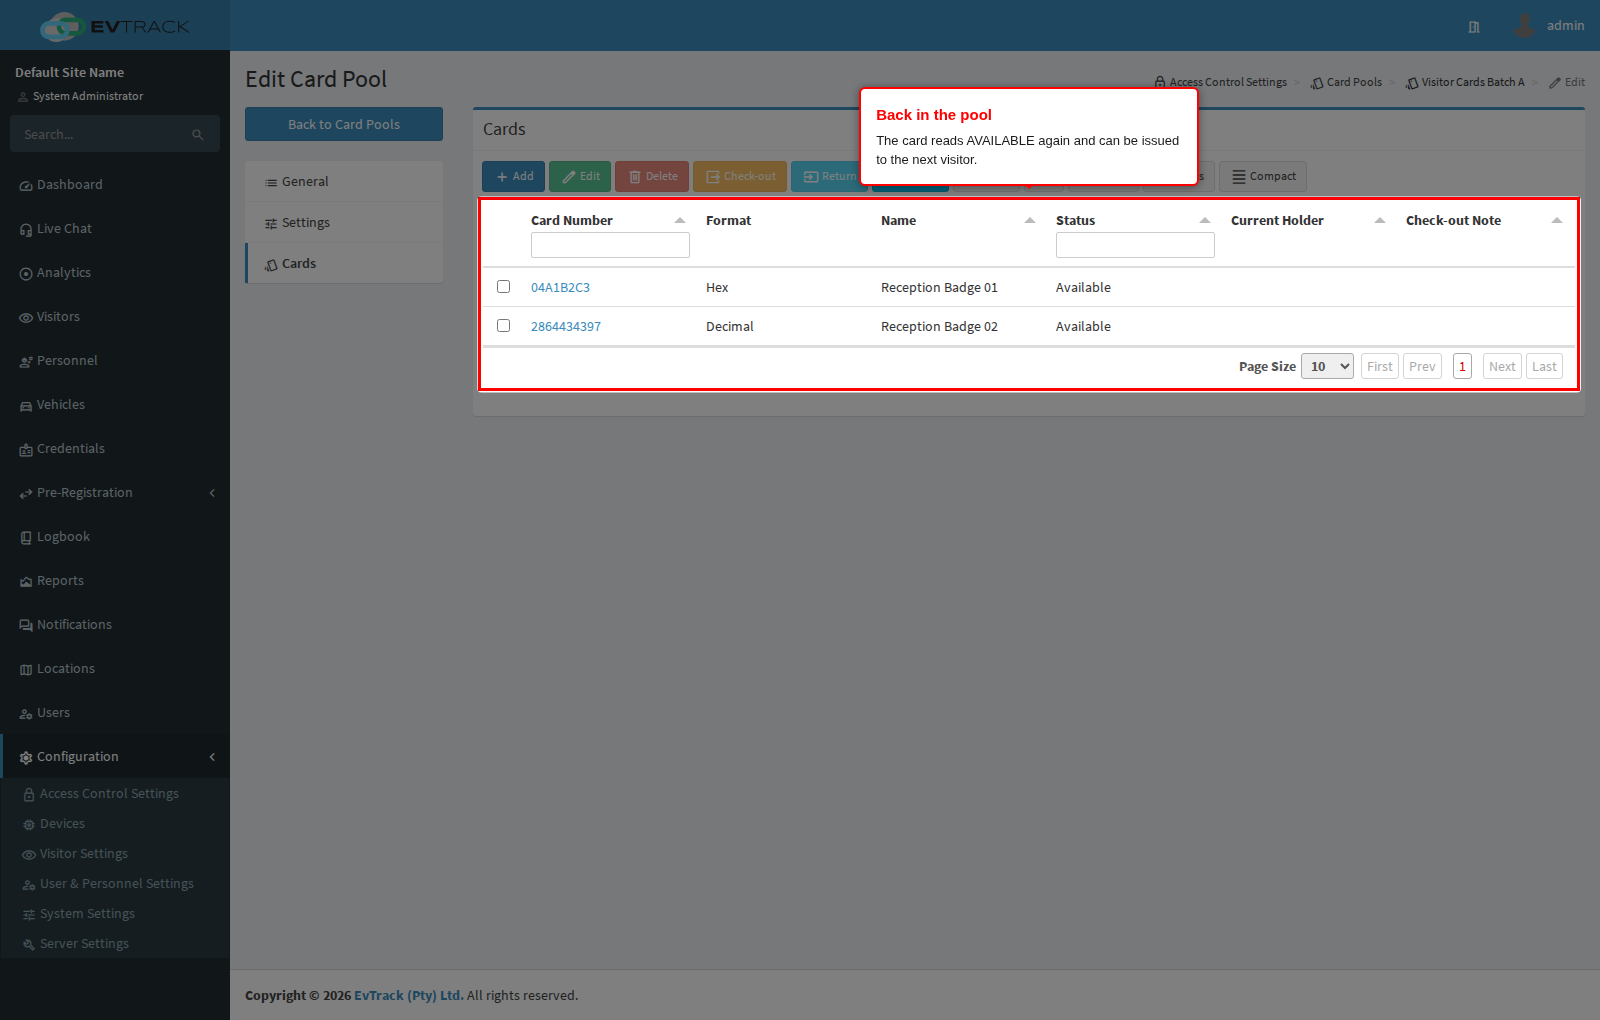
Step 20: The card is back in the pool
The status returns to Available, the holder and note clear, and the card is offered again the next time someone issues one.
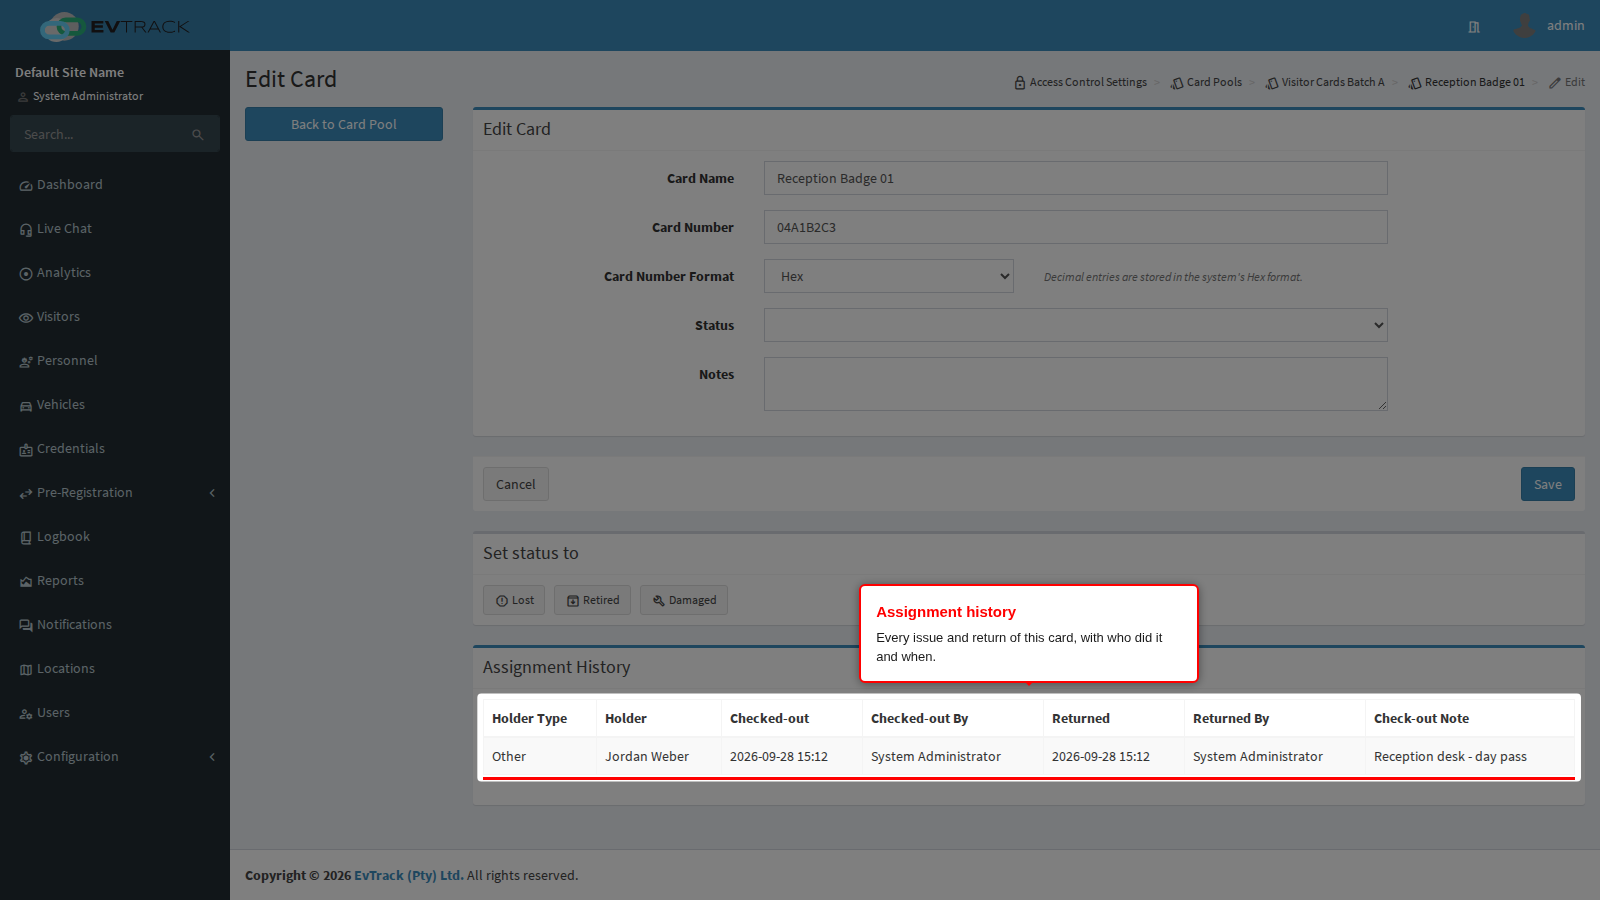
Step 21: The card’s history
Click a card number in the list to open that card. Below the card form, Assignment History lists every issue and return: holder type, holder, when it went out and who issued it, when it came back and who accepted it, and the check-out note. A card that is currently out shows “Currently out” instead of a return time. Nothing is overwritten, so the record answers “who had this badge on that day” long after the card is back in the drawer.
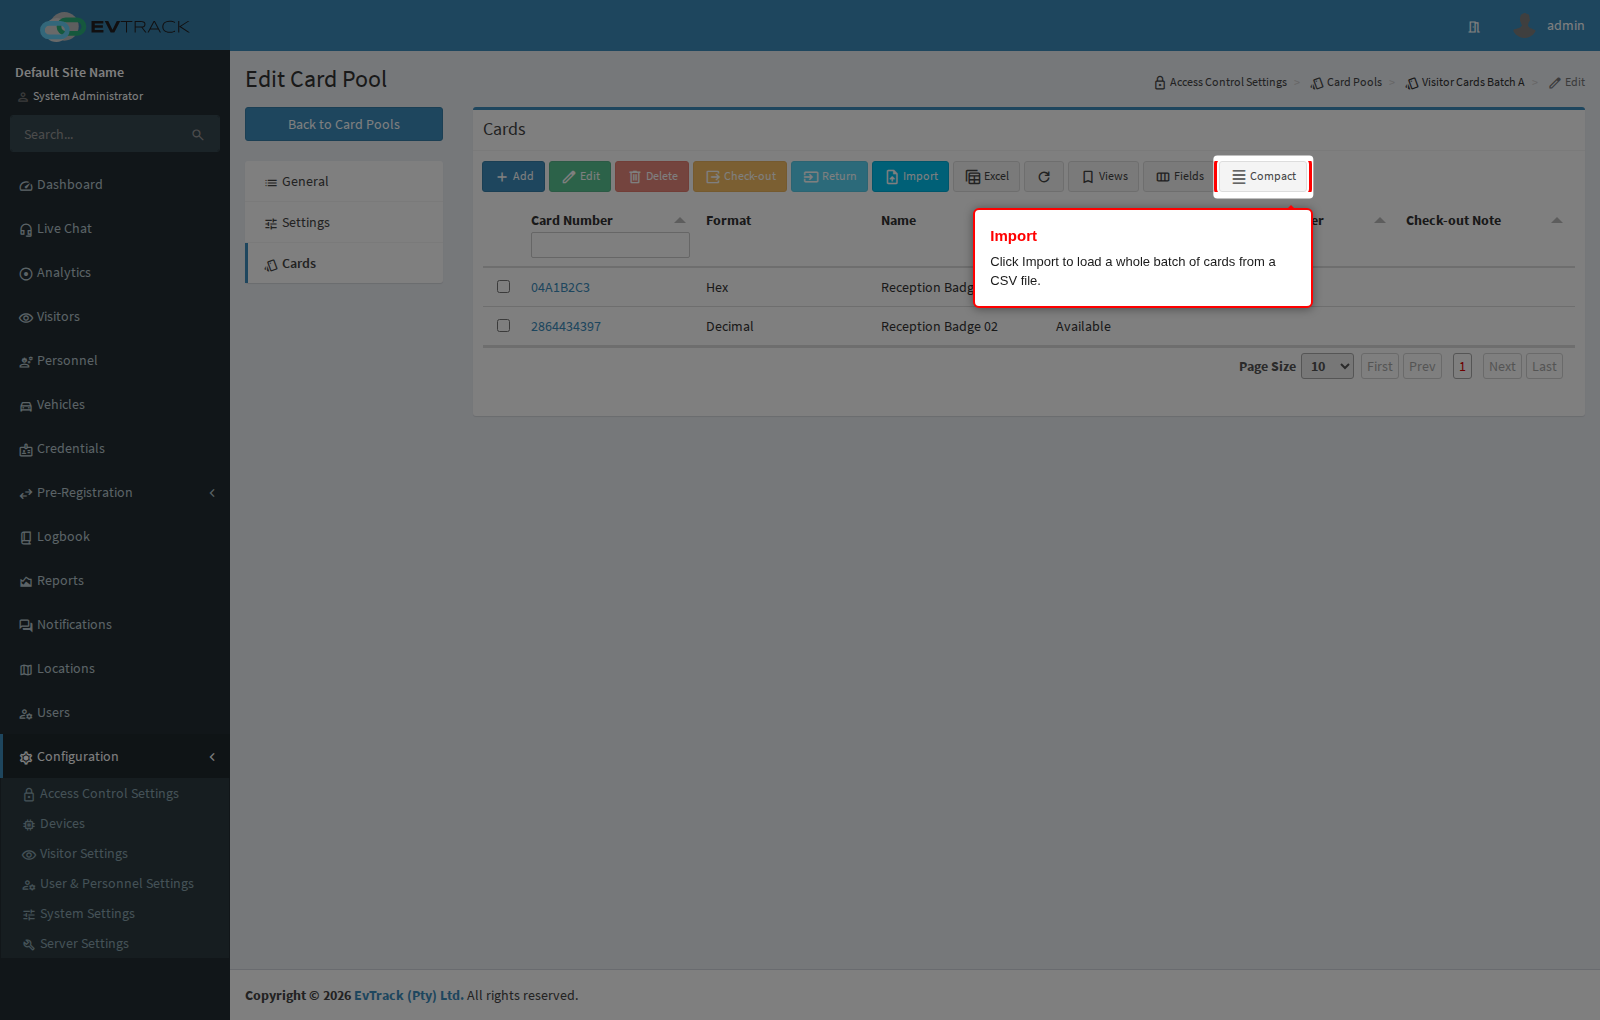
Step 22: Loading a batch with Import
Recording a delivery of two hundred cards by hand is not realistic. Click Import in the Cards panel toolbar to open the import wizard already targeted at this pool; see Importing Data for the wizard itself. The card template has three columns: Card Number (required), Card Name and Notes. Each row is reported individually, and a duplicate card number fails only that row.
One thing to check before you import: an imported file has no entry-base column, so imported numbers are stored exactly as they appear in the file. The file must therefore already be in hex. If your supplier sent you a decimal list, convert the column to hex in your spreadsheet before uploading it, or add those cards on the card form where you can pick Decimal.
Step 23: Editing a pool
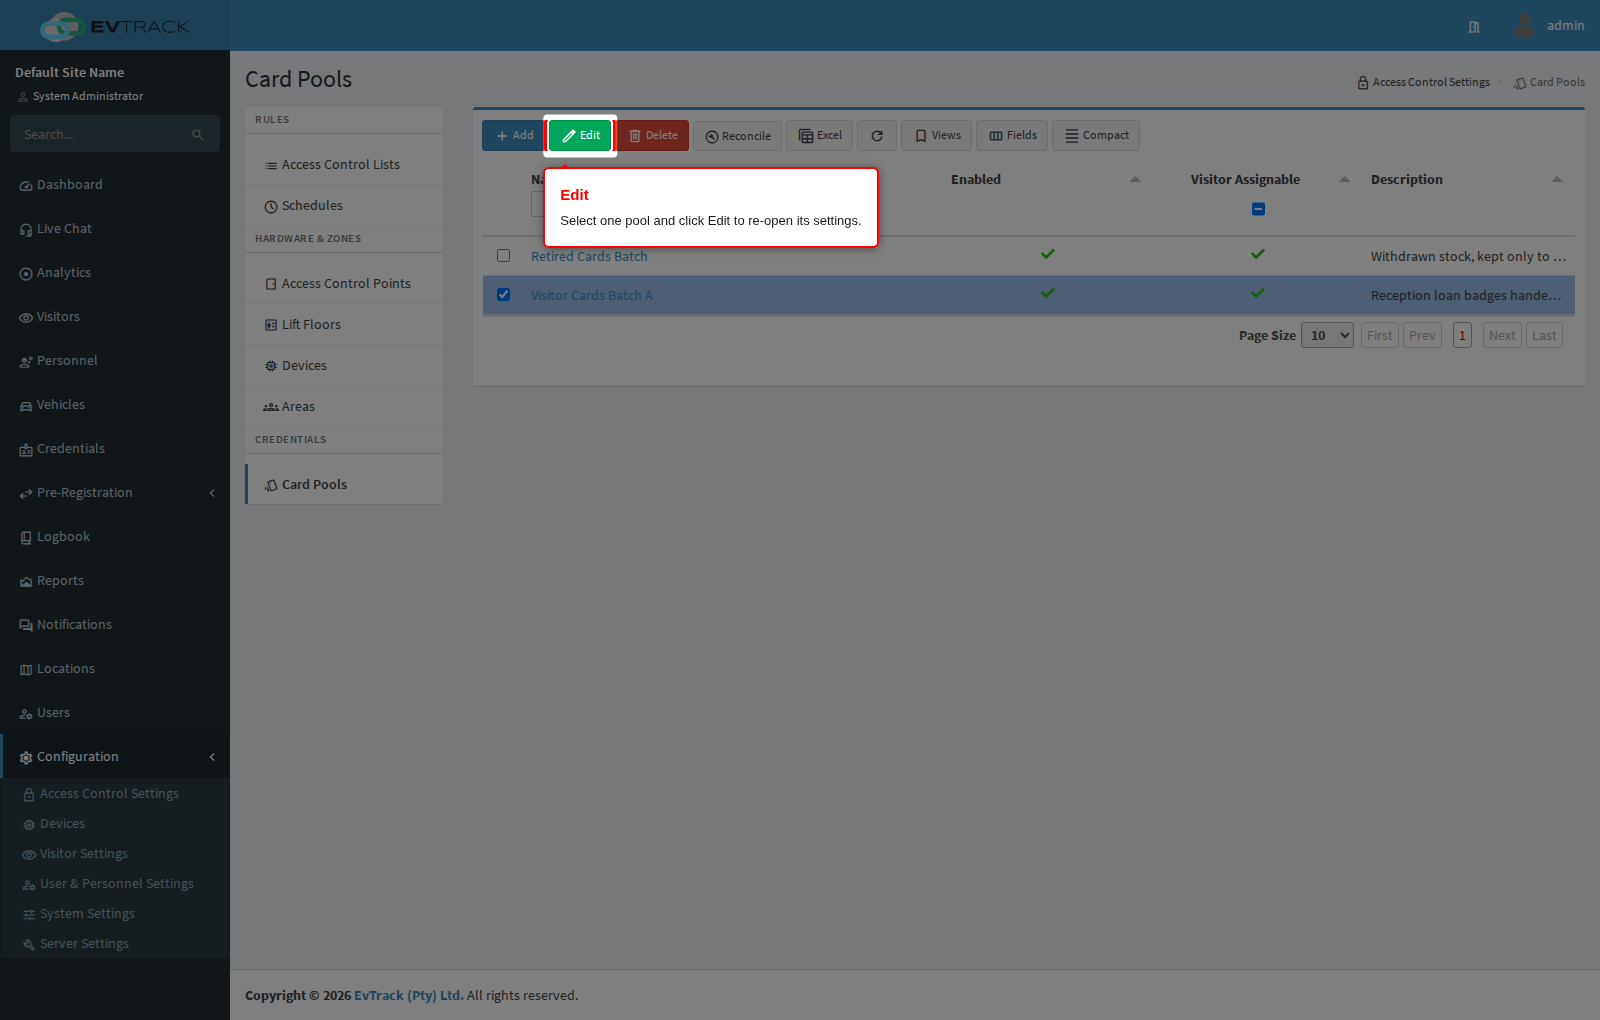
Nothing on a pool is fixed after creation. Open the card pool list, select the pool’s row and click Edit in the toolbar (or just click the pool’s name), then use the Settings panel shown in Step 9.
All five fields can be changed at any time: Pool Name, Description, Can be assigned to a visitor, Enabled and Location. Changing them never touches the cards themselves - the pool keeps every card, every status and every assignment record. What changes is only what the pool is allowed to do next: clearing Enabled stops further issues immediately without affecting cards already out, and clearing Can be assigned to a visitor takes the pool out of the check-in card picker while leaving it usable for manual check-outs.
The one thing the pool page cannot do is move a card to a different pool. A card belongs to the pool it was added to; to reorganise stock, delete the card from one pool and add it to the other.
Step 24: Editing a card
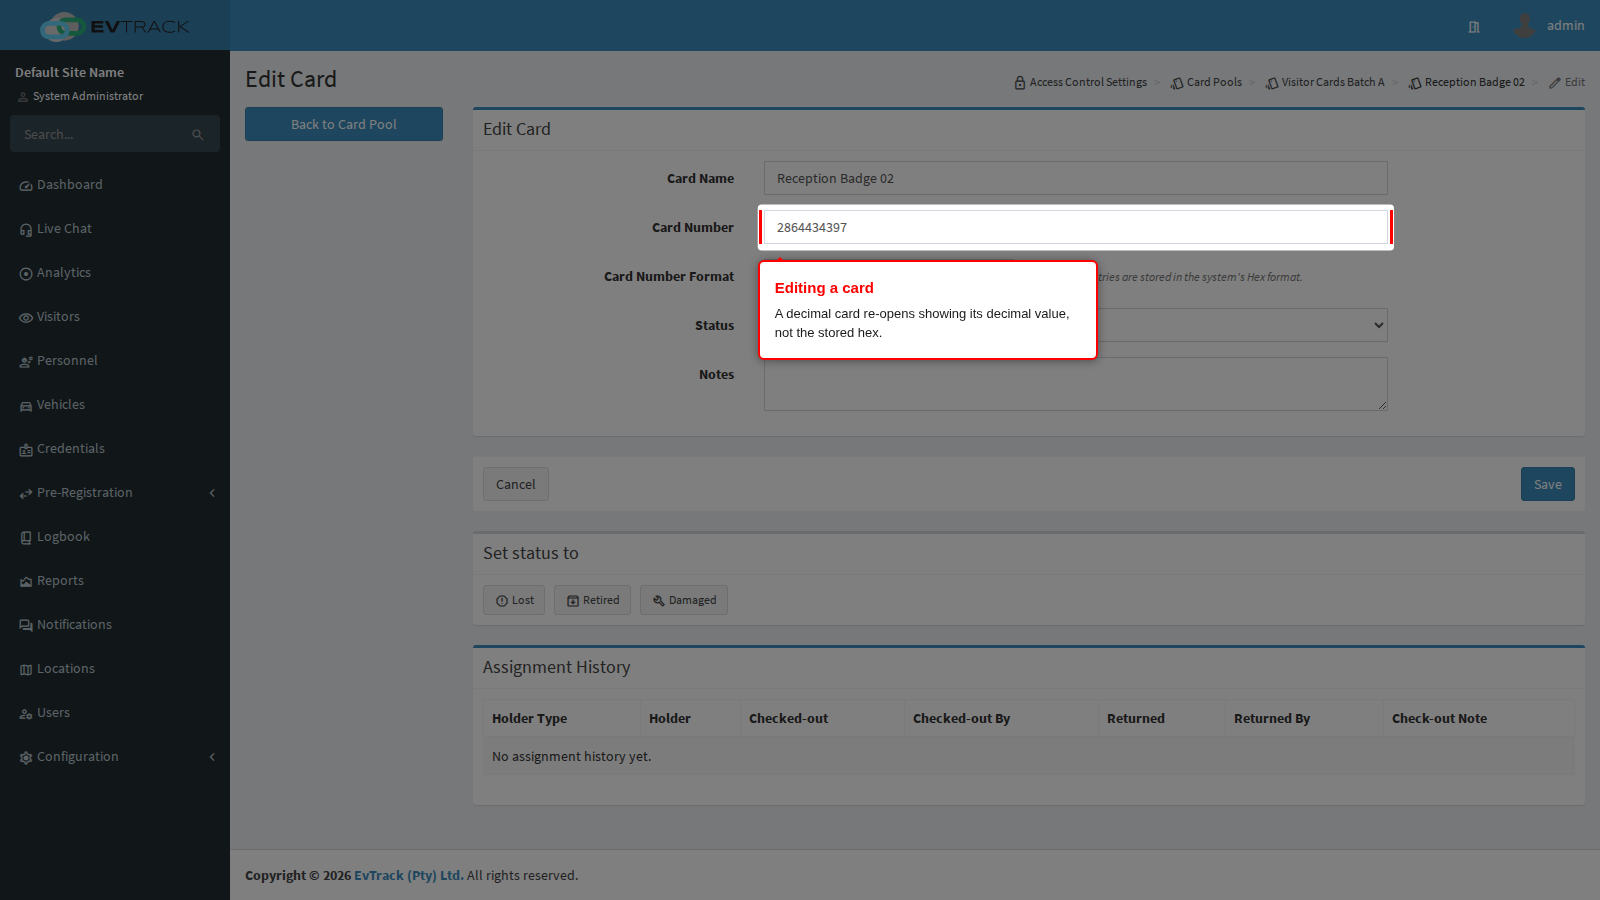
Open the pool’s Cards panel, then either click the card’s number or select its row and click Edit. The card form re-opens with Card Name, Card Number, Card Number Format and Notes editable, the card’s Status shown read-only, and the Assignment History panel below it.
Two things to know before you change a card number:
- A card entered in decimal re-opens showing its decimal value with the format still on Decimal, not the stored hex, so the value you see is the value you typed. Saving re-runs the same conversion, so a card can be re-saved without its number drifting.
- Changing the number is still checked against every other card in the system, in canonical hex. If the new number collides with an existing card in any pool, the save is refused as a duplicate.
Changing a card’s status (Lost, Damaged, Retired)
Status is not edited as a form field. Below the card form, the Set status to box offers one button per status the card can move to - Lost, Damaged, Retired, or back to Available. This is how you retire stock: mark a card Lost, Damaged or Retired and it can no longer be checked out, while its whole history remains intact.
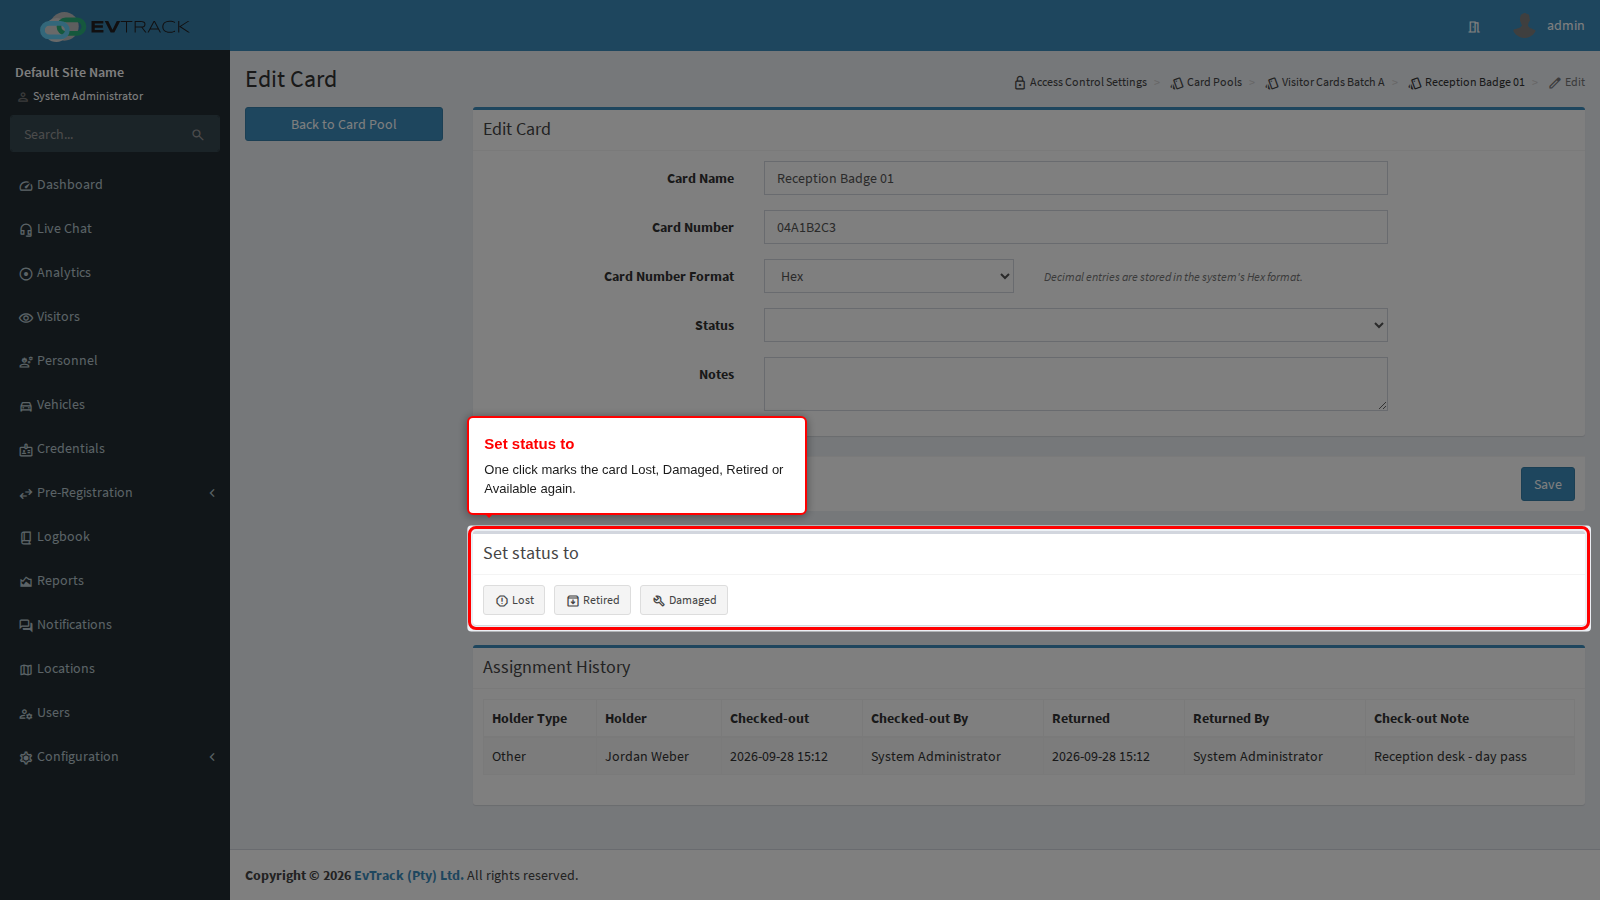
Each action asks for confirmation before it is applied.
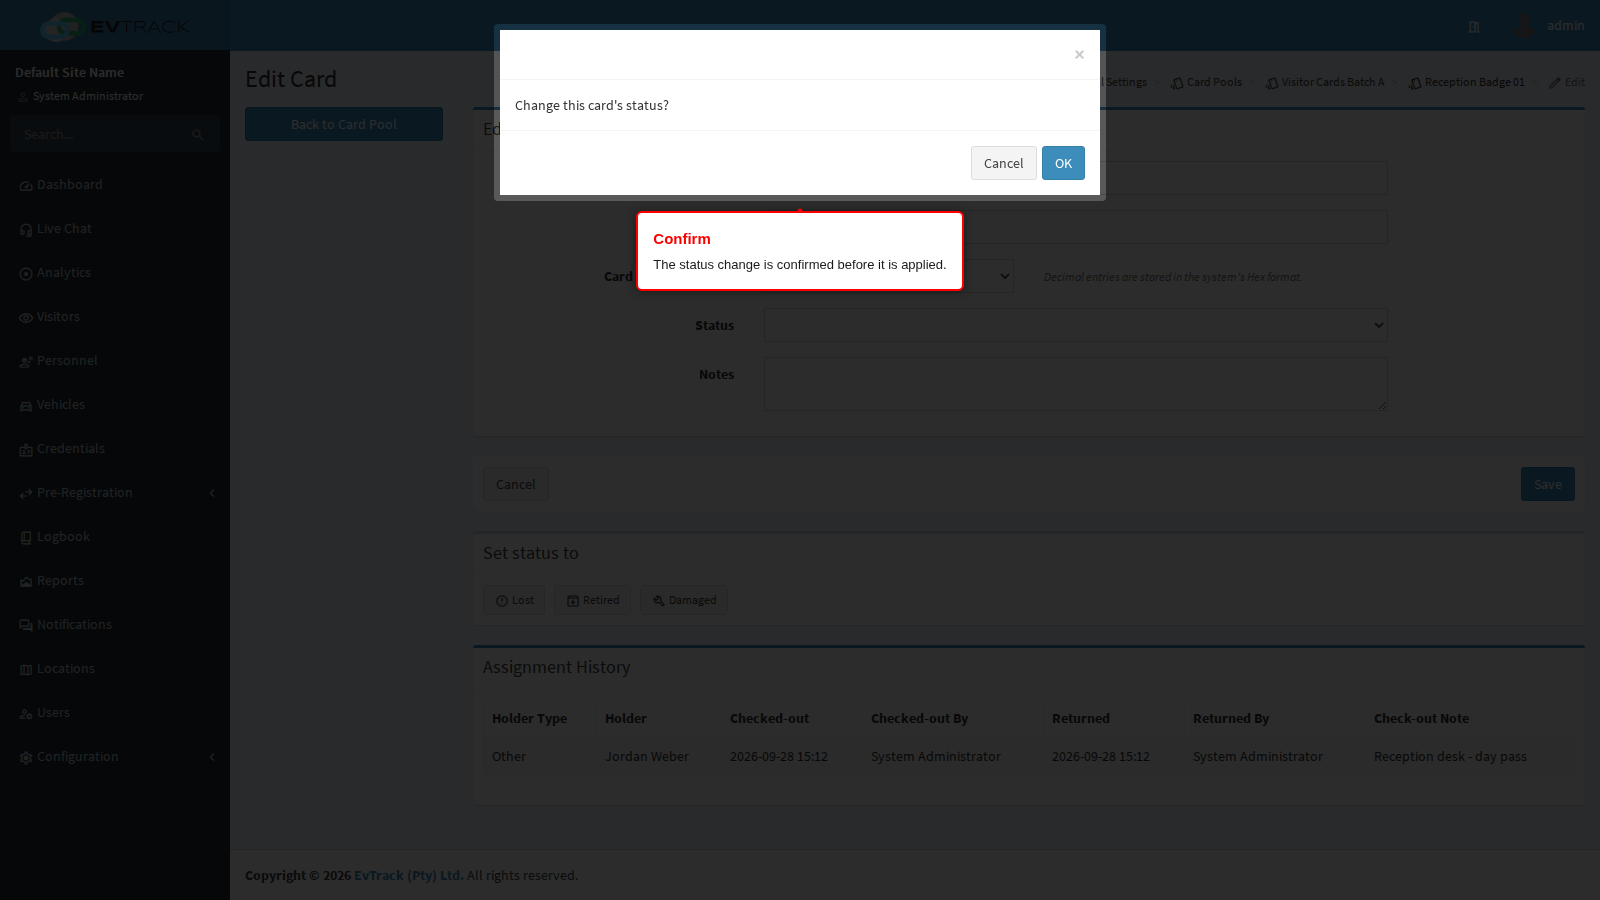
Two guards apply:
- A card that is checked-out refuses a status change: “This card has a current holder. Return the card first, then change its status.” Return it, then retire it.
- Checked-out is never offered as a button. Issuing a card is only done through Check-out, so an assignment record with a real holder always exists.
Step 25: Deleting a card
Select the card in the Cards panel and click Delete in the toolbar. Delete needs exactly one selected row.
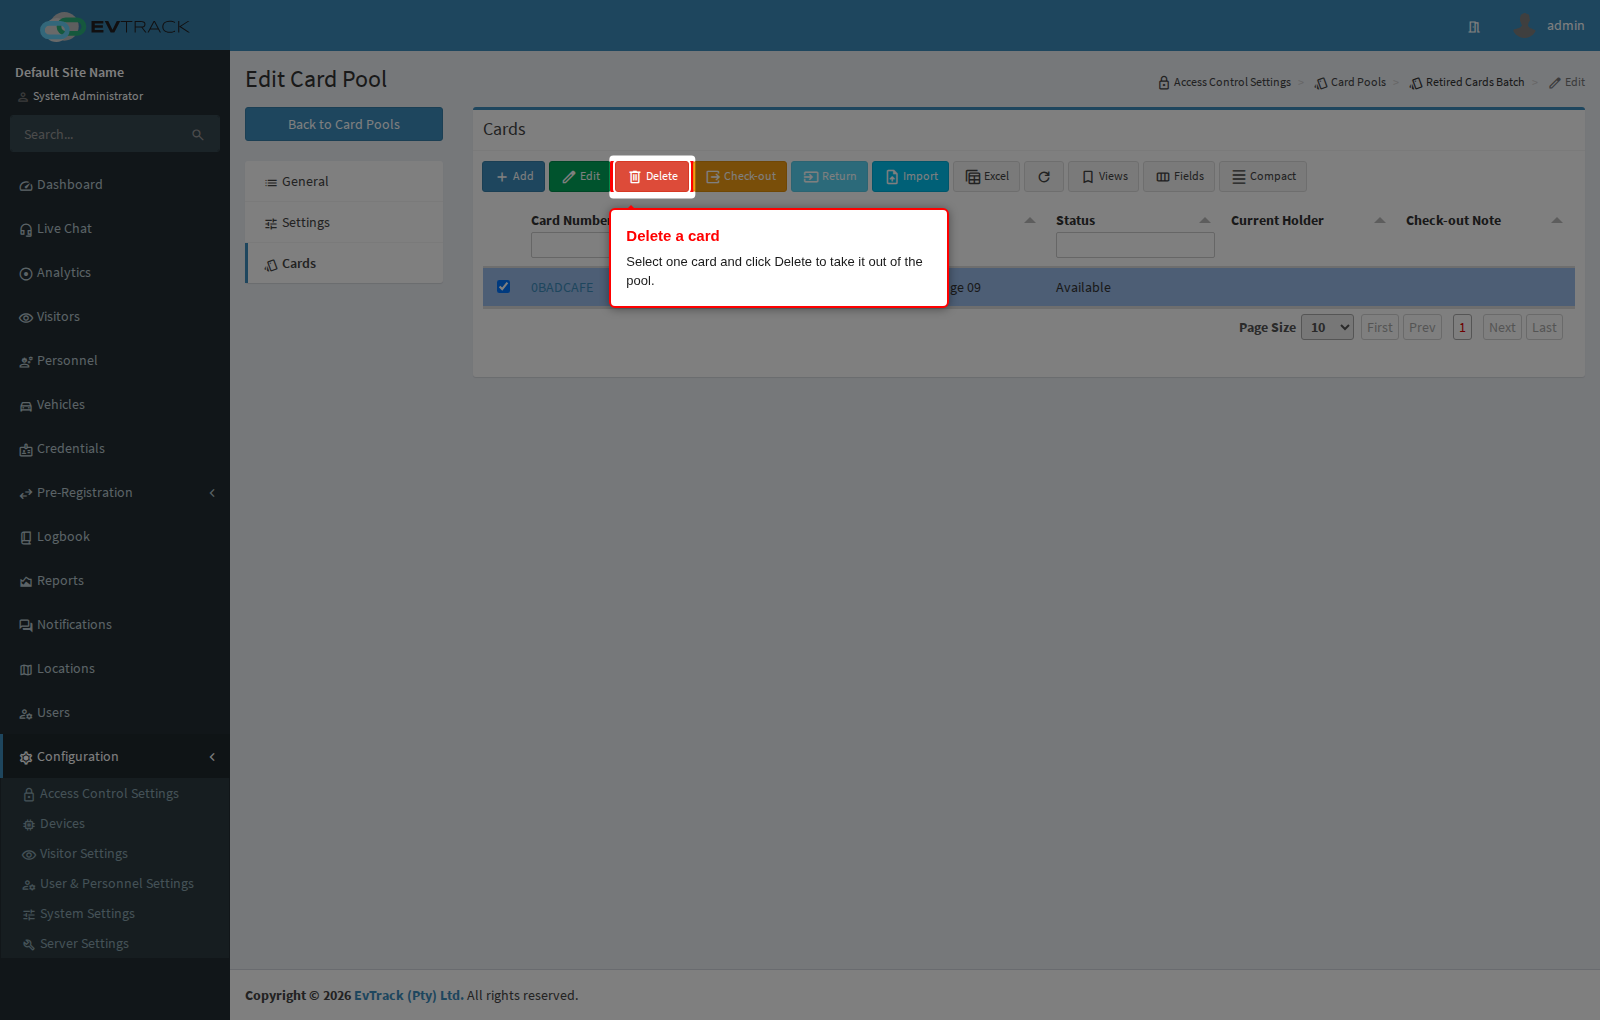
Step 26: Confirm the card deletion
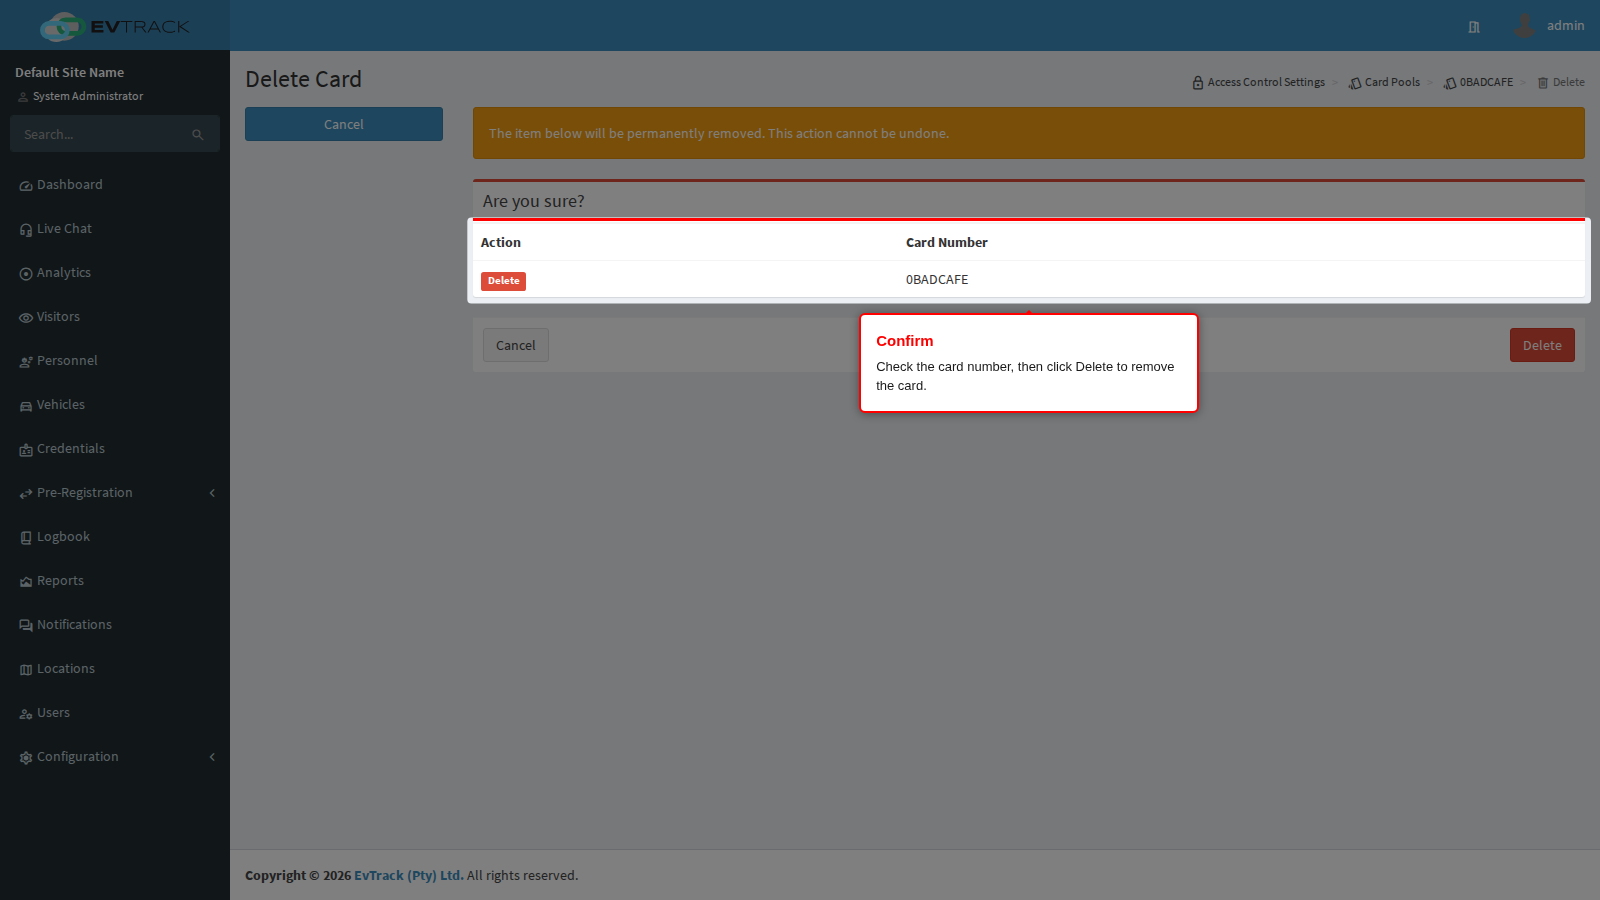
A confirmation page shows the card number before anything happens. Click Delete to remove the card, or Cancel to go back to the pool with nothing changed. After the delete you are returned to the pool’s Cards panel and the pool’s card count drops by one.
A card that is still checked-out cannot be deleted: the delete is refused until the card is returned, so an assignment is always closed properly and a holder is never left carrying a badge the system no longer knows about. If a badge is genuinely gone, do not delete it at all - set its status to Lost instead. That keeps the number reserved so it cannot be re-added by accident, and keeps the record of who had it.
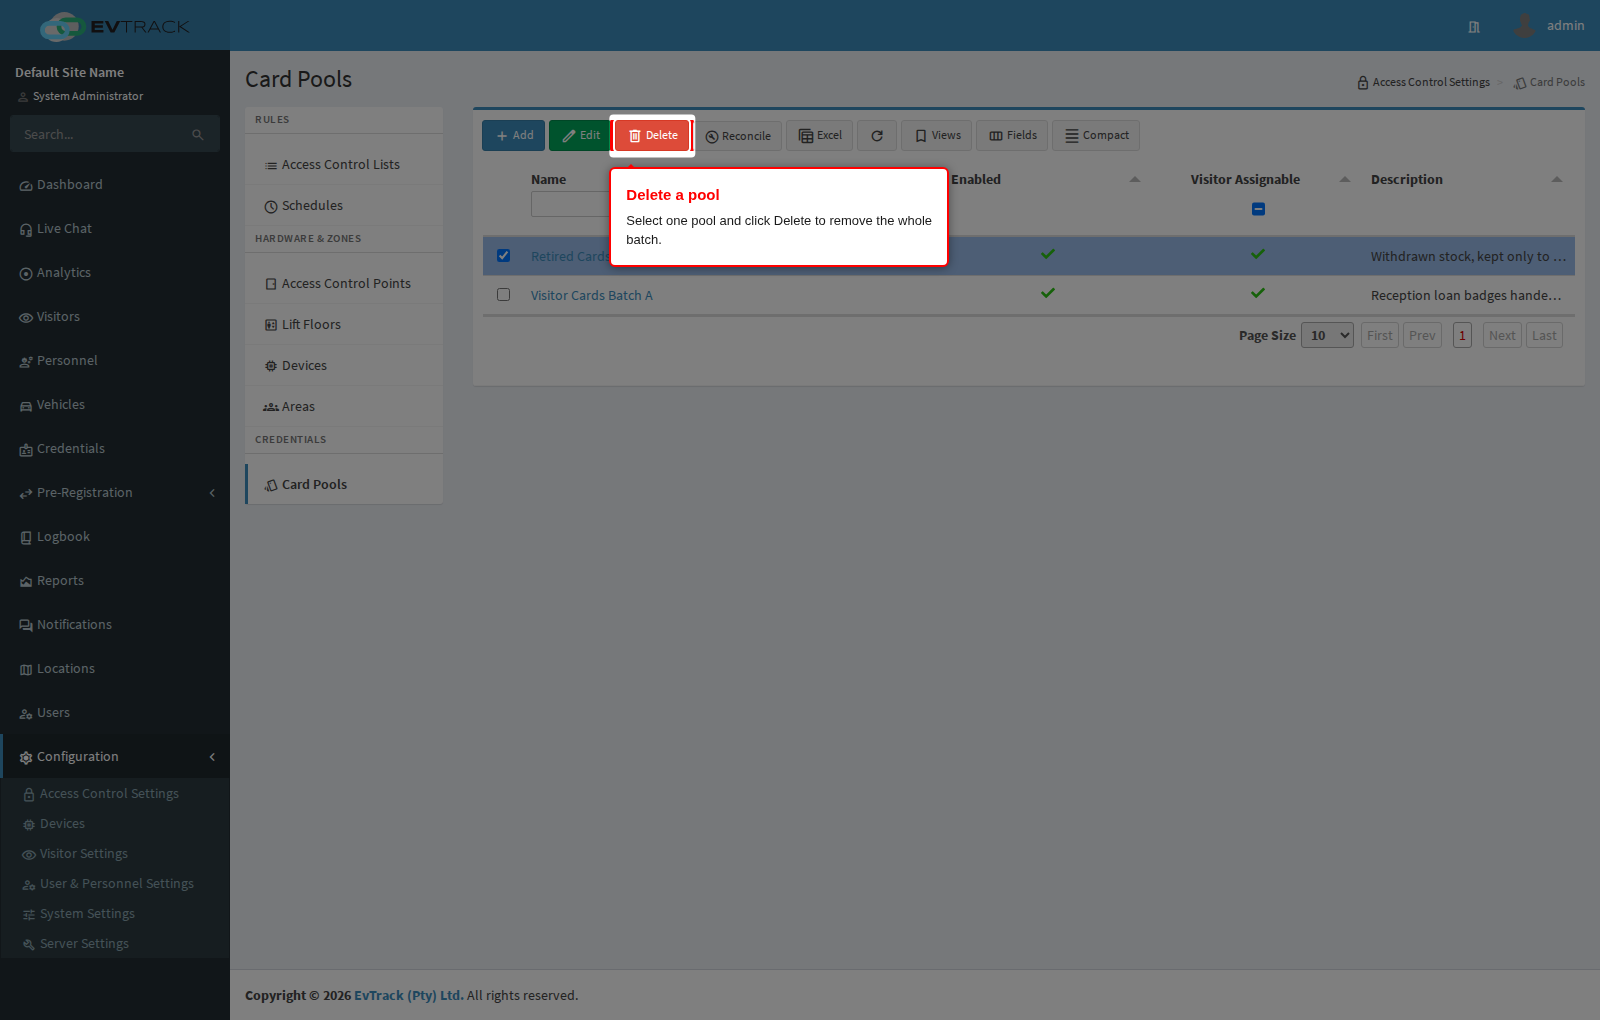
Step 27: Deleting a pool
Open the card pool list, select the pool’s row and click Delete in the toolbar.
Step 28: Confirm the pool deletion
A confirmation page shows the pool name. Click Delete to remove it, or Cancel to return to the list with nothing changed.
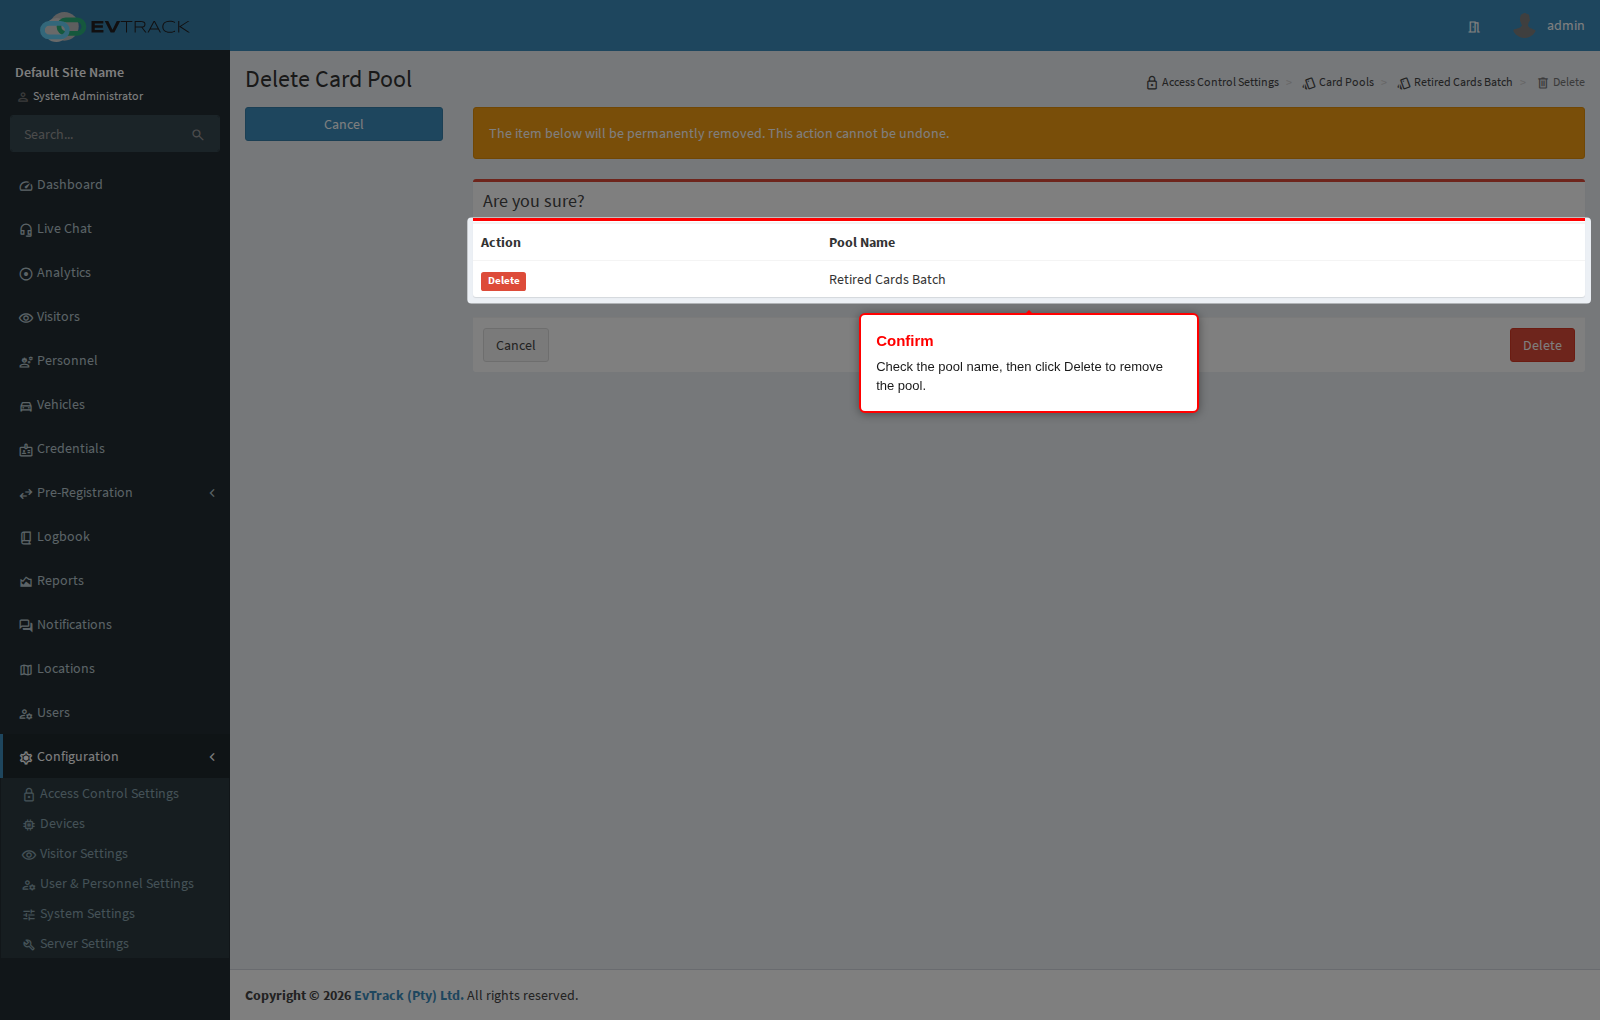
Step 29: A pool that still holds cards cannot be deleted
If the pool still has any cards in it, the delete is refused and the list comes back with “This card pool still has cards. Remove its cards before deleting the pool.” This guard is deliberate: deleting a pool outright would take its cards and their whole assignment history with it, including cards that are still physically out with people.
To get past it, delete every card in the pool first (Steps 25 and 26), then delete the pool.
In most cases you should not delete a pool at all. Clearing Enabled and Can be assigned to a visitor takes a batch out of service, keeps every card record and keeps the full history of who held what. Reserve deletion for pools created in error.
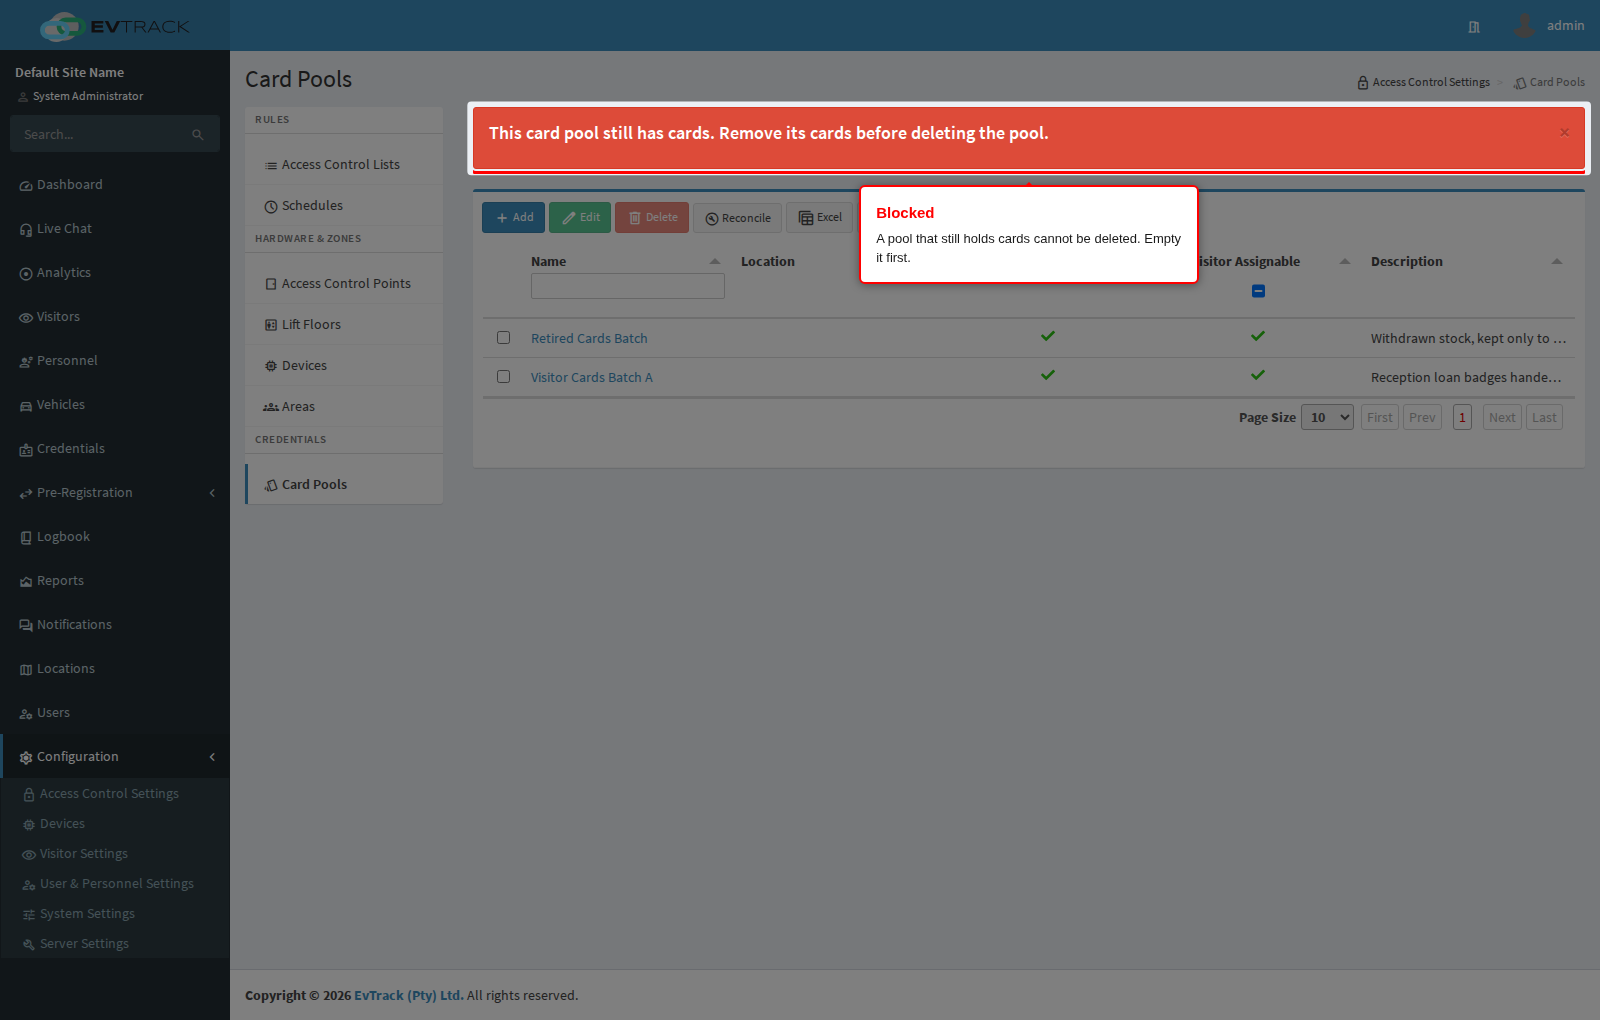
Step 30: The pool is gone
Once the pool is empty, the delete goes through and the list comes back without it.
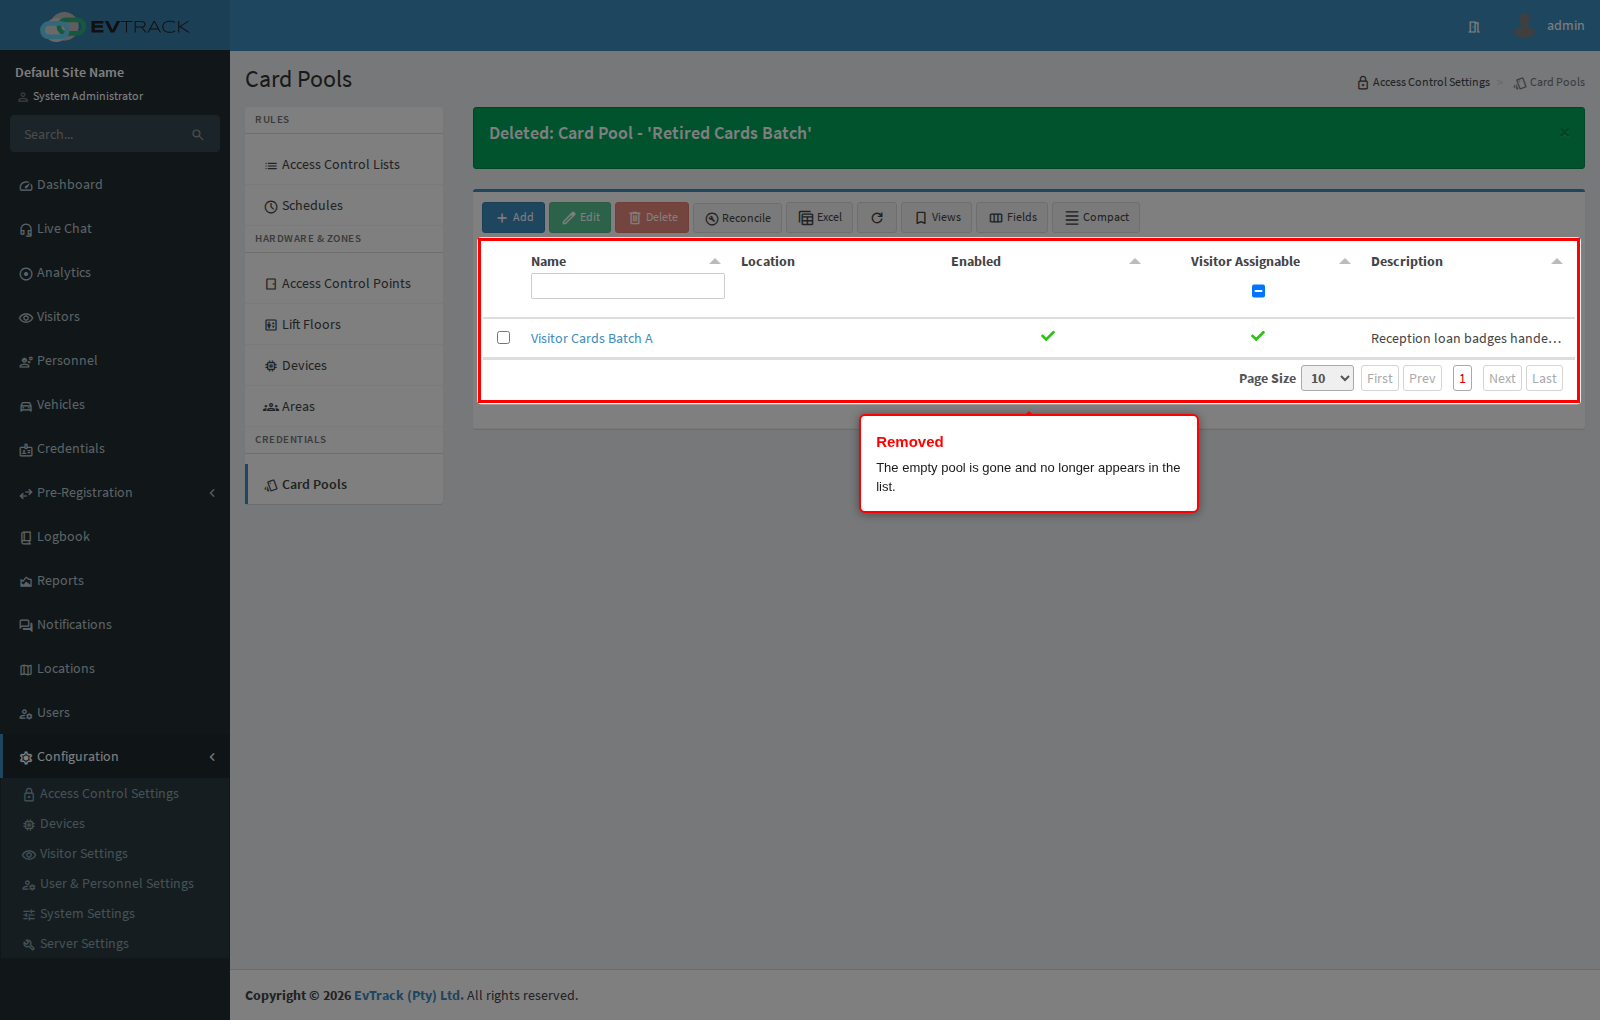
Repairing card state (Reconcile)
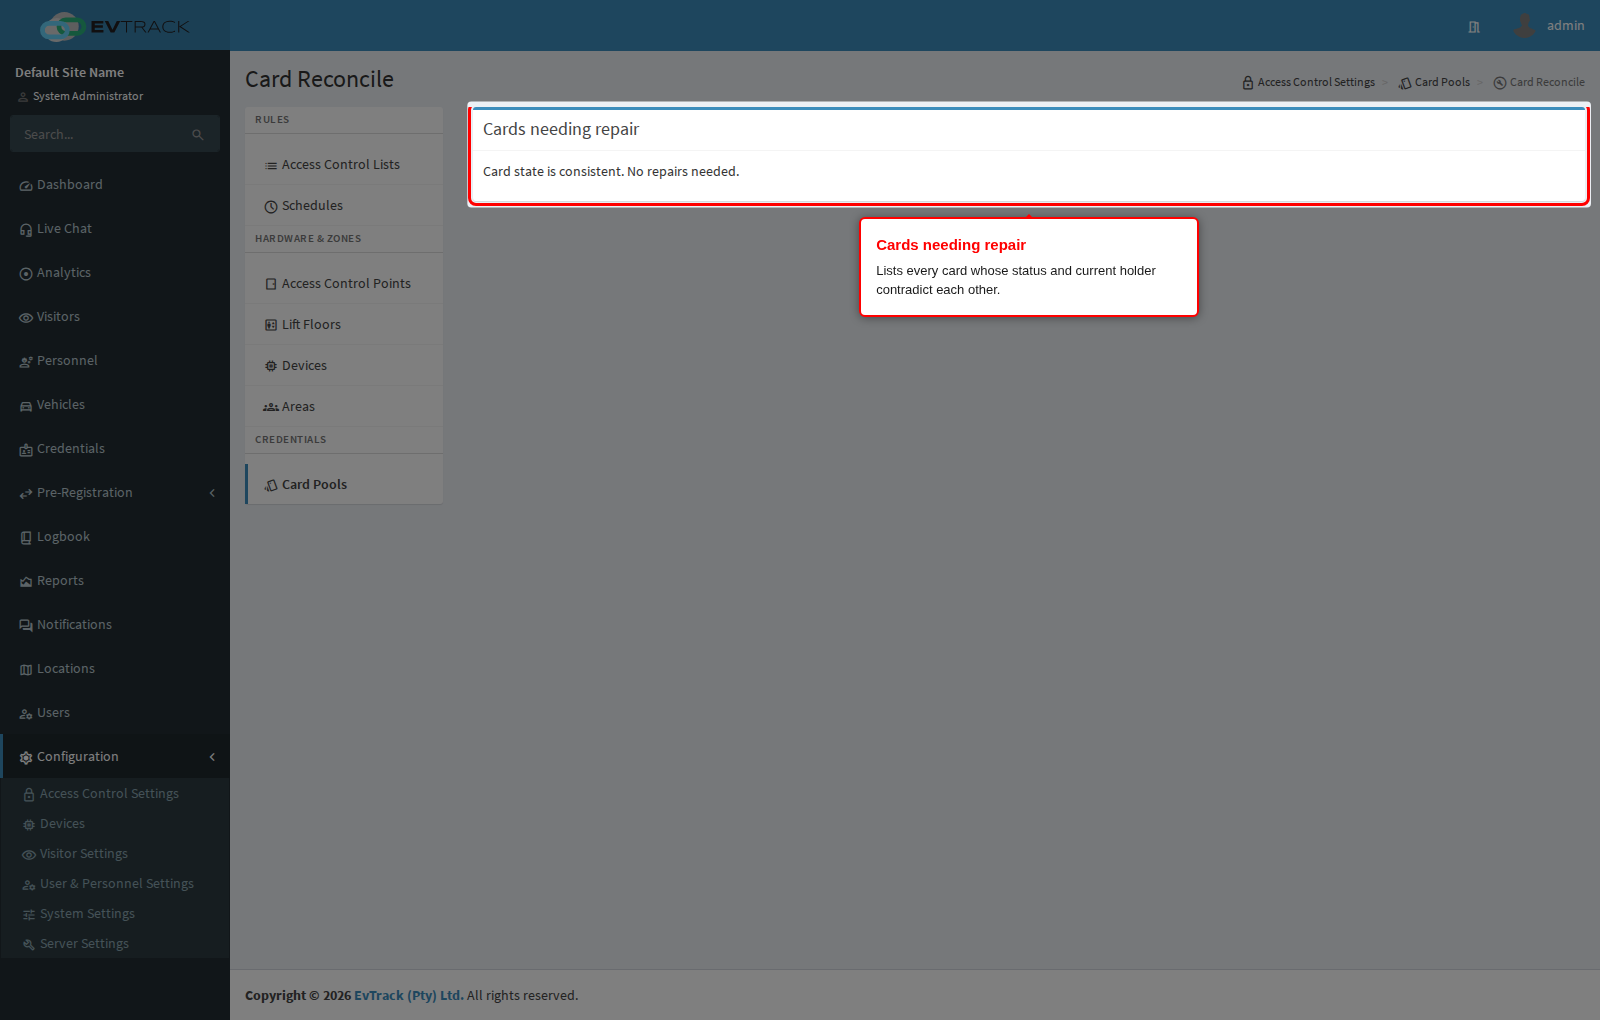
In day-to-day use the guards on this page keep every card’s status and its current holder in agreement. If a historical problem or an interrupted operation ever leaves them contradicting each other, the Reconcile button in the pool list toolbar opens the repair page.
The page lists every card whose record disagrees with itself, with the problem stated per card:
- Shows a free status but has a current holder - the card reads Available (or Lost, Damaged, Retired) while an assignment is still open. Its holder, the check-out time, and whether a visit is linked are shown alongside.
- Shows Checked-out but has no current holder - the card reads Checked-out while no assignment is open, so it sits unusable in the drawer.
Tick the cards to fix and click Repair selected (at most 50 at a time). A repair makes the record agree with itself again: a card with a lingering holder has that assignment closed, and a card stuck on Checked-out becomes Available. A card’s Lost, Damaged or Retired status is never changed by a repair - only the contradiction is removed.
On a healthy system the page simply reports that card state is consistent:
Cards during a visit
When Assign Card from Pool is enabled under Required Fields, the check-in screen offers a card picker listing the available cards of pools marked Can be assigned to a visitor. Choosing one checks the card out to that visitor and issues it as their credential for the visit; checking the visitor out hands the card back to the pool automatically. A card held by one visitor is never offered to another.
Which cards the picker offers follows three rules:
- Only enabled pools. A pool that is disabled keeps its cards out of the picker entirely, so a receptionist can never pick a card the system would then refuse to issue.
- Only pools matching the visit’s location. A pool tied to a location serves only visits at that location; a pool on No specific location serves every visit. A visit with no location selected draws only from the unscoped pools - if cards exist but they all belong to location pools, the picker says so and asks for a location to be selected first.
- Only Available cards. Checked-out, Lost, Damaged and Retired cards are never offered.
When a visit ends in any other way than a normal check-out - it is cancelled, checked-out in bulk from the visitor list, or closed by automatic check-out - the visitor’s card is returned to its pool automatically as well, provided Automatically return visitor cards when a visit ends is enabled under Check-out Settings. That setting is on by default. If it is switched off, a visit whose visitor still holds a card cannot be cancelled until the card is returned by hand from this page.