Your application, CRM/HMS, or website can all use API (Application Programming Interface) keys to authenticate access to EvTrack Web Services. They are the preferred alternative to using a username and password because you can revoke an API key at any time without having to change your username and password. We suggest that you use individual API keys for each service connecting to all of EvTrack’s services.
Before you start: you need an administrator account with API key administration rights, and you should know which resources the consuming application reads or writes so you can grant only those permissions.
1. Creating an API key
Step 1: Open Web Service API
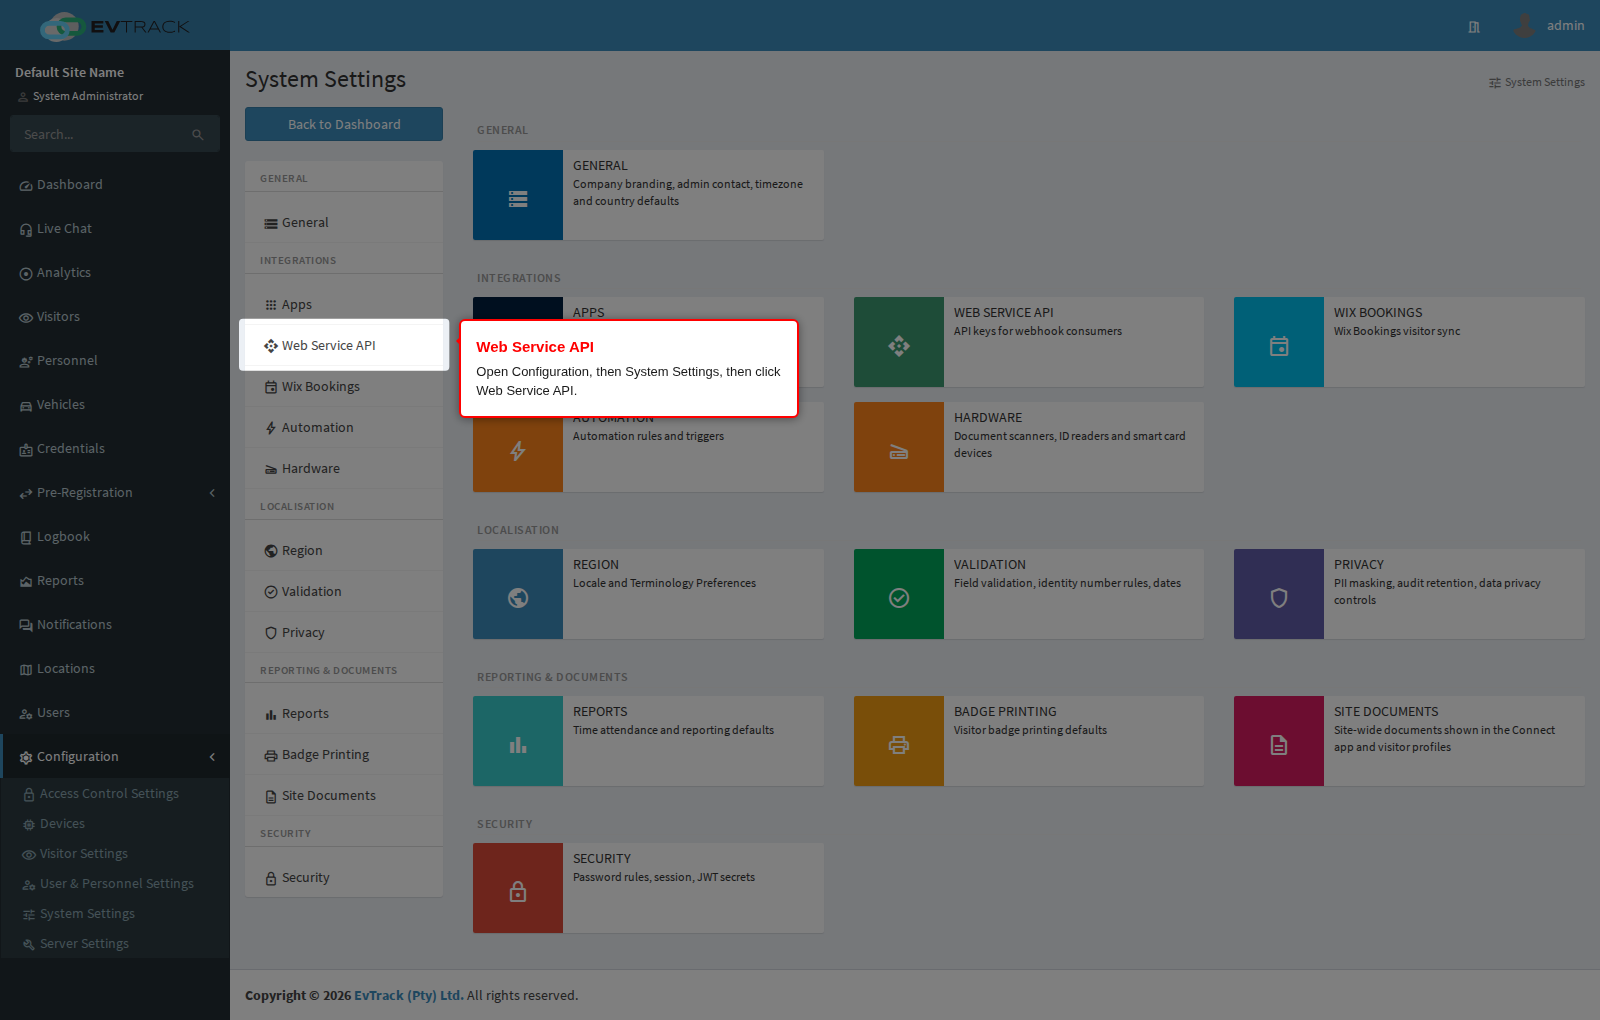
In the left sidebar open Configuration, click System Settings, then click Web Service API. The API key list opens.
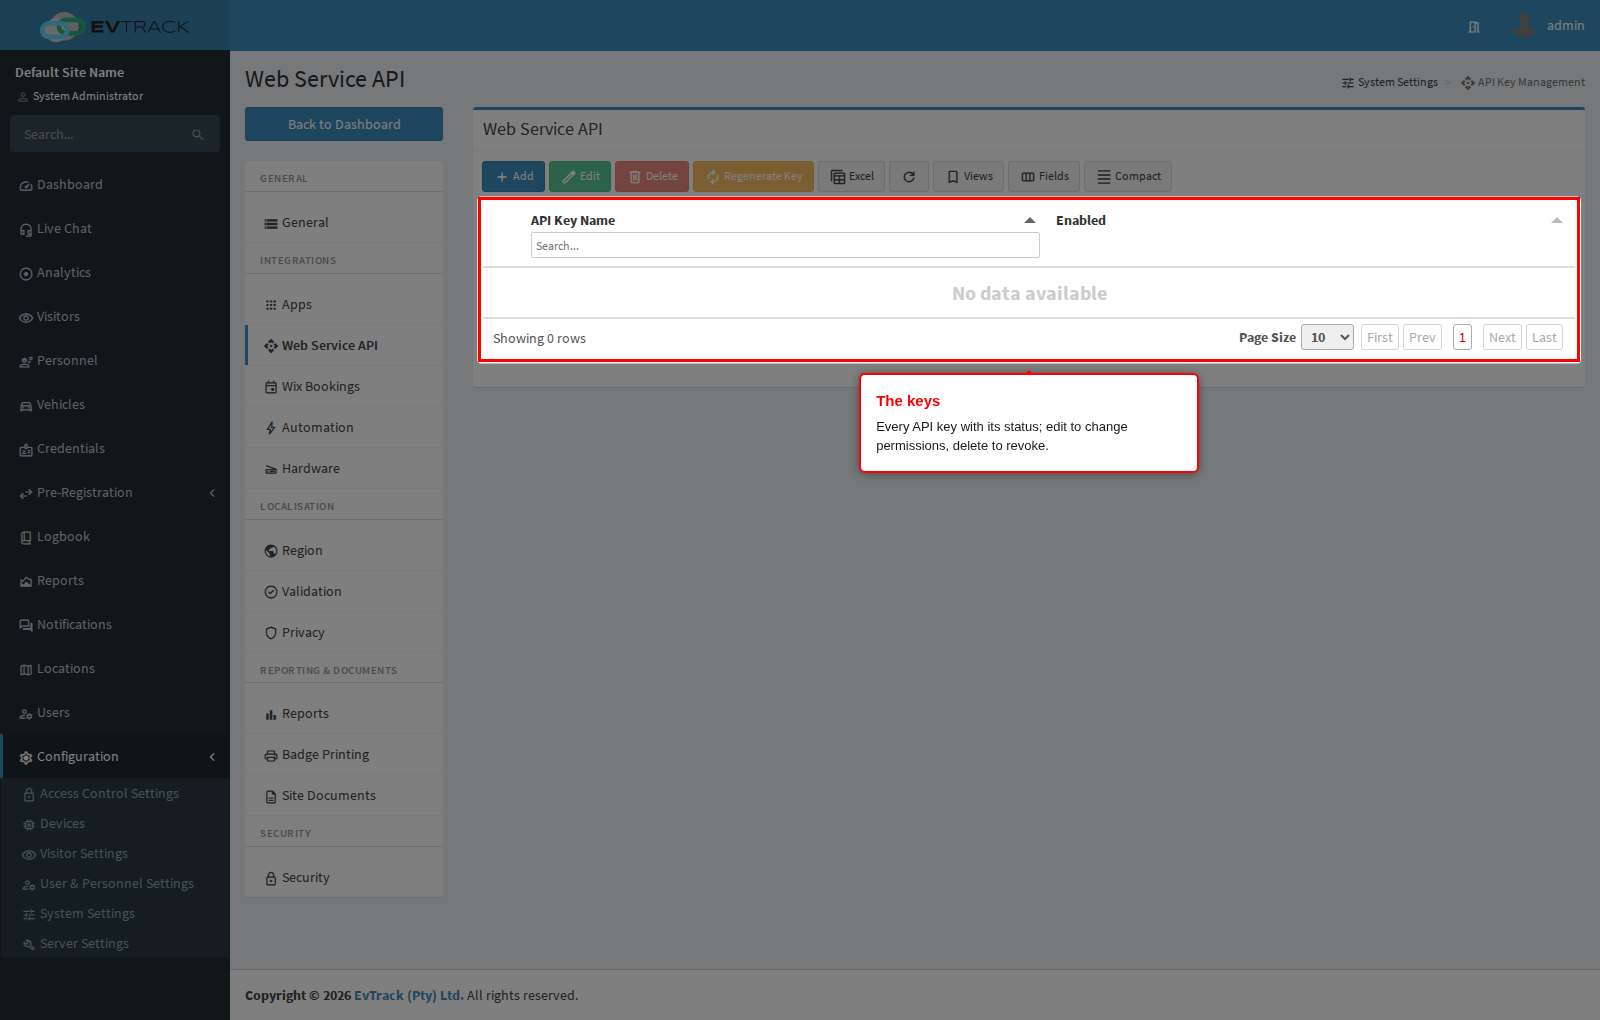
Step 2: Review the keys
The list shows every key with its status. Select a key to edit its permissions, or delete it to revoke access immediately.
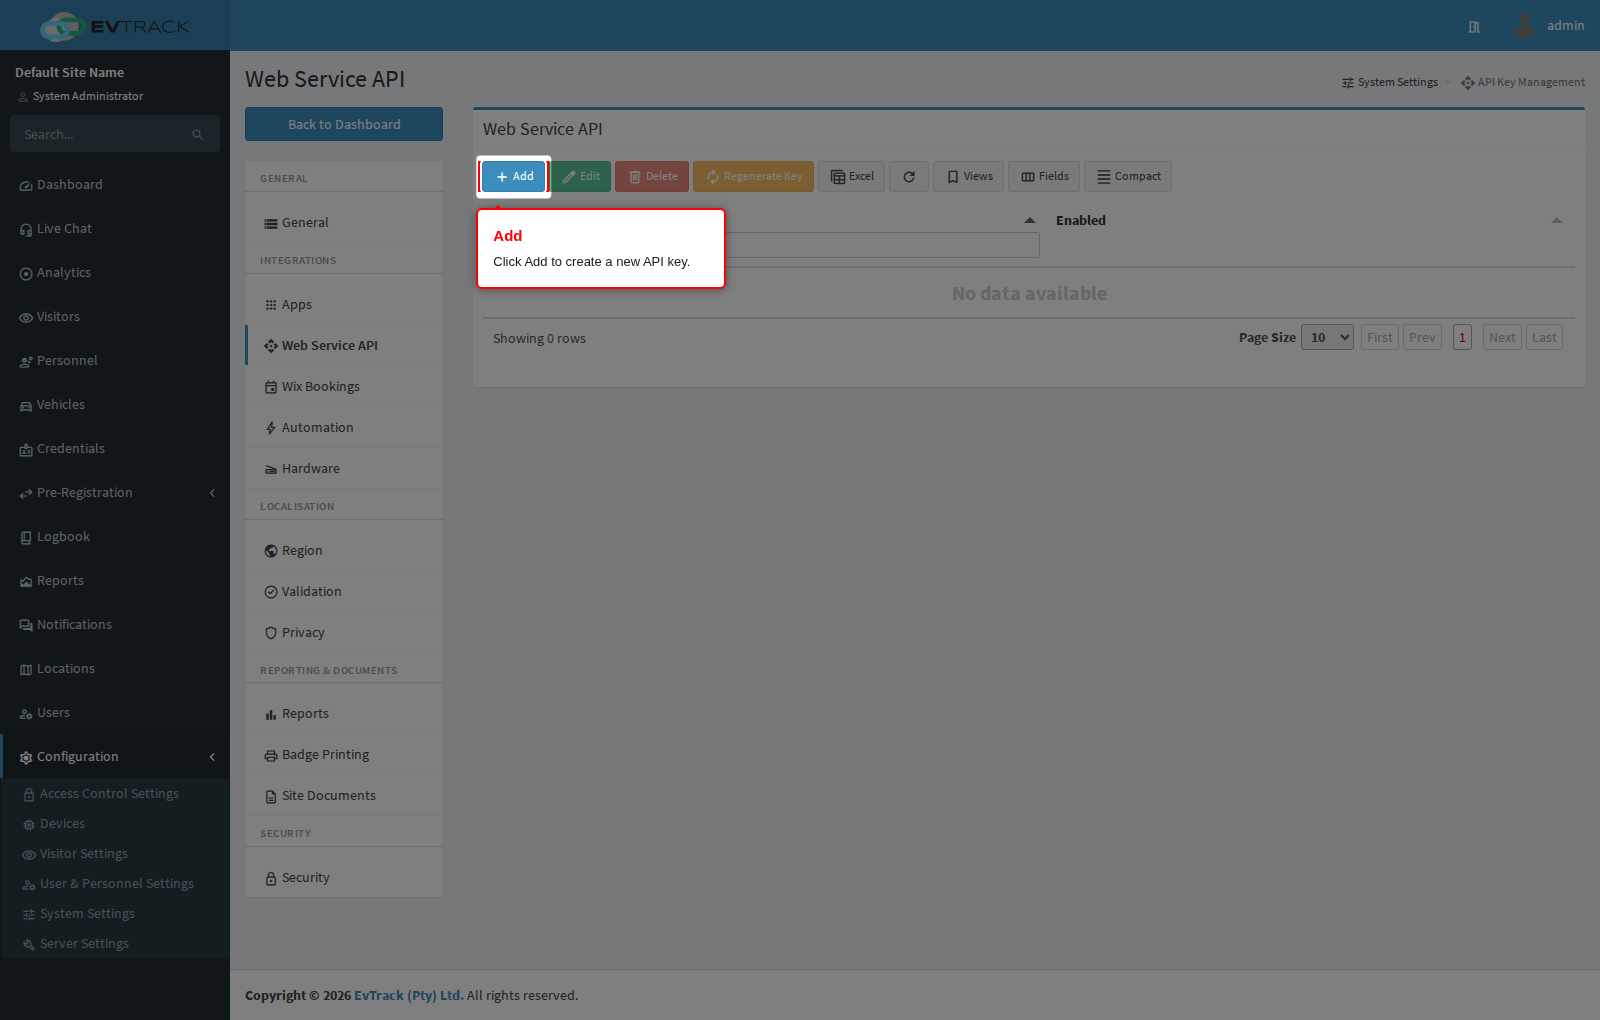
Step 3: Click Add
Click the Add button above the table. The new API key form opens.
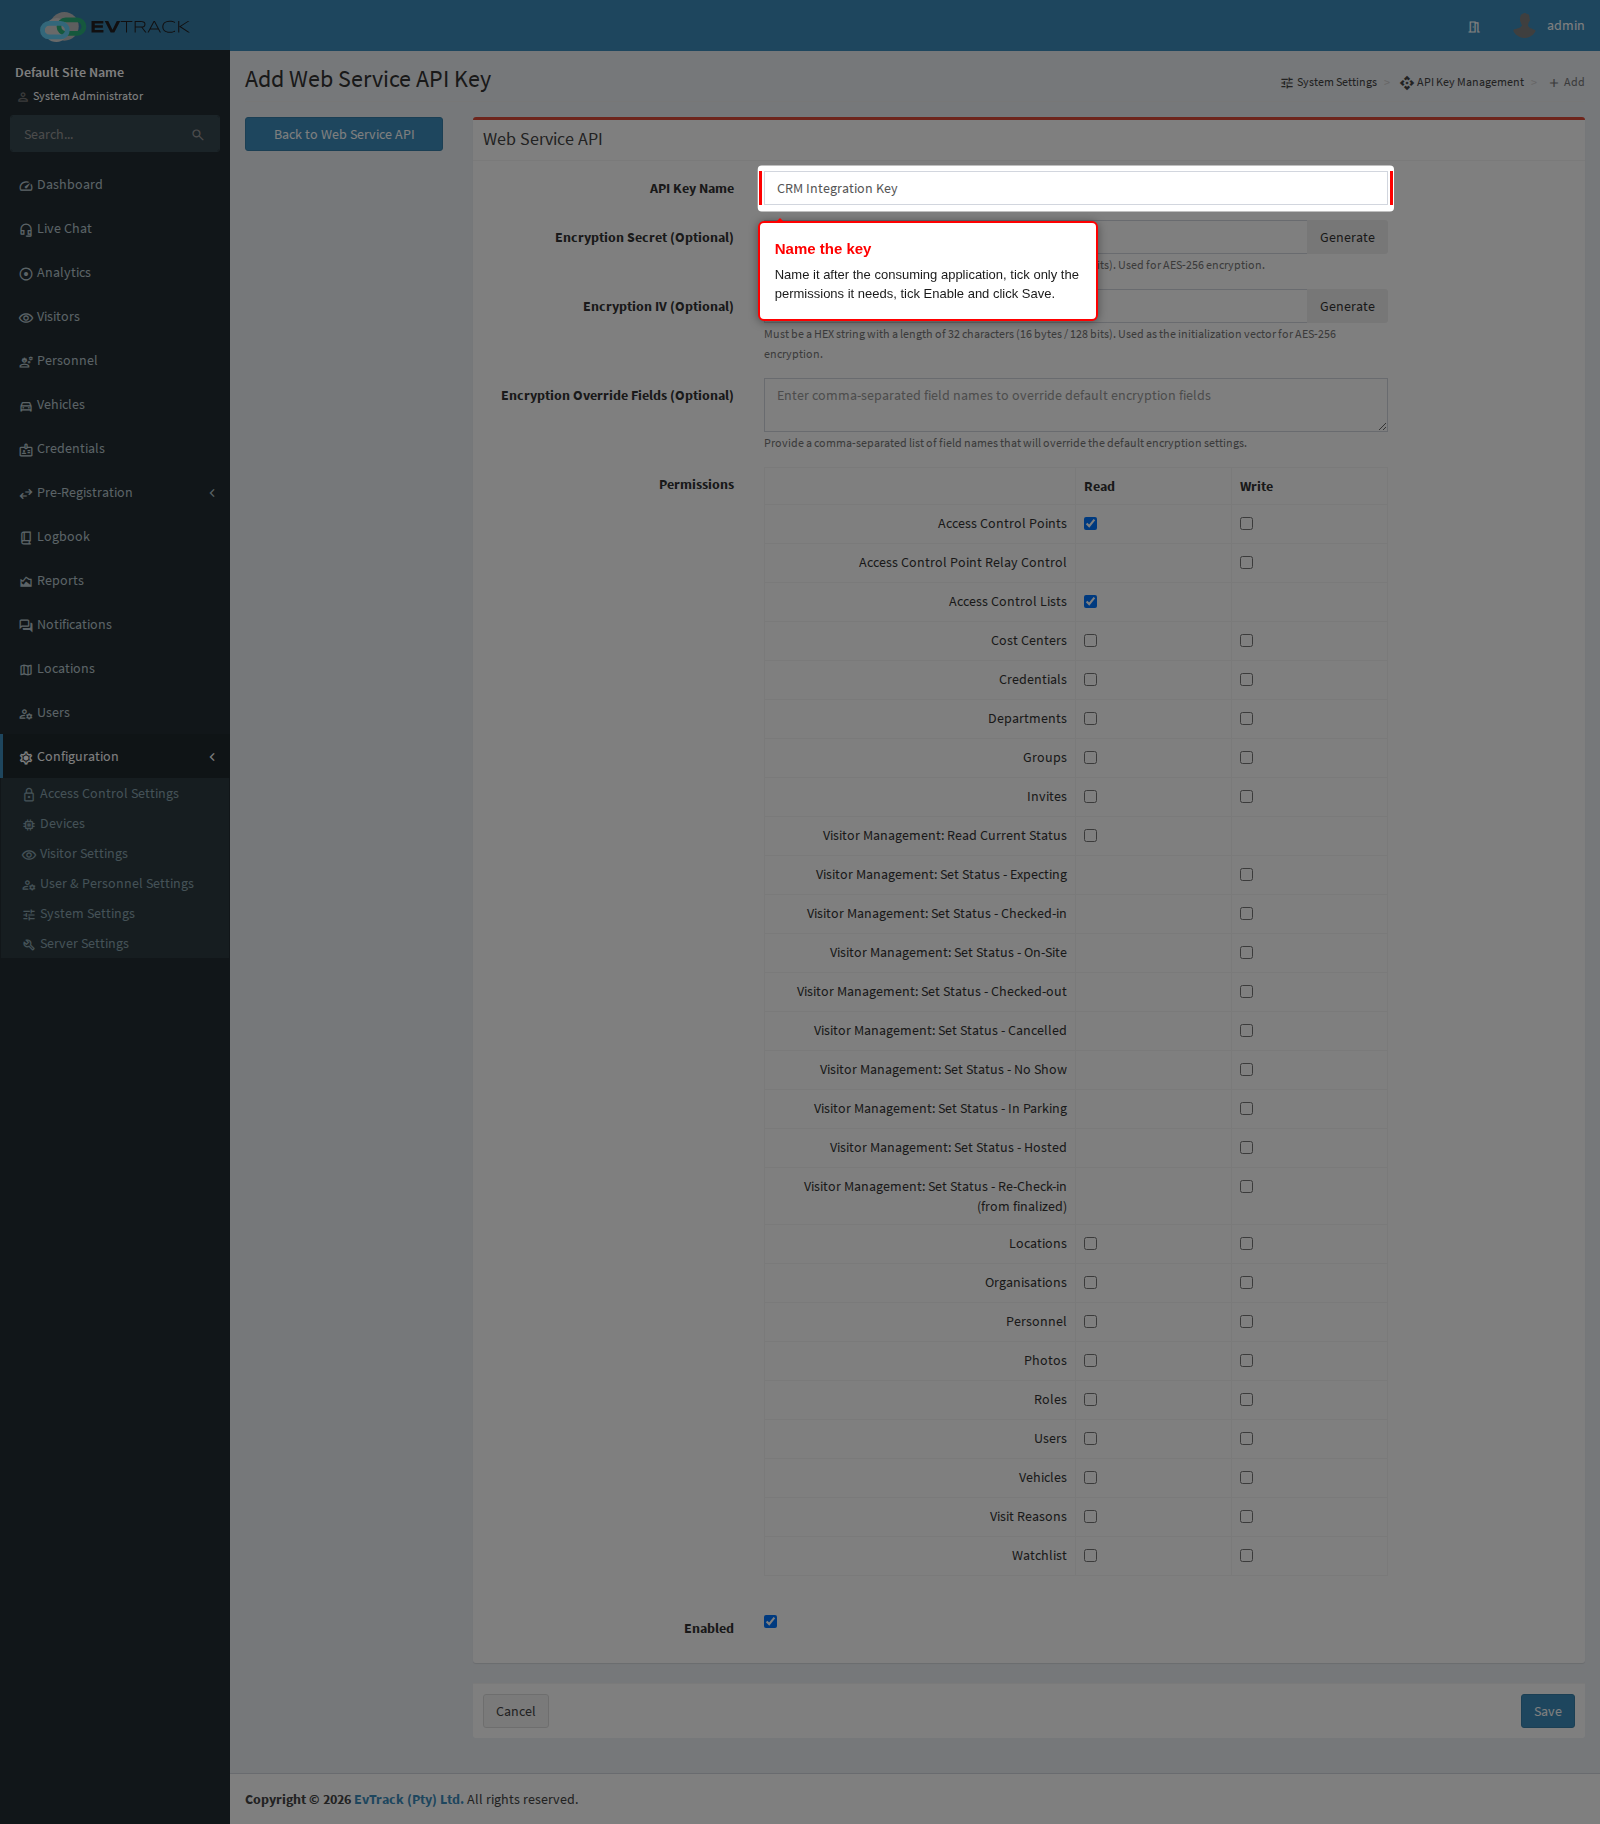
Step 4: Name the key, grant permissions and save
- Give your API key a name that identifies the consuming application.
- (Optional) Configure Encryption Secret (a 64-character HEX string, 32 bytes) and Encryption IV (a 32-character HEX string, 16 bytes) for AES-256 encryption. Click Generate to auto-generate values if required.
- Select Permissions for Read and Write access - grant only what the application needs. These include: Access Control Points (plus Access Control Point Relay Control), Access Control Lists (read only), Cost Centers, Credentials, Departments, Groups, Invites, Locations, Organisations, Personnel, Photos, Roles, Users, Vehicles, Visit Reasons and Watchlists, plus Visitor Management rights: Read Current Status and Set Status - Expecting, Checked-in, On-Site, Checked-out, Cancelled, No Show, In Parking, Hosted, Re-Check-in.
- Enable the key by checking the Enable box.
- Click Save.
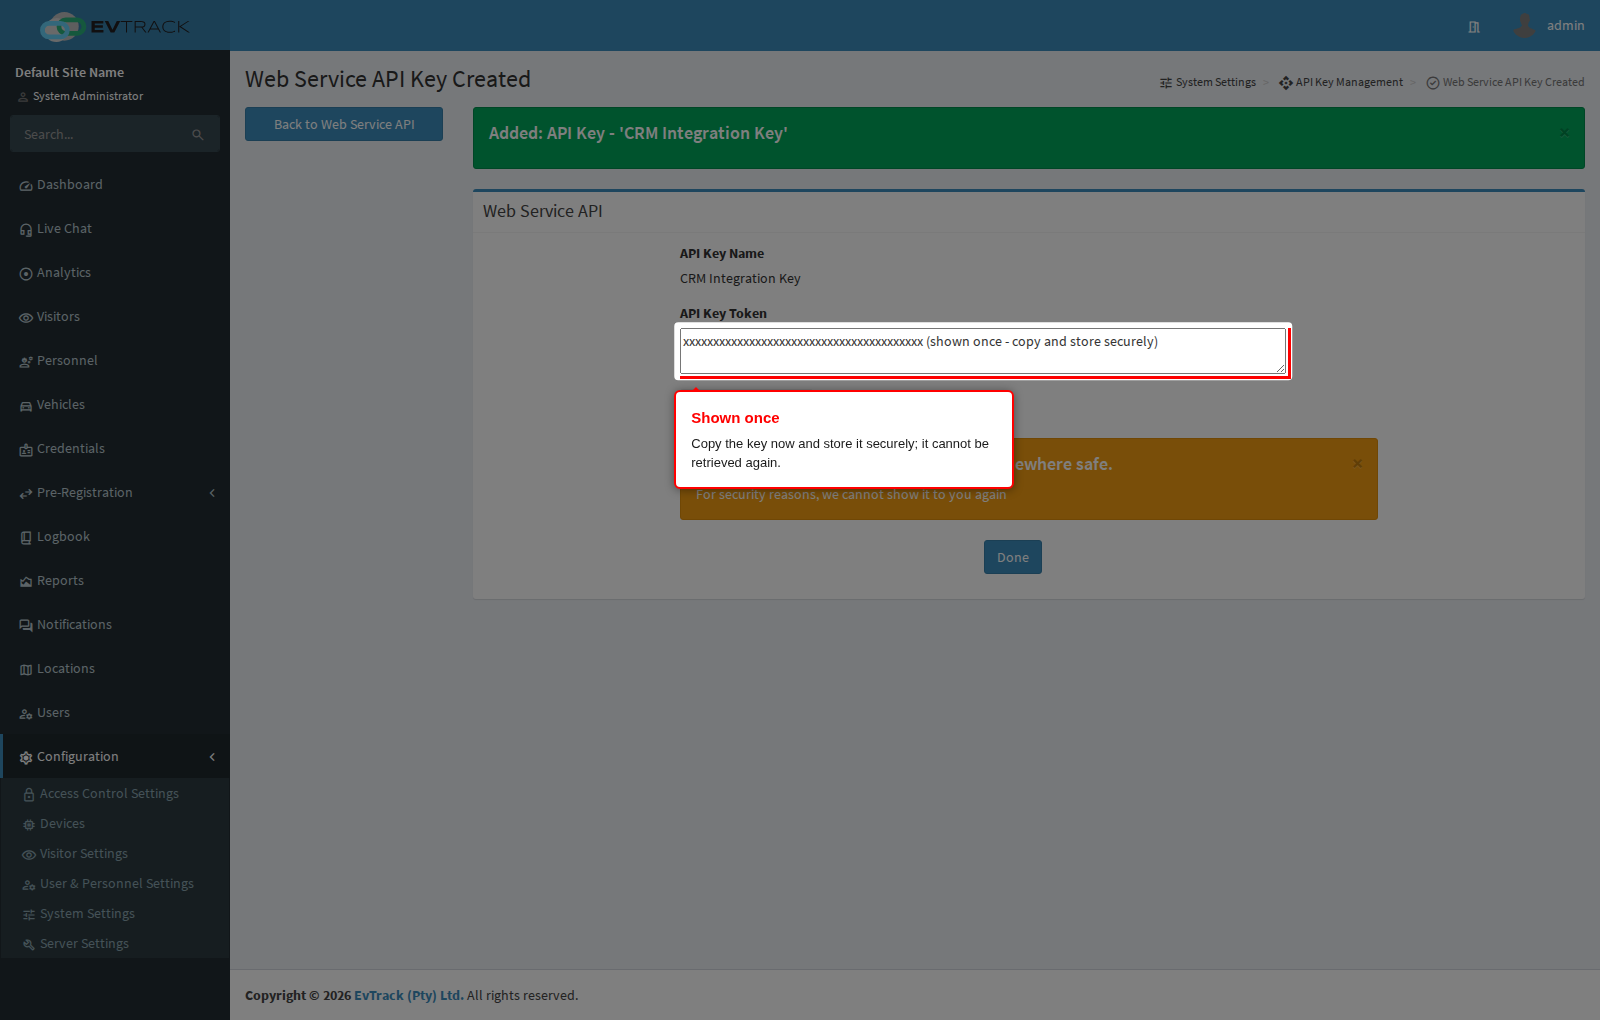
Step 5: Copy the key - it is shown once
After saving, the key token is displayed once. Copy it into the consuming application’s configuration and store it somewhere safe - it cannot be retrieved or restored, only replaced.
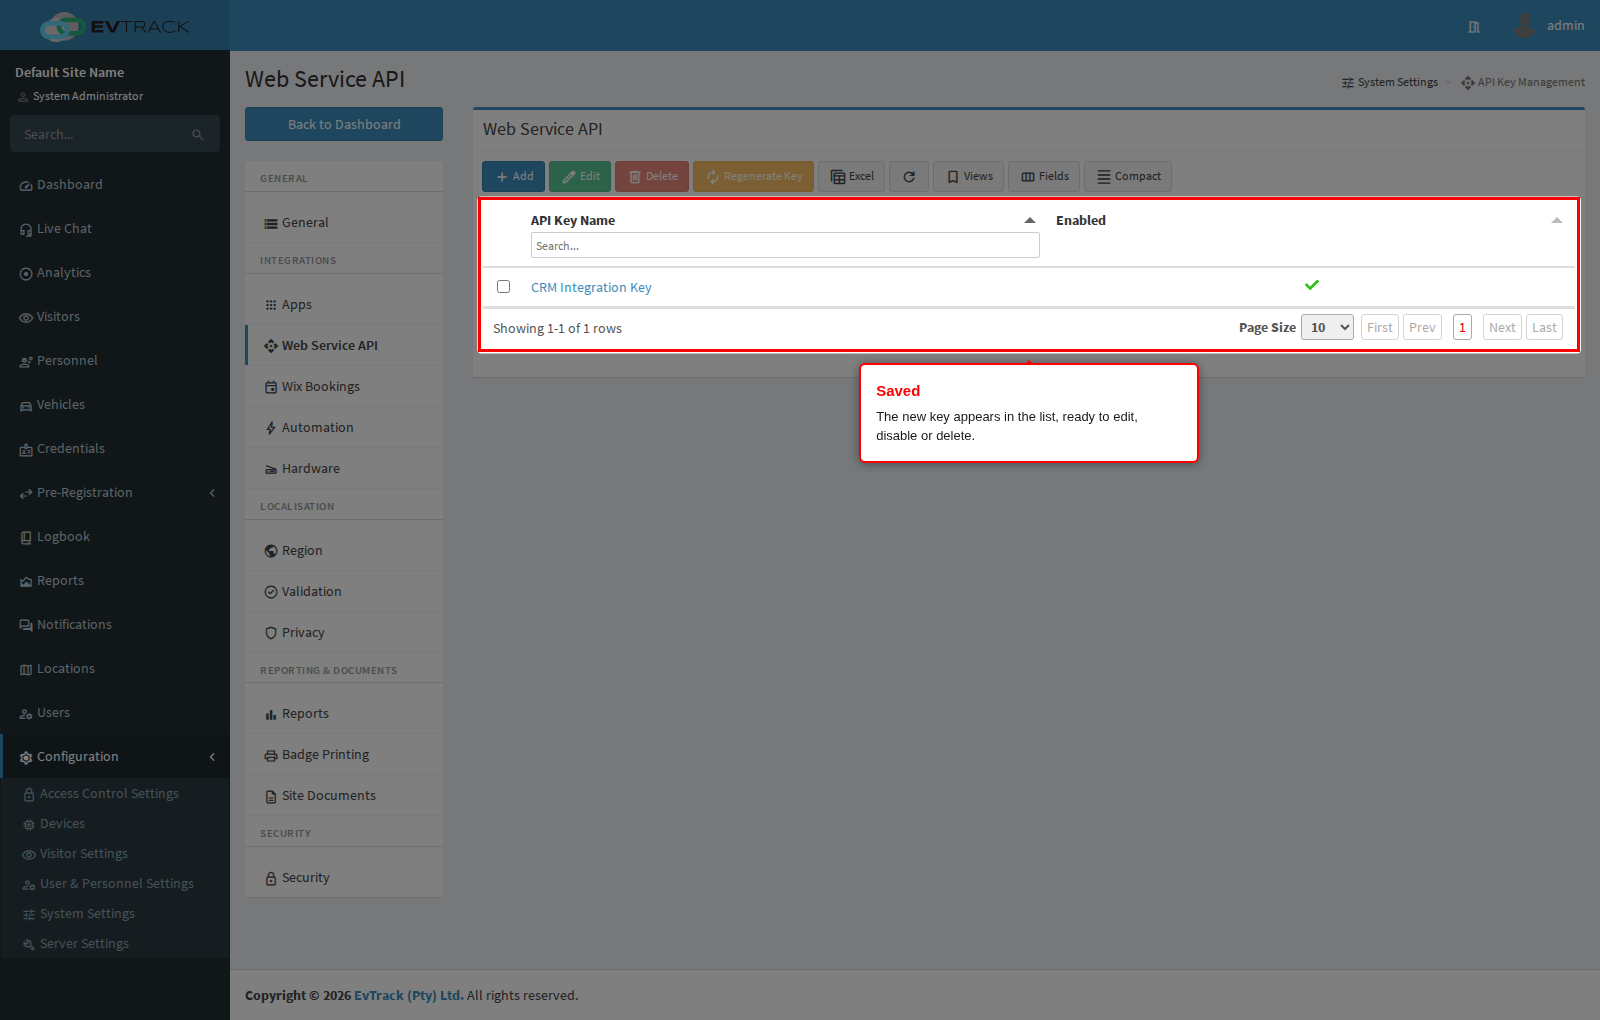
Step 6: Confirm the result
The new key appears in the list, where it can later be edited, regenerated or deleted.
2. Editing an API key
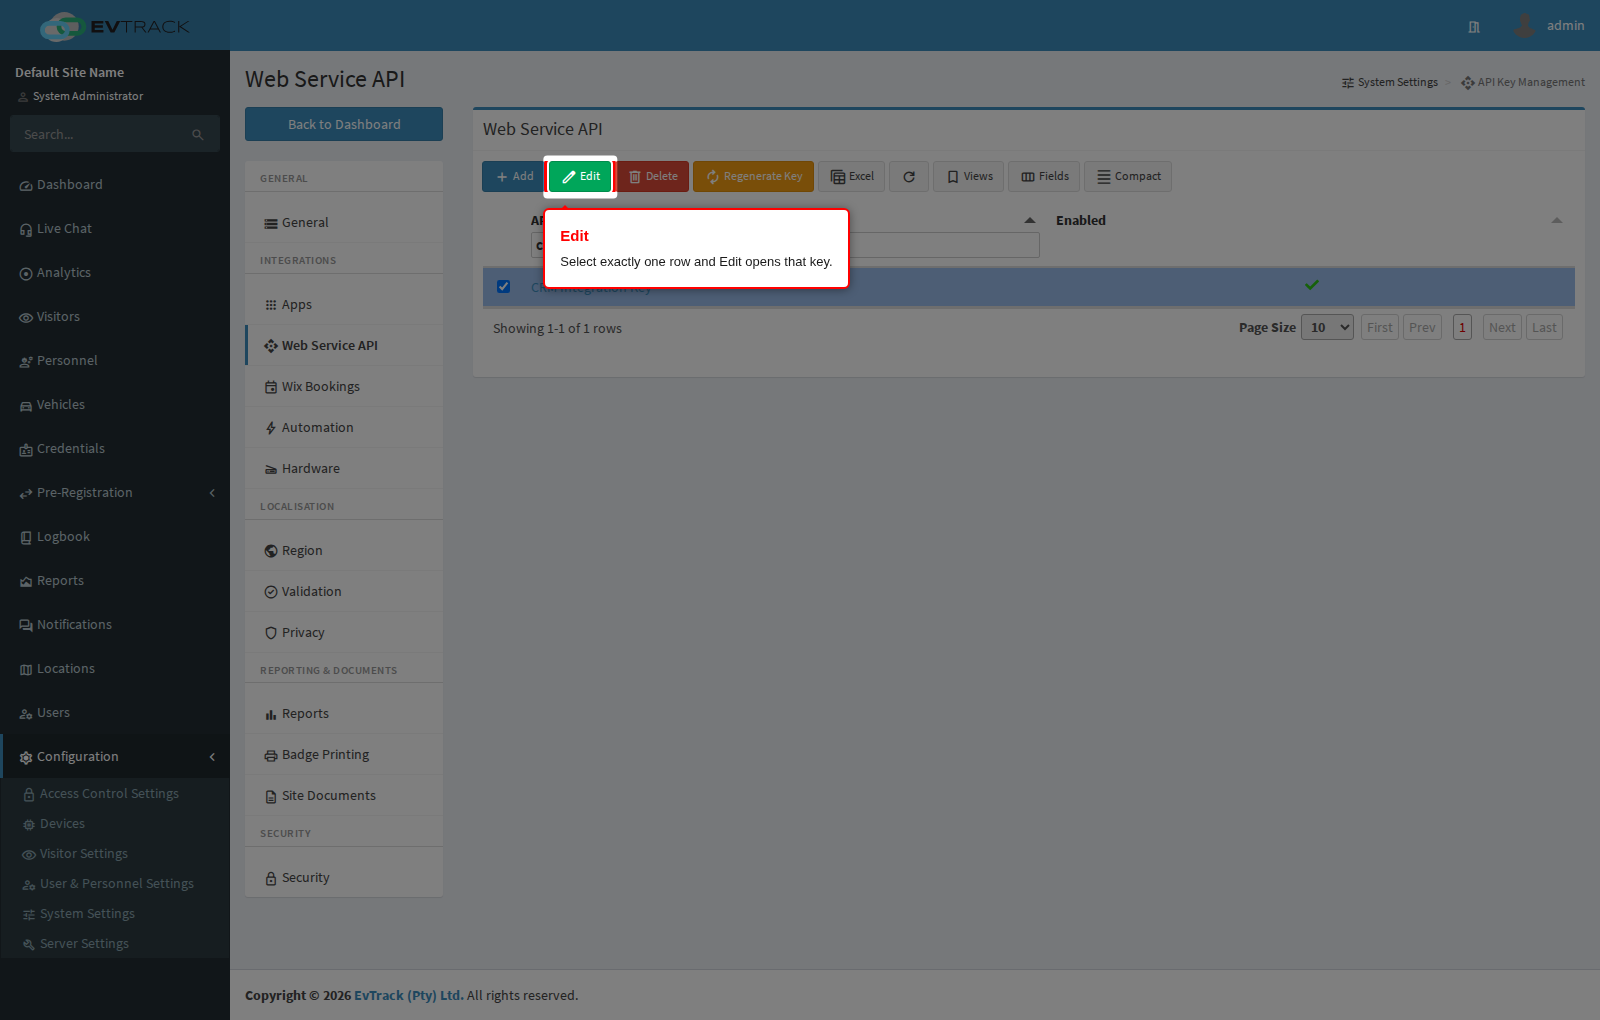
Step 7: Select the key
On Configuration > System Settings > Web Service API, click the row of the key you want to change. The toolbar Edit, Regenerate Key and Delete buttons remain greyed out until exactly one row is selected. Click Edit (clicking the key’s name in the list does the same thing).
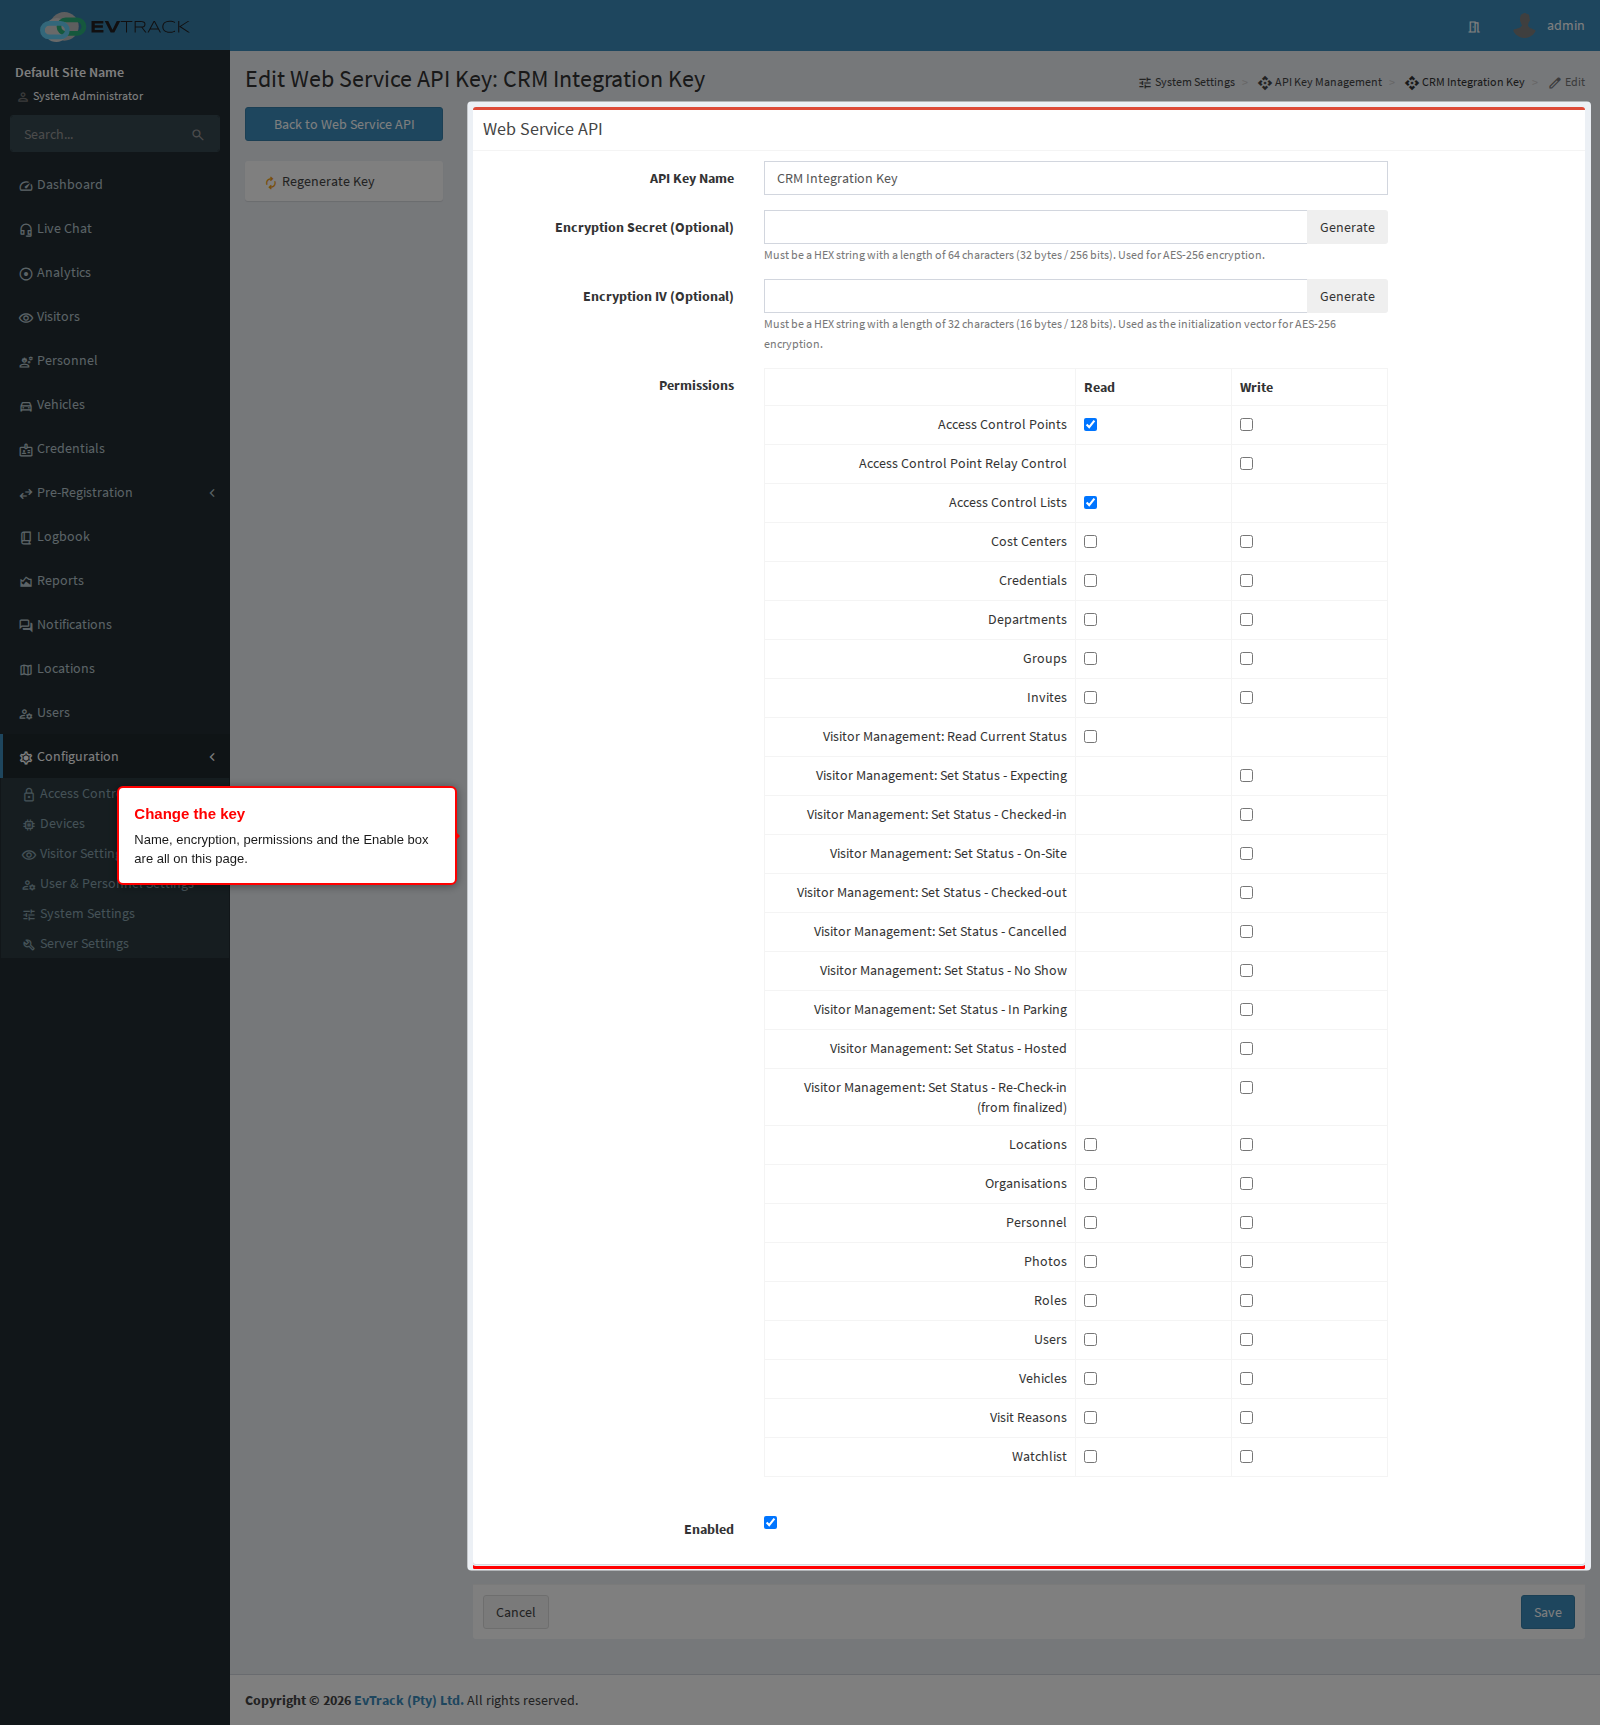
Step 8: Change the key
The edit page is a single page carrying everything about the key except its token:
- Name - what the key is called in this list. Two keys cannot share a name.
- Encryption Secret, Encryption IV and the override field list - see section 4 below. Leaving them empty means the key sends and receives plain payloads.
- Permissions - the same Read and Write grid as the add form. Clearing a permission takes that access away from the consuming application on its very next request, so tightening a key’s scope needs no new token.
- Enable - clear it to switch the key off. Requests using it are refused immediately, but the key and its permissions are kept, so ticking it again restores access with the same token. This is the reversible alternative to deleting.
The token itself cannot be edited or viewed here. It was shown once at creation; to replace it, use Regenerate Key (step 10).
Change what you need and click Save.
Step 9: Confirm the change
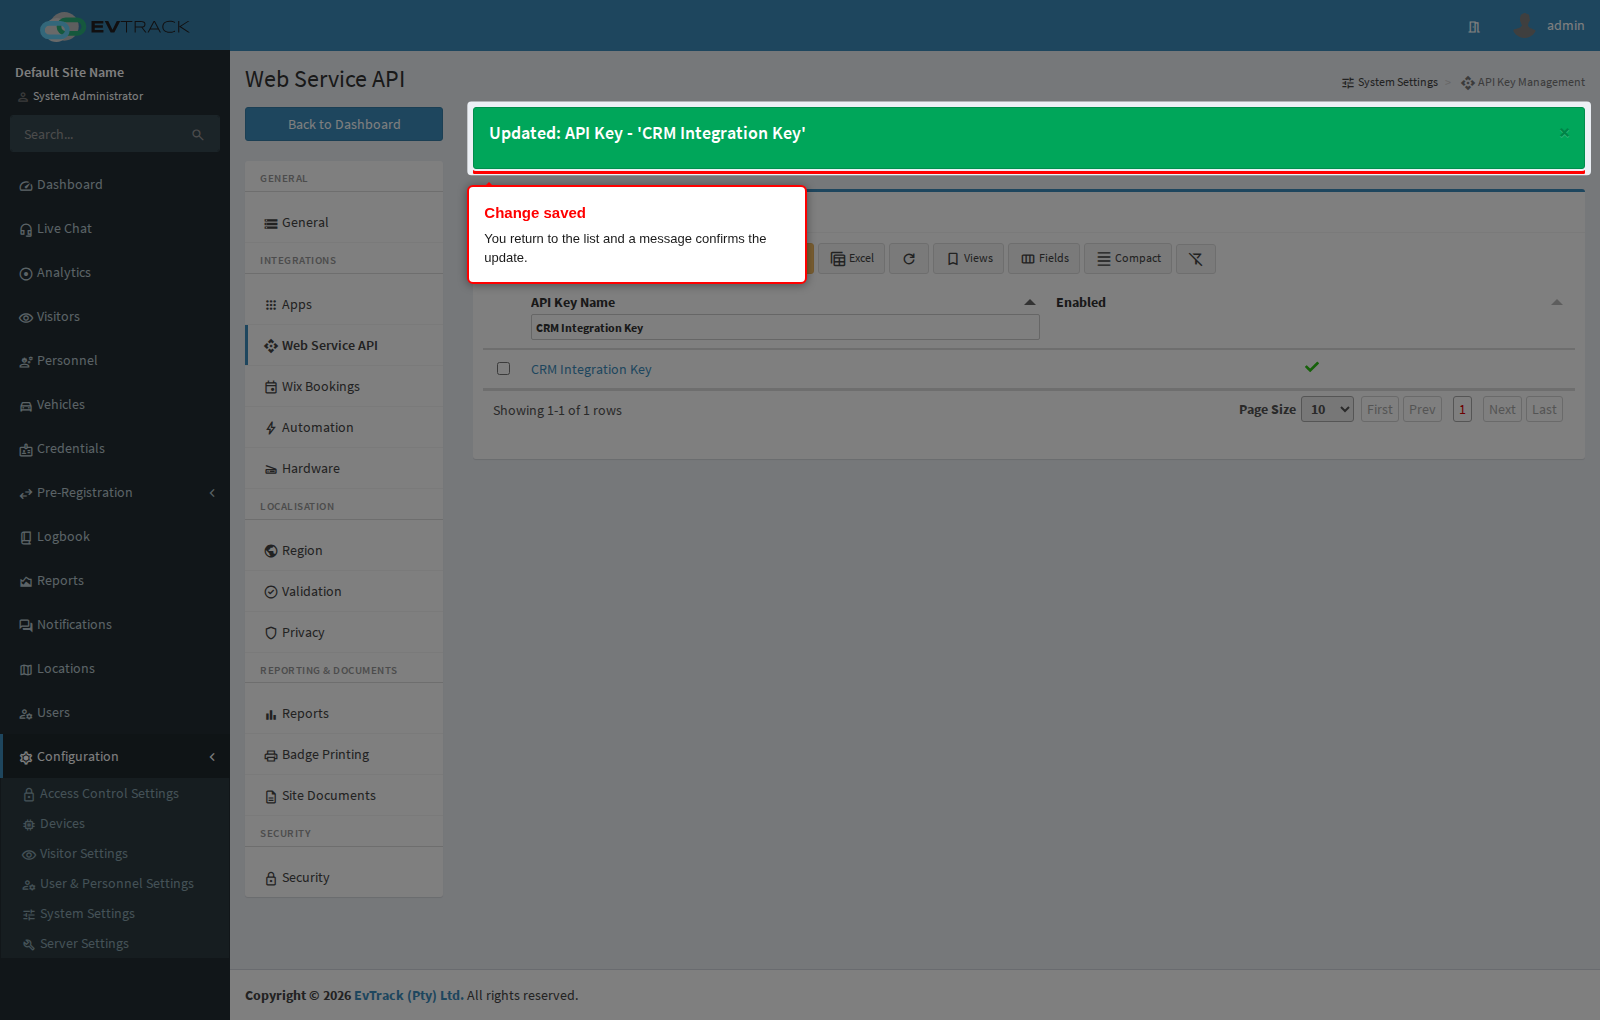
You return to the list with a success message. Permission and enable changes apply to the next request the consuming application makes.
3. Regenerating an API key
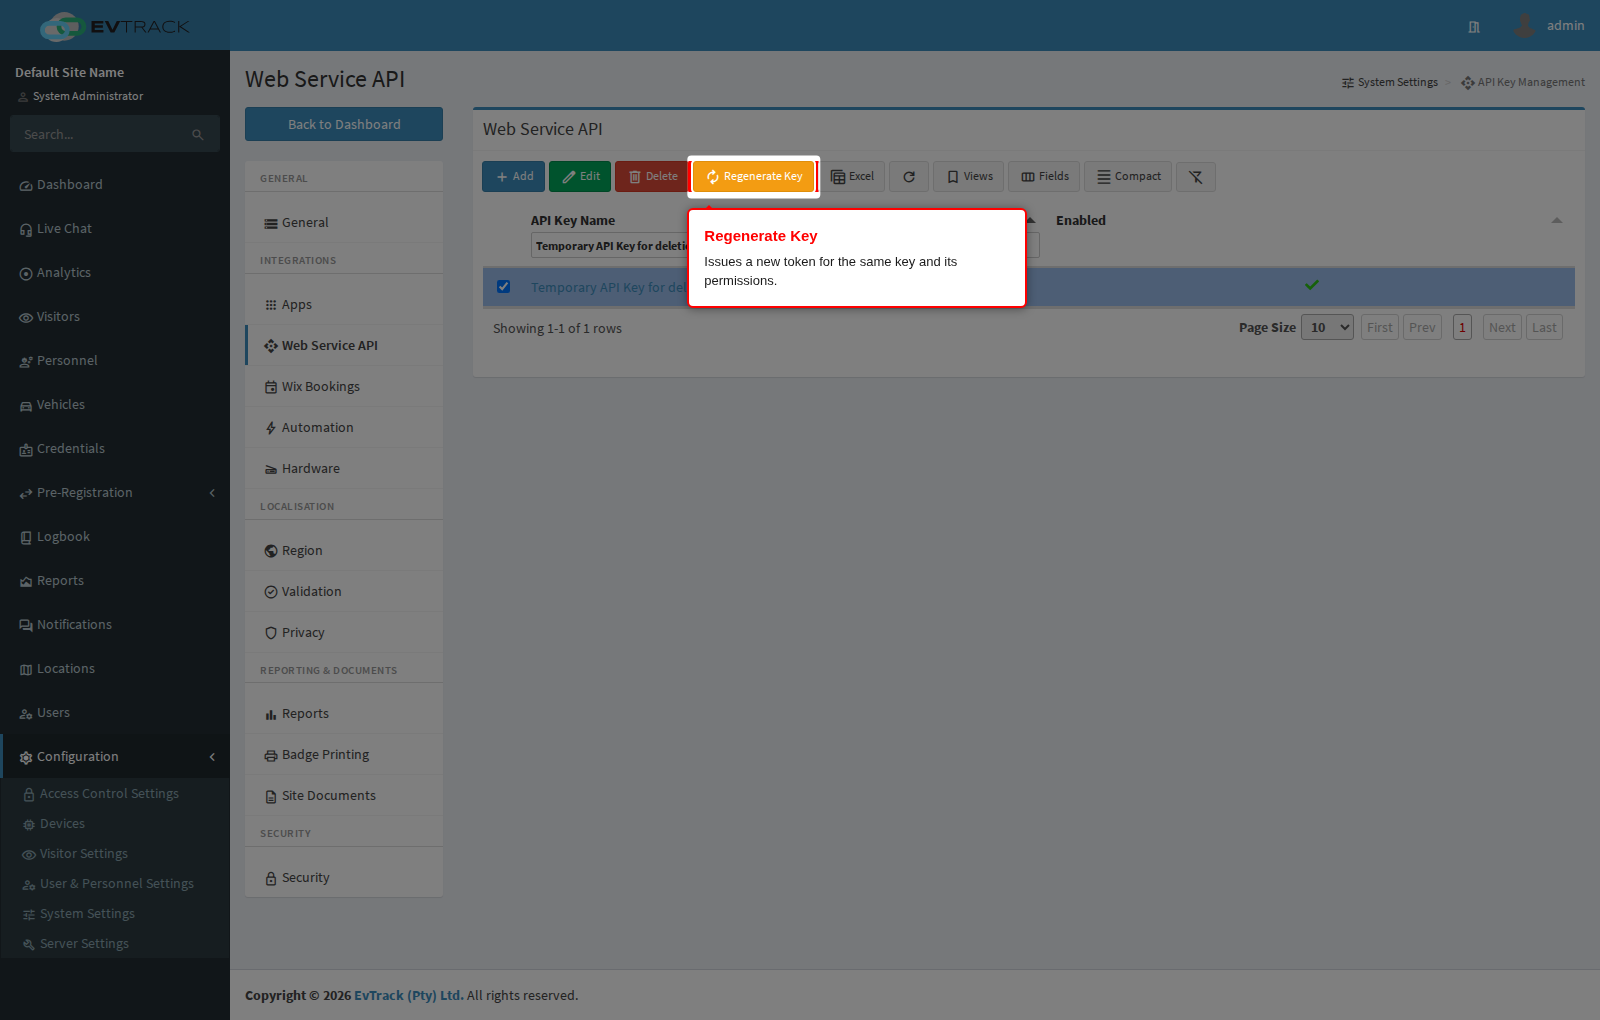
Step 10: Select the key and click Regenerate Key
Regenerating issues a new token for the same key: the name, the permissions and the encryption settings all remain as they are, only the token changes. Use it when a token may have leaked, or on a routine rotation schedule, instead of deleting the key and rebuilding its permissions.
Select the key’s row and click Regenerate Key in the toolbar.
Step 11: Confirm the regeneration
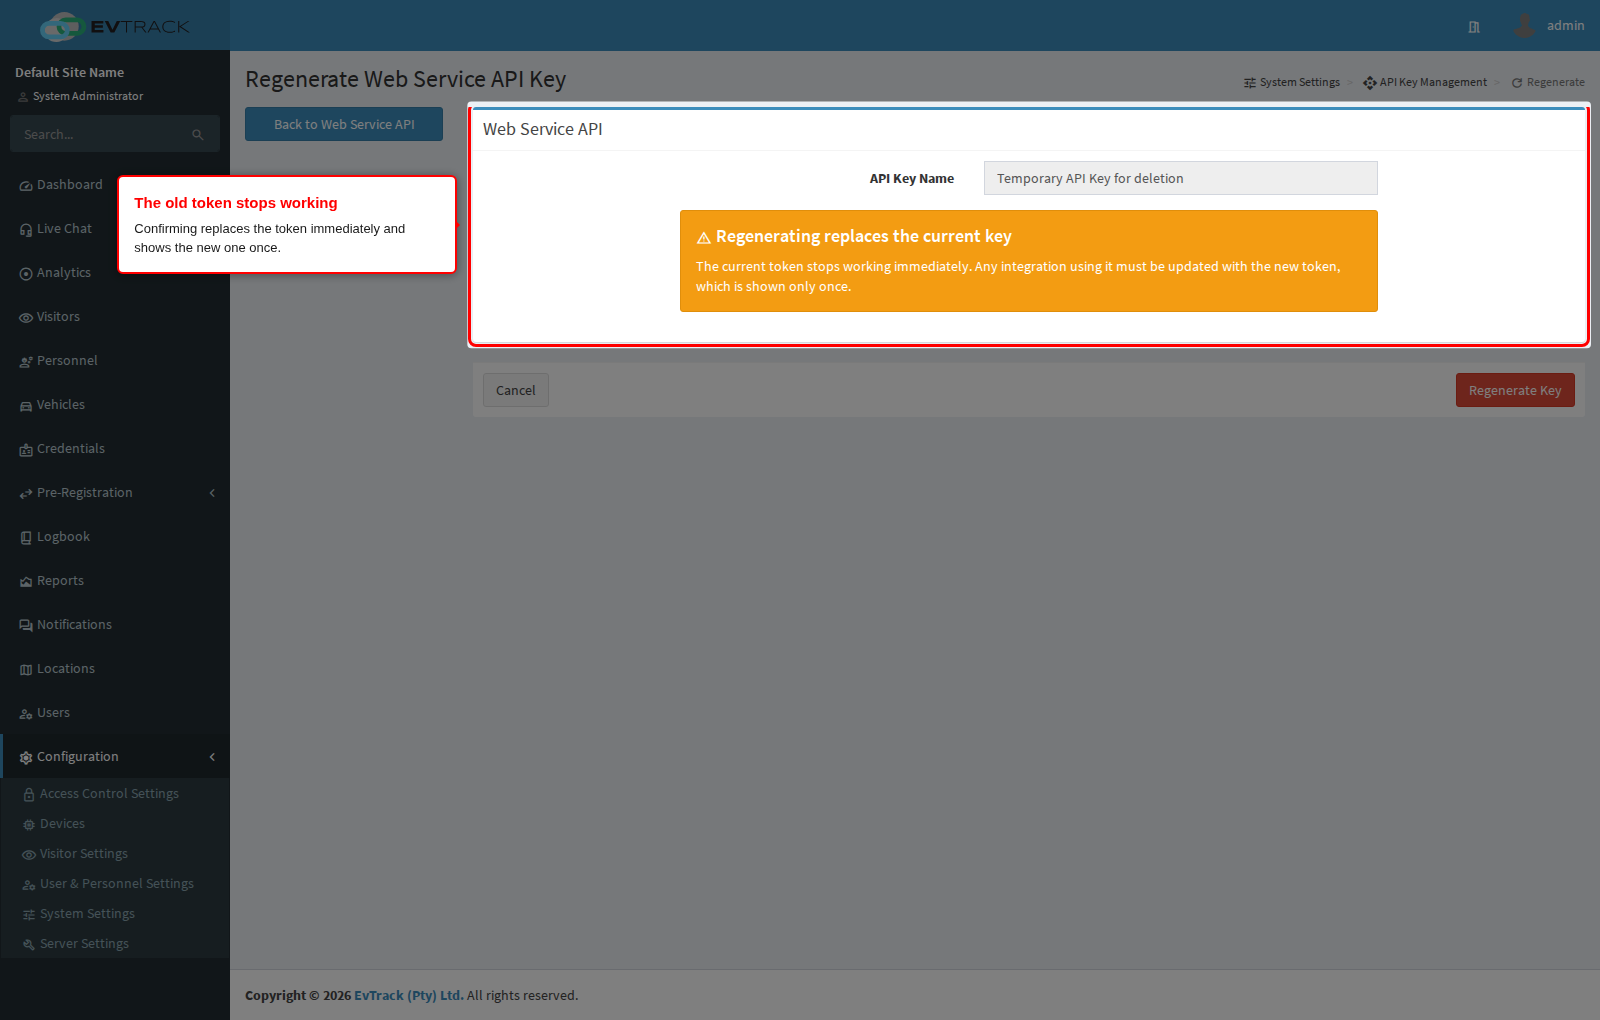
A confirmation page opens naming the key and warning that regenerating replaces the current key. Click Regenerate to go ahead, or Cancel to leave the token as it is.
The moment you confirm, the old token stops working - any application still using it starts getting rejected. The new token is then displayed once, on the same kind of page as step 5, so copy it straight into the consuming application. Plan the switchover before you confirm.
4. Deleting an API key
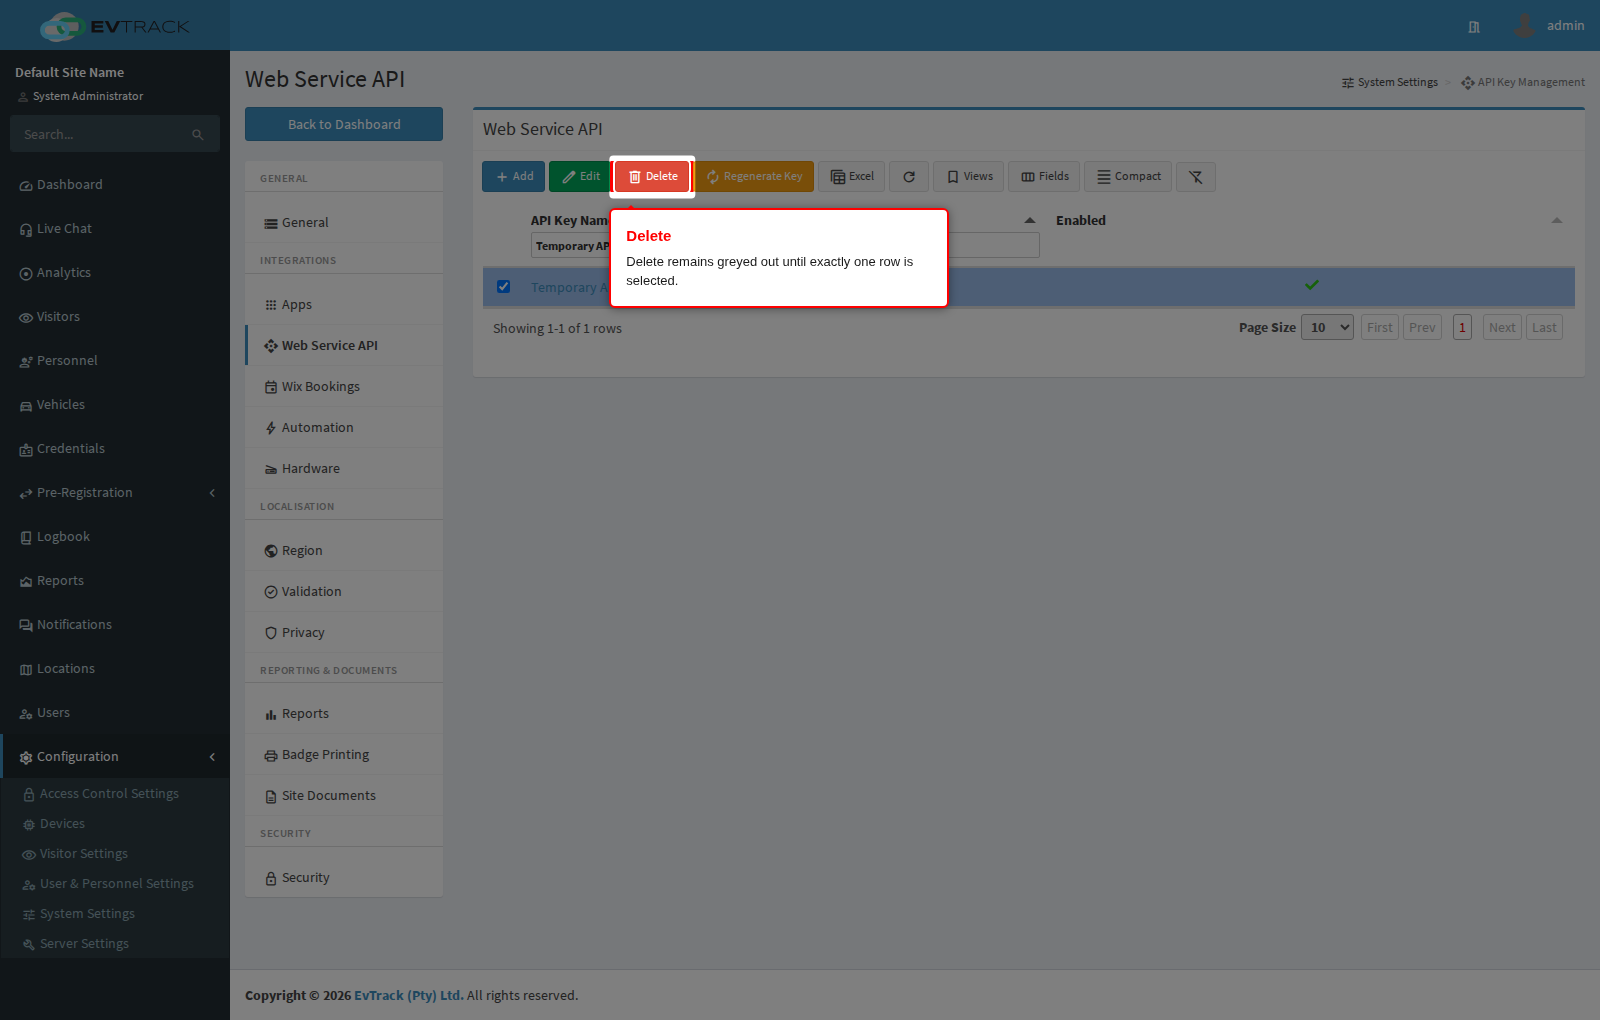
Step 12: Select the key and click Delete
Select the key’s row and click Delete. Like Edit, the button only becomes active with exactly one row selected. In the example below a disposable key, “Temporary API Key for deletion”, is being removed.
Step 13: Confirm the deletion
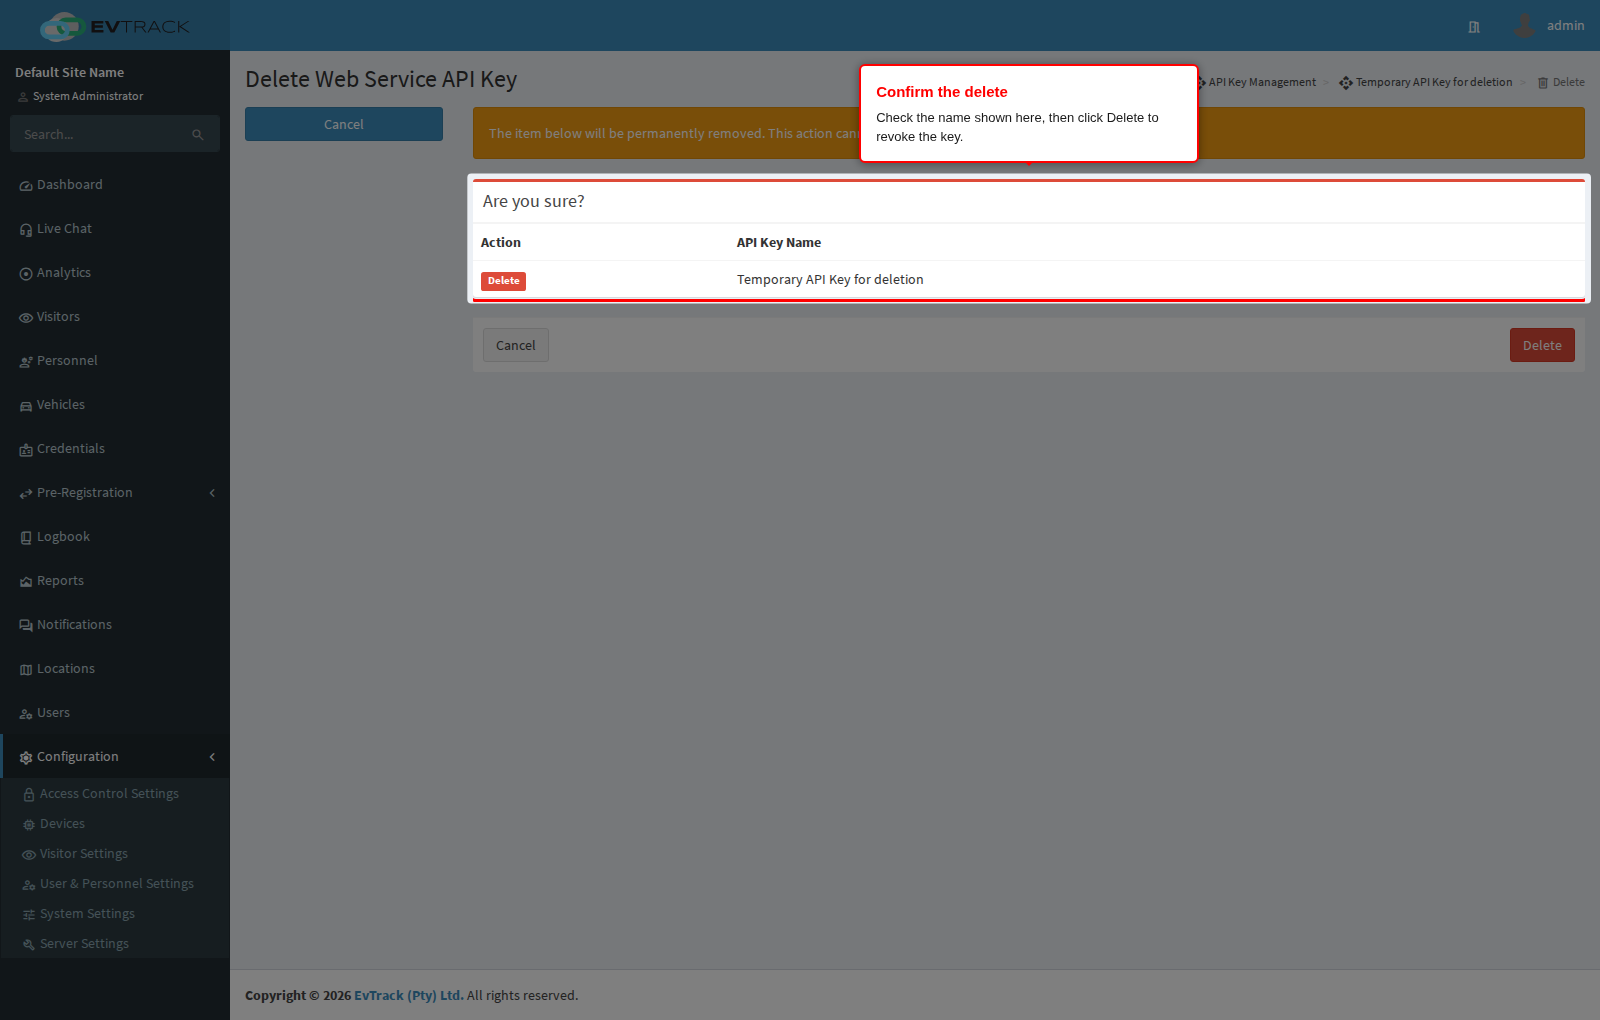
A confirmation page opens showing the key’s reference and name so you can check you picked the right one. Click Delete to revoke it, or Cancel to leave it alone.
Deletion is permanent and immediate: the token is refused from that moment and it cannot be restored, only replaced by a new key with new permissions. Nothing blocks a key from being deleted, not even one an application is actively using - the check is yours to make. If you only want to suspend access, clear Enable on the edit page instead (step 8); if you want to replace the token but keep the key’s setup, regenerate it (step 10).
Step 14: Confirm the result
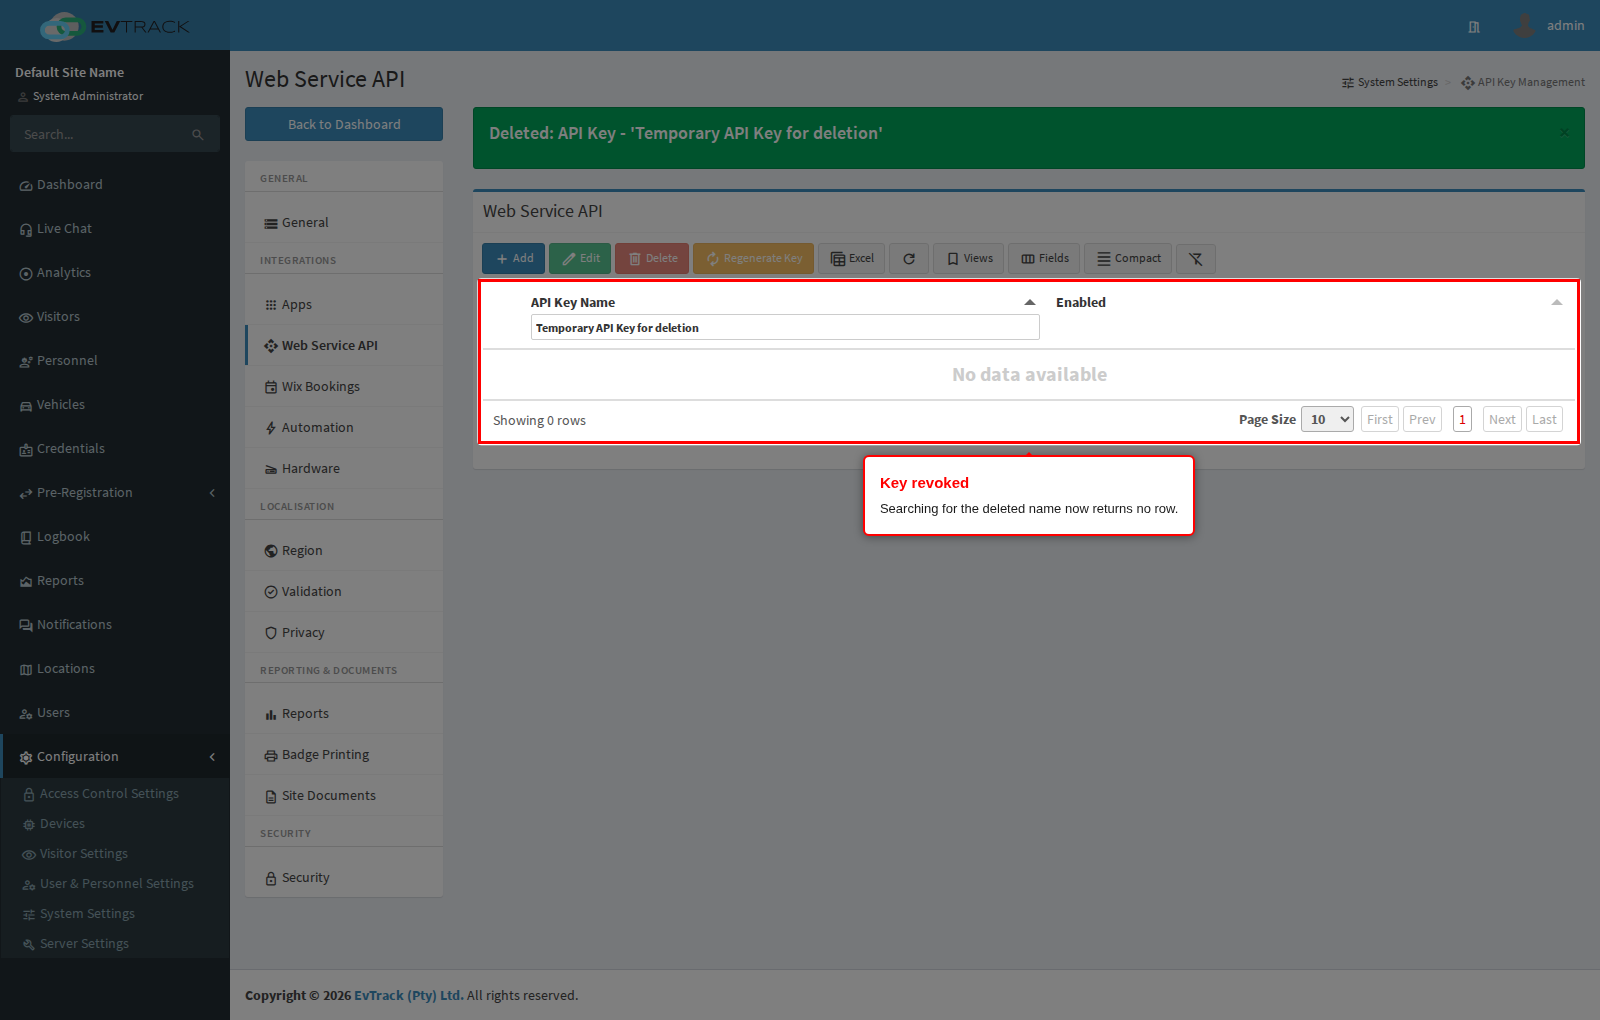
You return to the list with a success message and the key is gone: search for its name and no row is found.
5. Encryption Configuration (Optional)
EvTrack Web Service API supports AES-256 encryption for sensitive fields to ensure data security. When creating an API key, you can configure:
- Encryption Secret:
- Must be a HEX string of 64 characters (32 bytes / 256 bits).
- This serves as the AES-256 encryption key.
- Encryption IV:
- Must be a HEX string of 32 characters (16 bytes / 128 bits).
- This serves as the Initialization Vector (IV) for AES-256 encryption in CBC mode.
- Encryption Override Fields:
- (Optional) A comma-separated list of fields that entirely replaces the default encryption list.
- If provided, only these fields will be encrypted in the response and decrypted in the payload, ignoring the default fields.
- Padding Scheme:
- EvTrack Web uses
PKCS5Paddingfor AES encryption.
- EvTrack Web uses
- Example Java Snippet:
The following Java snippet demonstrates encrypting and decrypting sensitive fields using AES-256:
Encryption:
Cipher cipher = Cipher.getInstance("AES/CBC/PKCS5Padding");
SecretKeySpec secretKey = new SecretKeySpec(Hex.decodeHex(encryptionKey), "AES");
IvParameterSpec ivSpec = new IvParameterSpec(Hex.decodeHex(encryptionIV));
cipher.init(Cipher.ENCRYPT_MODE, secretKey, ivSpec);

byte[] ciphertext = cipher.doFinal(plaintext.getBytes(StandardCharsets.UTF_8));
String encryptedData = Base64.getEncoder().encodeToString(ciphertext);
Decryption:
cipher.init(Cipher.DECRYPT_MODE, secretKey, ivSpec);
byte[] decodedData = Base64.getDecoder().decode(encryptedData);
String decryptedData = new String(cipher.doFinal(decodedData), StandardCharsets.UTF_8);
6. Encrypted/Decrypted Fields
The following fields in the request and response payloads will be automatically encrypted and decrypted if AES-256 encryption is configured:
// Personal details
                    "initials",
                    "name",
                    "surname",
                    "firstName",
                    "middleName",
                    "lastName",
                    "identityNumber",
                    "reason",
                    "nationality",
                    "countryOfIssue",

                    // Images
                    "thumbnail",
                    "photo",

                    // Contact information
                    "email",
                    "mobile",
                    "homeNumber",
                    "officeNumber",
                    "mobileNumber",
                    "telMobile",
                    "unitAddress",

                    // Vehicle information
                    "vehiclePlateNumber",

                    // Access code
                    "accessCode",

                    // QR code details
                    "qrCodeUrl",
                    "qrCodeBase64",

                    // Invitation details
                    "inviteLink",
                    "inviteTextMessage",

                    // Key contact details
                    "keyContactName",
                    "keyContactNumber",

                    // Company details
                    "company",
                    "organisation",
                    "department",
                    "group",
                    "location",

                    // Misc Data Fields
                    "label",
                    "value"
These fields ensure that sensitive data is secure when transmitted via the API.
7. Replacing a key: which action to use
| You want to | Use | What happens to the token |
|---|---|---|
| Suspend an application’s access temporarily | Edit, clear Enable (step 8) | Unchanged - ticking Enable again restores access |
| Narrow or widen what an application may do | Edit, change the permissions (step 8) | Unchanged |
| Rotate a token, or replace a leaked one | Regenerate Key (step 10) | Replaced immediately, shown once |
| Retire an integration for good | Delete (step 12) | Revoked permanently, cannot be restored |
Only deletion loses the key’s setup. If you delete a key and create a replacement, remember to grant its permissions again and paste the new token into the consuming application.