The watchlist screens everyone entering the system against lists of flagged identities - banned contractors, barred former staff, security alerts. This page covers the full watchlist lifecycle and shows how a match surfaces.
Before you start: you need an account with watchlist administration rights, and the identity details (name, ID or passport number) of the people to flag.
Step 1: Open the Watchlist
In the left sidebar click Visitors, then click the Watchlist tab at the top right of the page. The watchlist page opens.
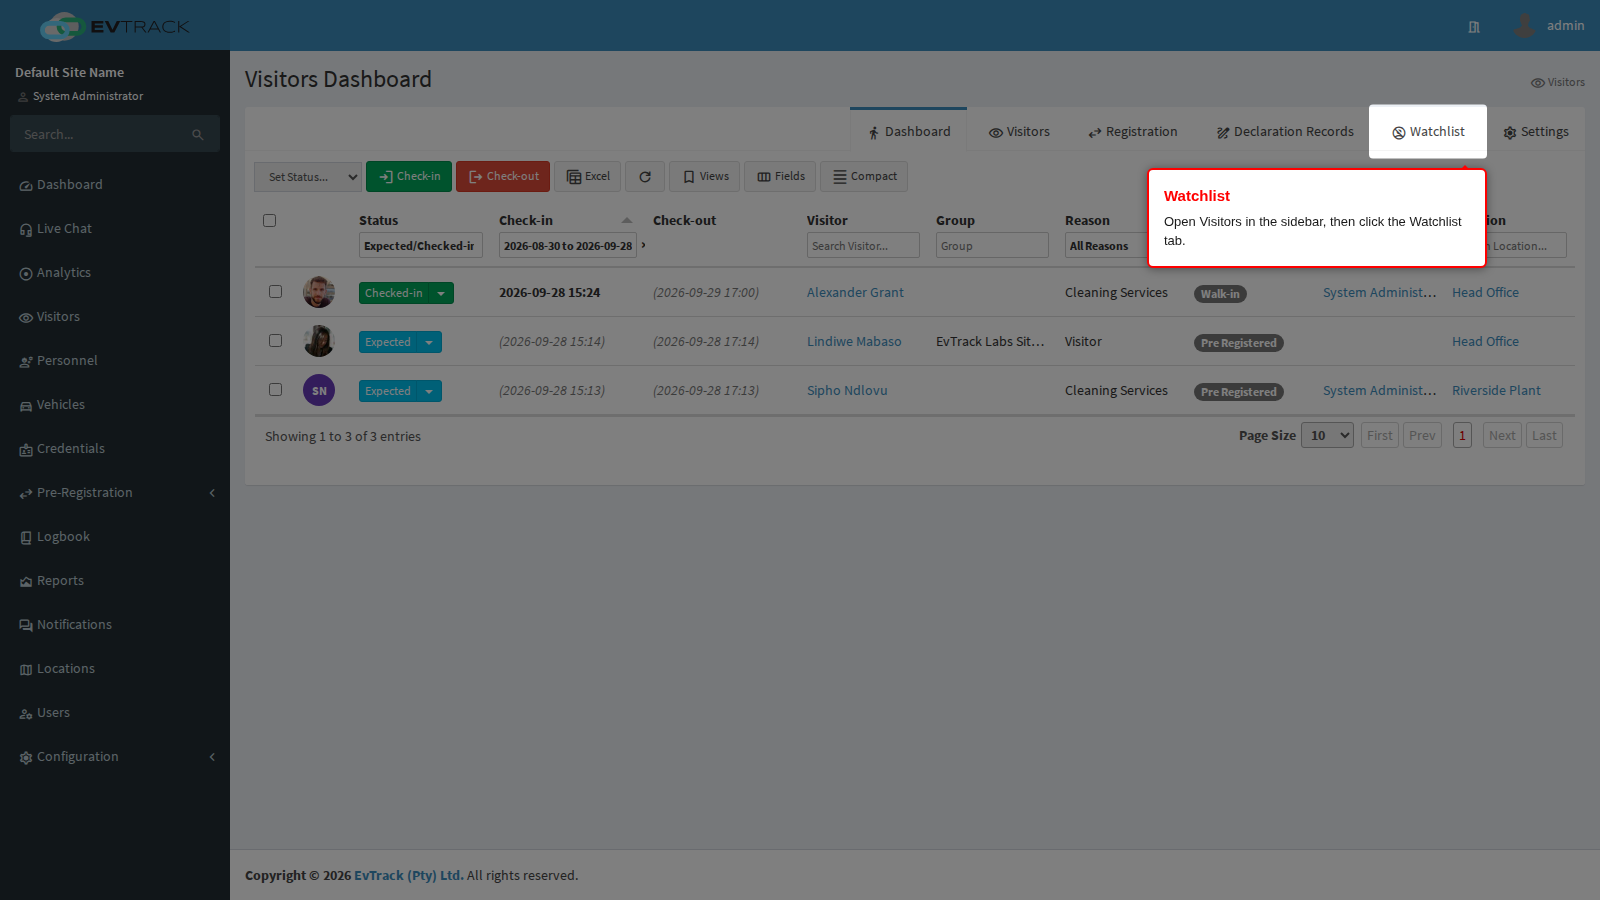
Step 2: Review your watchlists
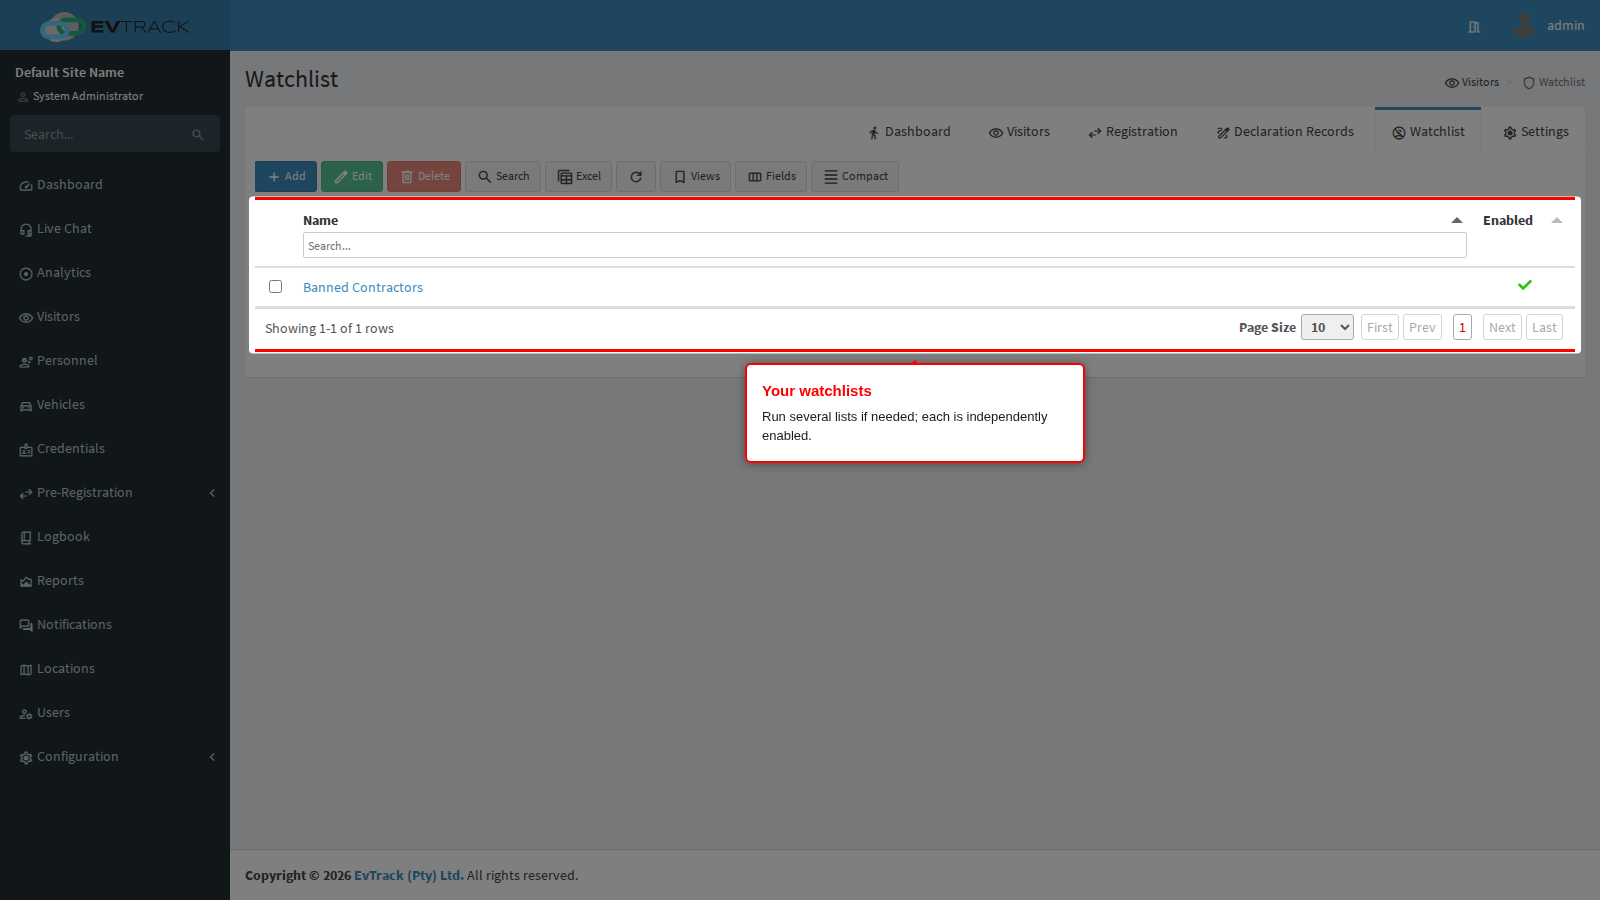
The table lists your watchlists - you can run several (for example one per site or category), each independently enabled.
Step 3: Click Add
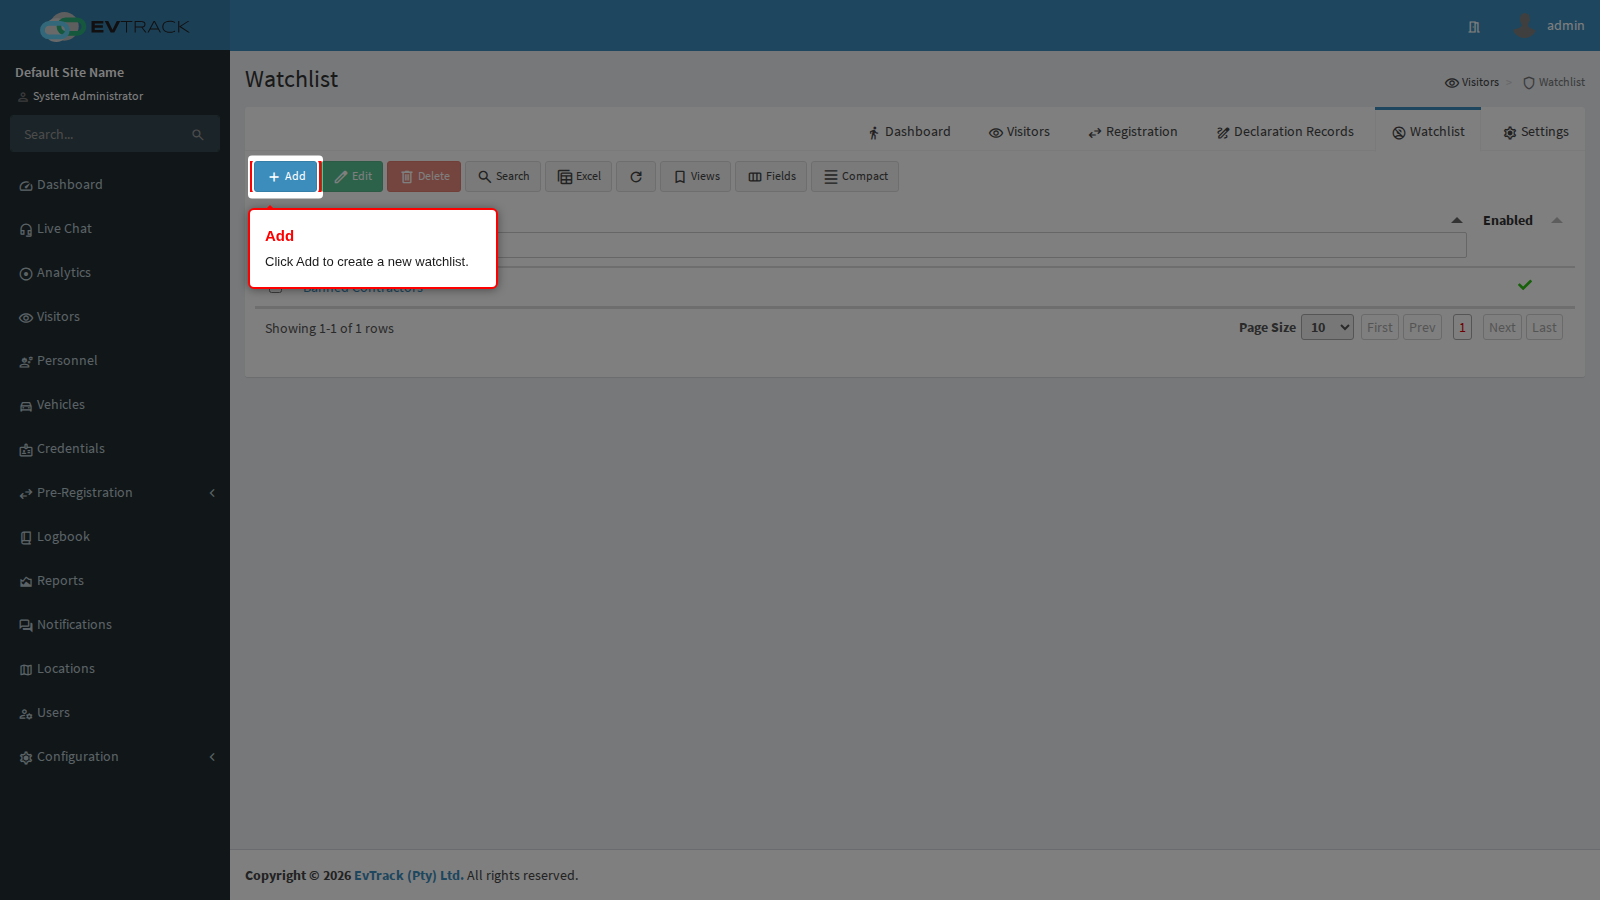
Click the Add button above the table. The new watchlist form opens.
Step 4: Create the watchlist
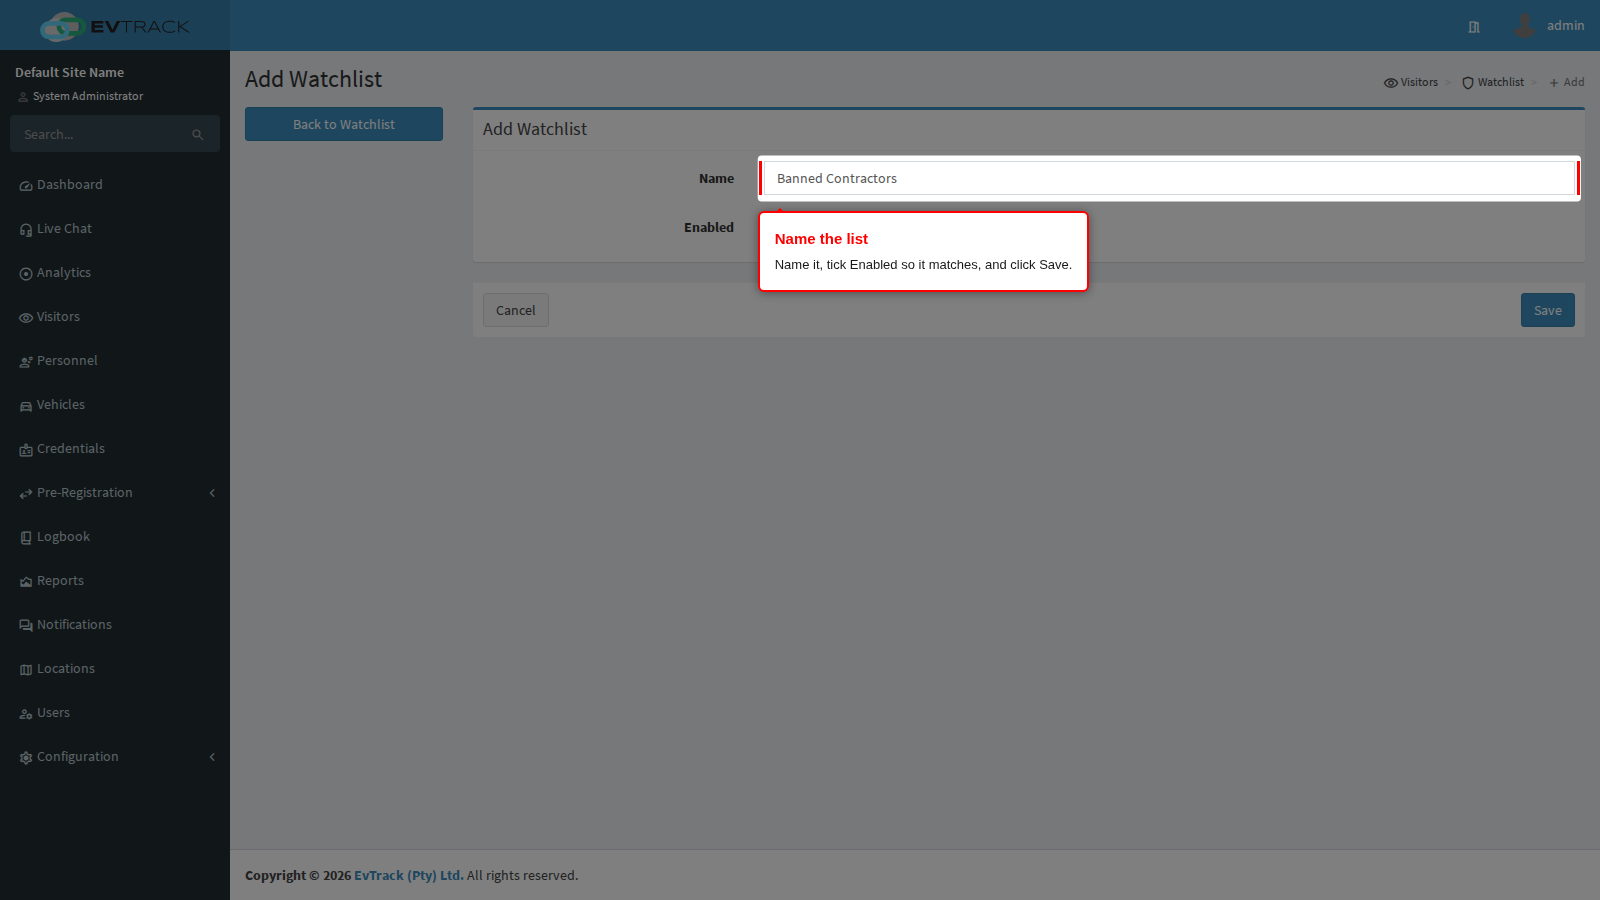
Give the list a name, tick Enabled, and click Save. A disabled list keeps its entries but stops matching. You are returned to the watchlist with a success message.
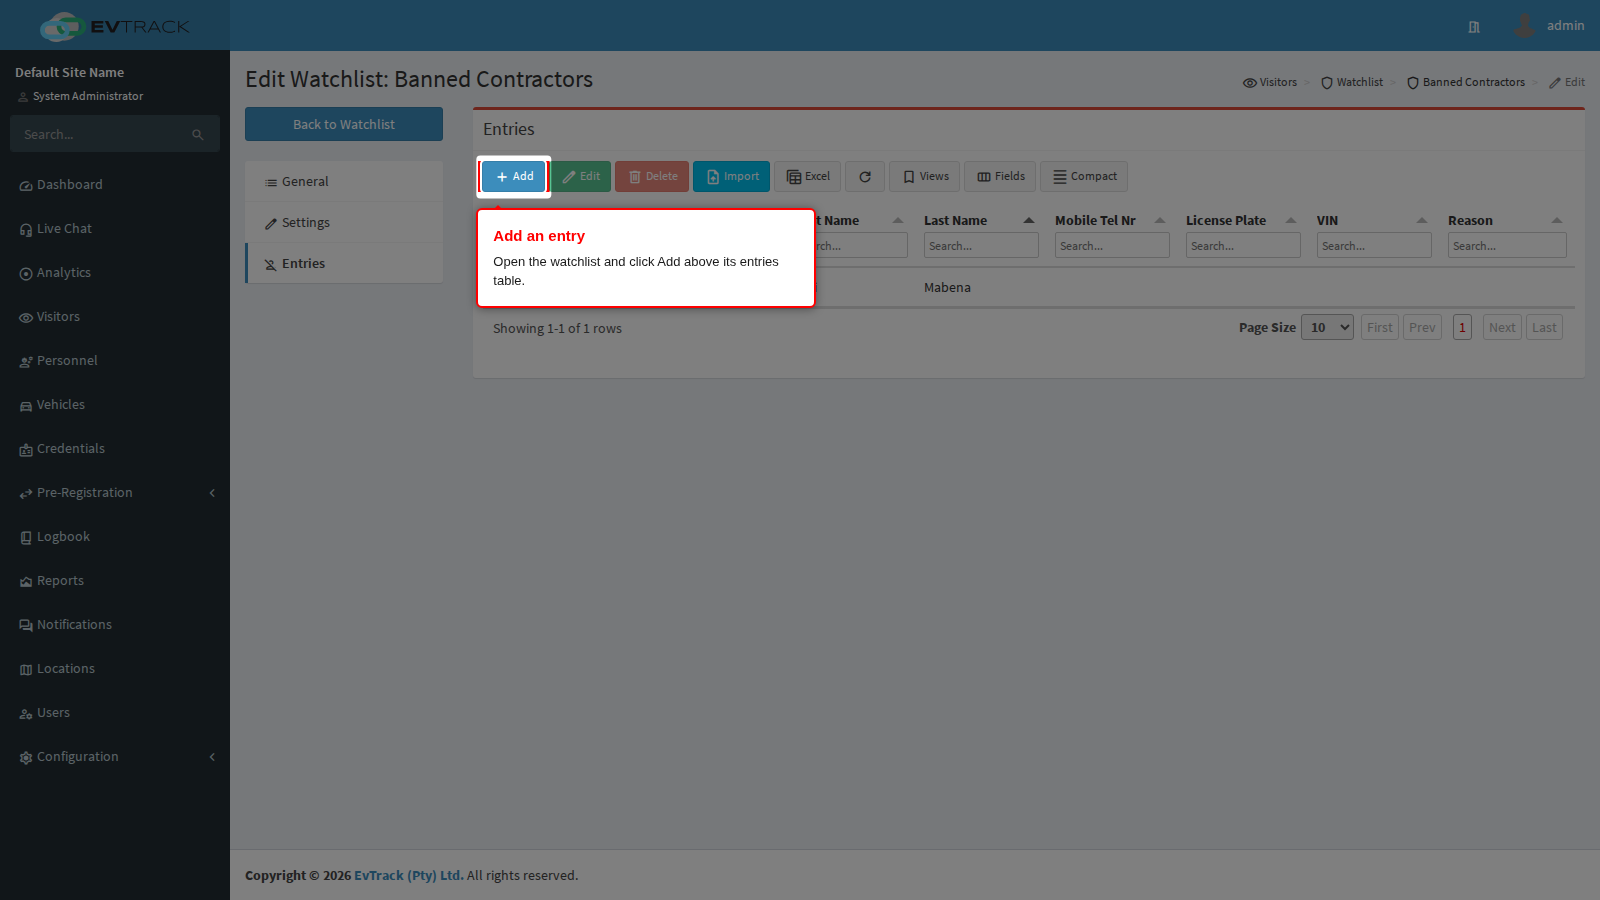
Step 5: Open the entries table
Open the watchlist from the list (click its name, or select its row and click Edit). Its entries table shows every flagged identity; click Add above the table to add one. Entries can also be bulk-loaded from a spreadsheet with the Import button (see the import wizard).
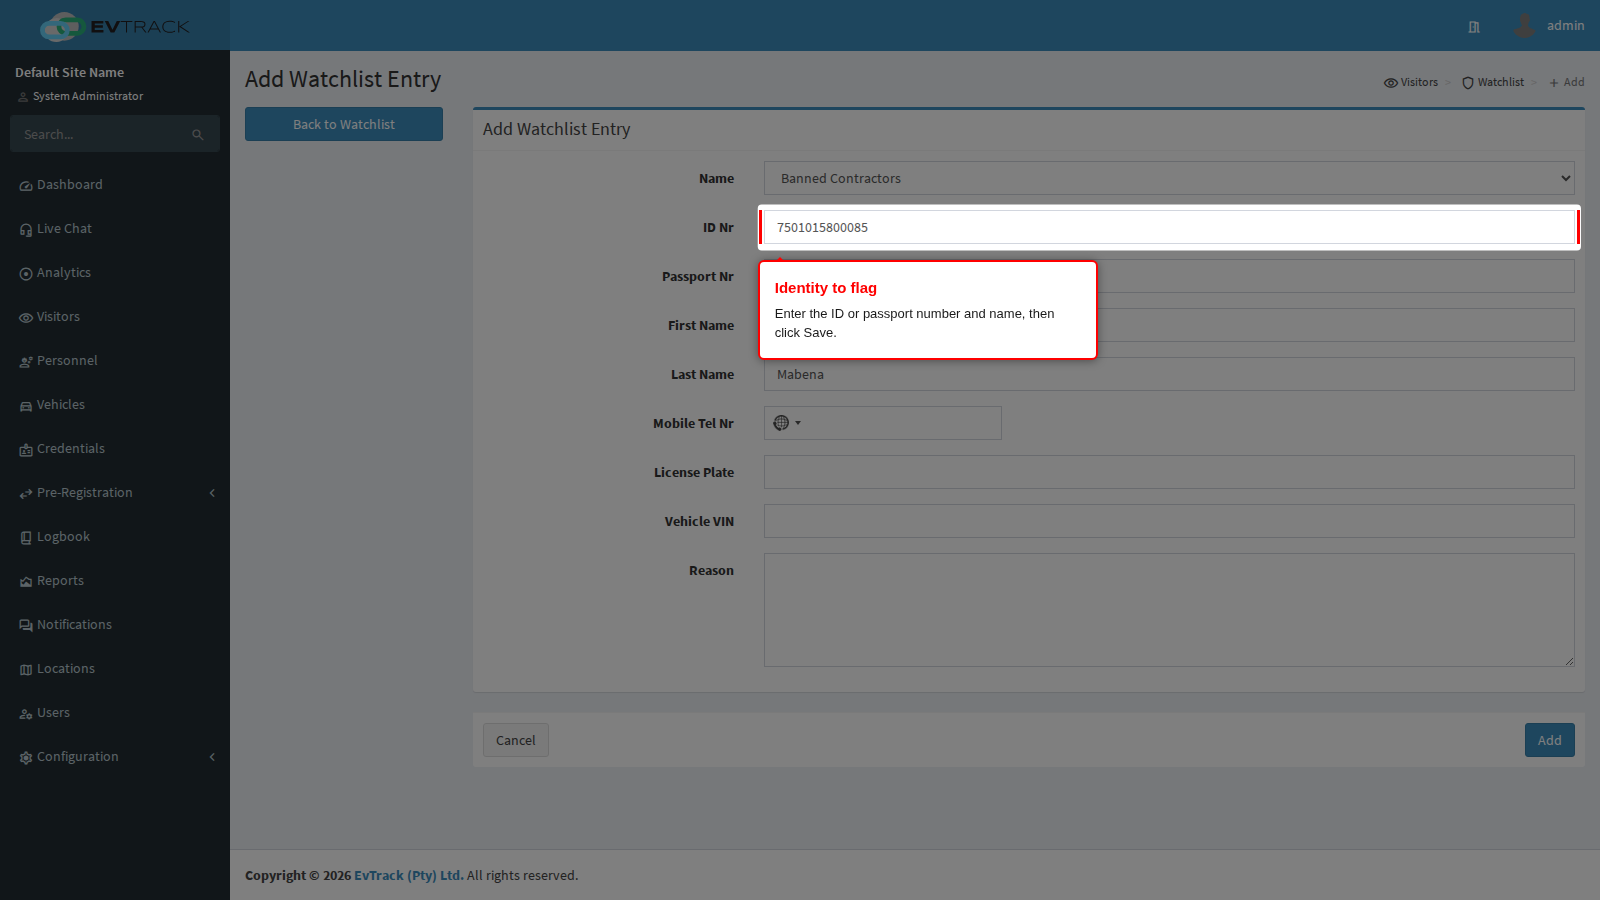
Step 6: Add the entry
Each entry is an identity to flag - enter the first name, last name and ID/passport number, then click Save.
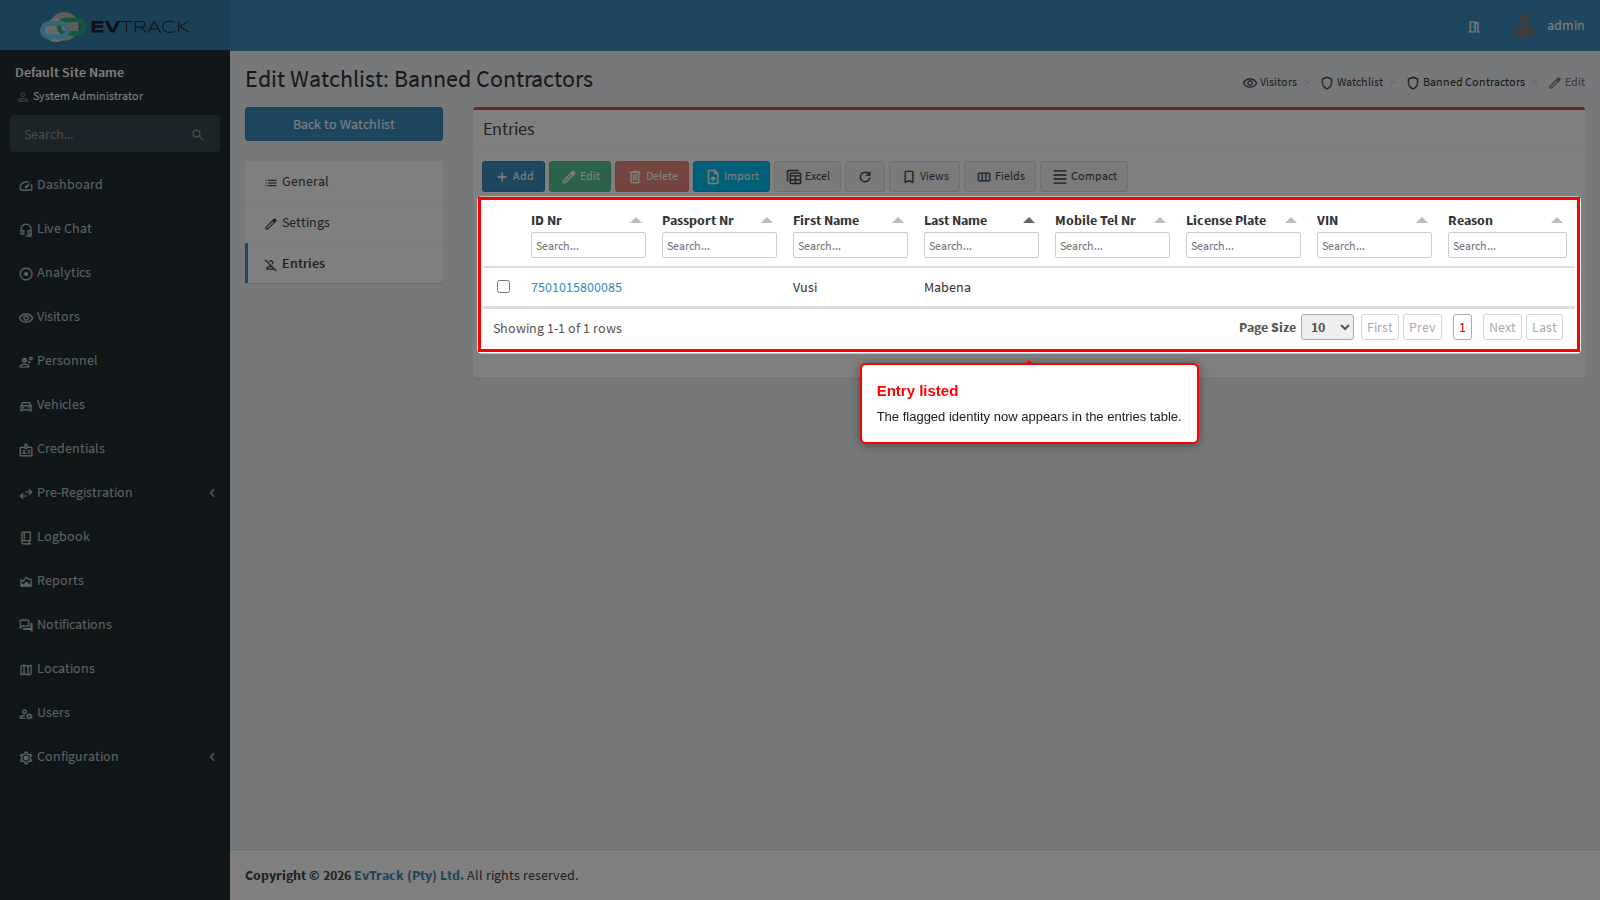
Step 7: Confirm the entry
Back on the watchlist, the entry appears in the entries table. Matching is live from this moment.
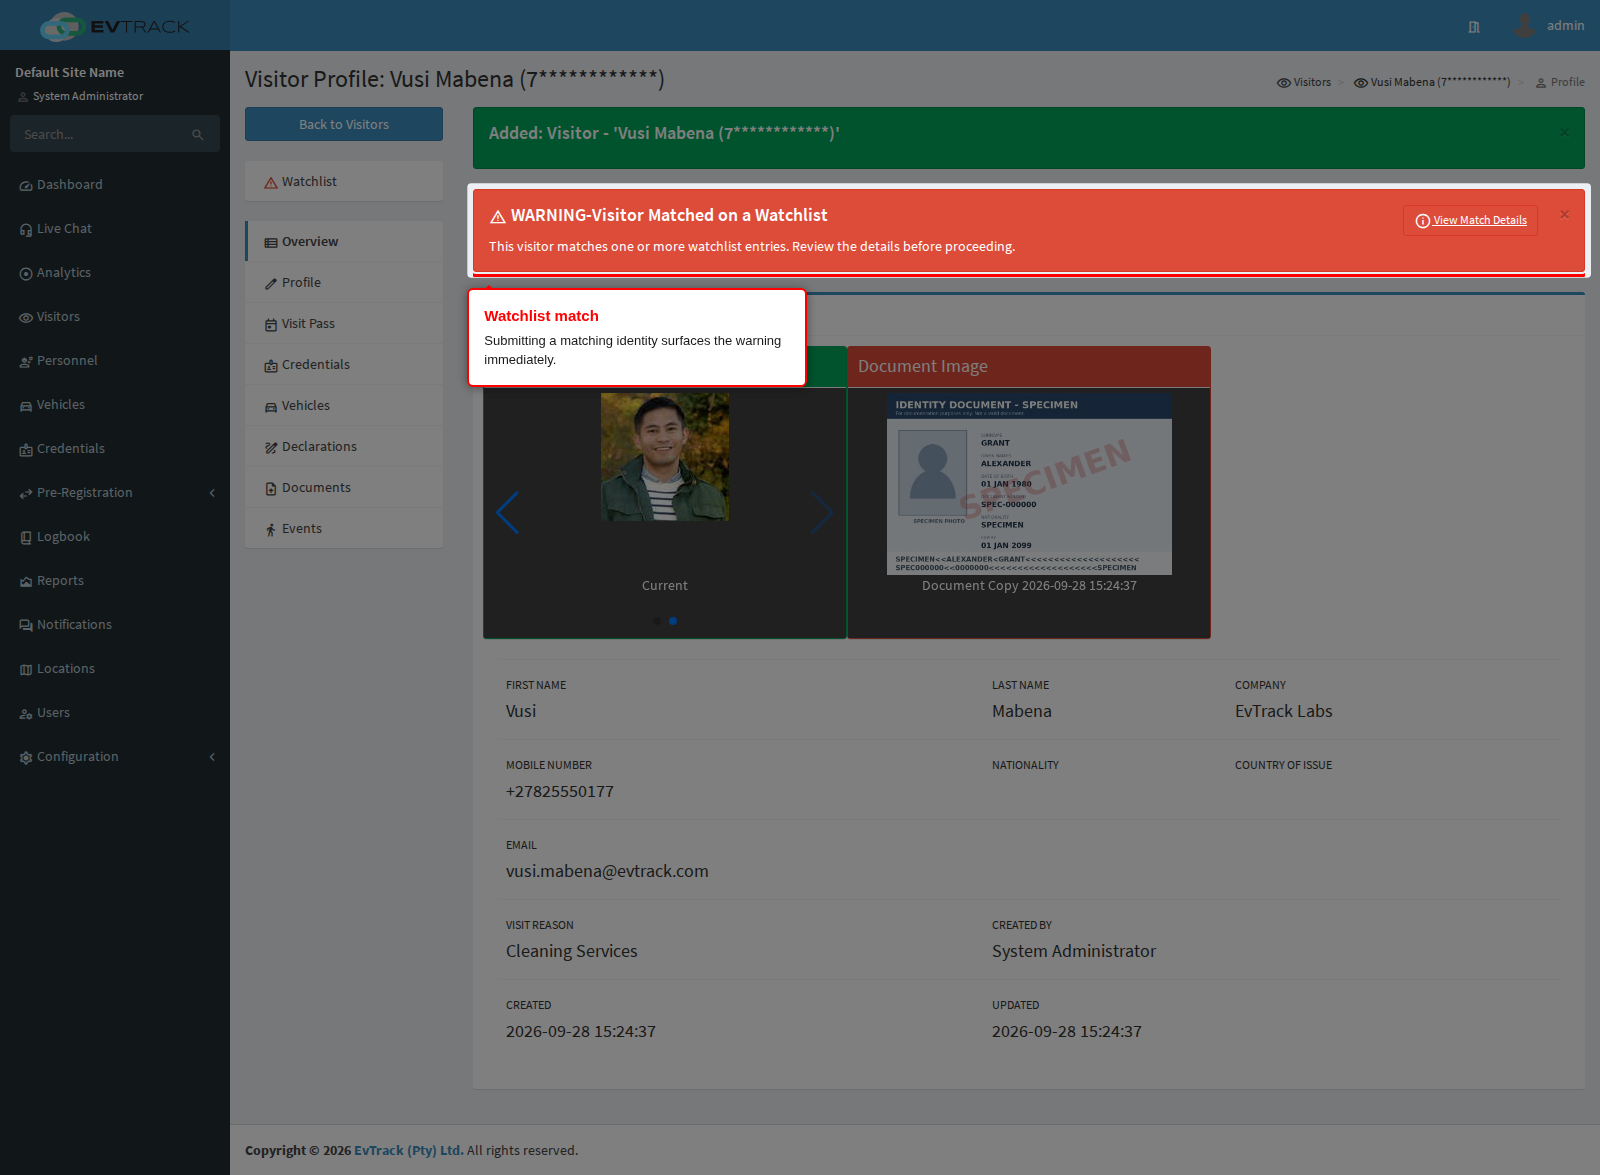
Step 8: How matches surface
Screening runs wherever identities enter the system. Adding a visitor whose details match an entry immediately shows the watchlist warning on their record:
Step 9: Change the watchlist itself
Open the watchlist again from the list and click Settings in the panel menu on the left. This is the only panel that changes the list itself, and it holds two things: the Watchlist Name and the Enabled tick. General, the panel it opens on, is a read-only summary showing the name, the date it was created and whether it is enabled.
Clearing Enabled is the safe alternative to deleting: the list keeps every entry but stops screening, so you can switch it back on later without re-loading anything. Change what you need and click Save.
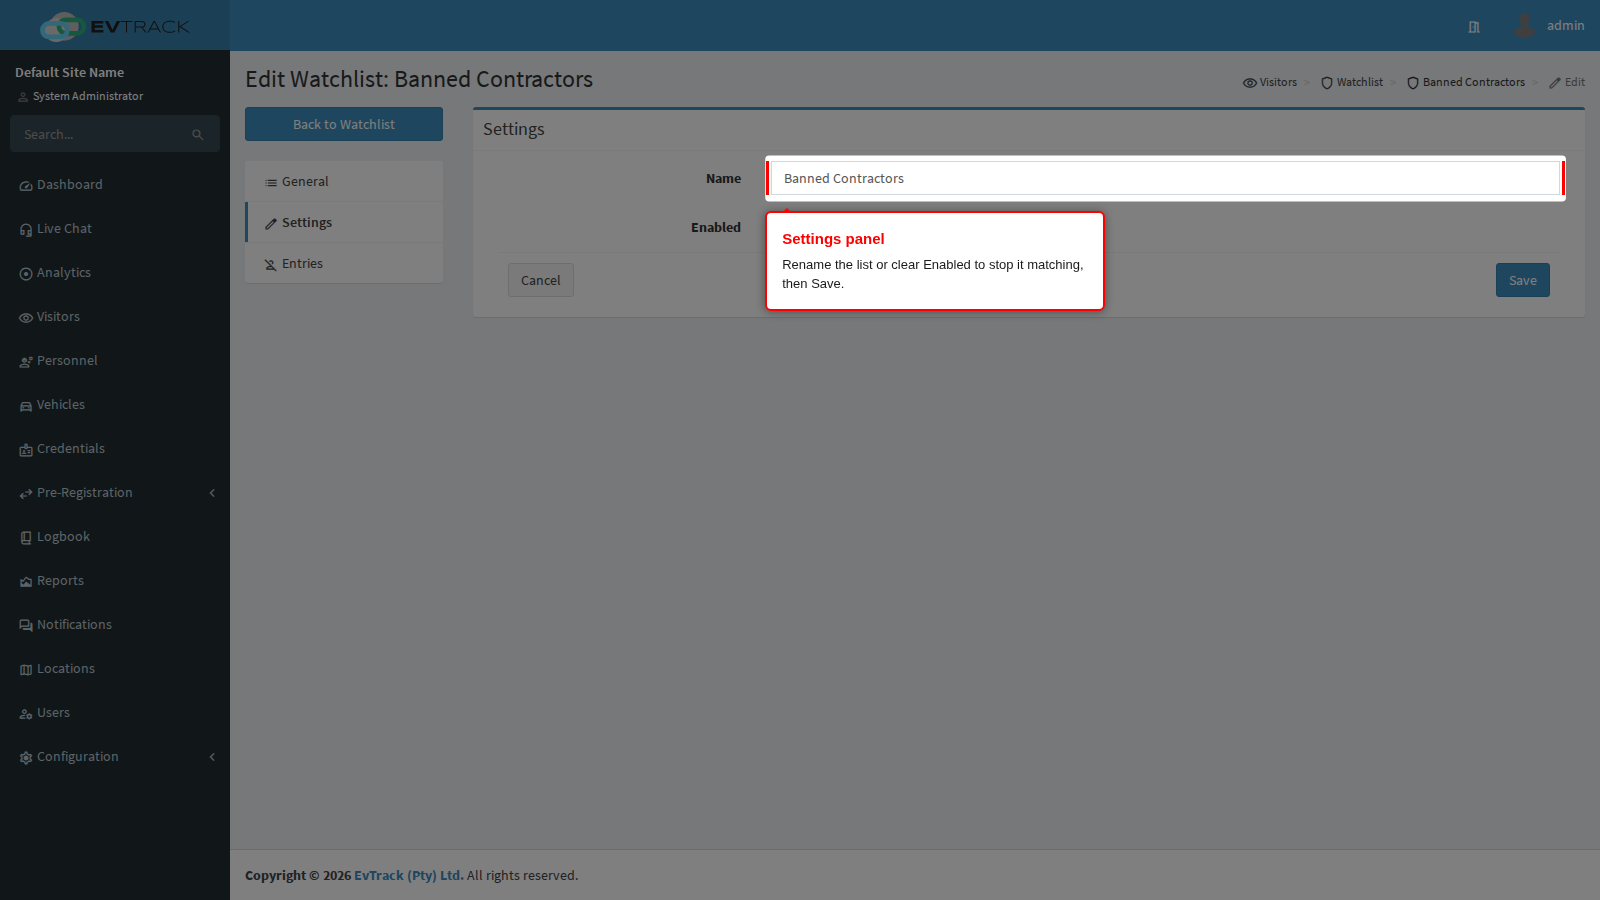
Step 10: Select an entry to edit it
On the Entries panel, click the row of the entry you want to change. The toolbar Edit and Delete buttons above the entries table remain greyed out until exactly one entry row is selected. Click Edit (clicking the entry’s ID number in the table does the same thing).
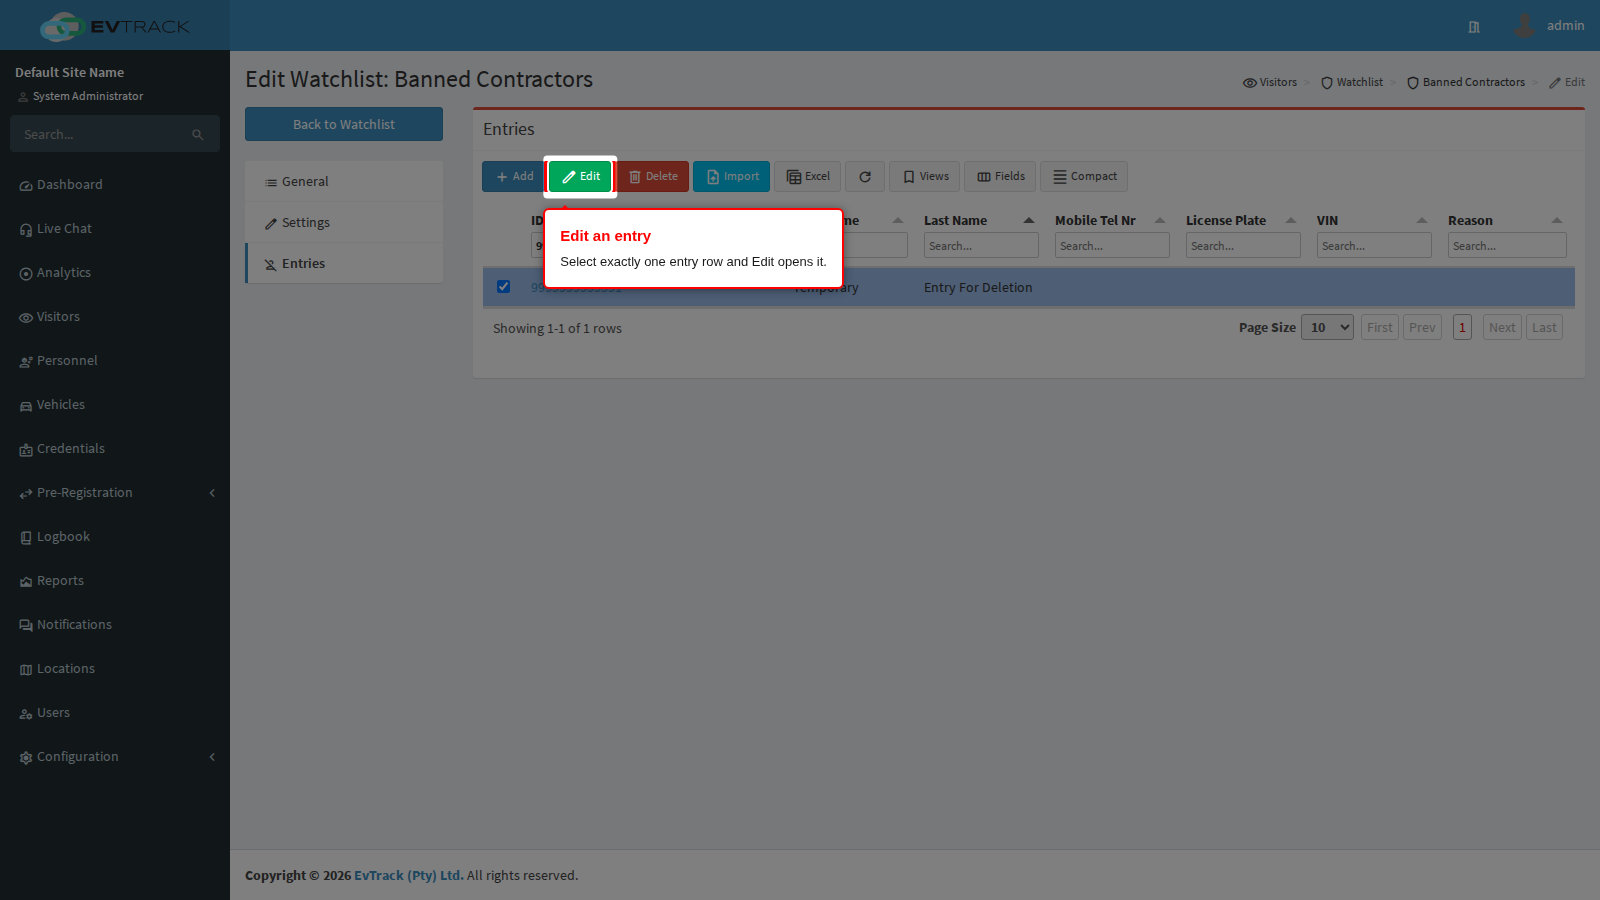
Step 11: Change the entry
The entry form holds everything screening compares against: ID Number, Passport Number, First Name, Last Name, Mobile, Vehicle License Plate, VIN and a free-text Reason. Correct a mistyped ID number here, or add the plate of a vehicle the same person now uses.
Change what you need and click Save. Screening uses the new details from that moment.
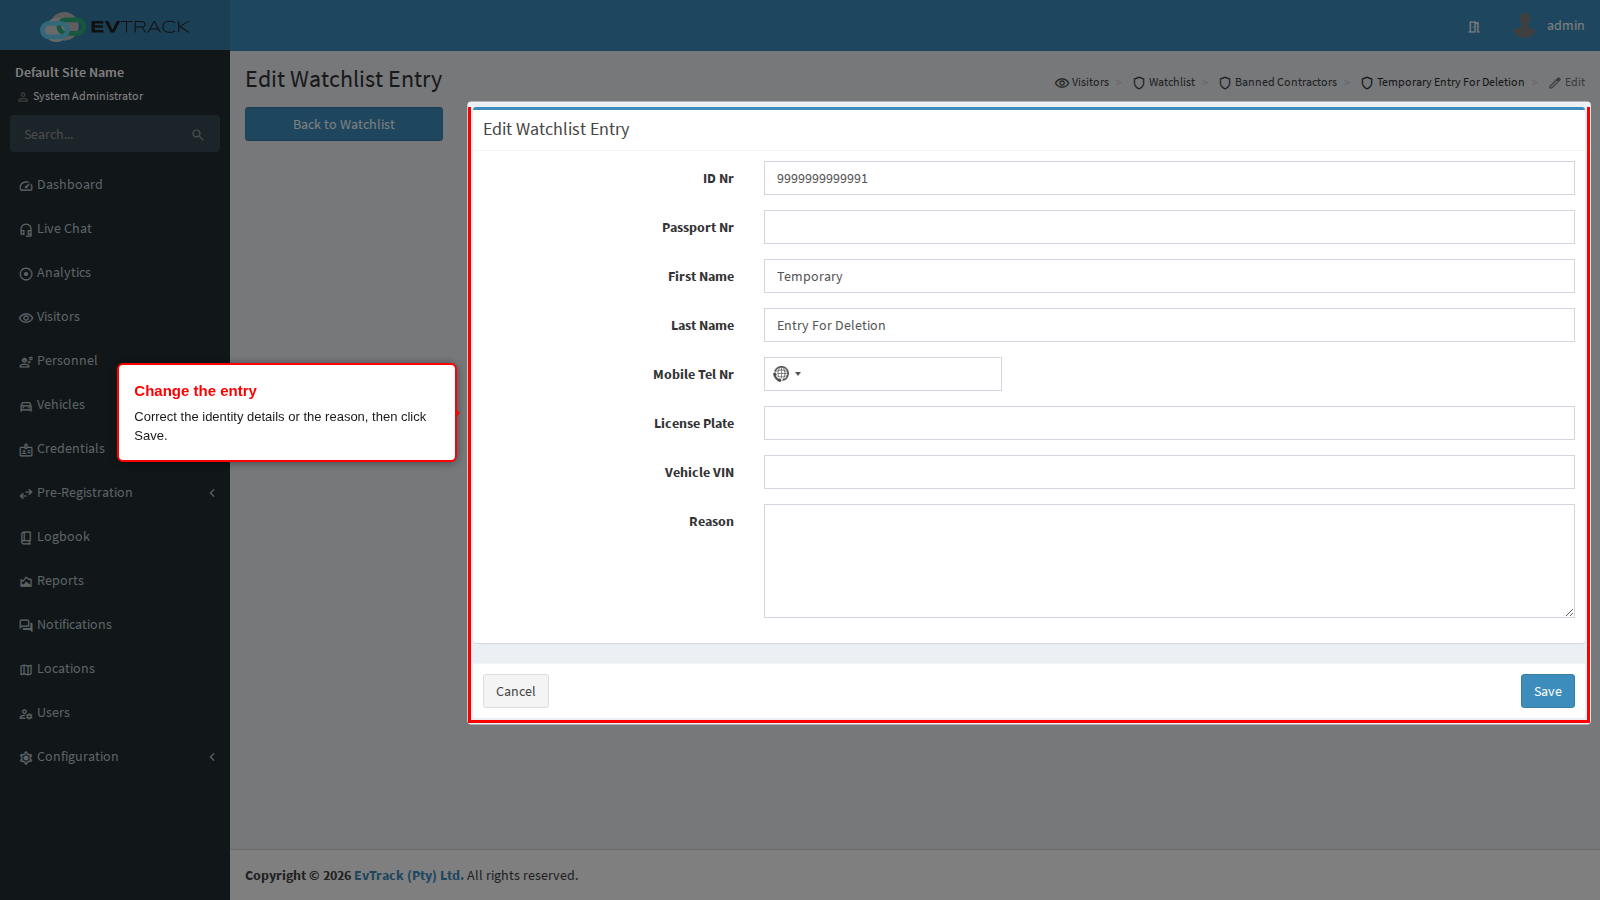
Step 12: Select an entry to delete it
To unflag an identity, select its row on the Entries panel and click Delete. Like Edit, the button only becomes active with exactly one entry row selected.
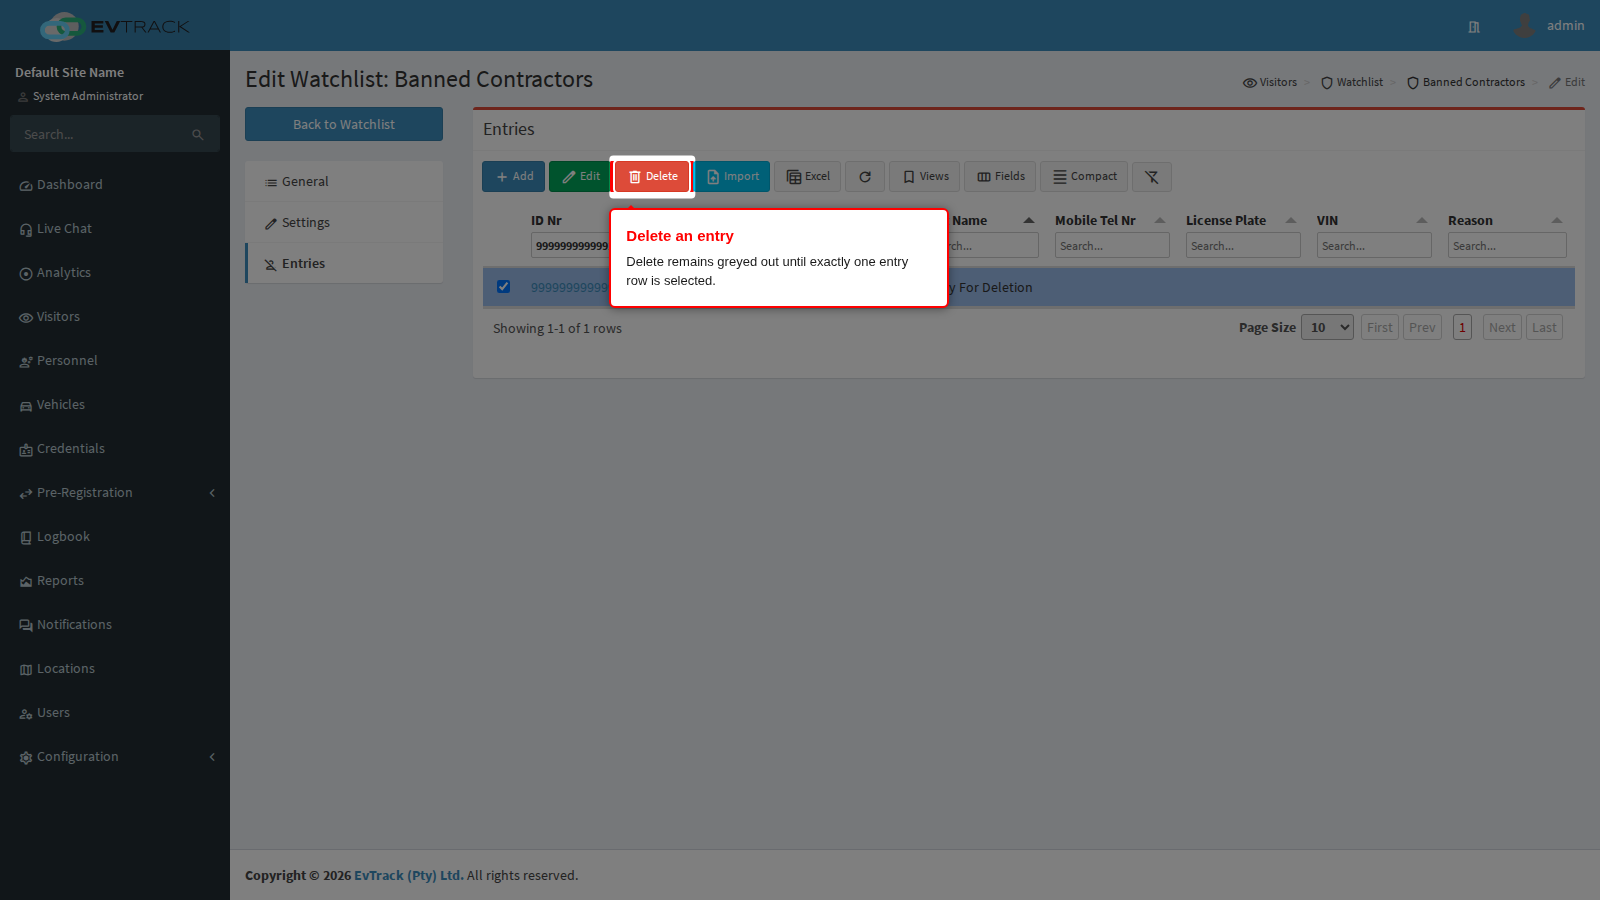
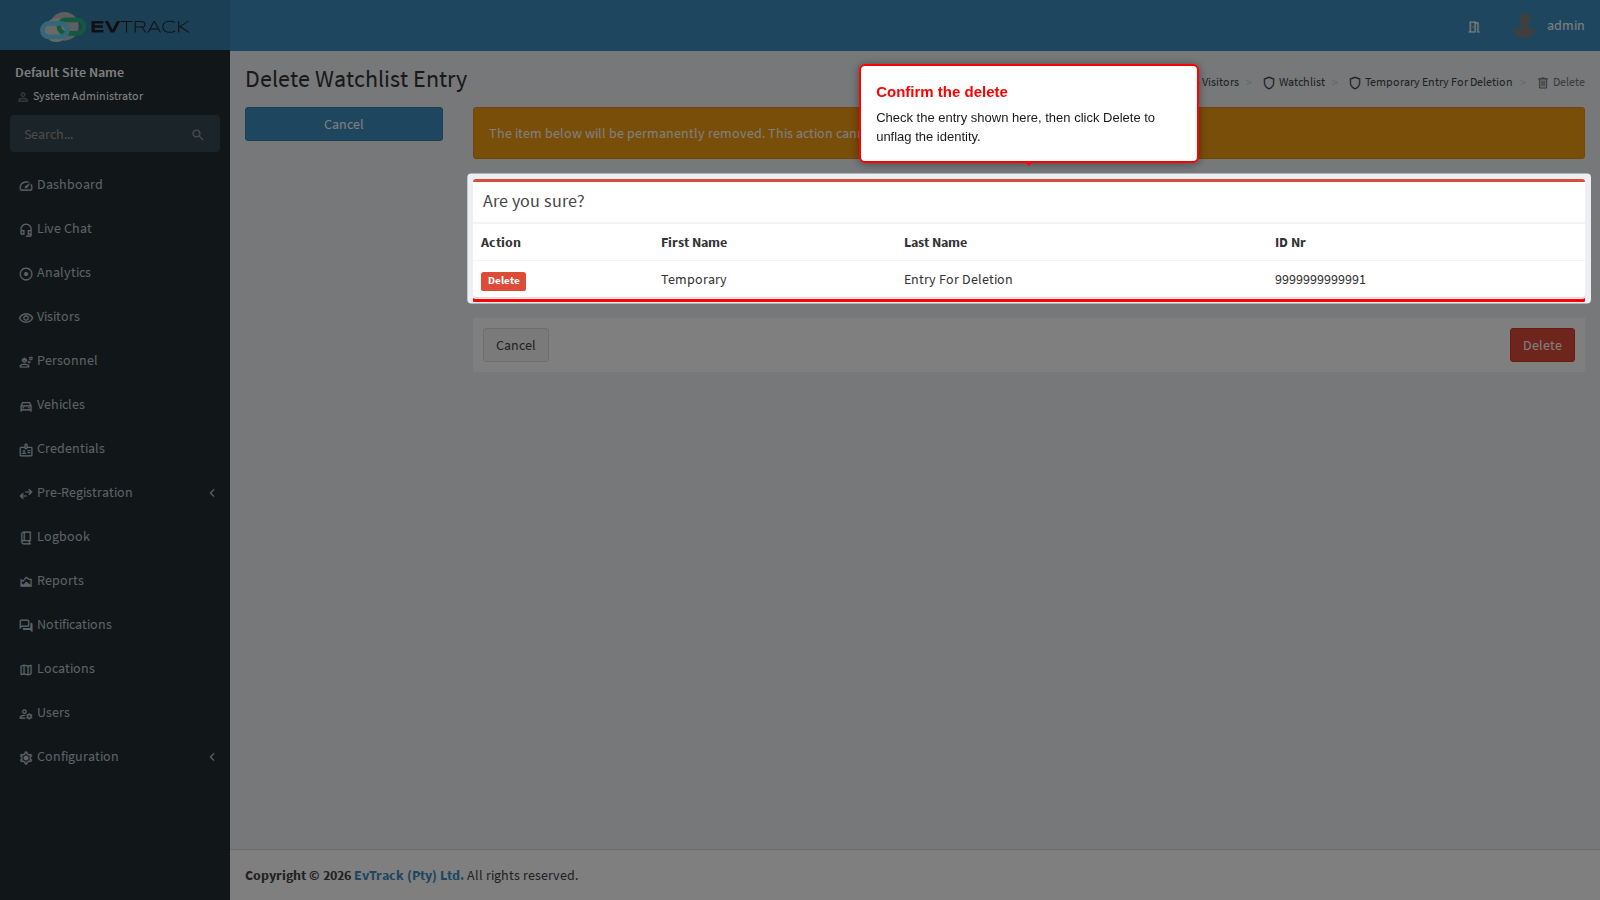
Step 13: Confirm the entry deletion
A confirmation page opens showing the entry so you can check you picked the right one. Click Delete to remove it, or Cancel to leave it alone. Deletion is permanent - there is no undo, and the entry has to be re-added by hand or re-imported. From that moment the identity is no longer flagged and passes screening normally. Nothing blocks an entry from being deleted.
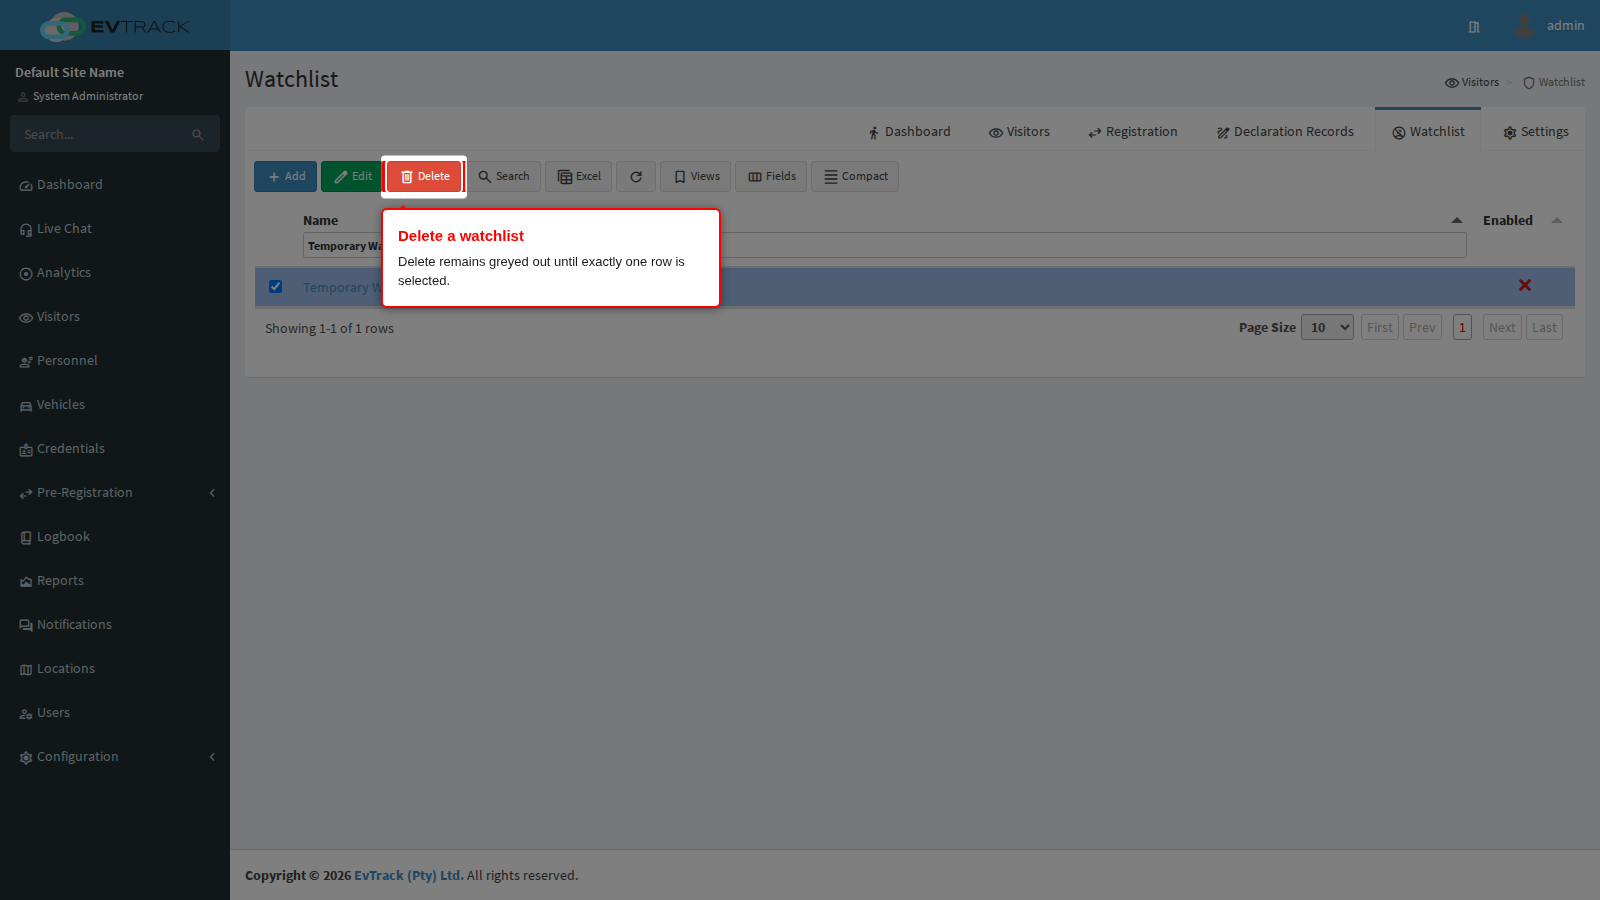
Step 14: Select a watchlist to delete it
To remove a whole watchlist, go back to the watchlist table, select its row and click Delete. Like Edit, the button only becomes active with exactly one row selected. In the example below a disposable list, “Temporary Watchlist for deletion”, is being removed.
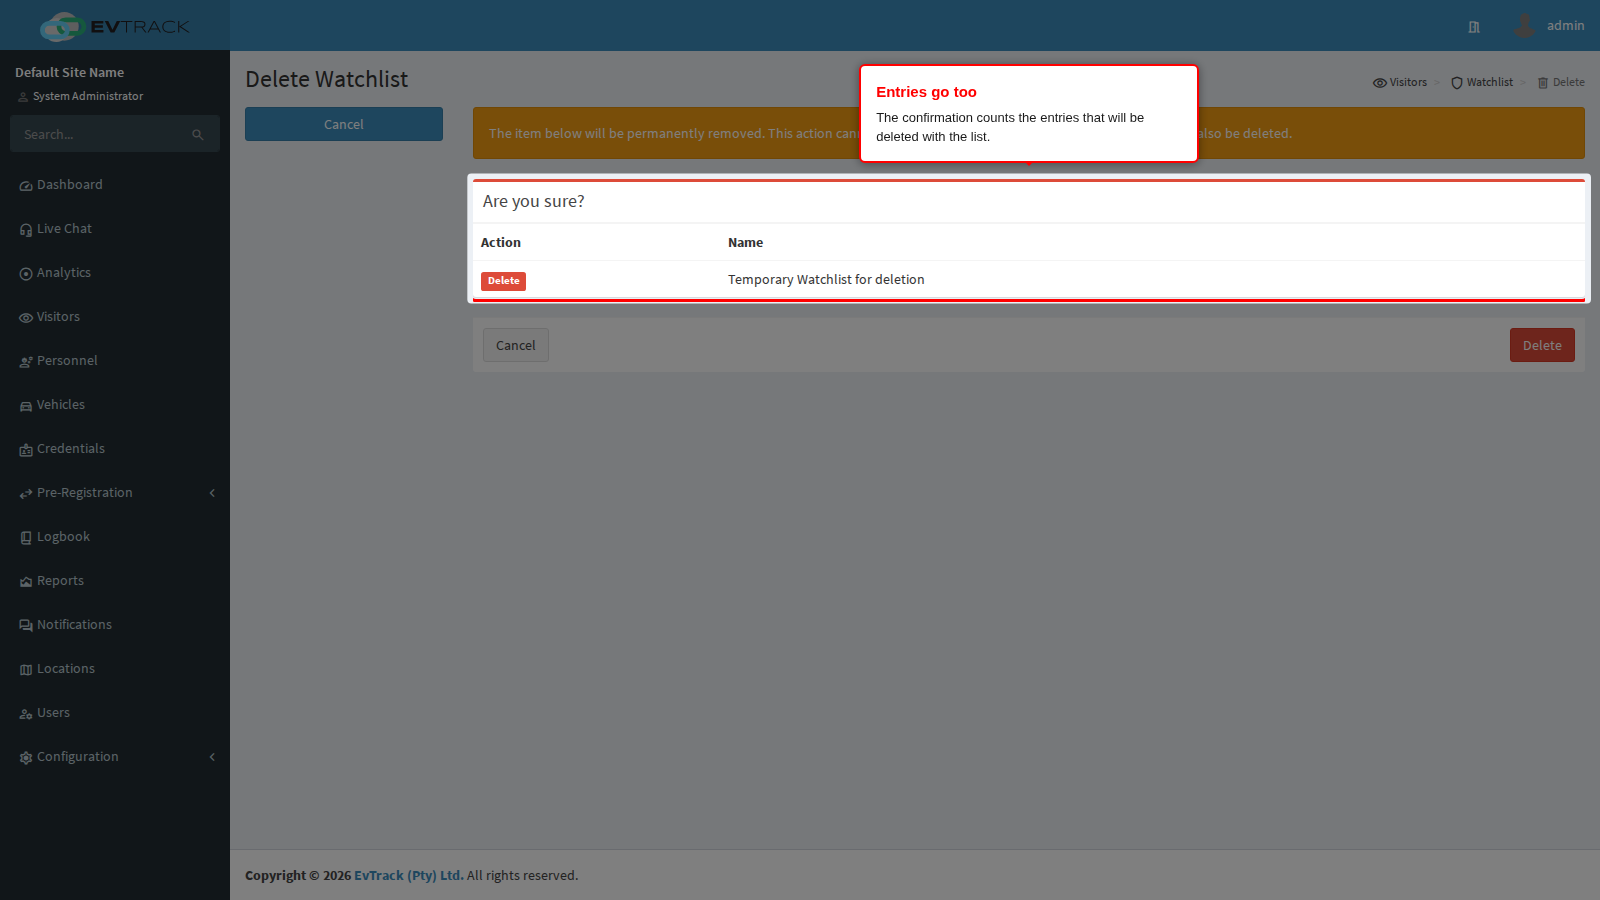
Step 15: Confirm the watchlist deletion
A confirmation page opens showing the list’s reference and name. If the list still holds entries, it also warns how many entries will be deleted with it - deleting a list deletes every identity on it, not just the list.
Click Delete to remove it, or Cancel (or Back to Watchlist) to leave it alone. Deletion is permanent - there is no undo and no recycle bin. Nothing blocks a watchlist from being deleted, so if you may need the entries again, clear Enabled on the Settings panel instead (step 9) or export the entries first.
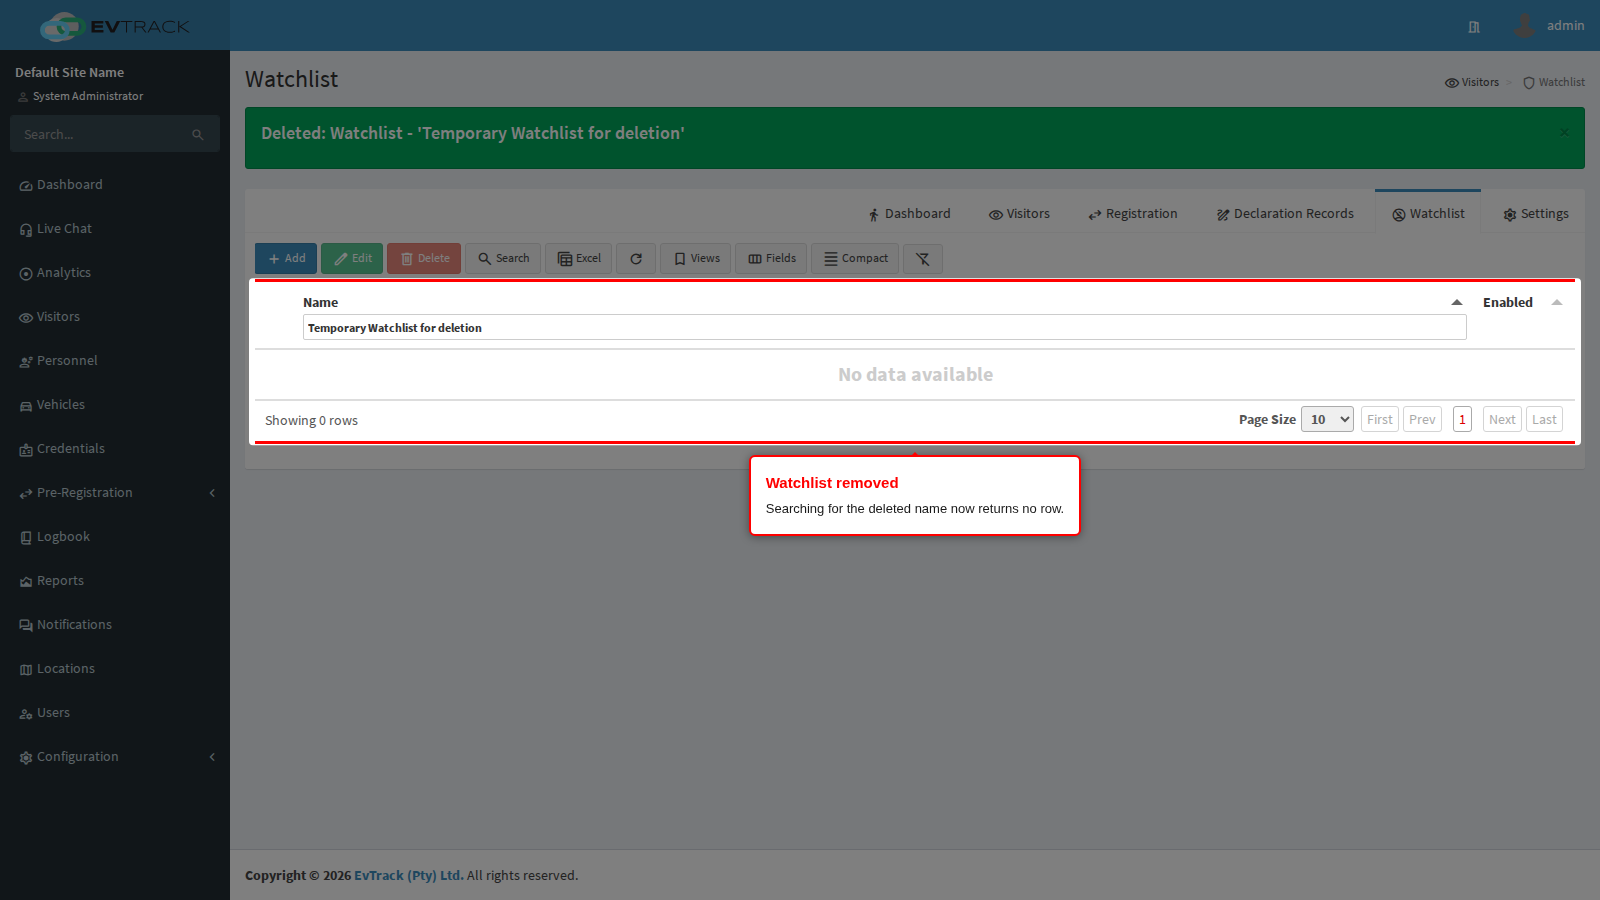
Step 16: Confirm the result
You return to the table with a success message and the list is gone: search for its name and no row is found. The identities it held are no longer screened by any other list.
Screening across the system
The same screening applies across entity types:
- Visitors - on add, on self-registration and when processing registration requests (including each group member in a group registration)
- Personnel and users - person and user profiles carry an Add to Watchlist quick action, and their identities are screened the same way
- At the checkpoint - matched identities are highlighted to operators during processing so site policy can be applied before access is granted
A match never blocks automatically - it flags the record and the operator decides, so false positives (a common name) can be waved through deliberately. Match details show which list and entry matched.