Integration & Installation Manual
EvTrack Visitor Management with the Gallagher Access Control System, for temporary visitor and contractor access by face recognition, QR code or one-time PIN.
1. Introduction
EvTrack’s Gallagher integration connects EvTrack’s visitor management system to Gallagher Command Centre, so visitor access is managed automatically inside your physical access control. It suits sites that already run Gallagher and need to control access for temporary visitors and contractors.
The EvTrack server can run in the cloud or on premise, and it communicates with the Gallagher server through Gallagher’s REST API.
When a visitor arrives, whether ad hoc or pre-registered in EvTrack, their details are captured. Ad-hoc visitors are captured at the EvTrack FrontDesk kiosk, on the EvTrack Guard handheld device or in the EvTrack web portal. EvTrack then creates their profile with credentials, start and end dates and access permissions, and sends it to the Gallagher server, where the matching cardholder, access groups and cards are created. Administrators map EvTrack access control lists to the access groups they need on the Gallagher side.
For pre-registered visitors the credentials are created before arrival and loaded onto both the EvTrack server and the Gallagher server.
2. Intended Audience
This guide is for the administrative and technical staff who connect EvTrack to Gallagher Command Centre.
3. Visitor to Access Control Workflow
- A visitor is registered or checked in, and EvTrack issues their credentials (QR code, card, face or PIN).
- EvTrack creates or updates the matching Gallagher cardholder, with one card per credential and the access groups mapped from the visitor’s access control lists.
- The visitor presents the credential at a Gallagher reader, and Command Centre grants or denies entry.
- When the visit ends or the credential is cancelled, EvTrack removes the card, and the cardholder when it has no other credentials.
4. Prerequisites
4.1 Gallagher Requirements
EvTrack supports Gallagher Command Centre vEL9.0.x and later.
4.2 Gallagher Licensing
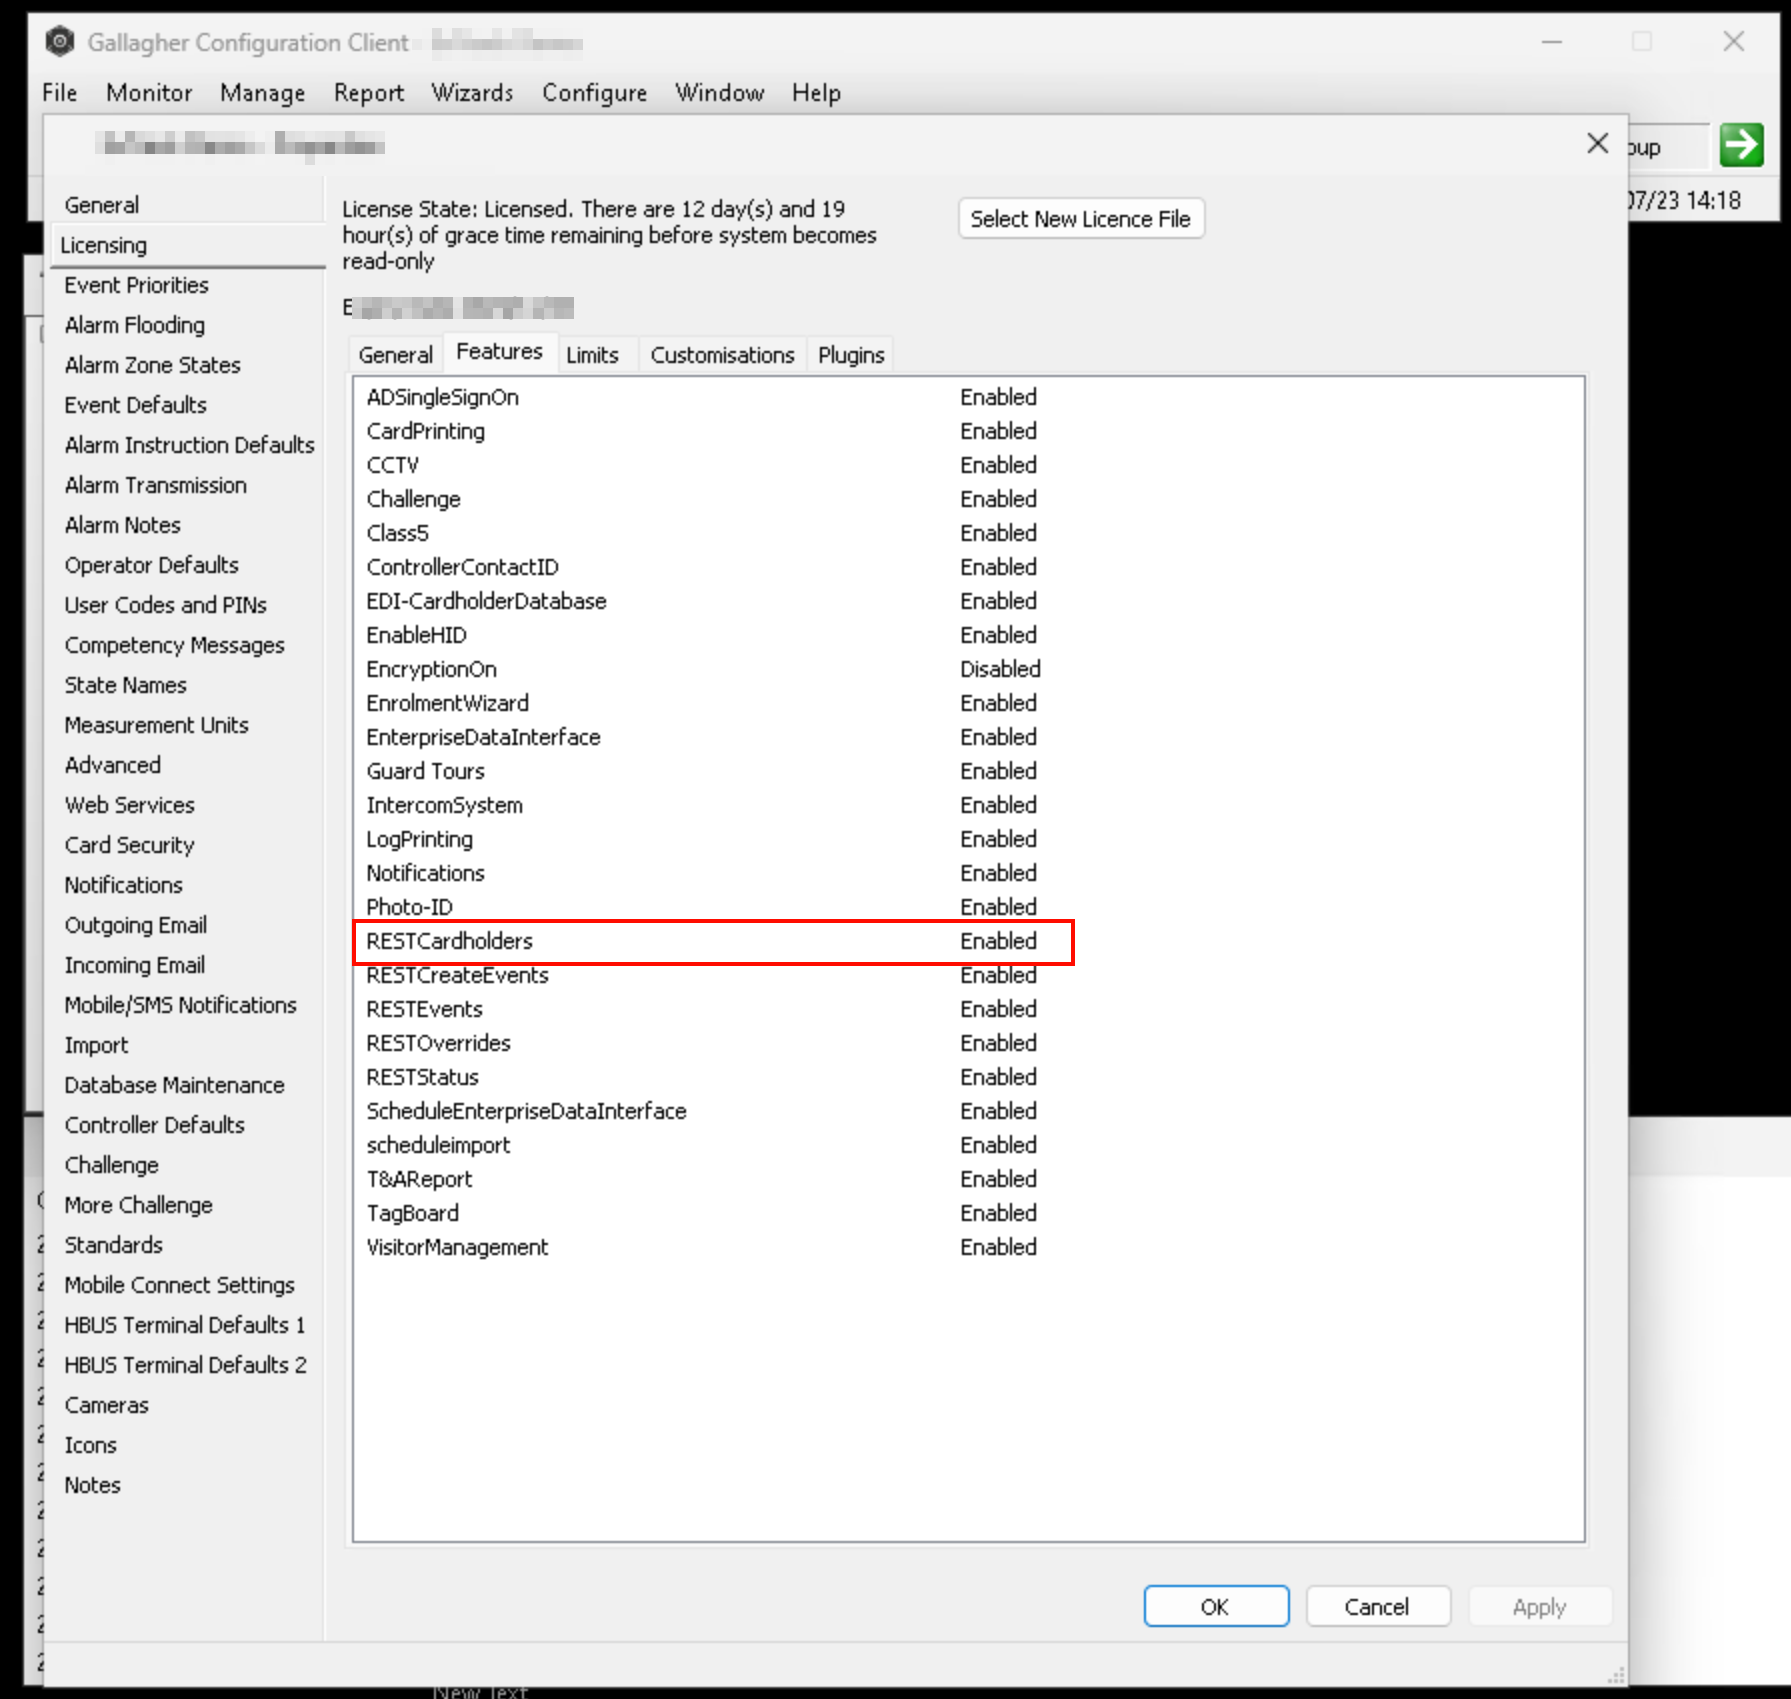
1. Confirm that the licence includes the RESTCardholders feature. If it does not, ask Gallagher Sales to add it to the licence.
5. Gallagher Command Centre Configuration
5.1 Configure the REST API Operator Group
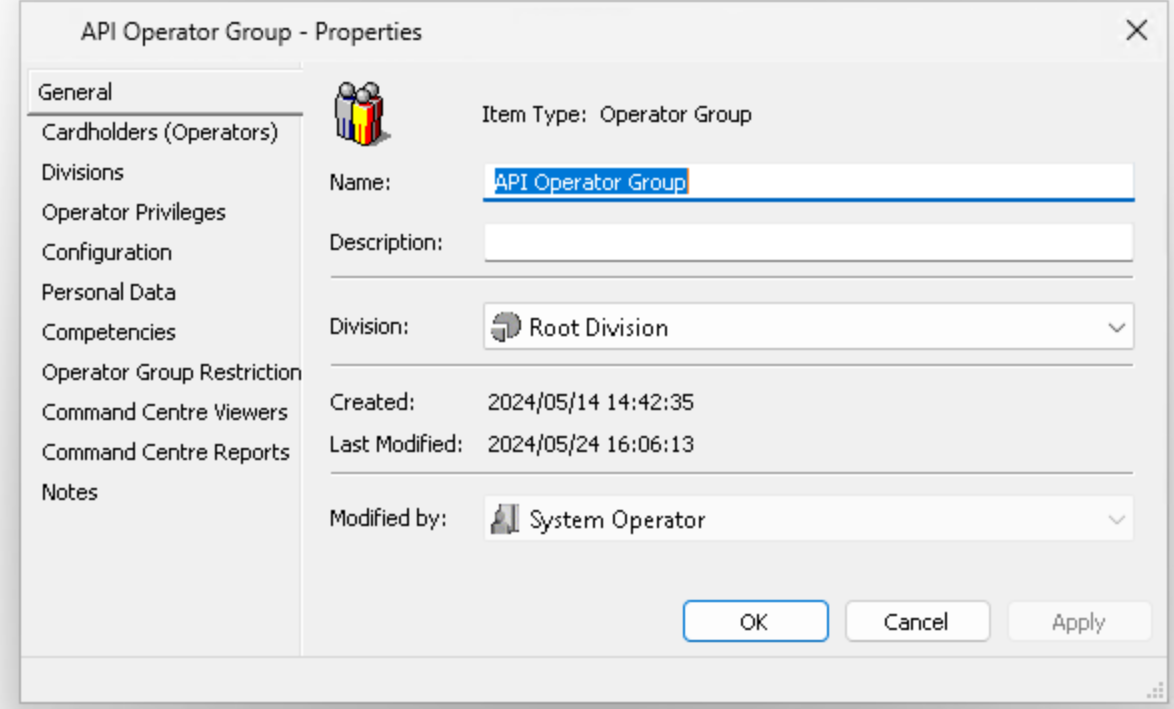
1. Create the “API Operator Group” operator group.
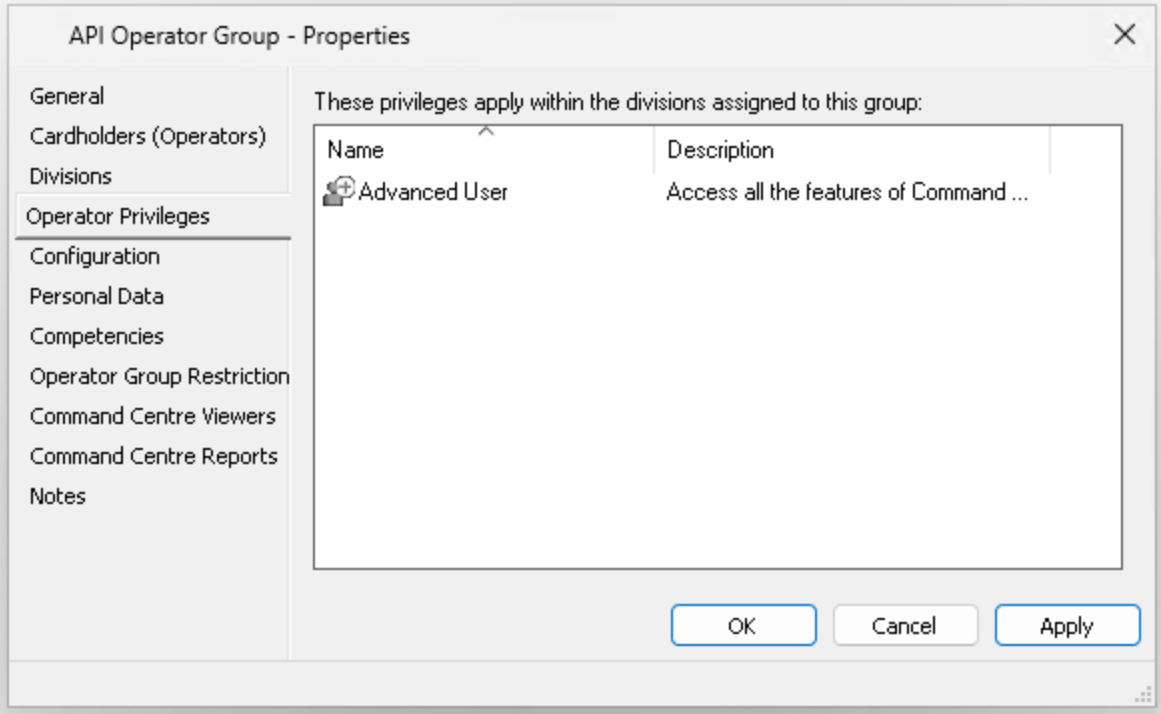
2. Assign operator privileges: add the Advanced User privilege.
5.2 Configure the REST API Operator
1. Create the “EvTrack API Operator” cardholder.
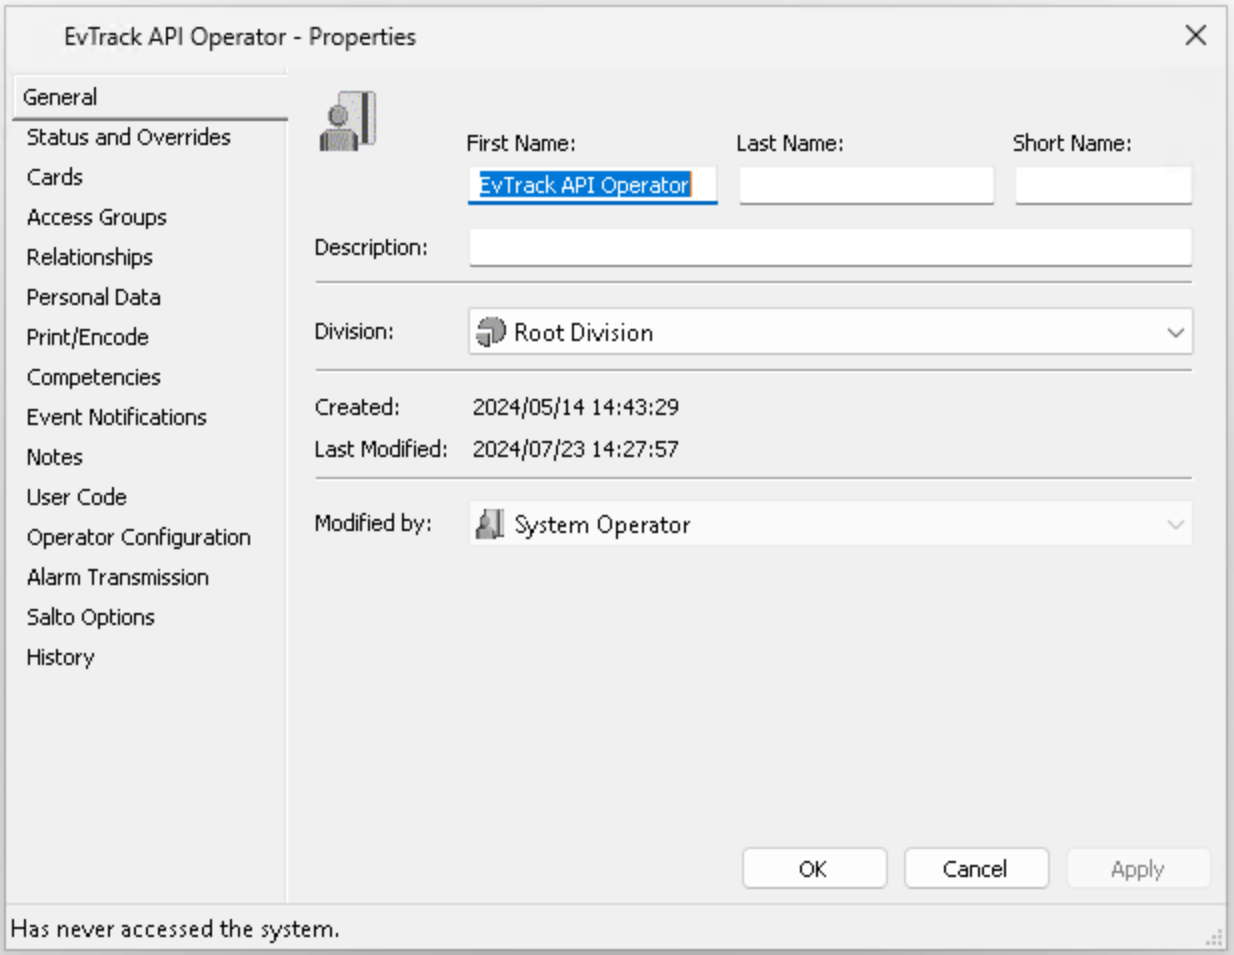
2. Add the operator to the “API Operator Group” operator group.
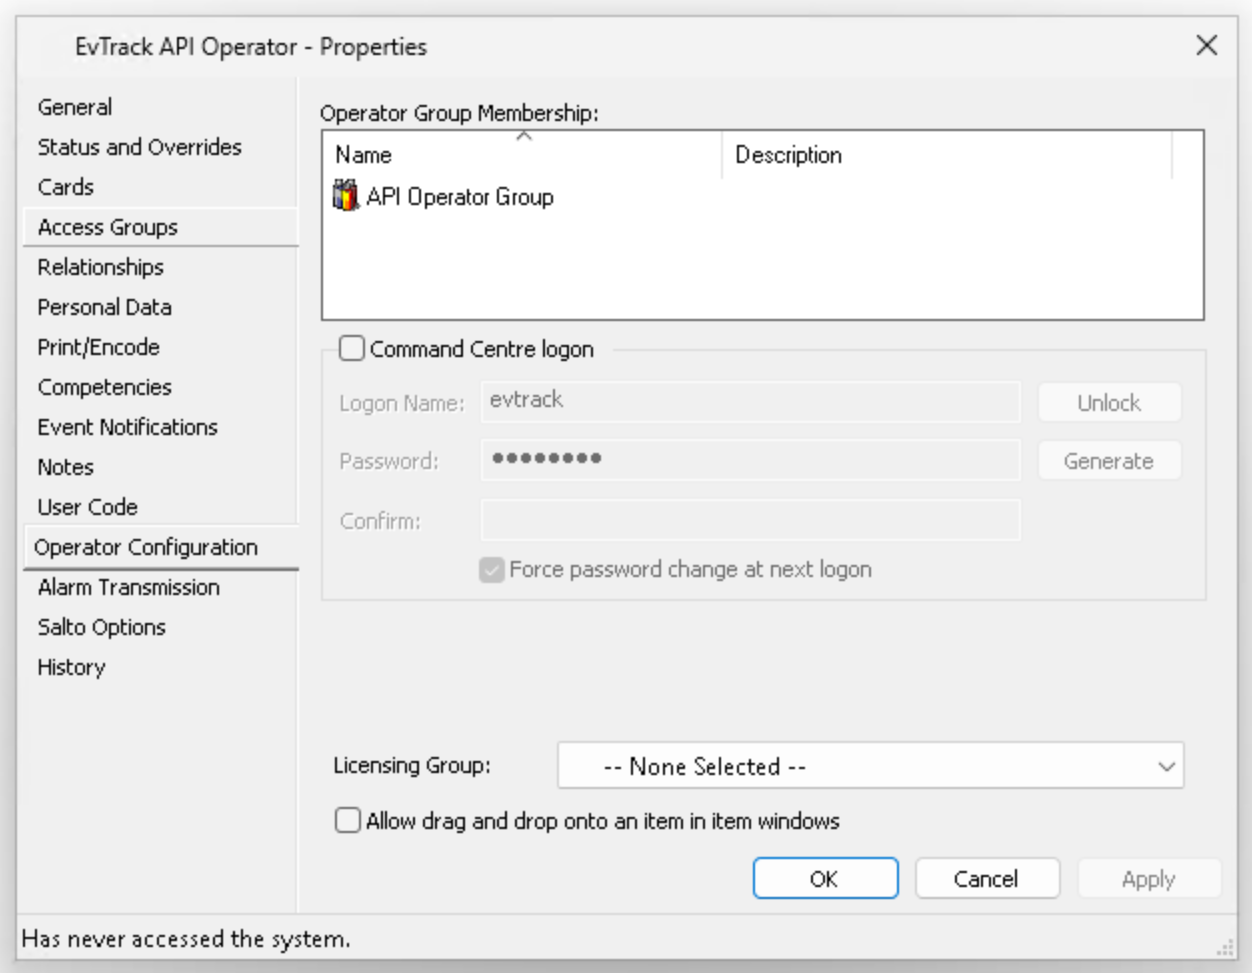
5.3 Configure the REST API Gateway
1. Enable Local Network Connections.
2. Enable REST Clients with no certificate.
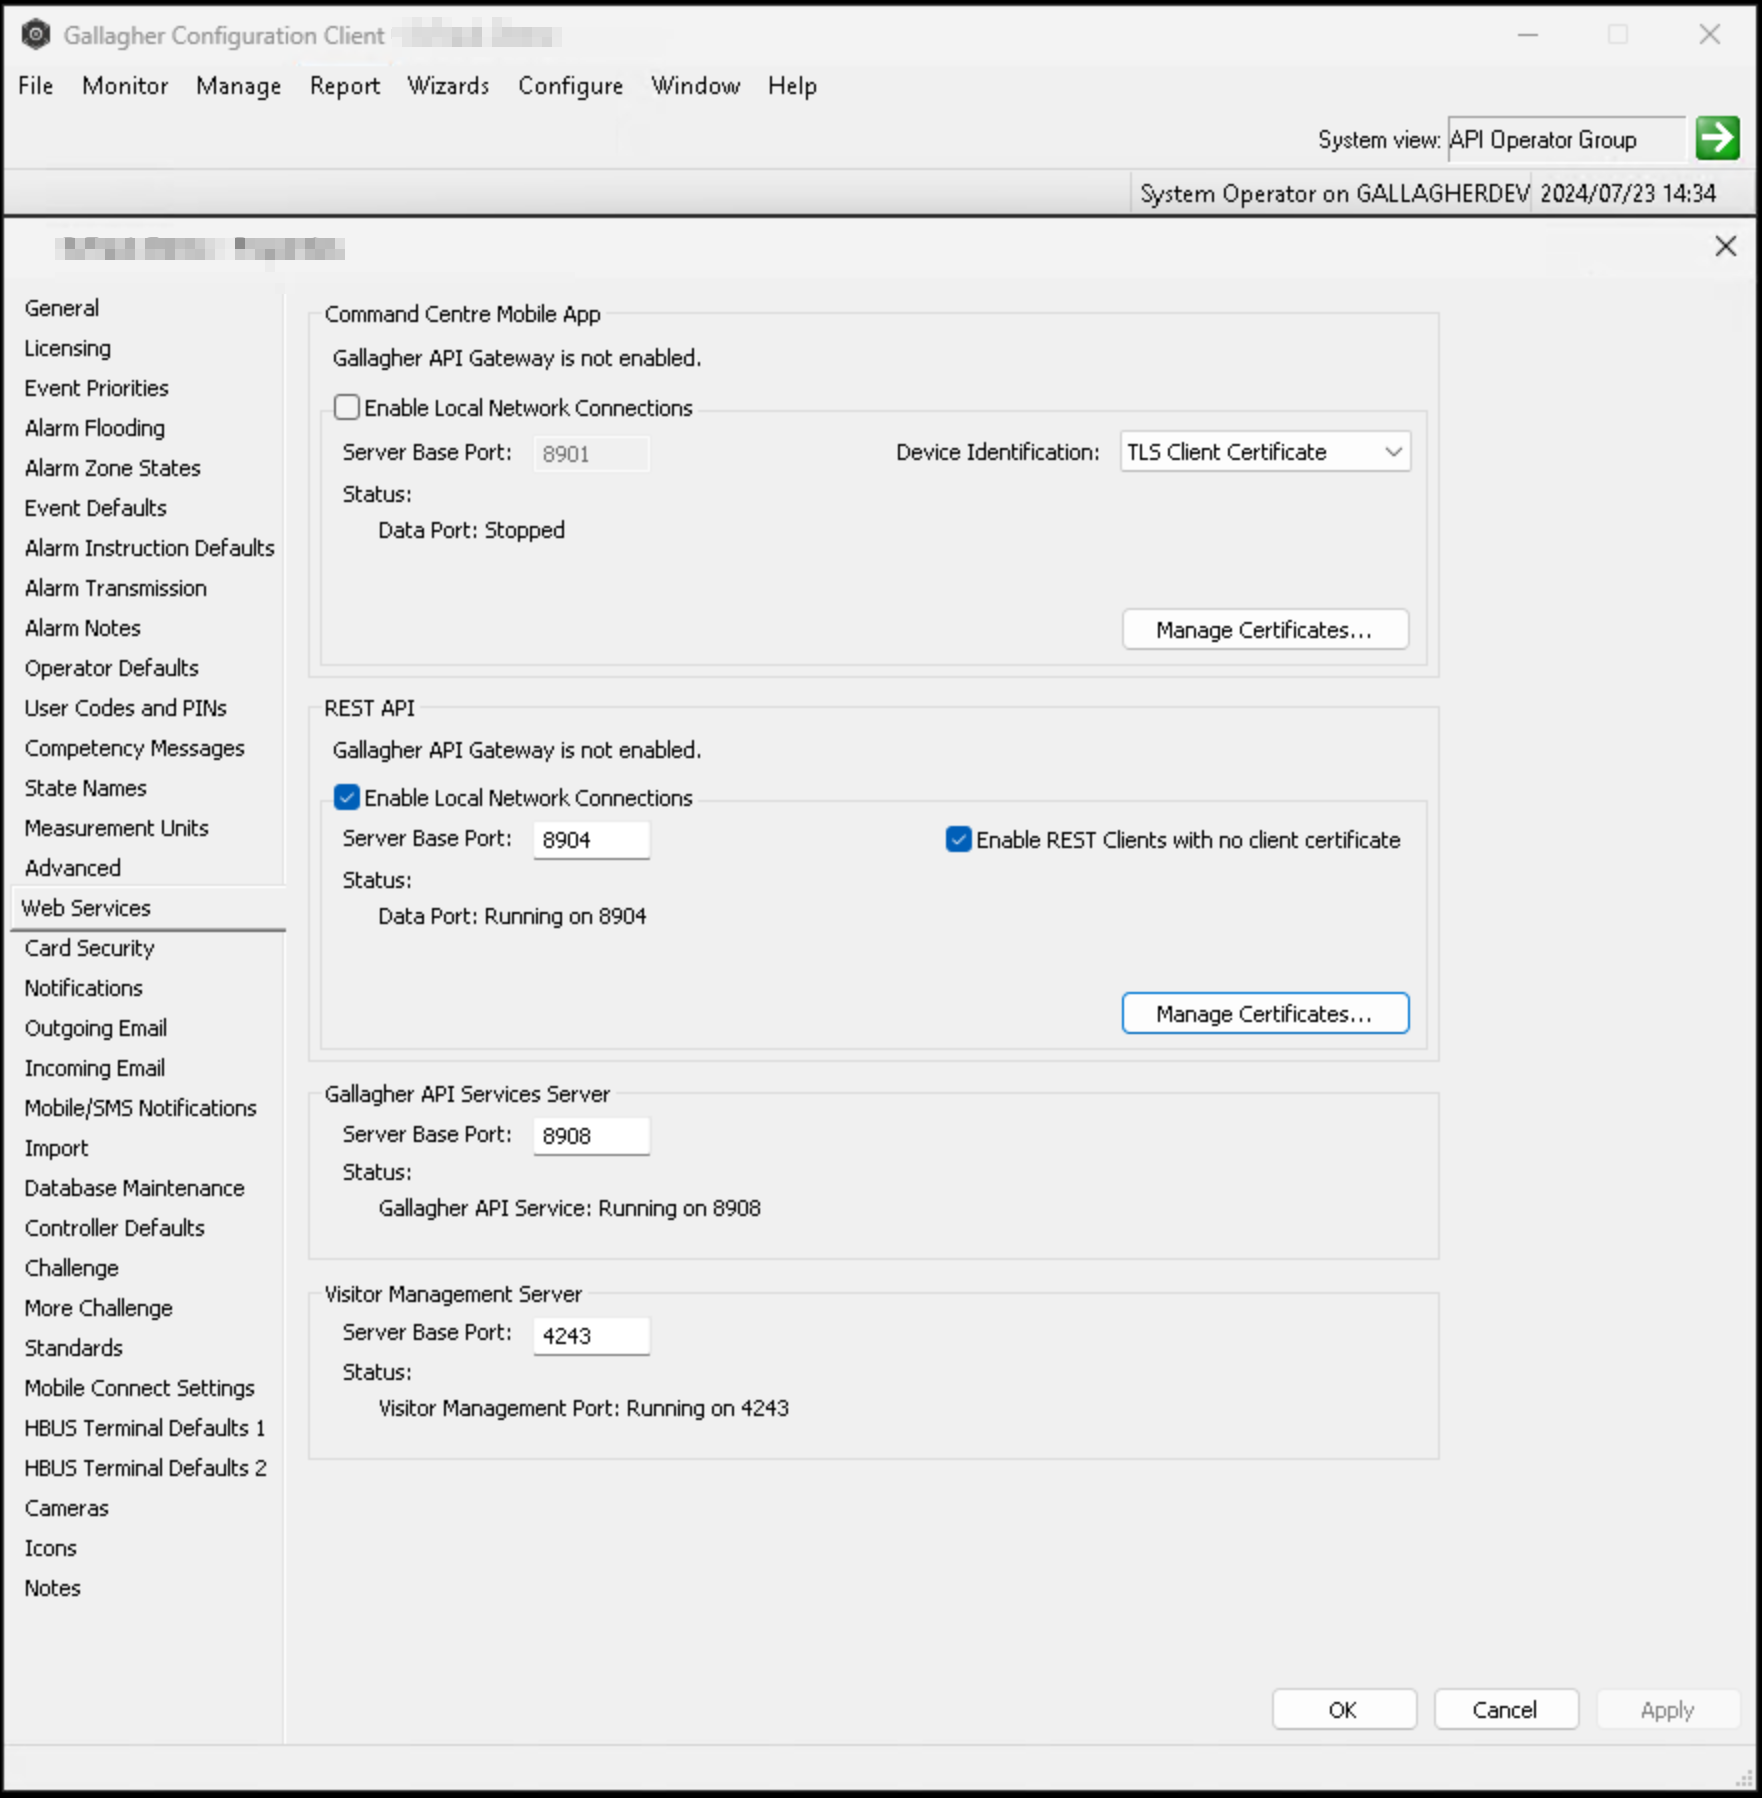
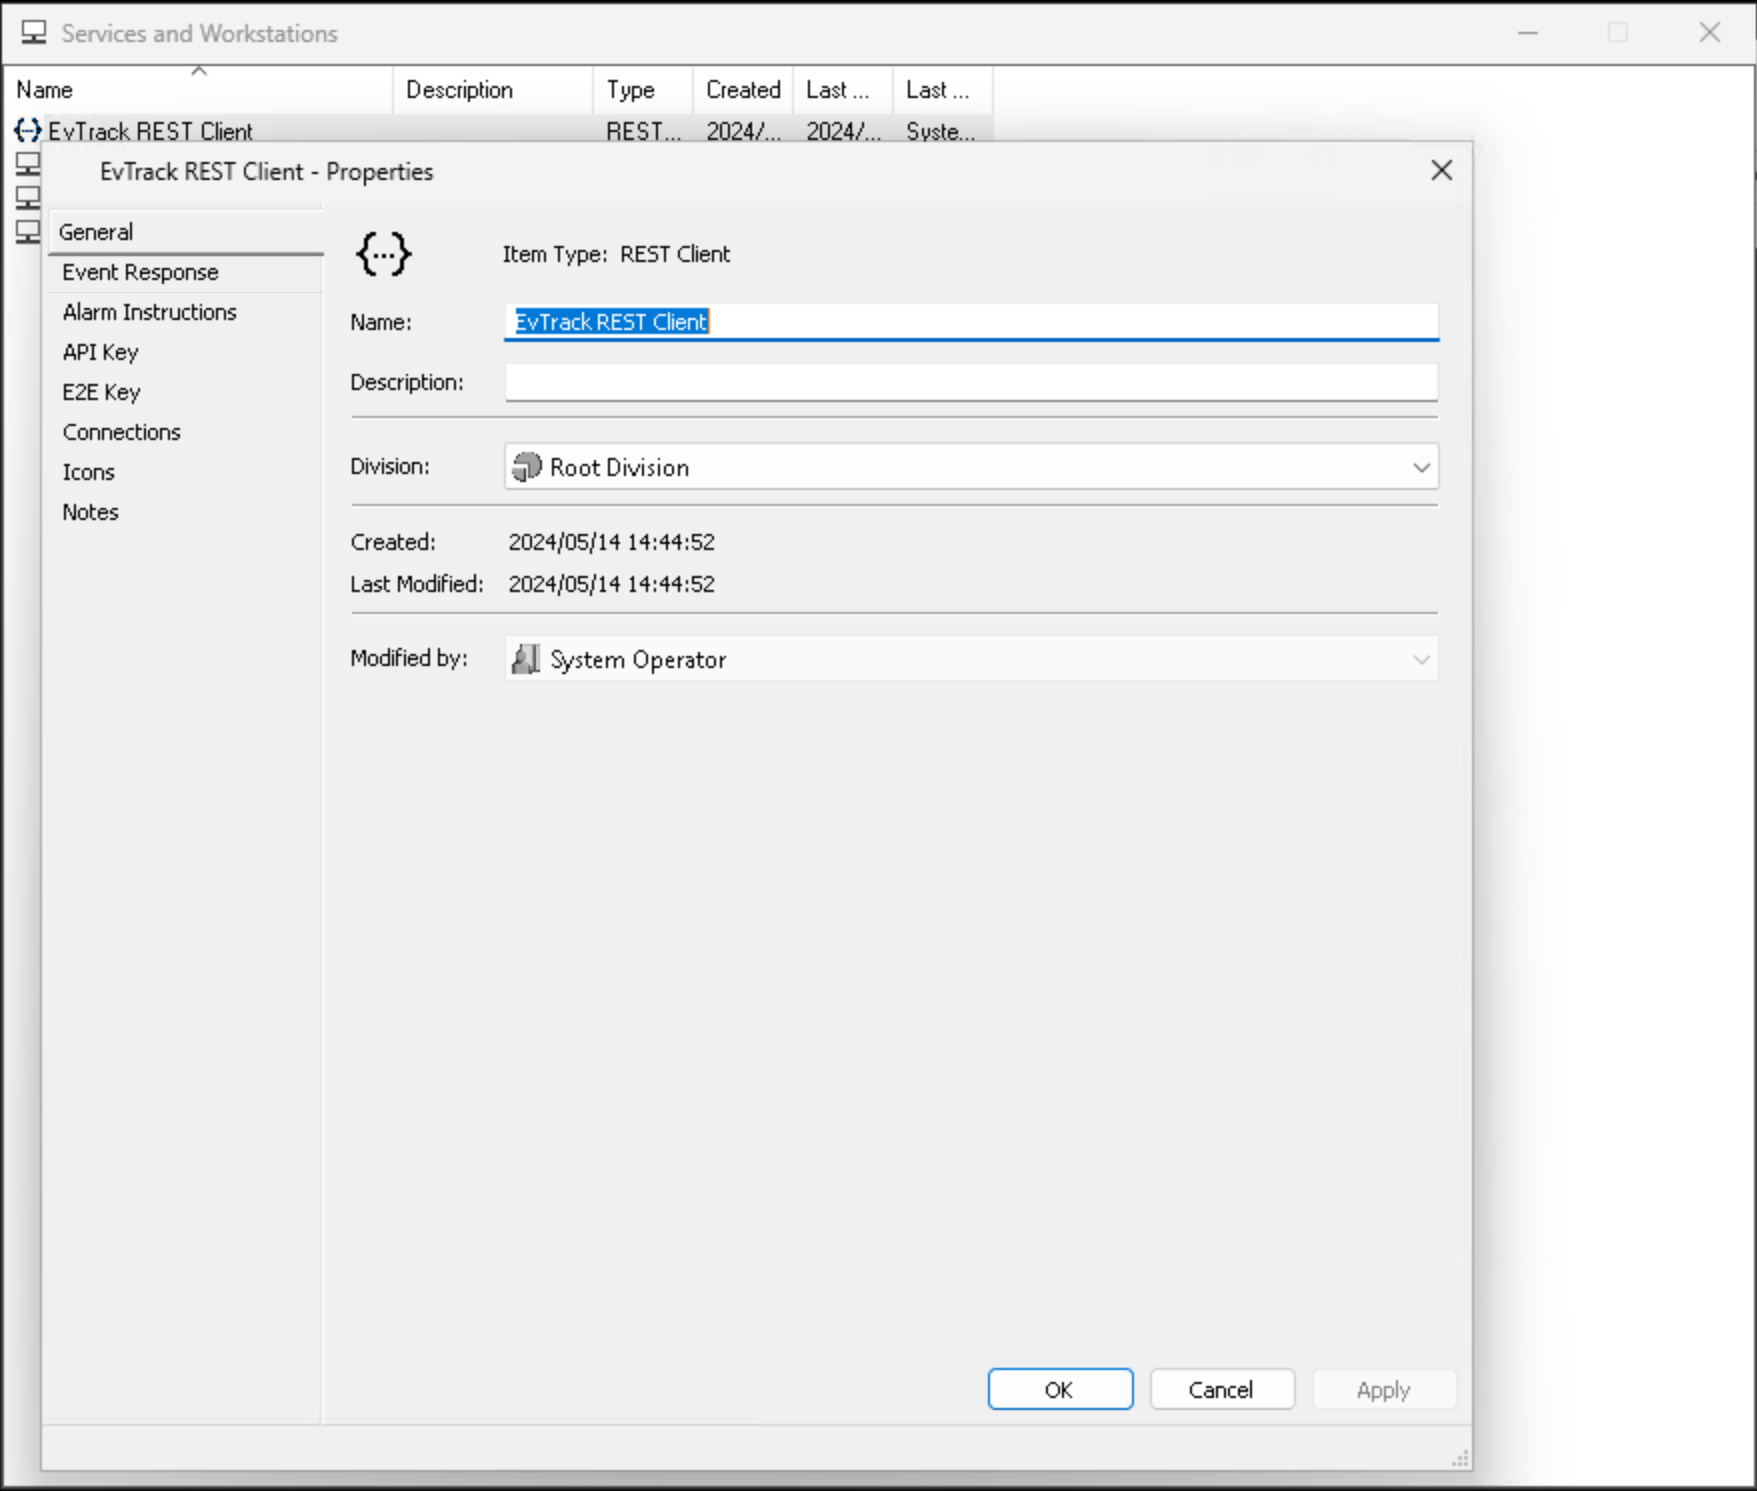
3. Create a new REST client, “EvTrack REST Client”.
4. Set the REST client’s operator to “EvTrack API Operator”.
5. Enable the REST client.
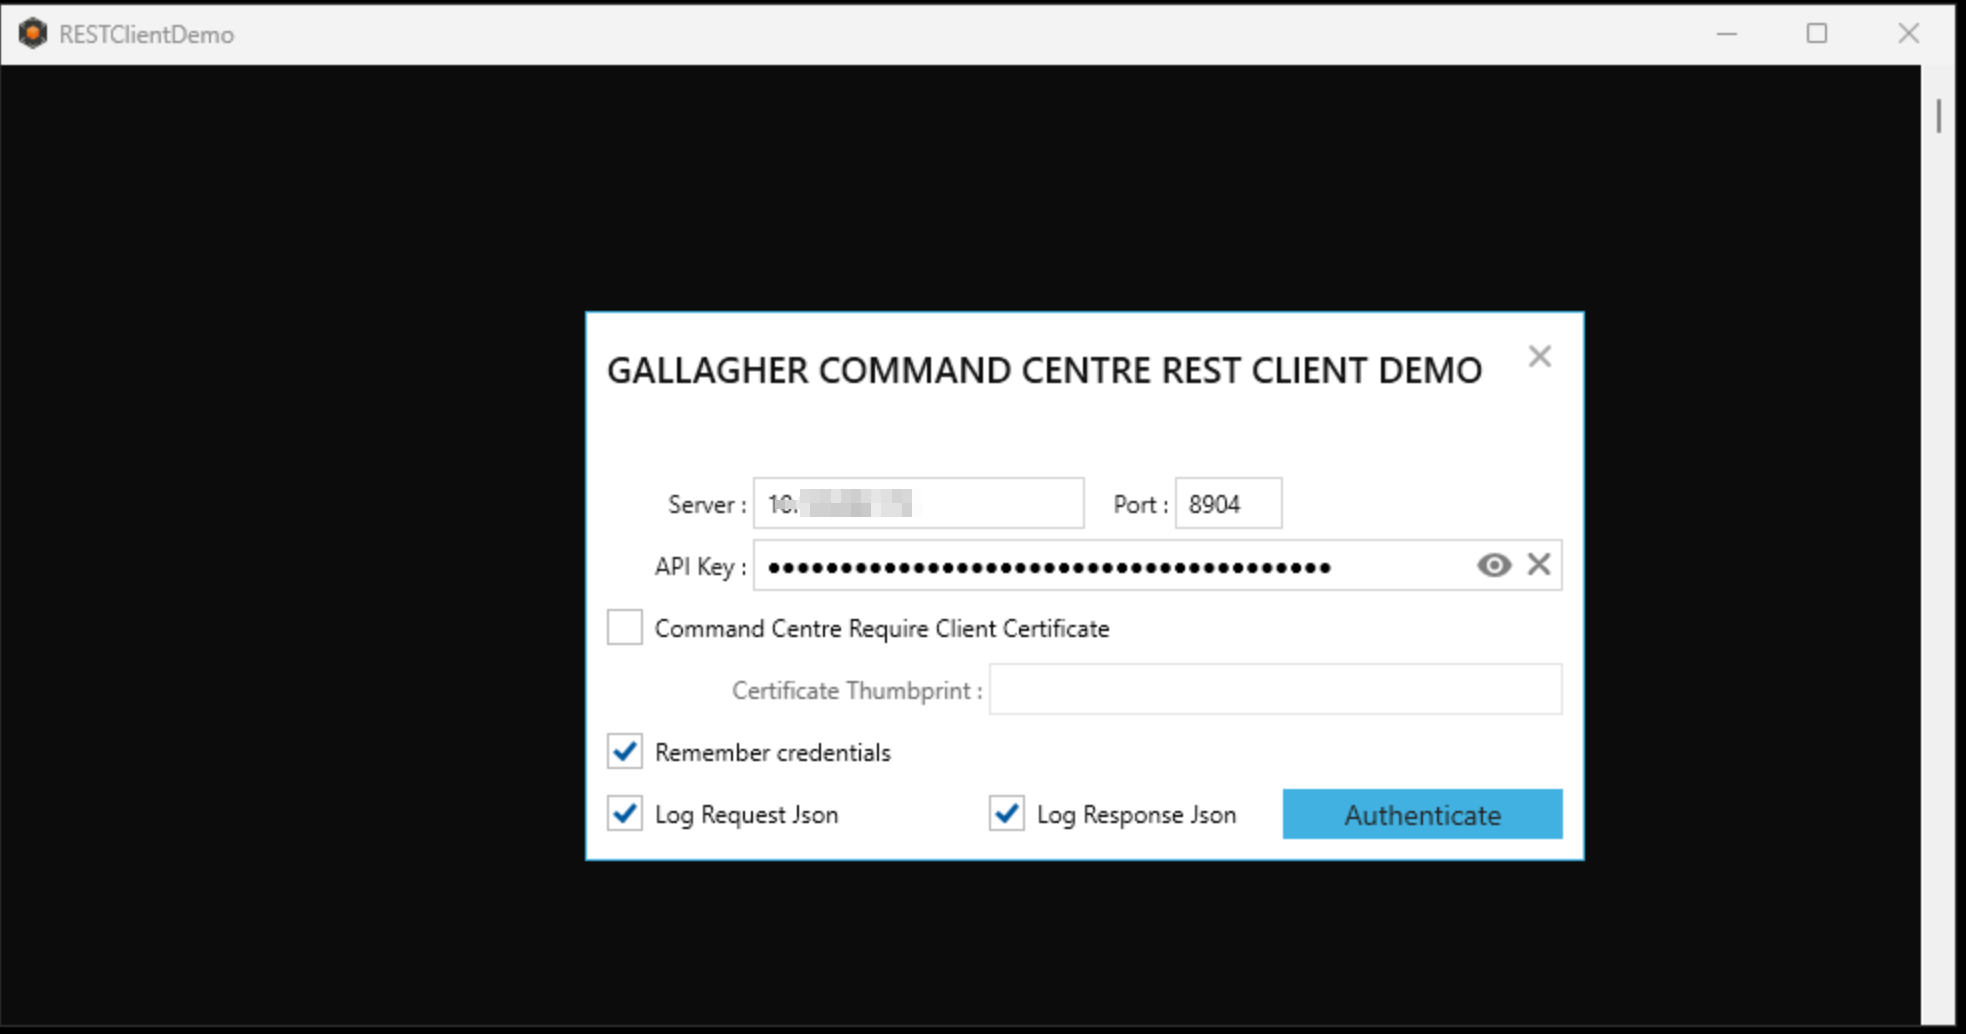
6. Copy and keep the API Key. EvTrack needs it in section 6.
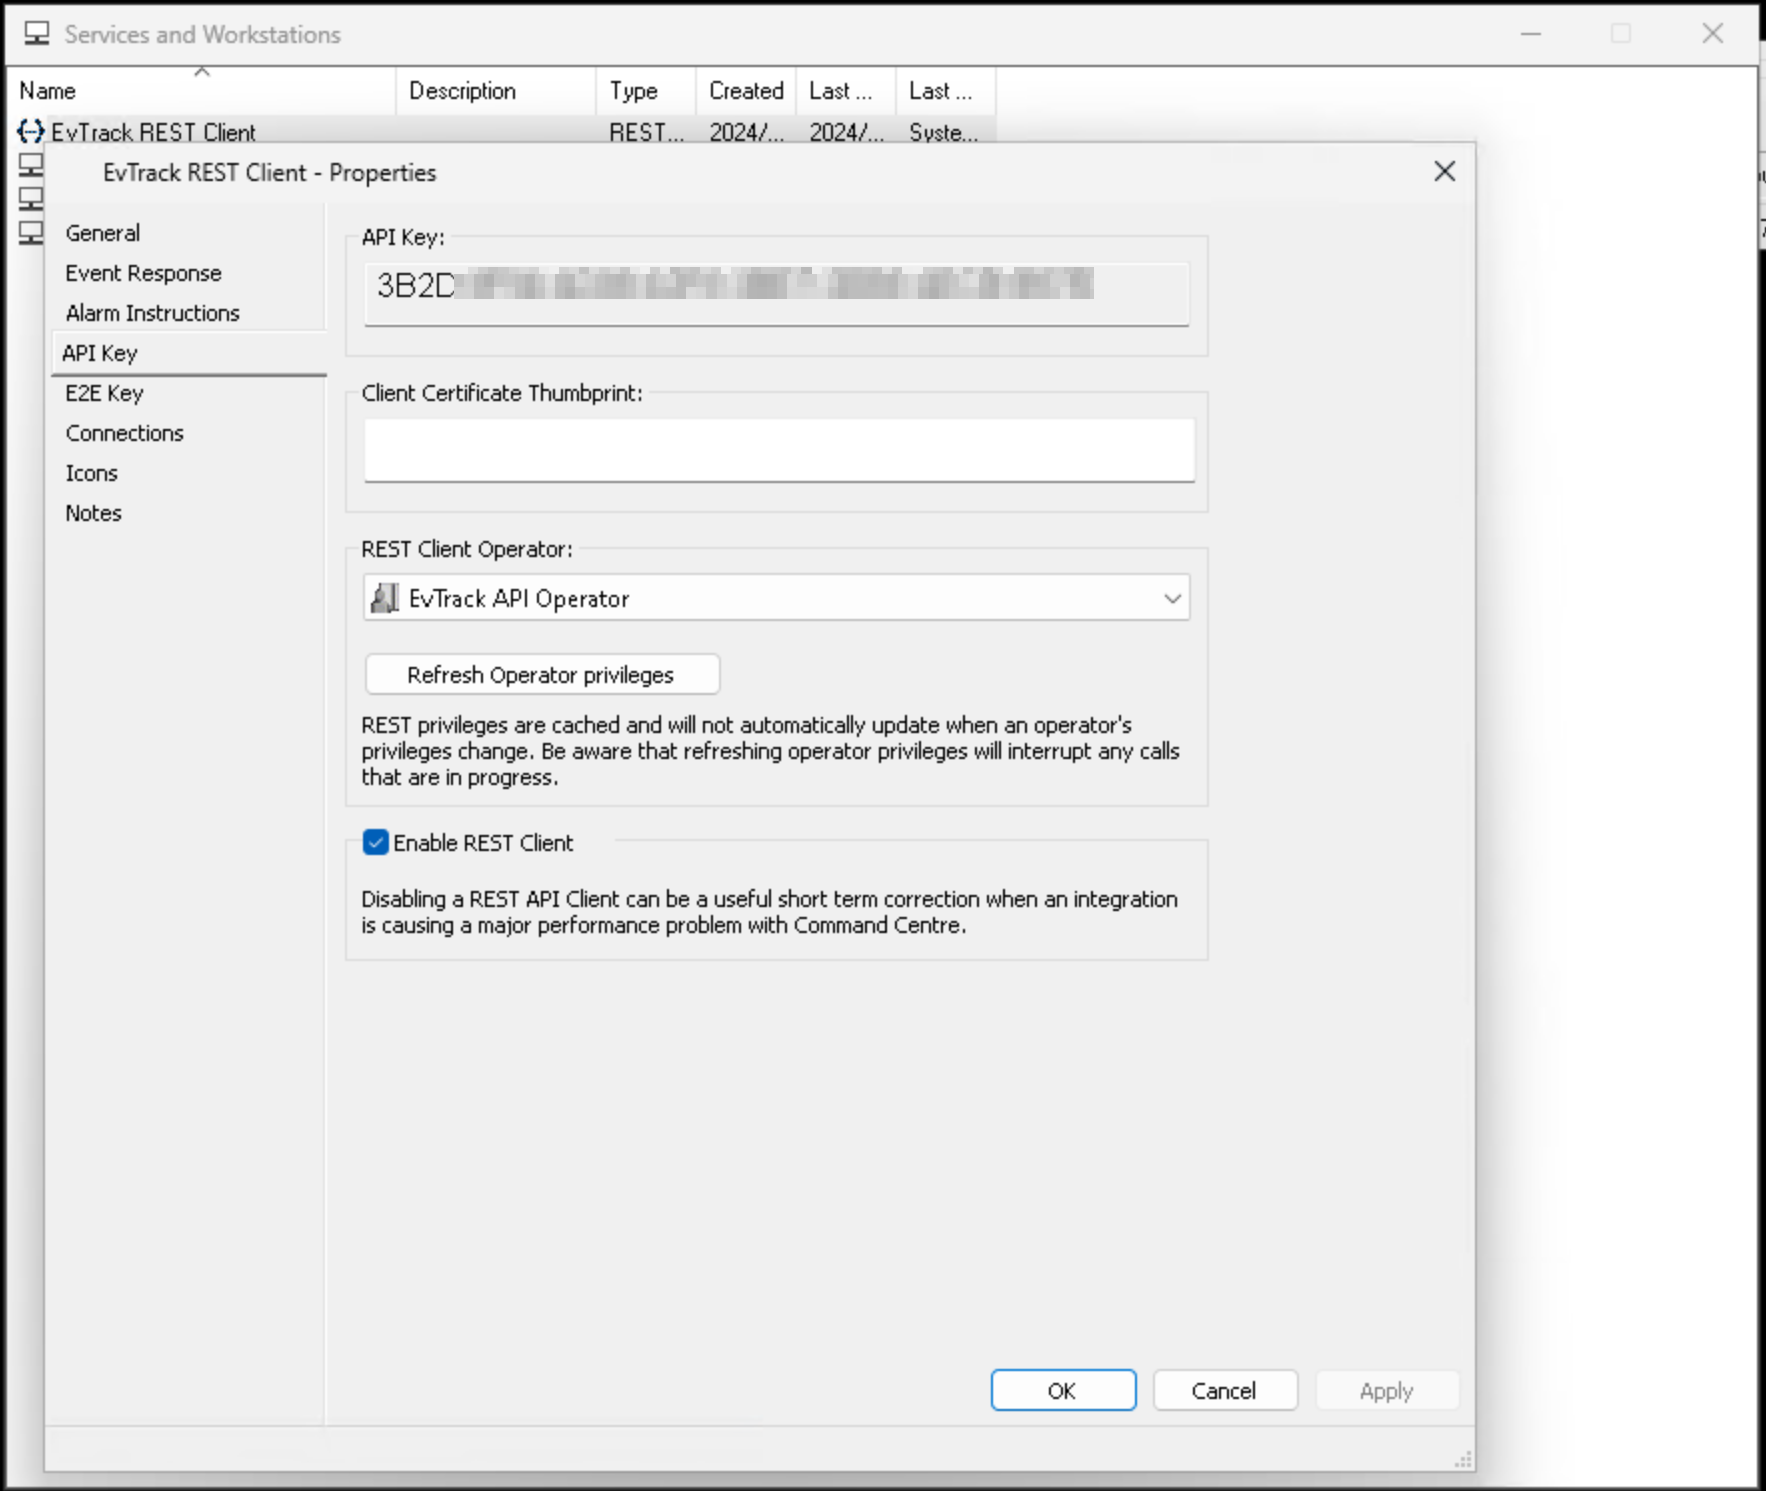
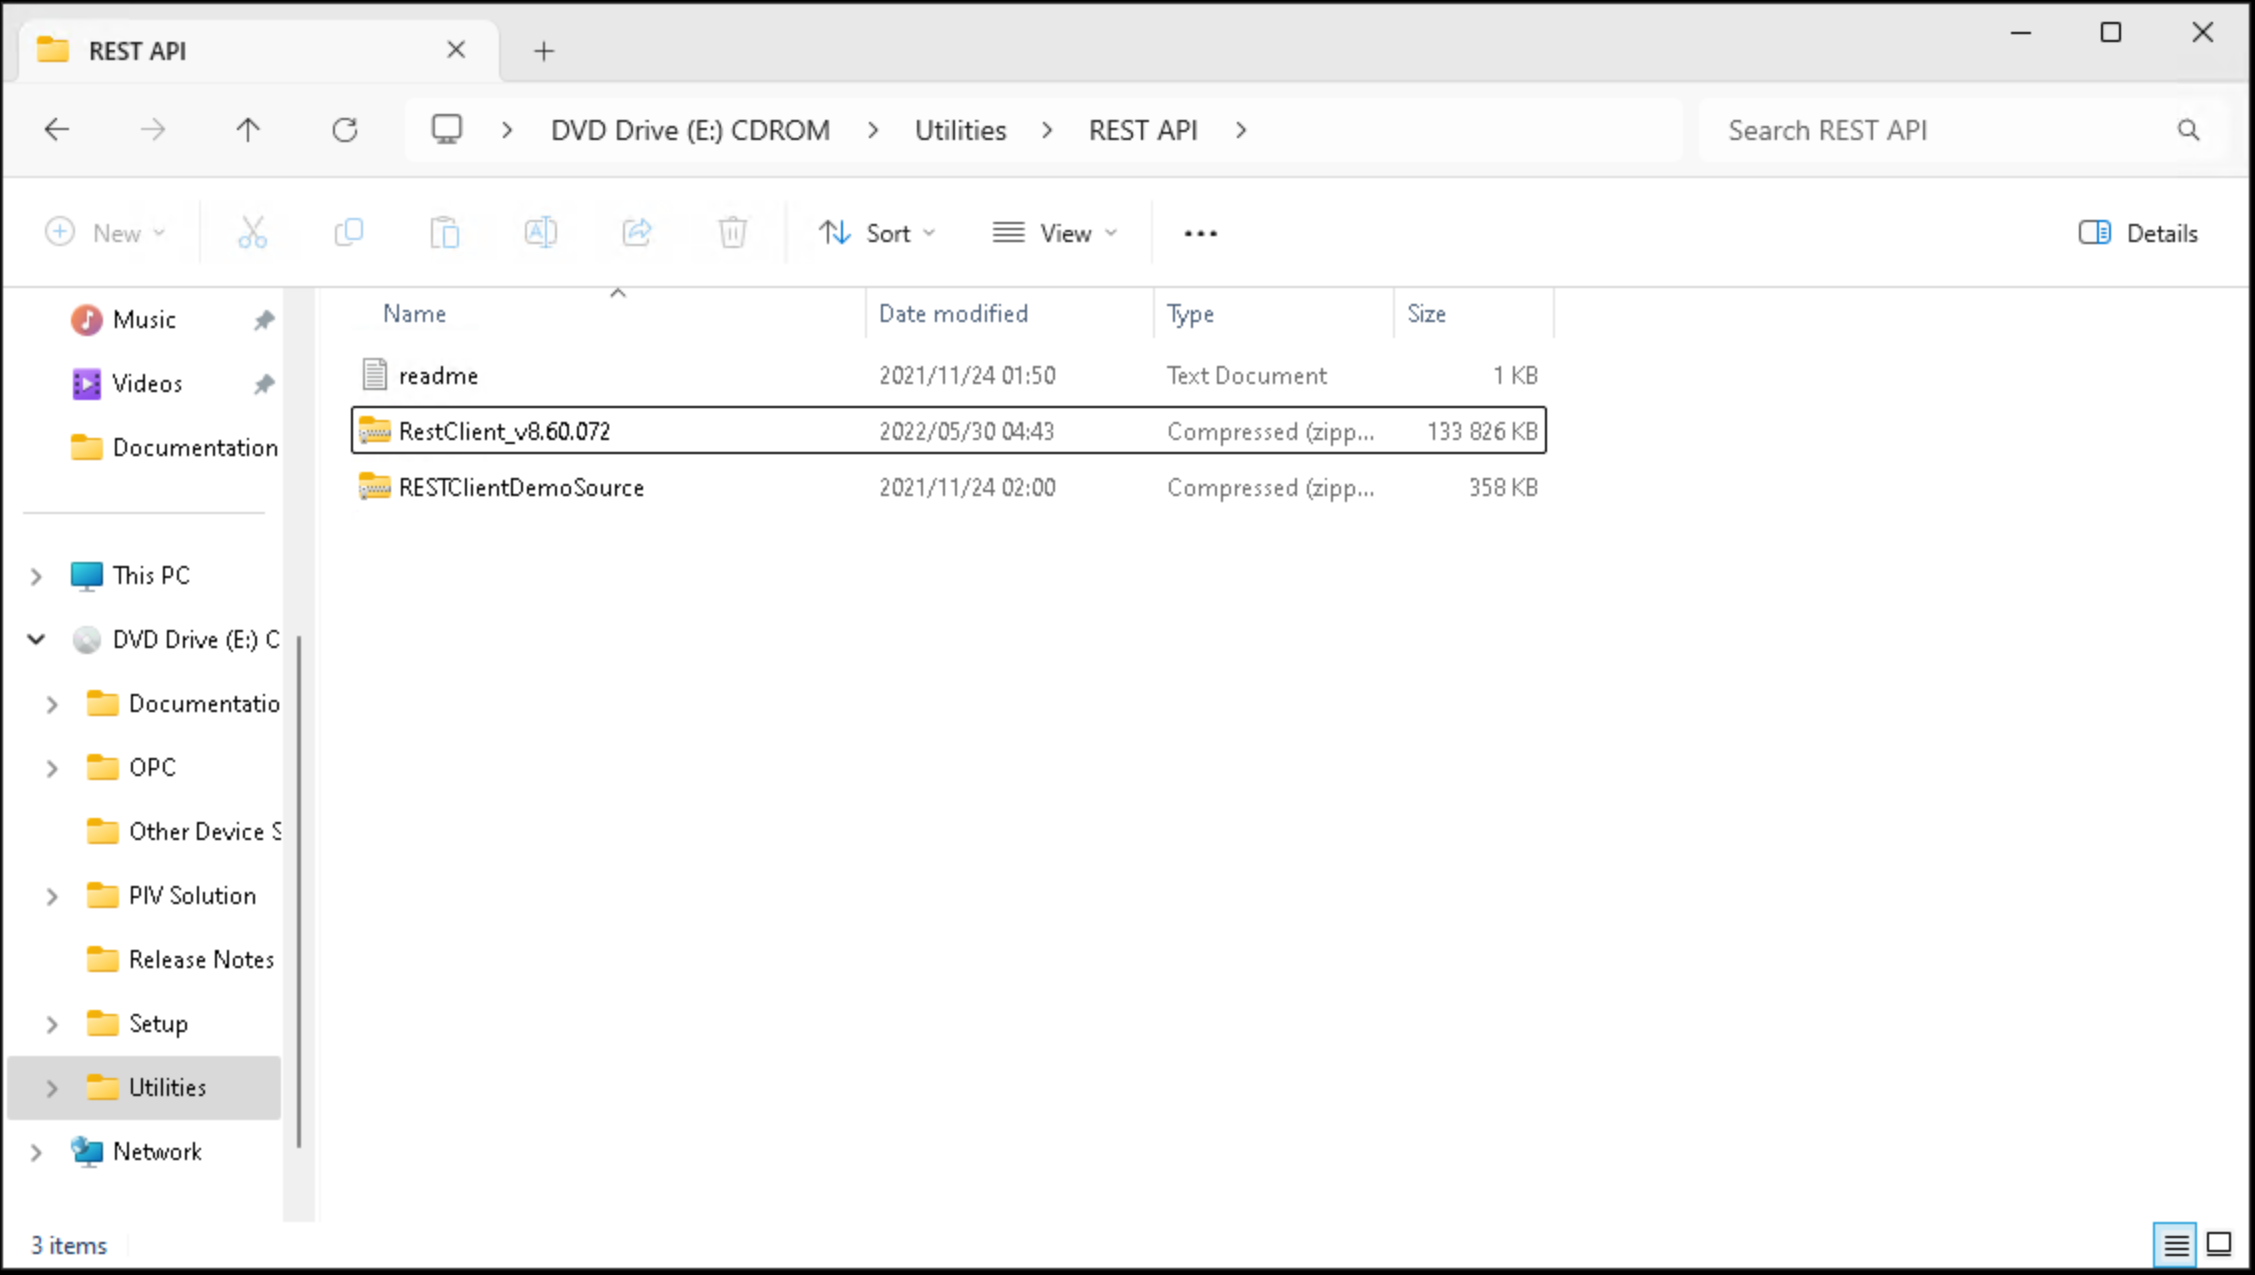
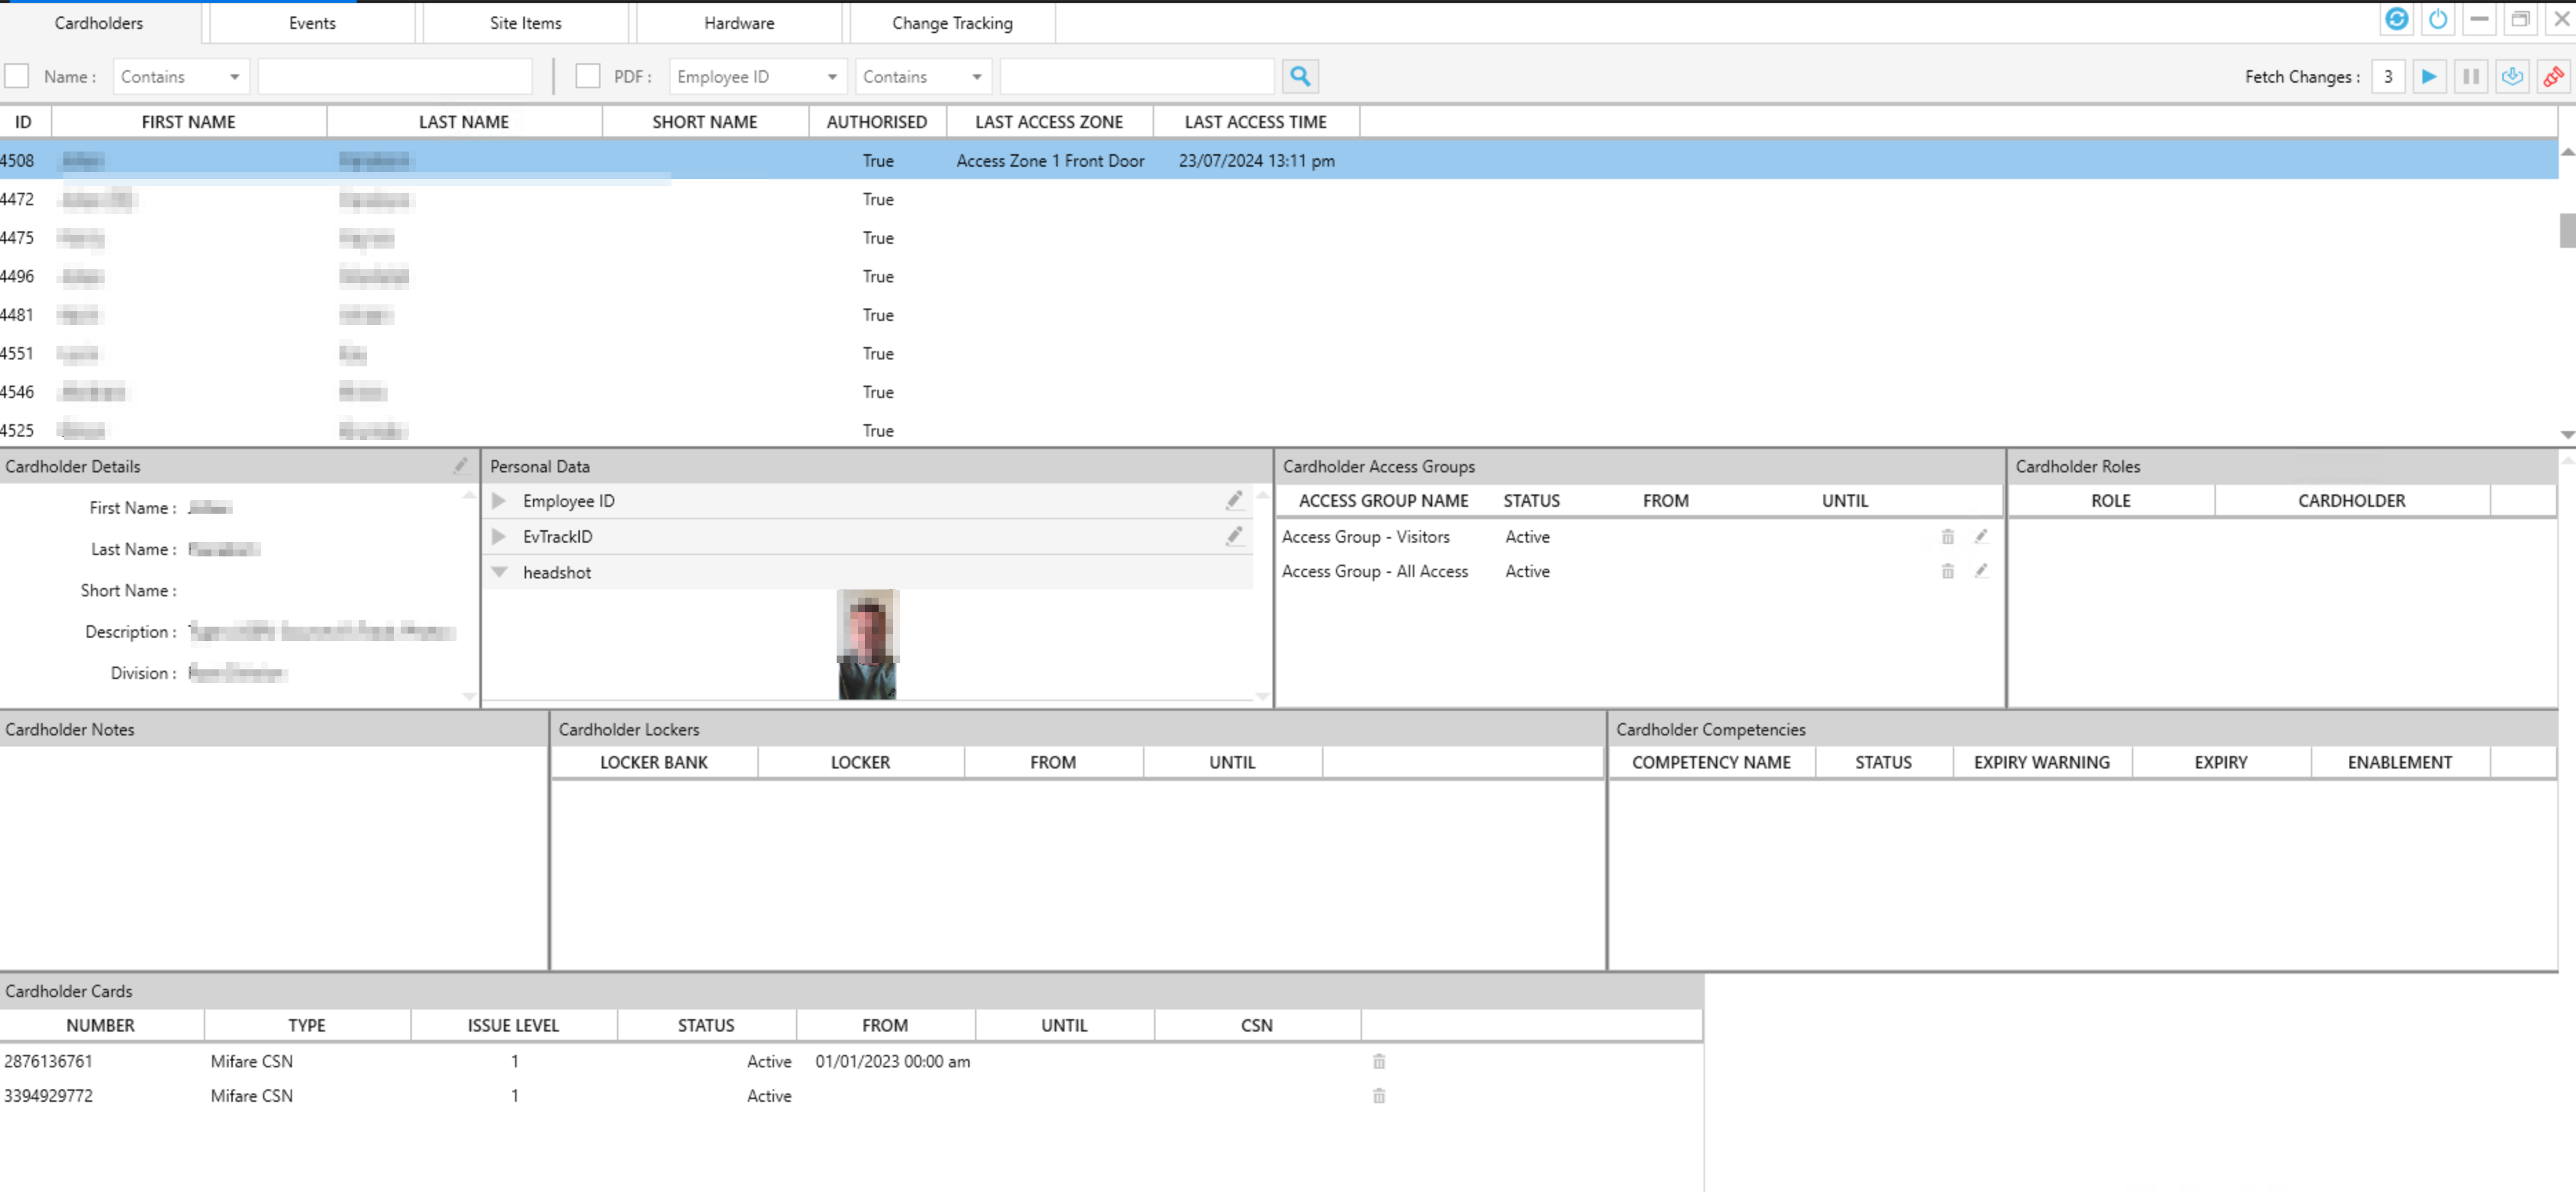
7. Test the API key with Gallagher’s RESTClientDemo, found on the installation ISO under Utilities\REST API.
5.4 Configure the Card Type and Card Formats (Wiegand readers)
This is the card type for sites whose readers send card serials and QR codes over Wiegand. For IDEMIA VisionPass readers on OSDP, use the card type in section 7 instead.
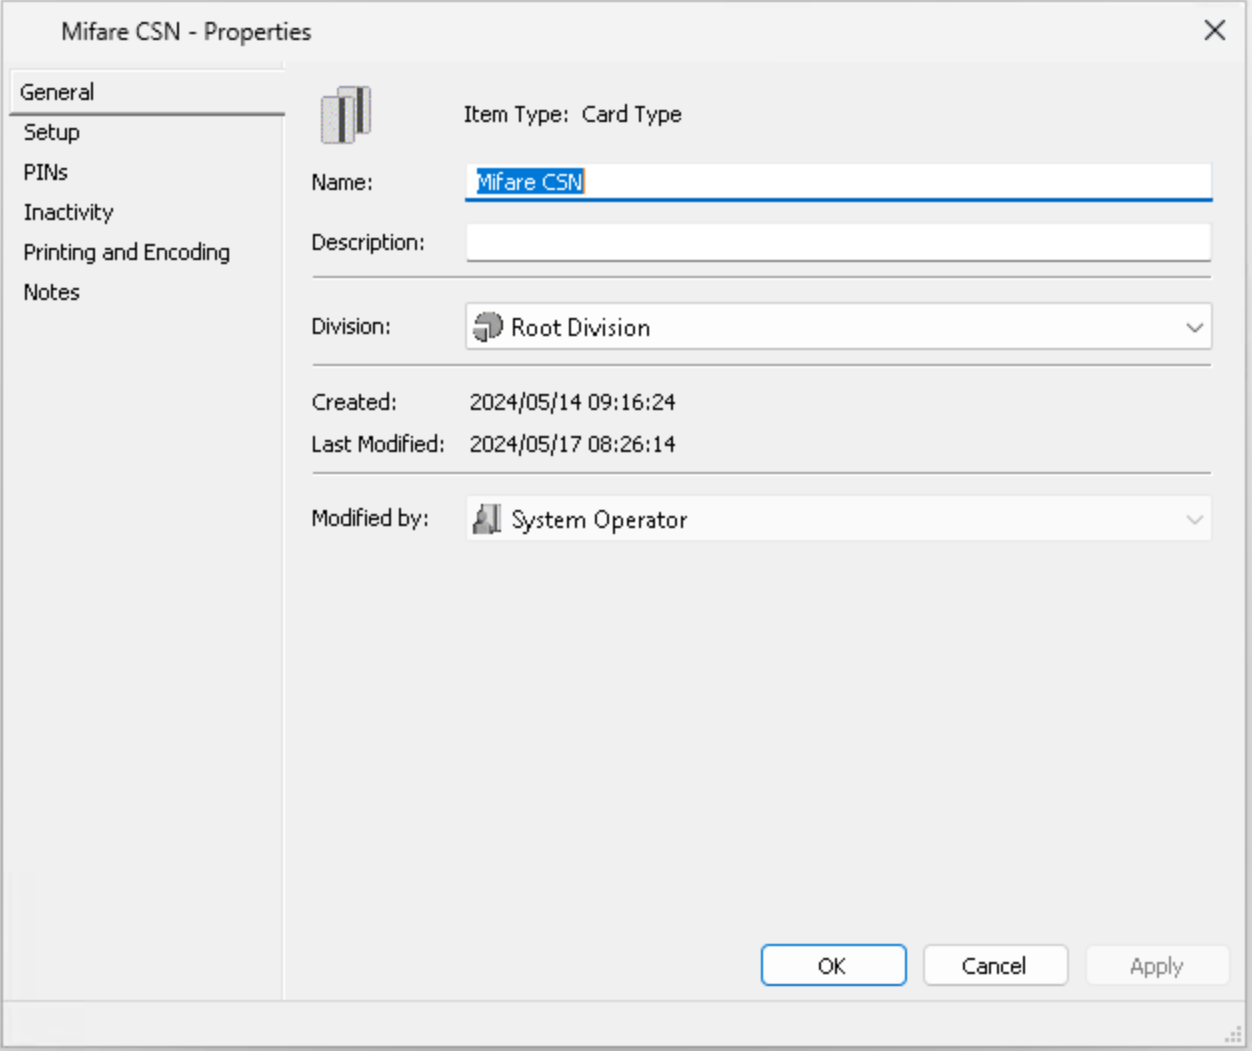
1. Create the “Mifare CSN” card type.
2. Set the facility code and the card number range: 1 to 4294967295.
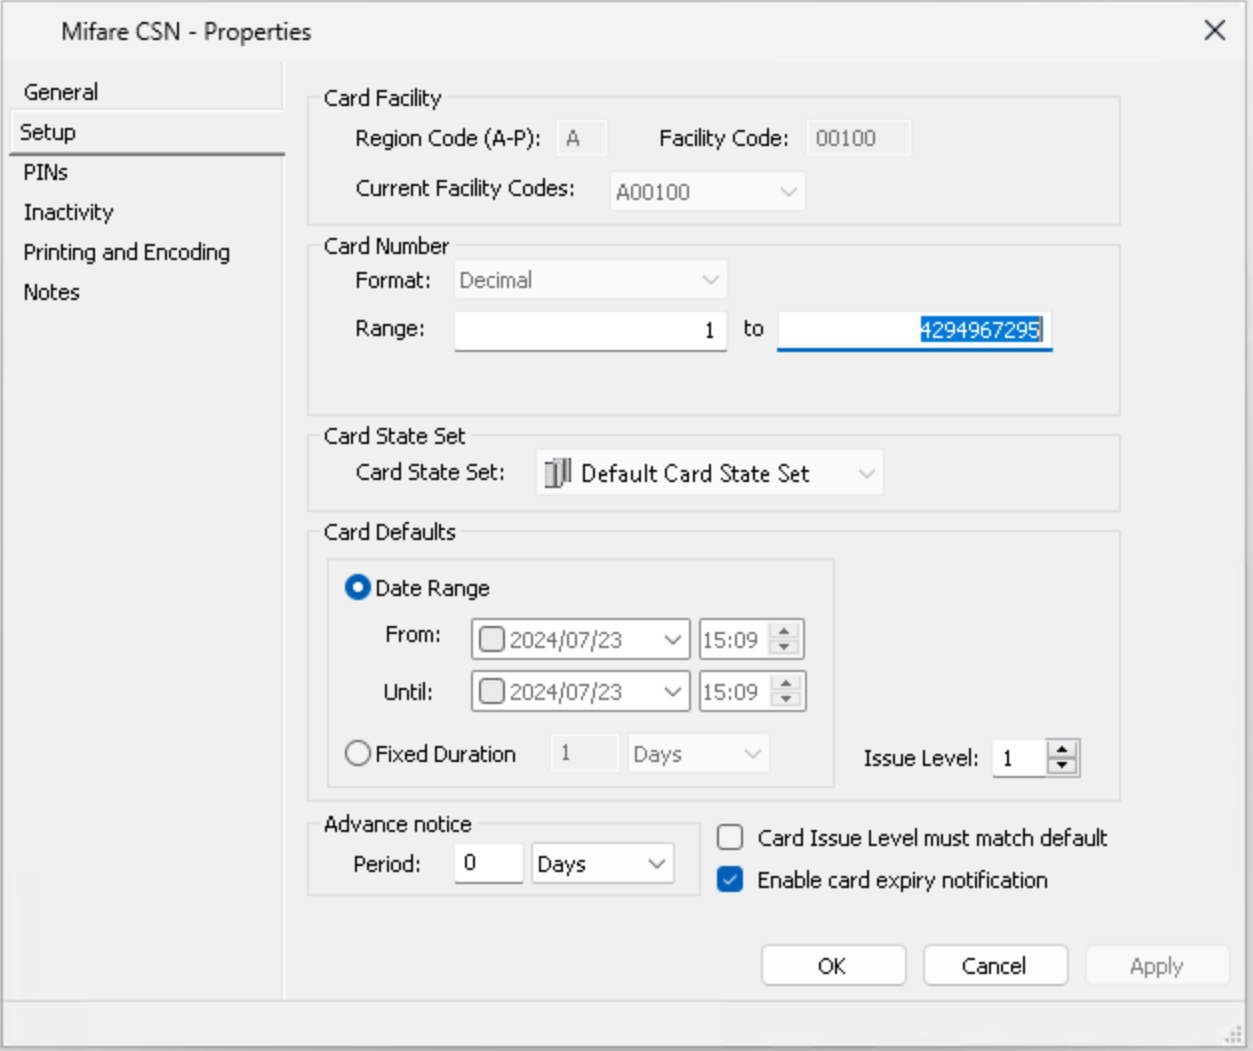
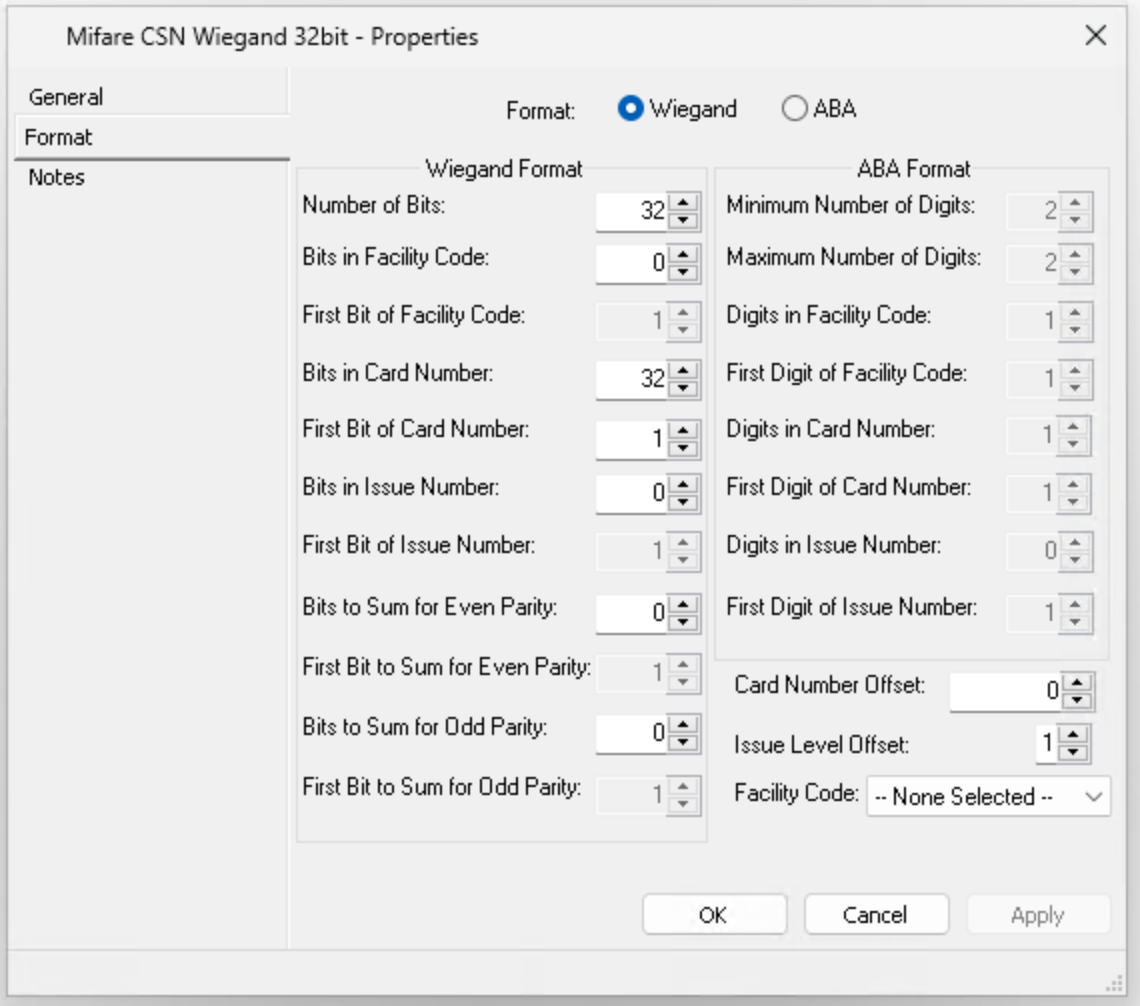
3. Configure the EvTrack Wiegand QR code universal card format.
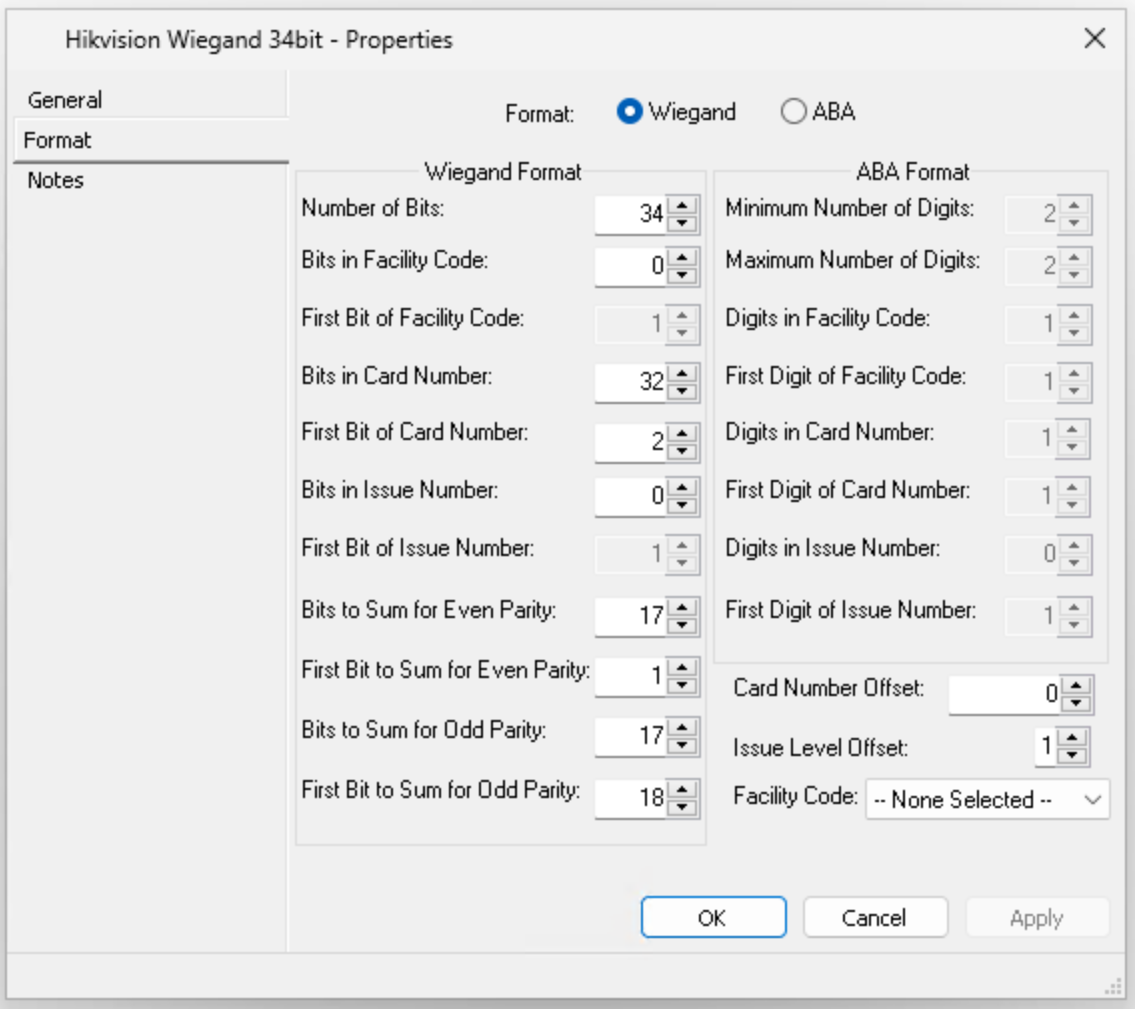
4. Optional: configure the Hikvision Wiegand34 universal card format.
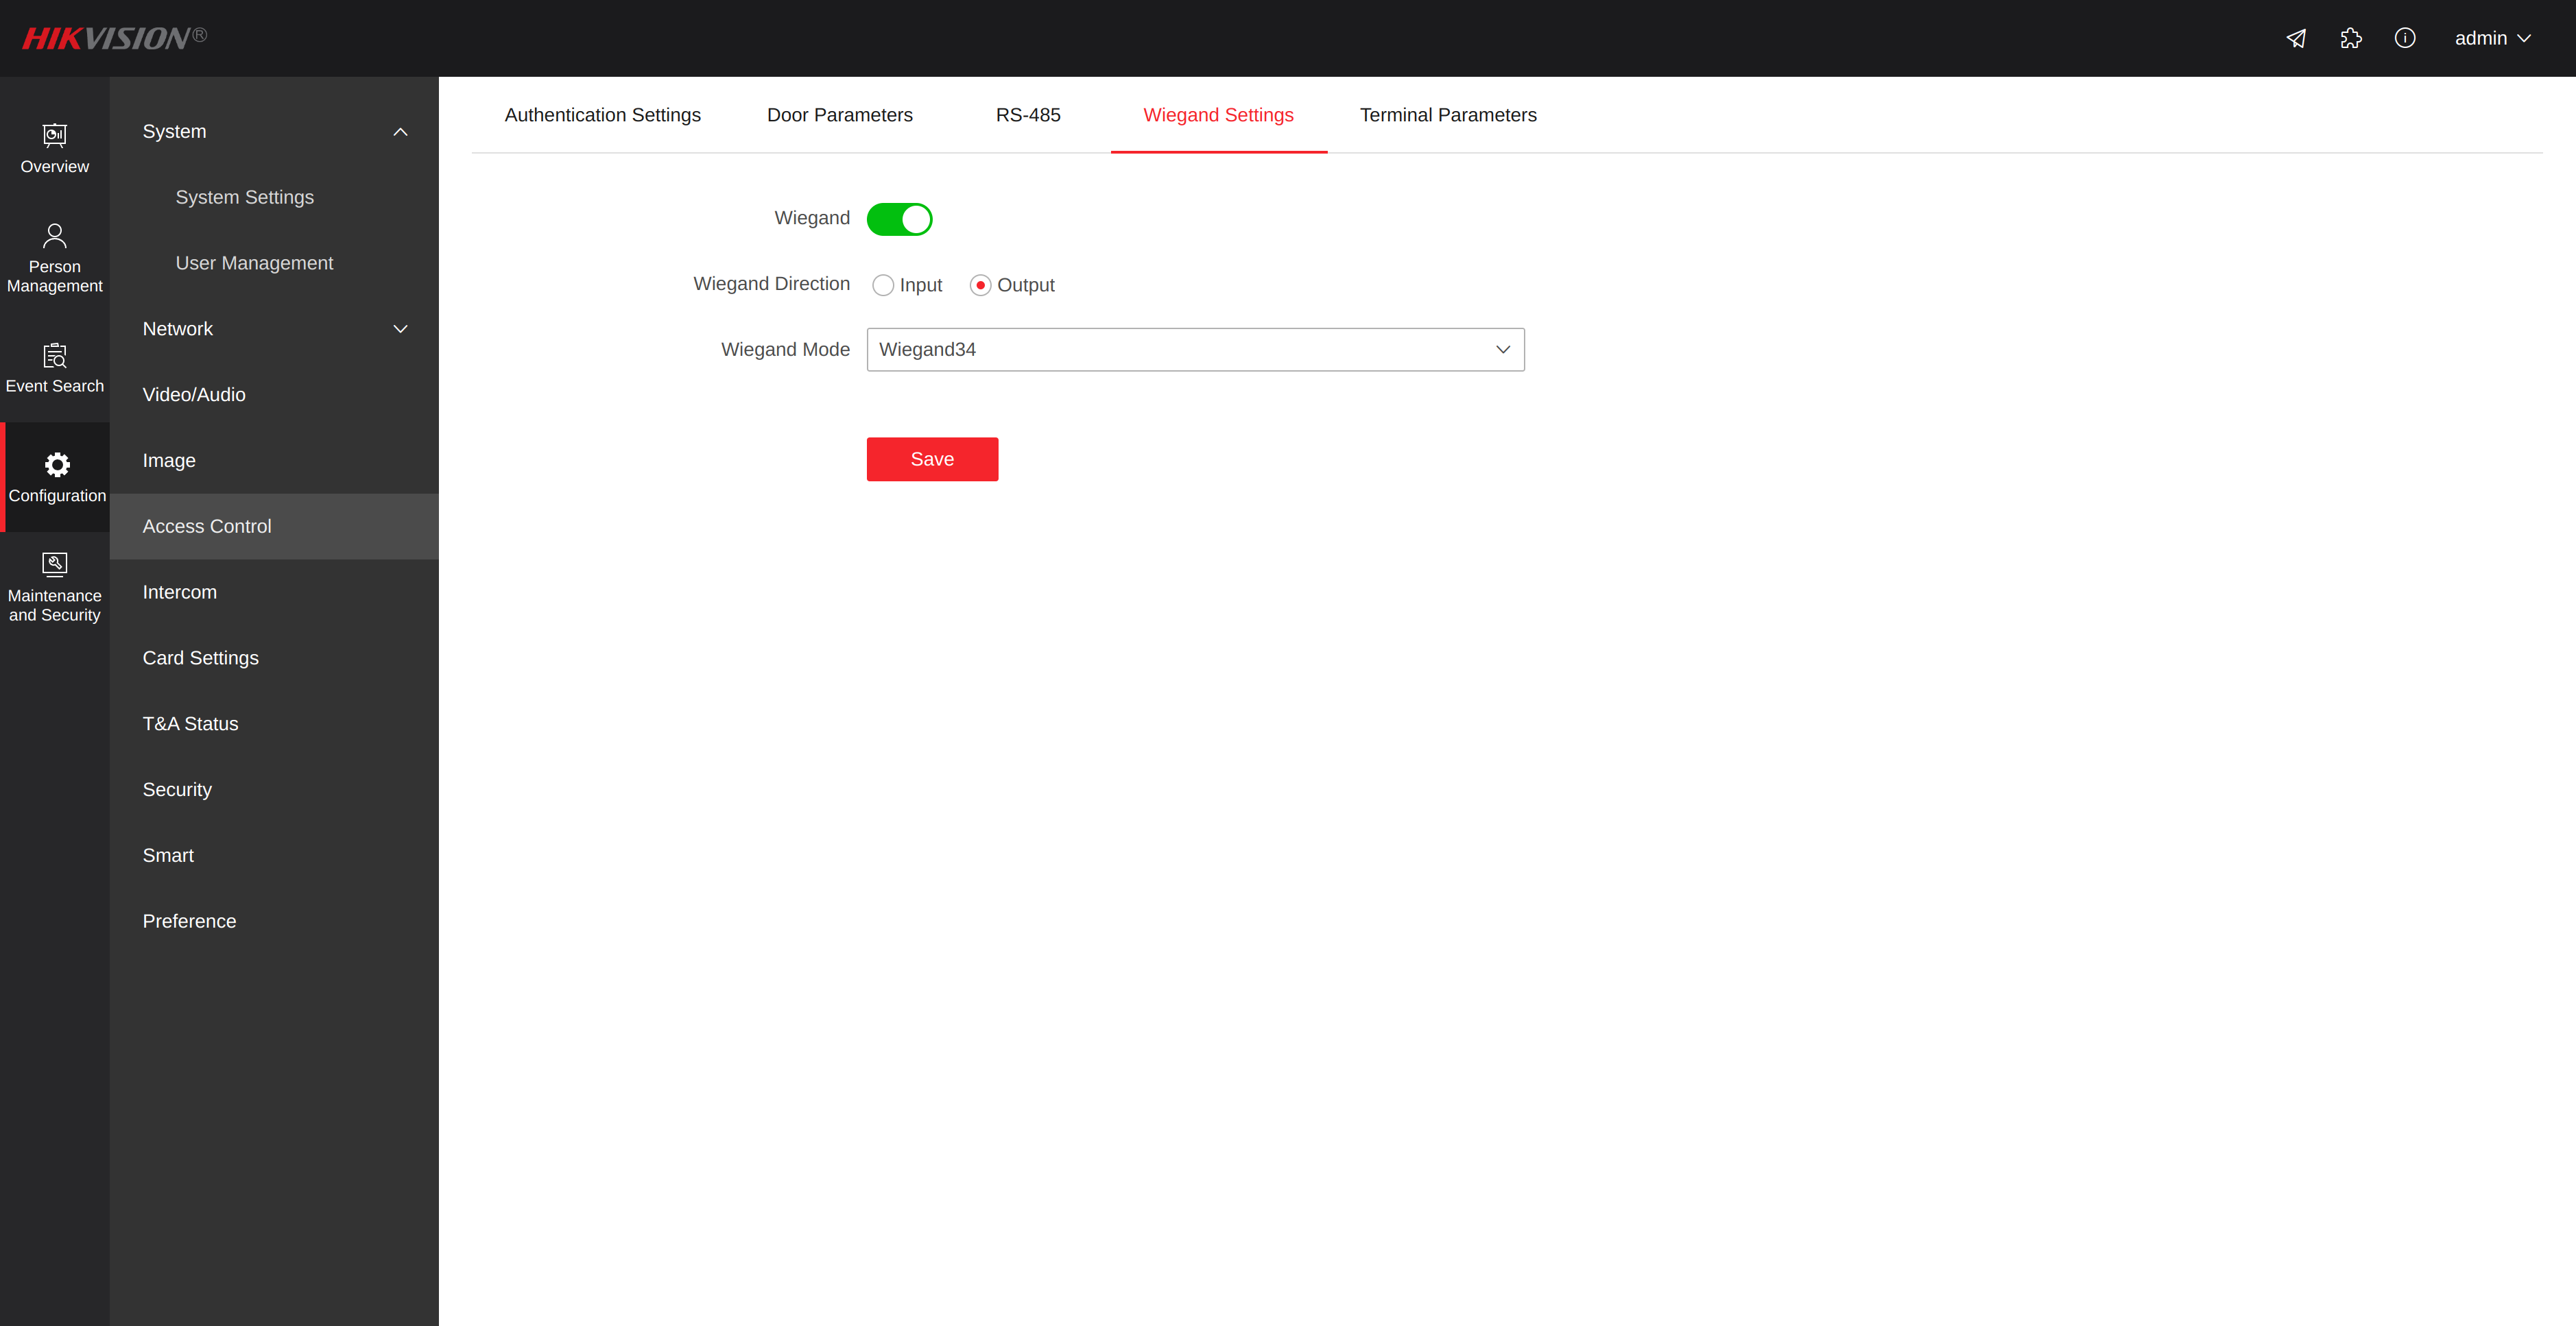
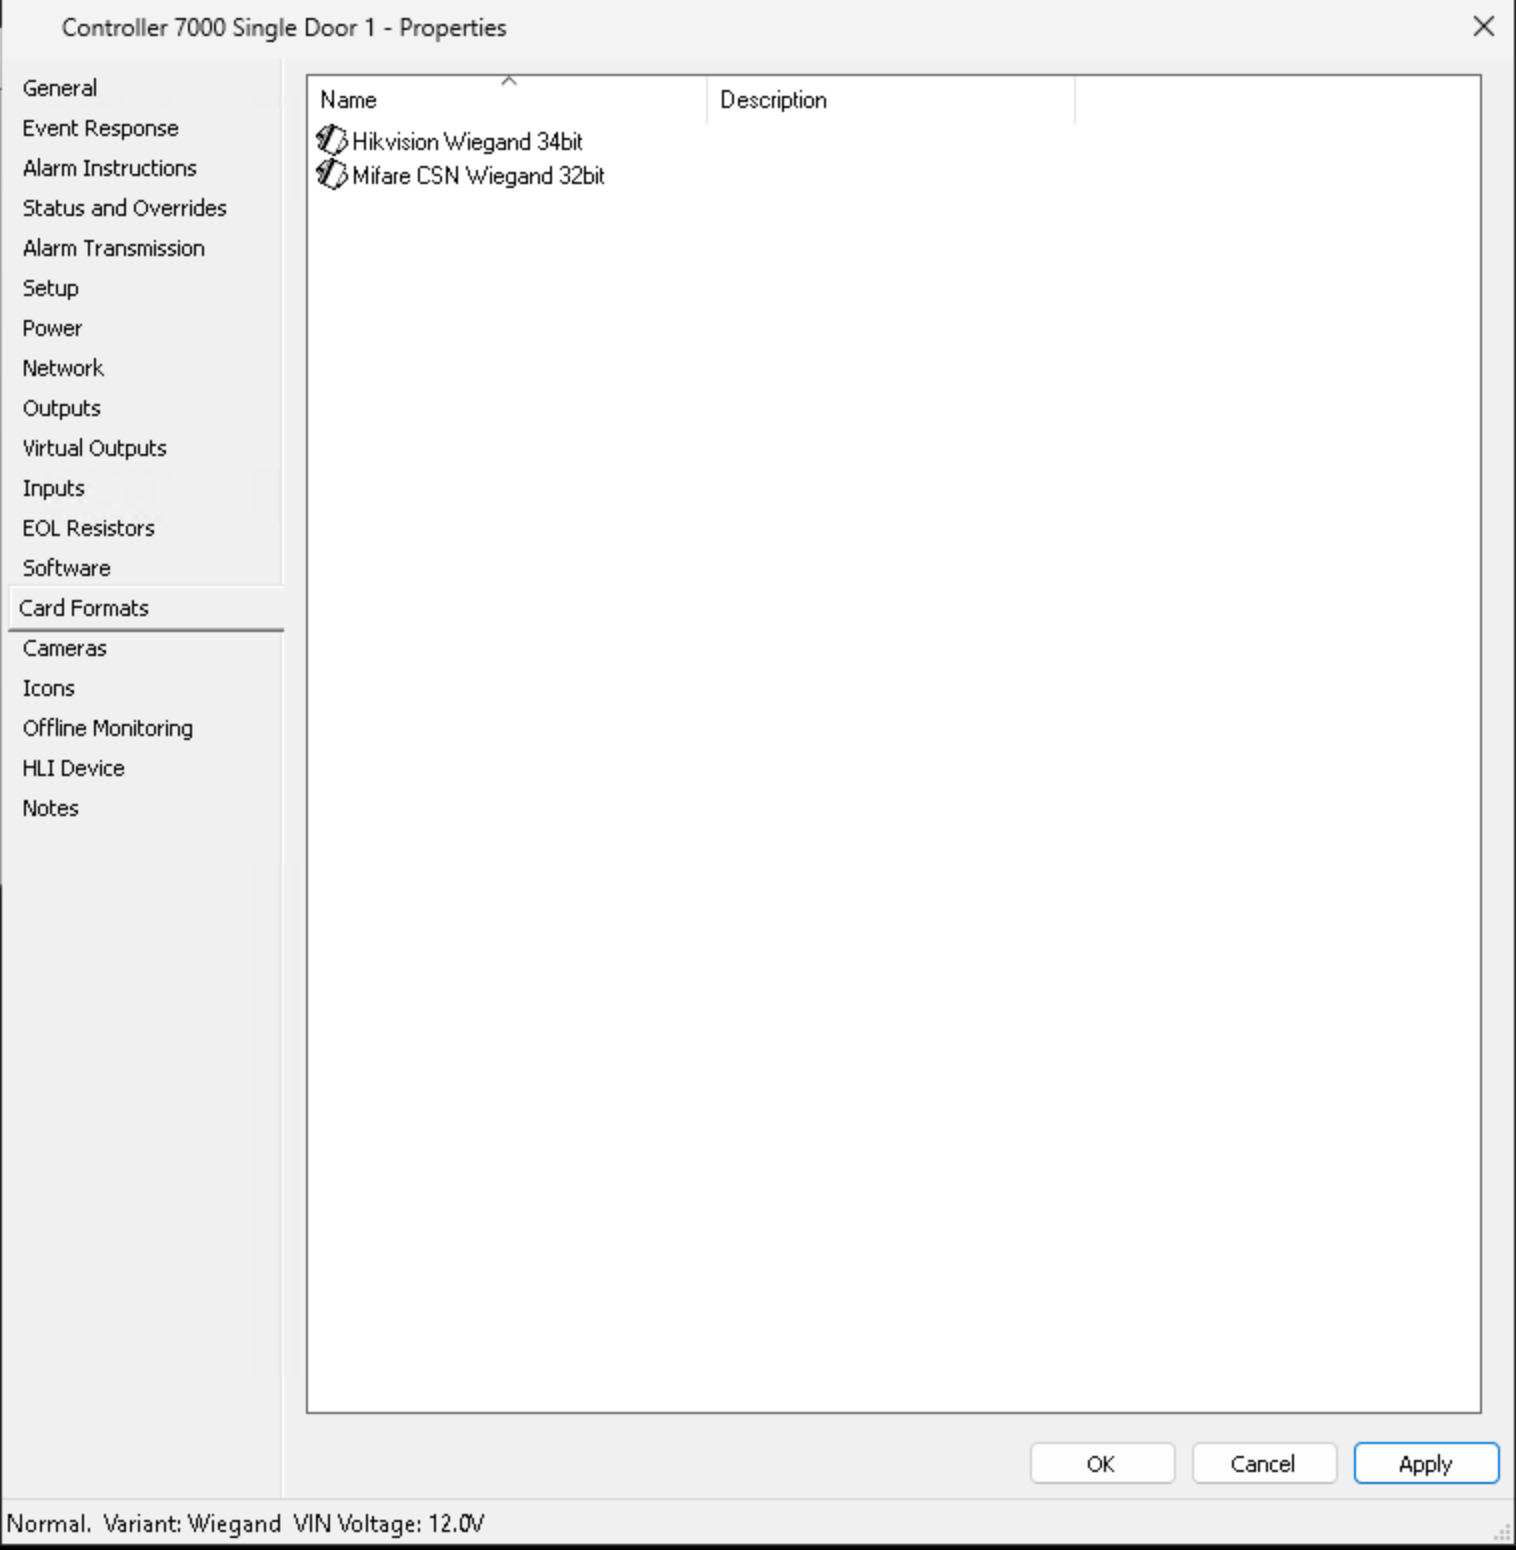
5. Set up the card formats on every controller.
5.5 Configure Personal Data Fields
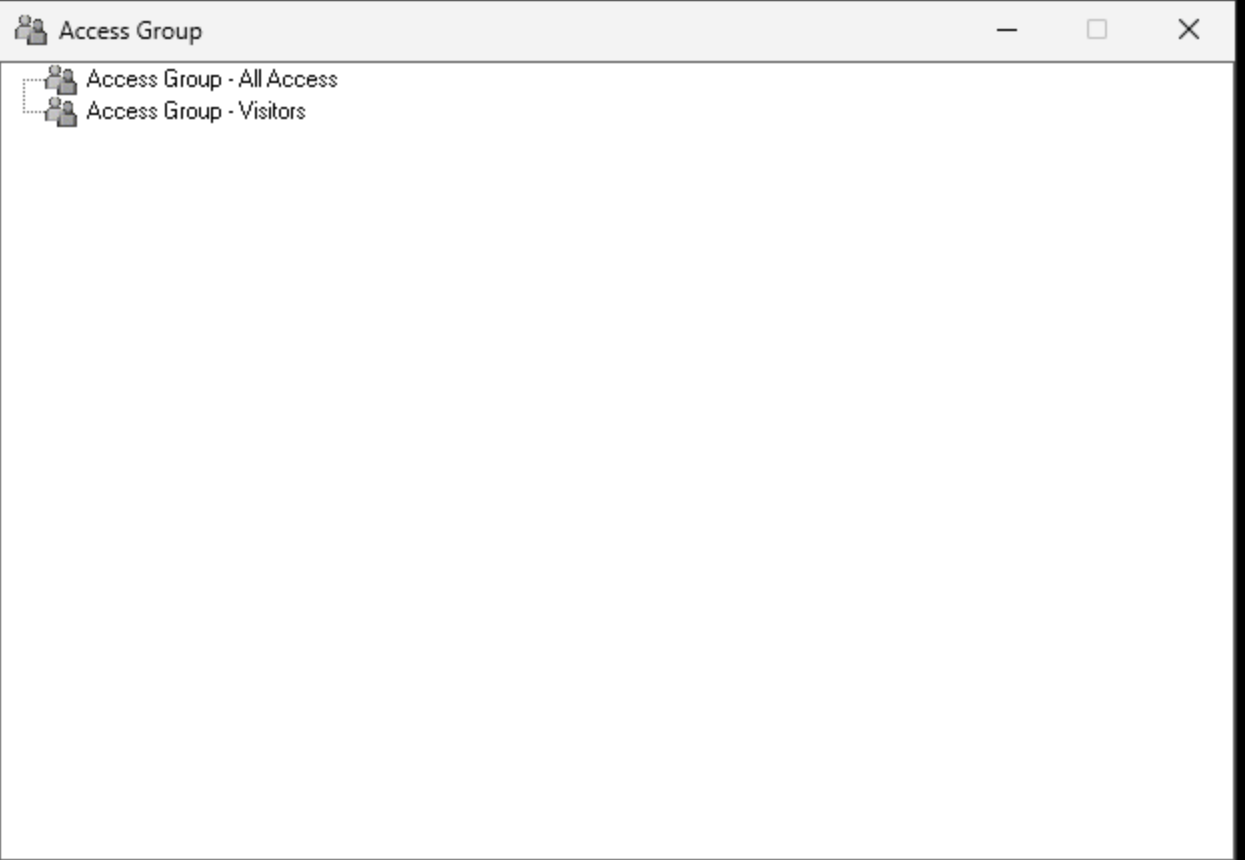
1. Optional: create Visitors and Personnel access groups.
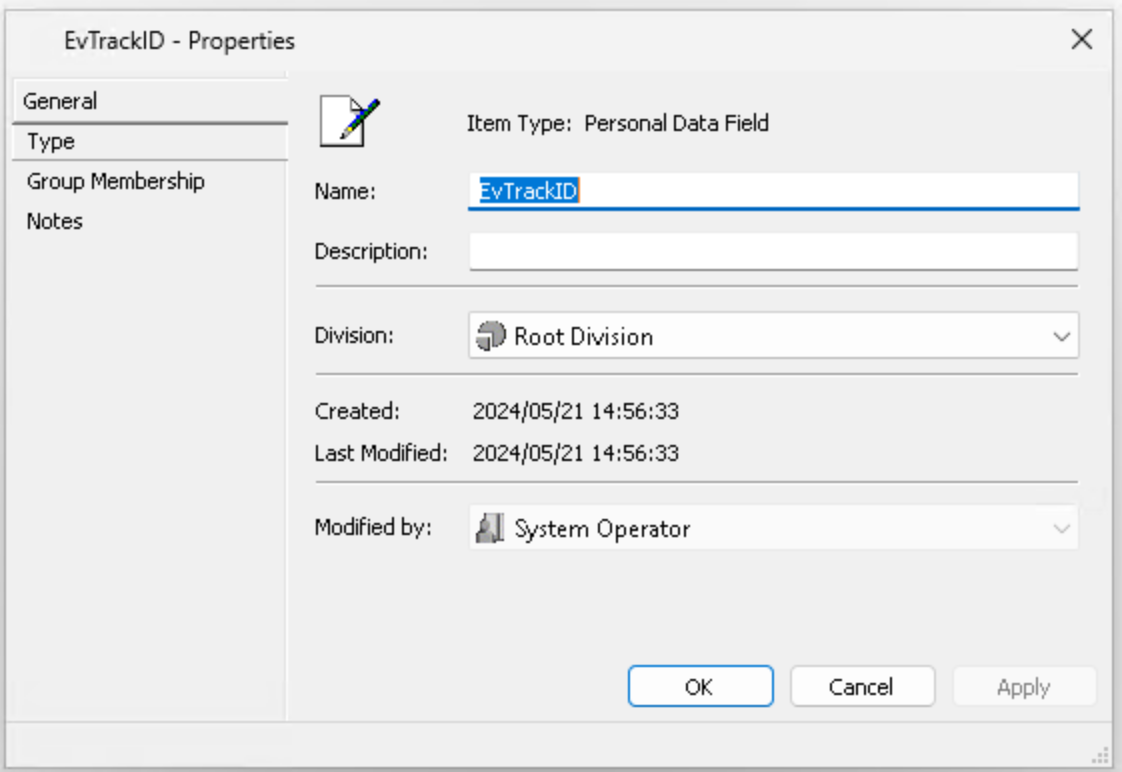
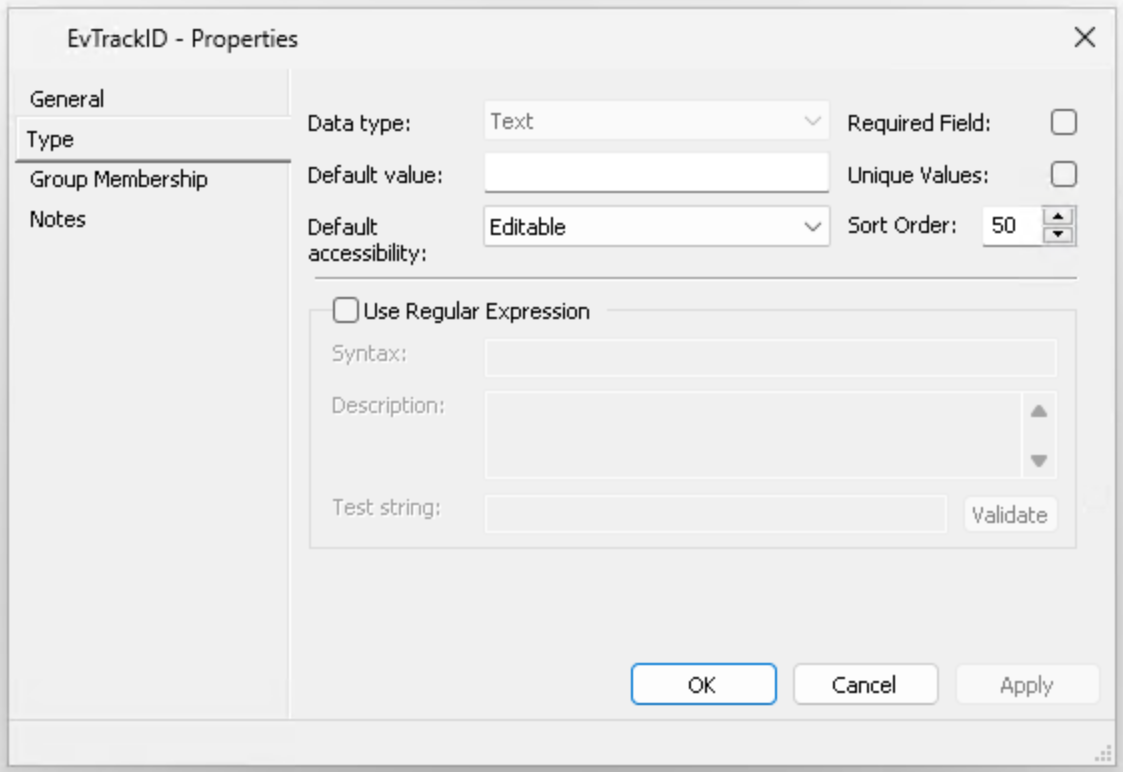
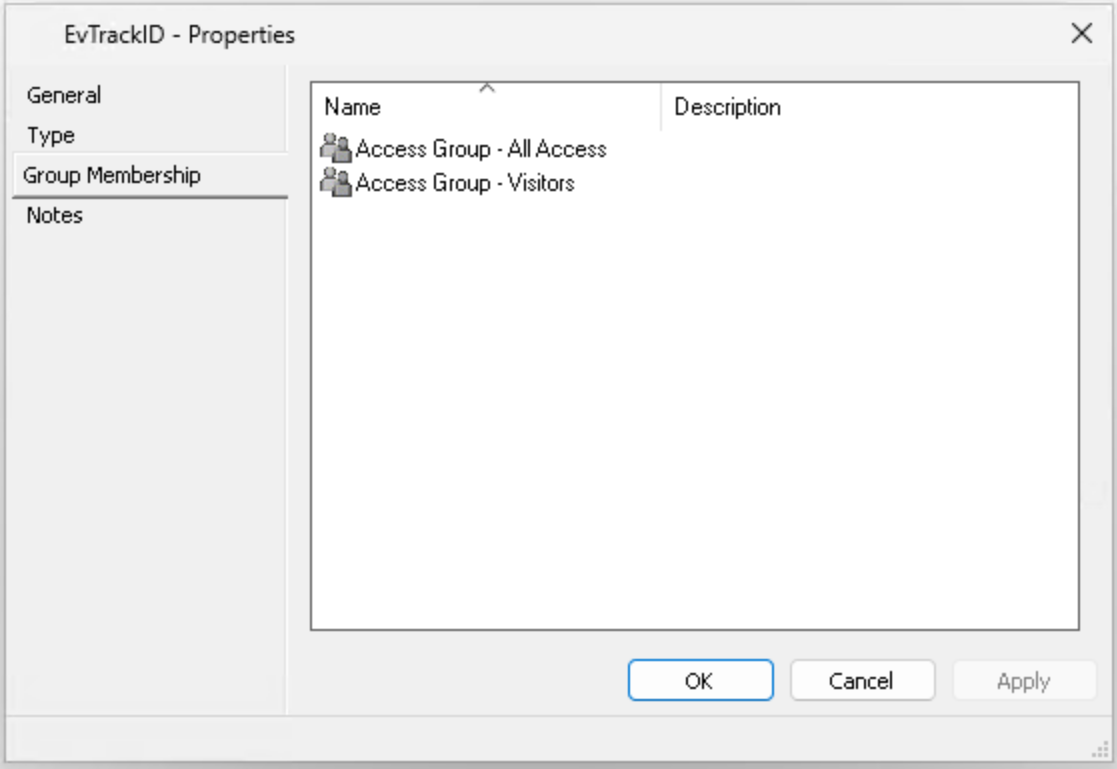
2. Create the EvTrackID personal data field and give every access group access to it.
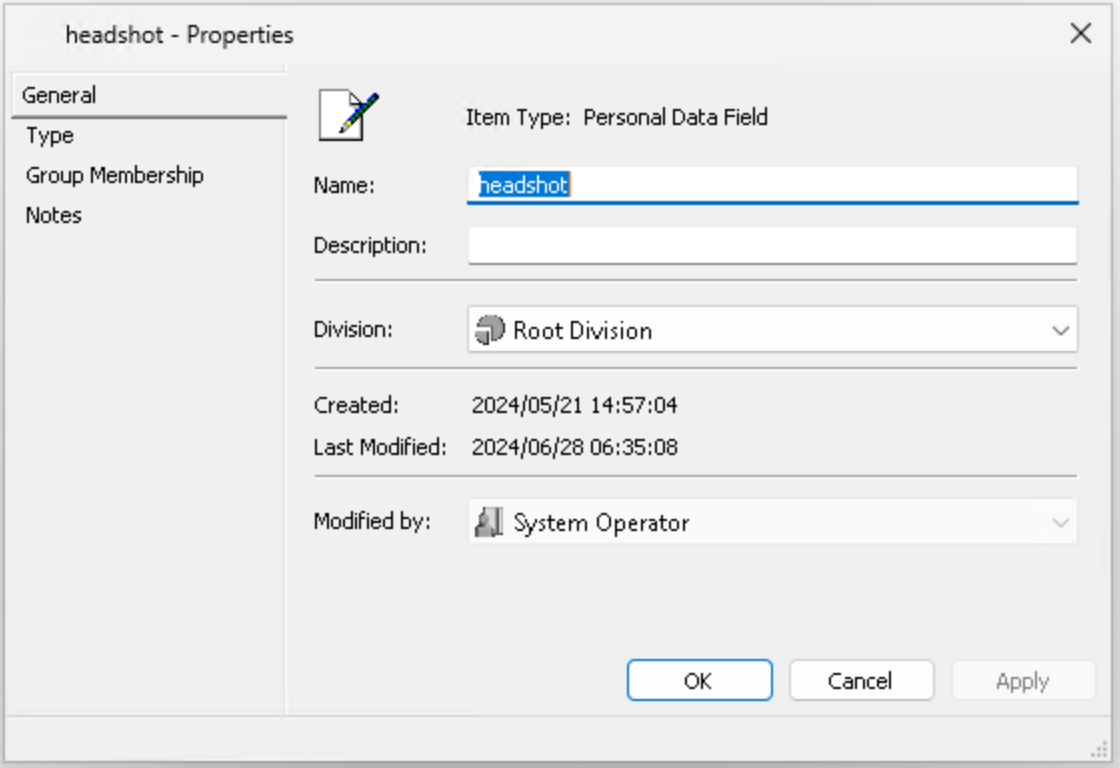
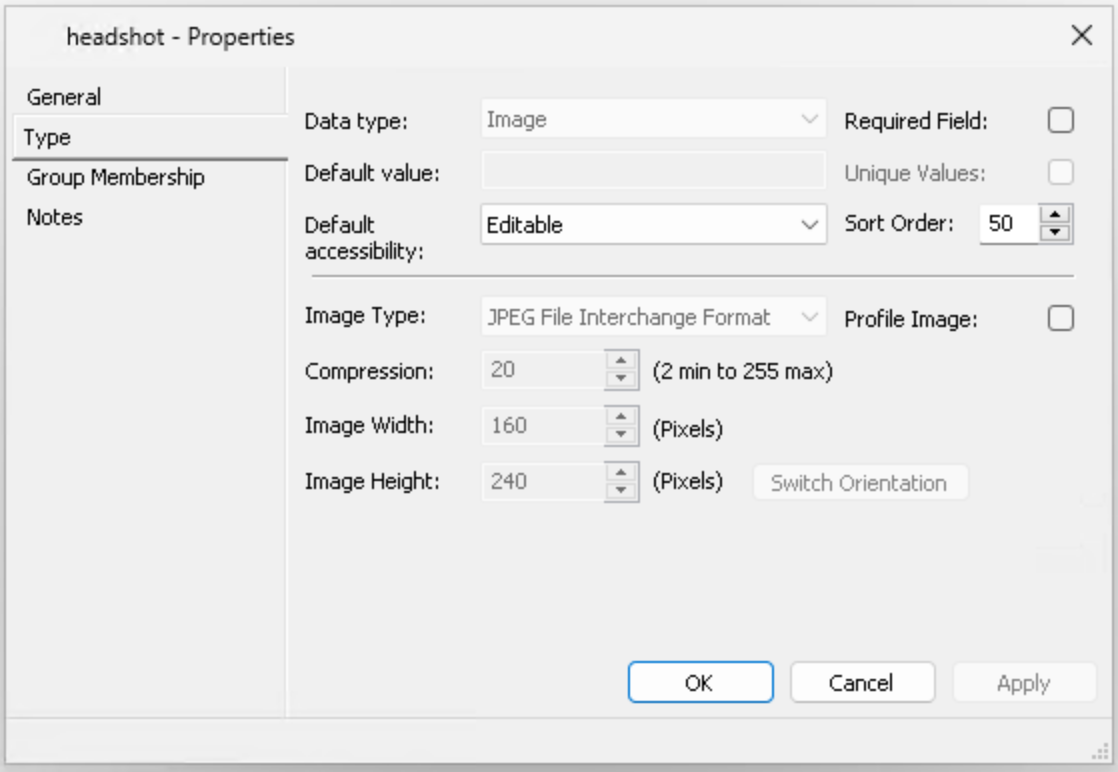
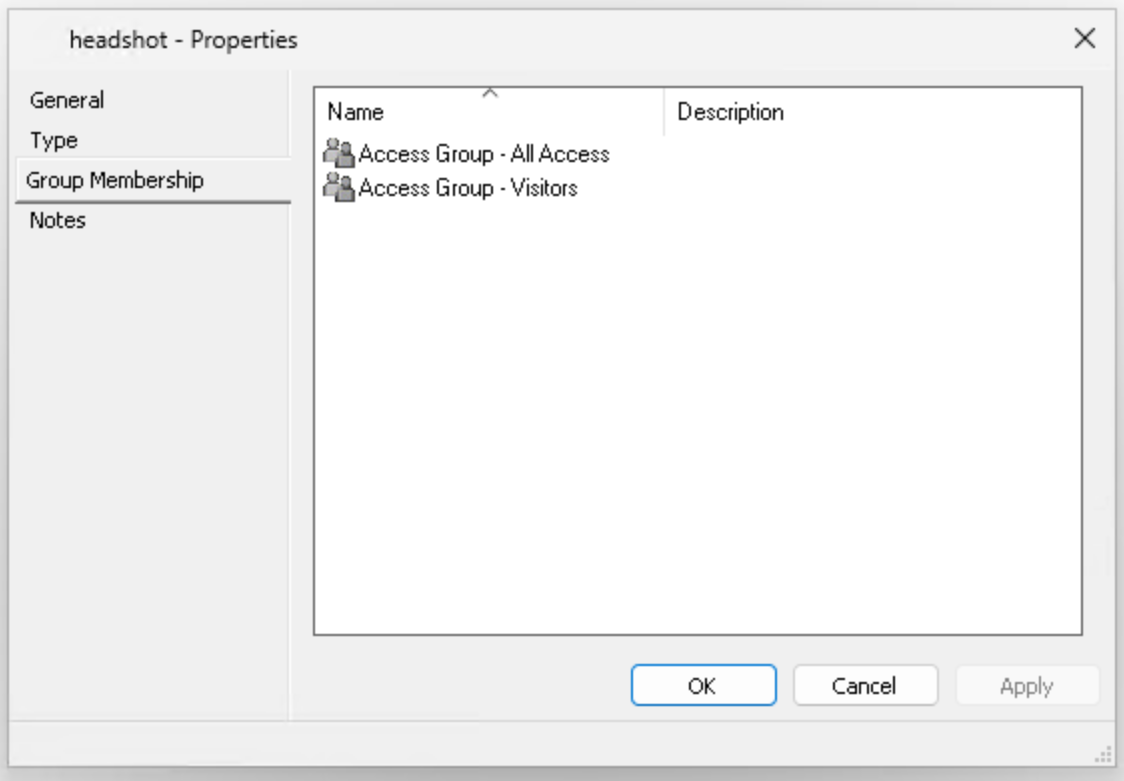
3. Create the headshot personal data field and give every access group access to it.
4. Optional additional personal data fields. EvTrack fills these from its own records where it has them:
- Identity Number
- Employee Number
- Cost Centre
- Department
- Organisation
- Location
- Group
6. EvTrack Configuration
6.1 Add the integration
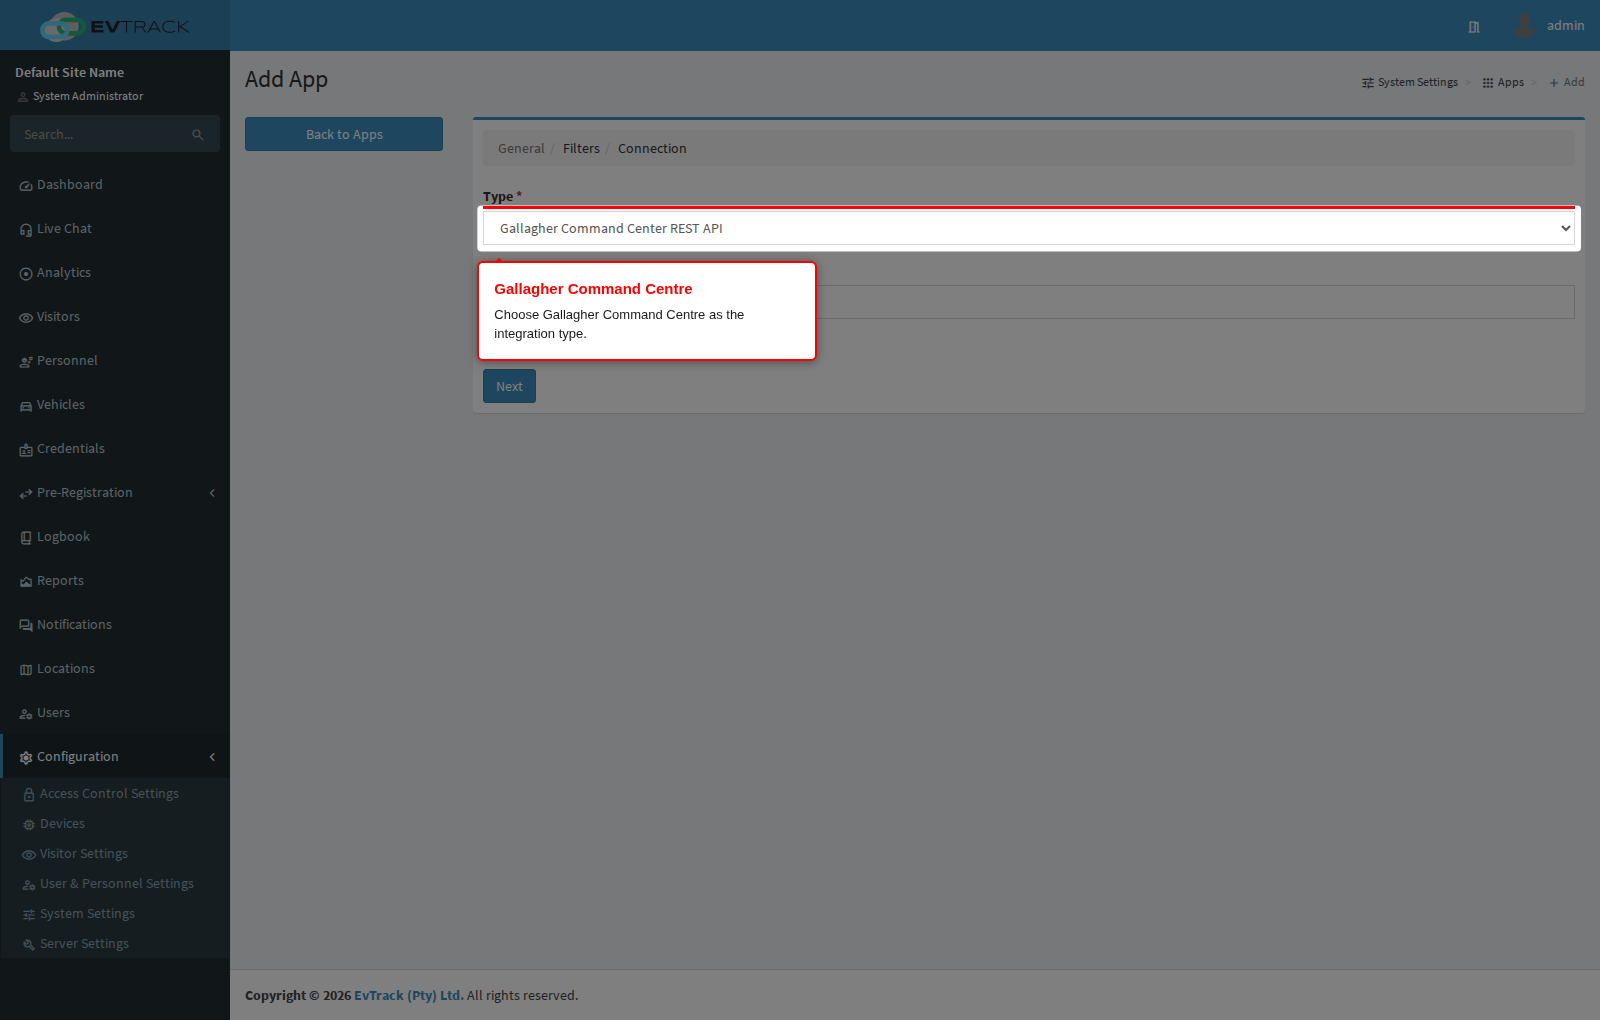
Open Configuration > System Settings > Apps, click Add and choose Gallagher Command Center REST API as the integration type.
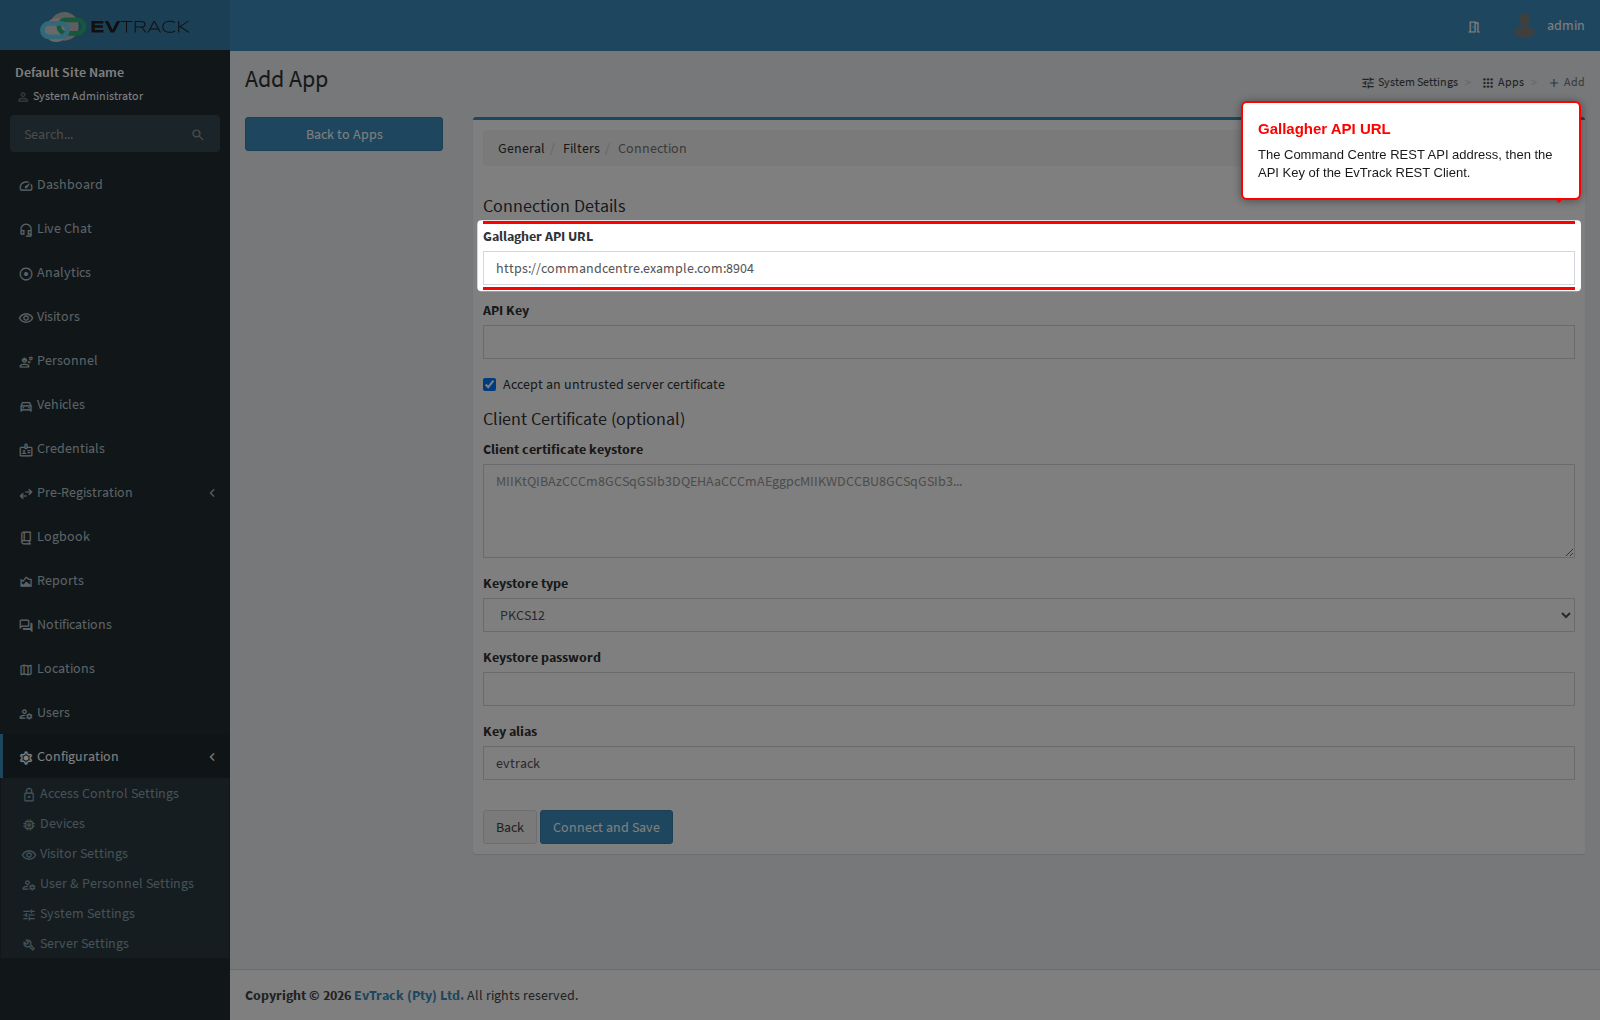
Enter the Gallagher API URL and the API Key from section 5.3. Leave Accept an untrusted server certificate on when Command Centre uses a self-signed certificate, which is usual on premise. A client certificate is only needed when the REST client in Command Centre requires one. Saving the integration tests the connection.
6.2 Configure the integration
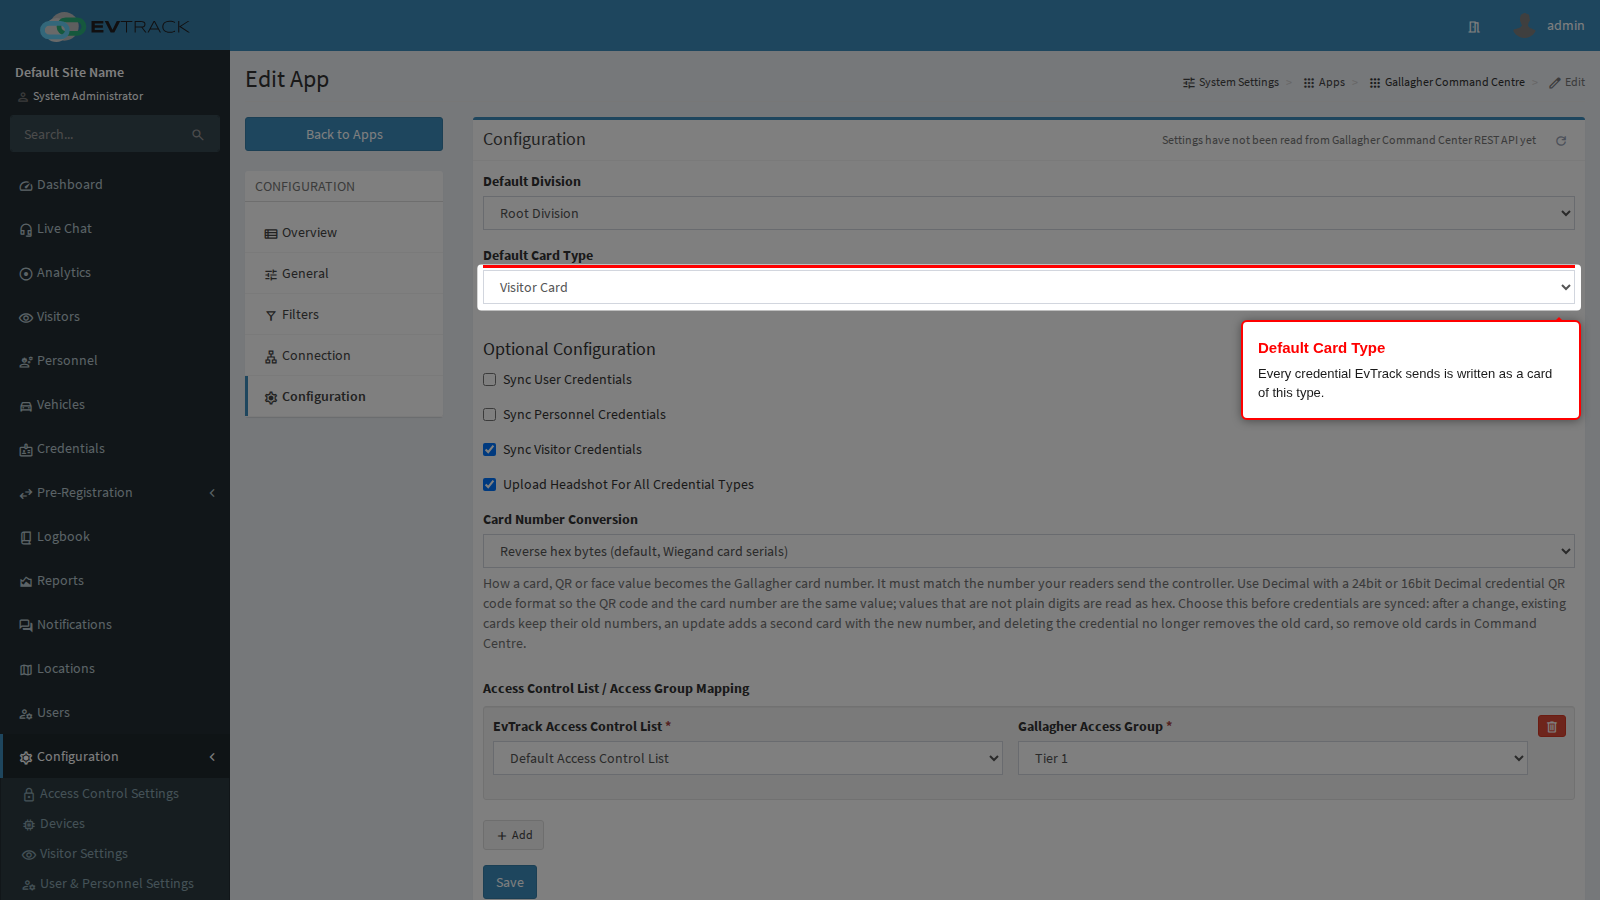
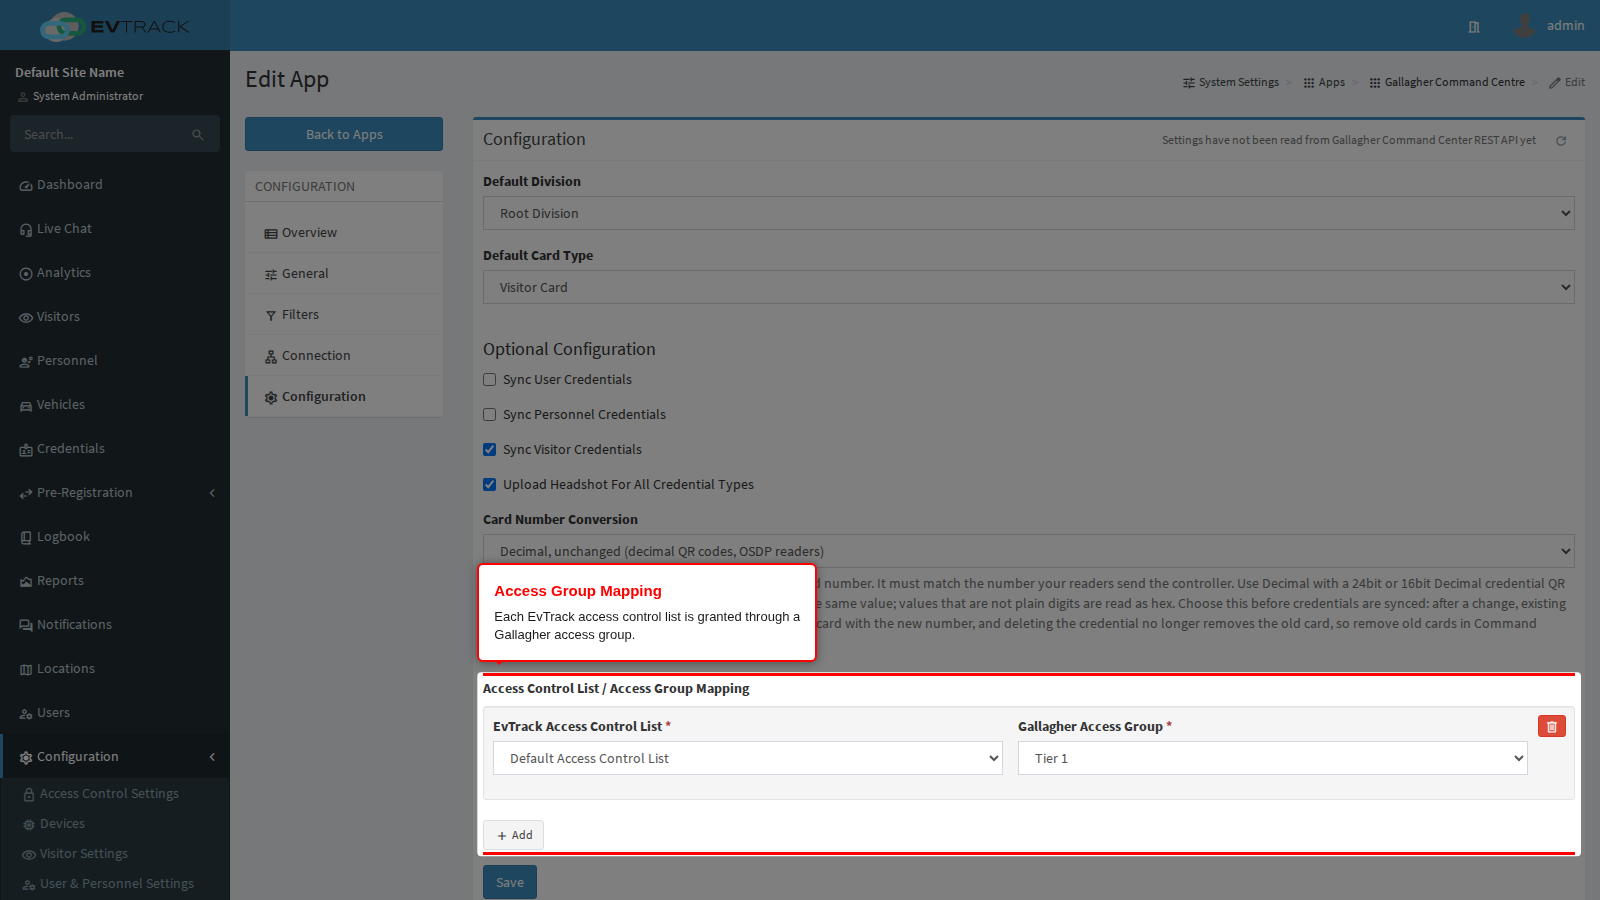
Once the integration is saved, open it again and go to its Configuration section. The lists are read from Command Centre, so they fill only after the connection works.
- Default Division: the division EvTrack creates cardholders in.
- Default Card Type: the card type from section 5.4 (or section 7 for IDEMIA readers). Every credential EvTrack sends, whether QR code, card or face, is written as a card of this one type, so its card number range must hold all of them.
- Sync User / Personnel / Visitor Credentials: which credential holders are sent to Gallagher.
- Upload Headshot For All Credential Types: on, every cardholder carries its photo; off, only face credentials do.
Card Number Conversion sets how EvTrack turns a credential into the card number it writes to Gallagher. It must produce exactly the number the reader sends the controller, and that depends on the reader:
| Choice | Card number written to Gallagher | Use for |
|---|---|---|
| Reverse hex bytes (default, Wiegand card serials) | the value byte-reversed and read as hex: A3335C2B becomes 727462819 | Wiegand readers that send MIFARE serials least significant byte first. The default, and unchanged from earlier versions |
| Straight hex to decimal | the value read as hex: A3335C2B becomes 2738052139 | readers that send the serial most significant byte first |
| Decimal, unchanged (decimal QR codes, OSDP readers) | a value made only of digits is written as that number, without leading zeros: 01234567 becomes 1234567. Anything else is read as hex | QR codes in a decimal format, read by IDEMIA VisionPass readers on OSDP (section 7) |
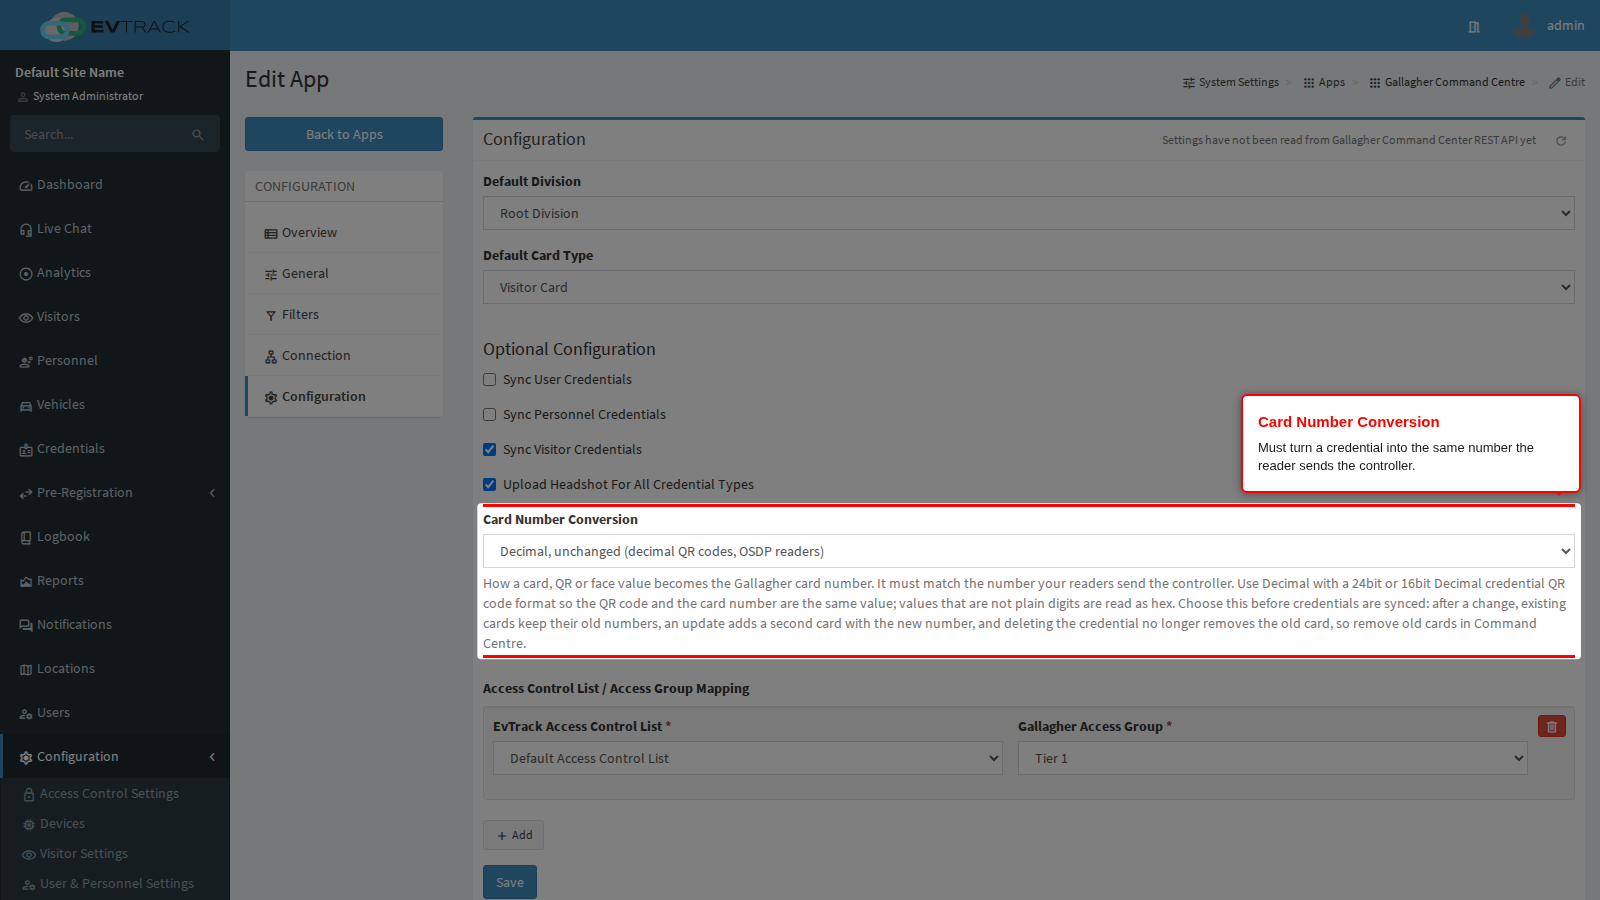
Choose the conversion before any credentials are synced. If it is changed later, cards already in Command Centre keep their old numbers: the next update adds a second card beside the old one, and deleting the credential no longer finds the old card. After a change, remove the old cards in Command Centre.
Finally, map each EvTrack access control list to the Gallagher access group that grants it. A credential whose access control lists have no mapped access group is not given any access in Gallagher, even when its card number is correct.
7. Decimal QR Codes and Face Credentials on IDEMIA VisionPass Readers (OSDP)
IDEMIA VisionPass readers can serve both facial recognition and visitor QR codes, but only with one card format and one facility code per reader. Gallagher keeps card numbers 8,388,608 - 16,777,215 on that facility code for its own biometric credentials, so every visitor QR code and every EvTrack face credential must use a card number between 31 and 8,388,607. The QR code carries that number as plain decimal text, which the reader sends to the controller unchanged.
7.1 EvTrack: Identifier Formats
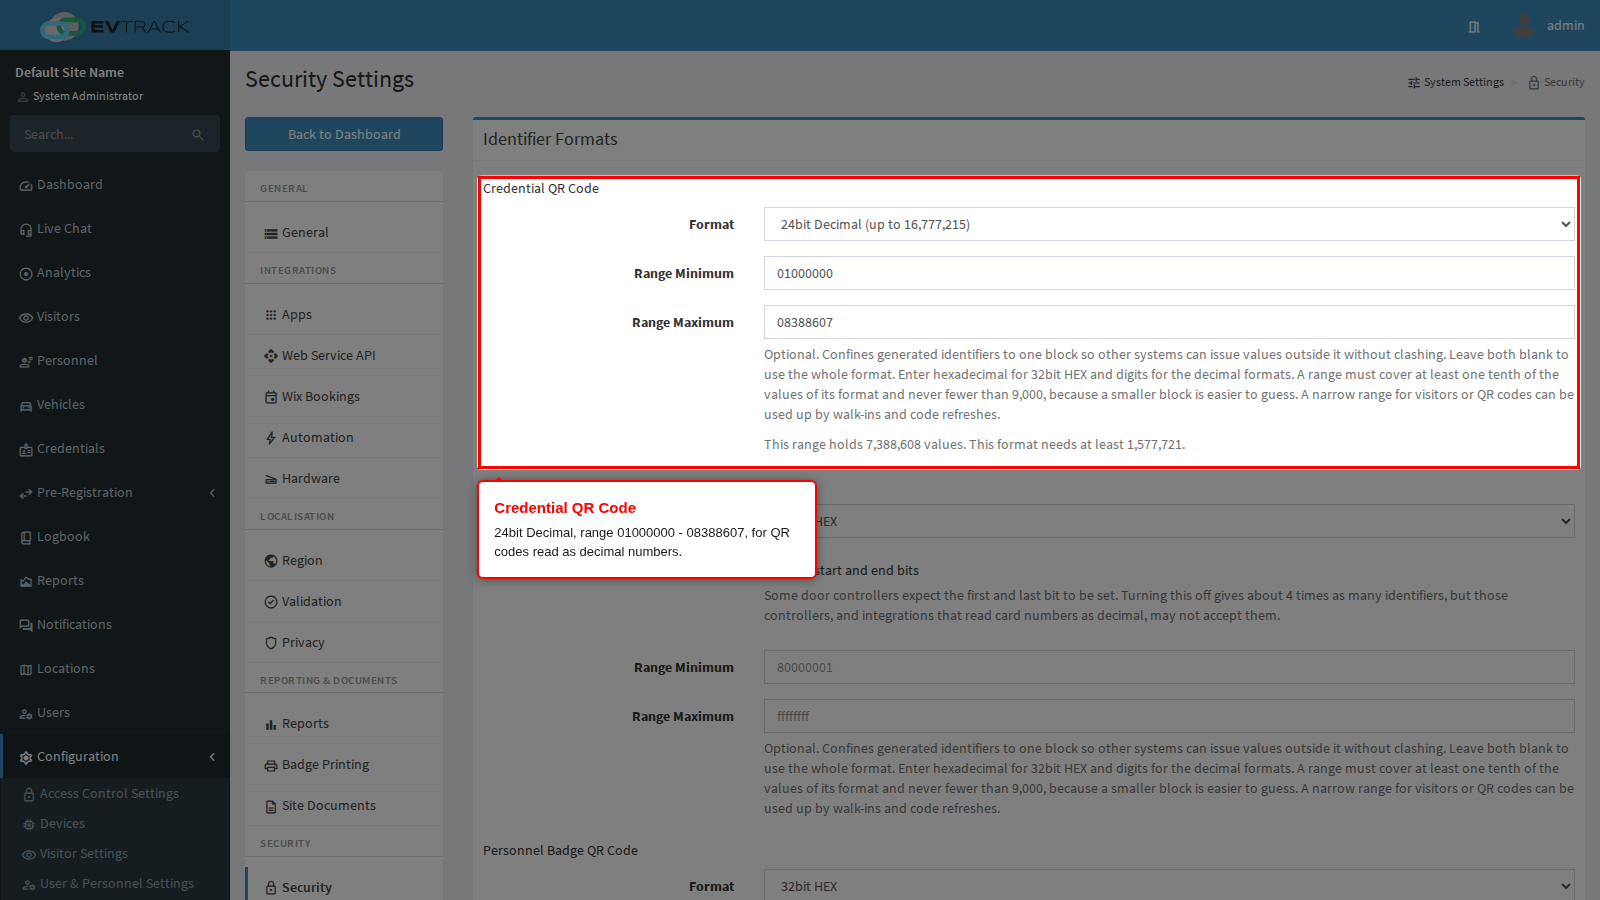
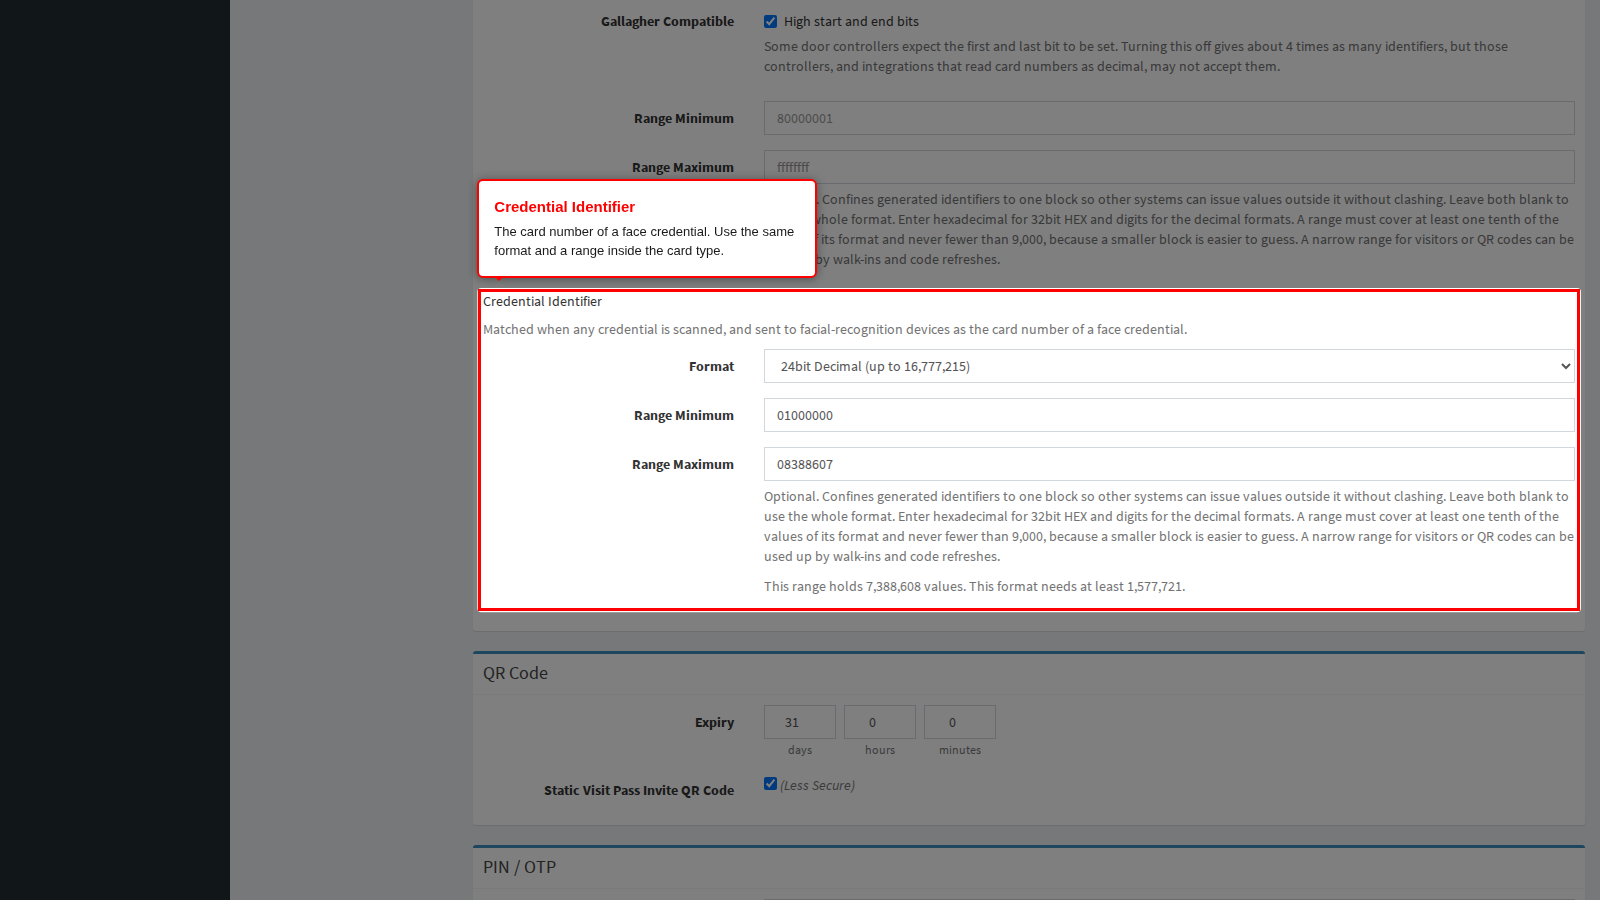
Open Configuration > System Settings > Security > Identifier Formats and set both of these blocks:
| Block | Format | Range Minimum | Range Maximum |
|---|---|---|---|
| Credential QR Code | 24bit Decimal | 01000000 | 08388607 |
| Credential Identifier | 24bit Decimal | 01000000 | 08388607 |
Credential Identifier is the card number of a face credential, so it needs the same treatment as the QR code. Left on its default, a face credential gets a number far above 8,388,607.
- The two blocks can share one range. EvTrack never issues a number that is already held by another QR code, credential or badge.
- The 24bit Decimal format starts at 1,000,000, so
01000000is the lowest minimum. The range above holds about 7.4 million numbers. - EvTrack QR codes are always 8 characters, so every code in this range starts with a zero, for example
01234567. EvTrack writes it to Gallagher without the zero, as1234567. - The formats apply to identifiers issued after saving. Existing QR codes and face credentials keep their numbers until they are reissued.
7.2 EvTrack: Gallagher integration
On the integration’s Configuration section (section 6.2):
- Default Card Type: the Visitor Card type from section 7.3.
- Card Number Conversion: Decimal, unchanged (decimal QR codes, OSDP readers). Set it before visitor credentials are synced.
Because every credential is written with the one Default Card Type, do not also sync physical Wiegand or MIFARE cards through this integration: a card serial is read as hex, which gives a number above 8,388,607.
7.3 Gallagher Command Centre
1. Create a Visitor Card card type: facility code as issued for the site, Decimal, card number range 31 - 8,388,607, Auto Fill Card Number off.
2. Edit the card layout and add a New MIFARE Classic Object. No QR object is needed.
7.4 IDEMIA VisionPass readers
- Set
ucc.per_user_rulesto 0 on every reader. - Leave
QR.hexa_valueat its factory default of 0: the QR code is already decimal. - After any MIFARE push or reader change from Command Centre, read
ucc.per_user_rulesback. Command Centre can reset it to 1, and then every QR code is rejected at the reader.
7.5 Bench check before go-live
On one reader, confirm that a QR code of 01234567 is sent to the controller as 1234567: the reader’s transaction log shows the decimal value, and the Command Centre event trail shows the cardholder granted with that card number.
8. Testing
1. Record a visitor check-in at the kiosk or on the Guard device, and confirm that the cardholder and credential appear in Command Centre under Cardholders.
2. Present the visitor’s QR code (on the badge, or as sent by email, SMS or WhatsApp) at a reader, and confirm the Command Centre event shows the visitor granted entry.
3. On IDEMIA readers, also confirm that the card number in Command Centre is the QR code without its leading zero, that an EvTrack face credential has a card number between 1,000,000 and 8,388,607, and that staff facial access still works on the same reader.