Scanned paperwork can be stored directly on the record it belongs to, instead of on a shared drive nobody at the checkpoint can reach. The same Documents panel appears on several kinds of record, works identically everywhere, and is documented here once.
Where the Documents panel appears
| Record | Typical documents | Chapter |
|---|---|---|
| Visitor | Copy of the identity document or passport, work permit, signed non-disclosure agreement | Documents on a Visitor |
| Personnel | Safety induction certificate, contractor insurance, trade licence, medical certificate | Documents on Personnel |
| User | Copy of the identity document, signed system access agreement, training record | Documents on a User |
| Location | Site map, evacuation plan, emergency procedure, building rules, lease or permit | This chapter |
| Vehicle | Vehicle licence document, roadworthy certificate, insurance, hazardous-goods permit | This chapter |
Files that belong to the whole site rather than to one record - the general induction pack, the site terms and conditions - are stored separately under Site Documents.
Before you start
- Have the file ready as a JPG, PNG or PDF of up to 10 MB.
- Viewing, uploading and deleting documents are three separate permissions. If the Documents tab, or the Upload or Delete button, is missing, ask an administrator to extend your role.
Location documents
A location holds the paperwork that describes that building or site: the site map handed to contractors, the evacuation plan and emergency procedure, the building rules, the lease or the operating permit. Storing it on the location means the people who manage that building find it where they work, and an expiry date on a permit shows when it has to be renewed.
A location’s documents are also offered through the companion mobile app to app users who are assigned to that location, provided their role is allowed to read location documents. Files meant for everyone, regardless of building, belong under Site Documents instead.
Step 1: Open Locations
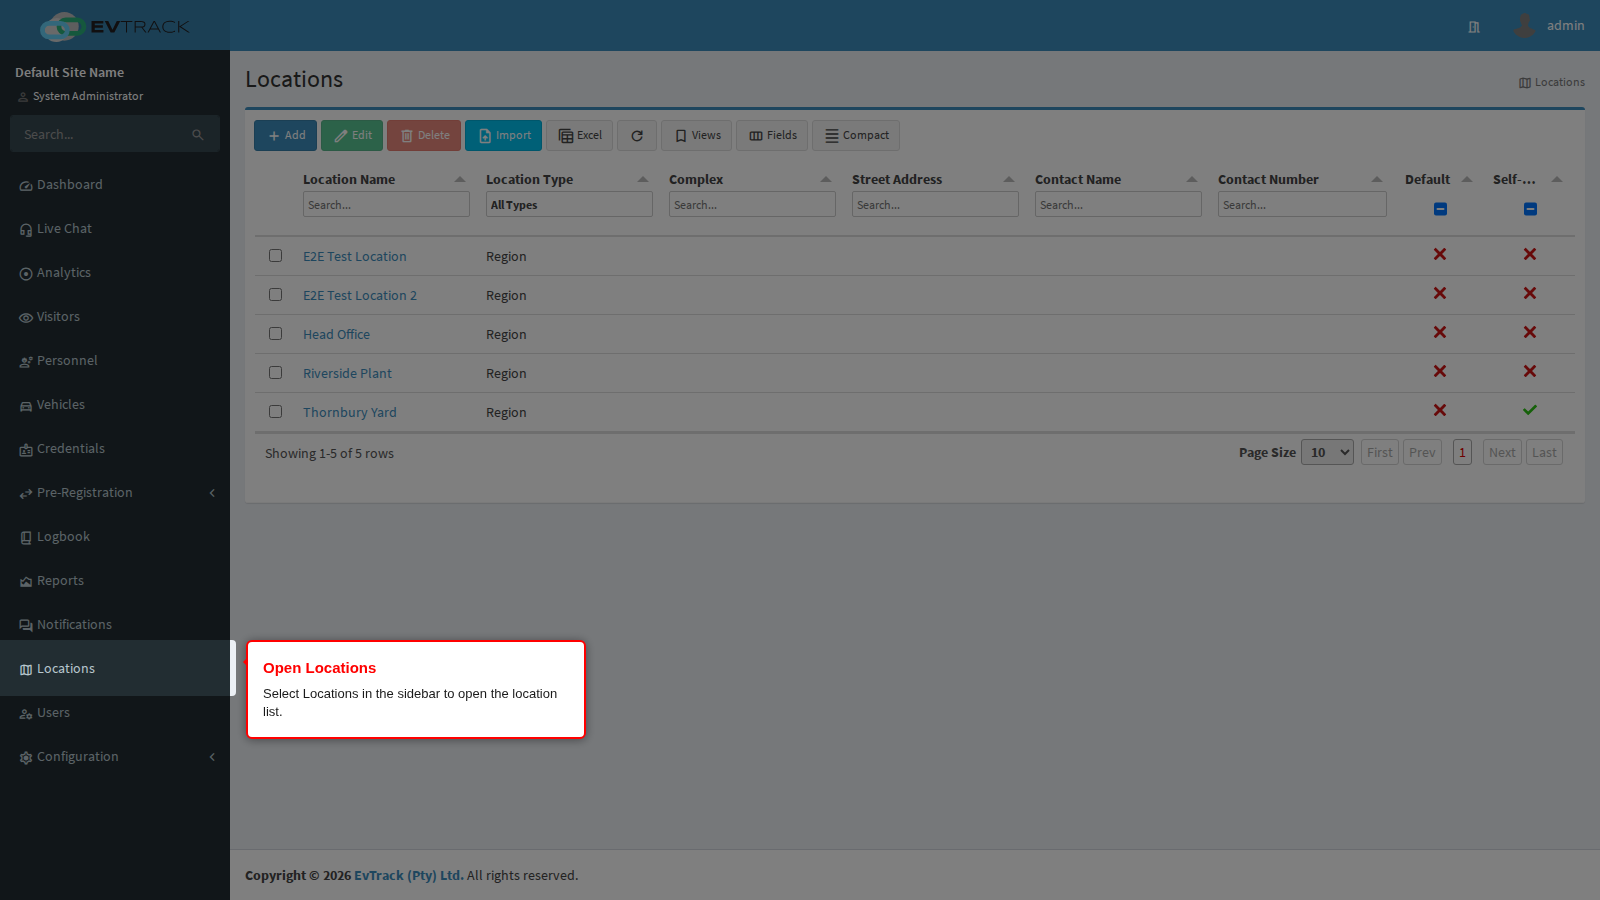
Select Locations in the sidebar. The location list opens, with a search field under each column heading.
Step 2: Open the location
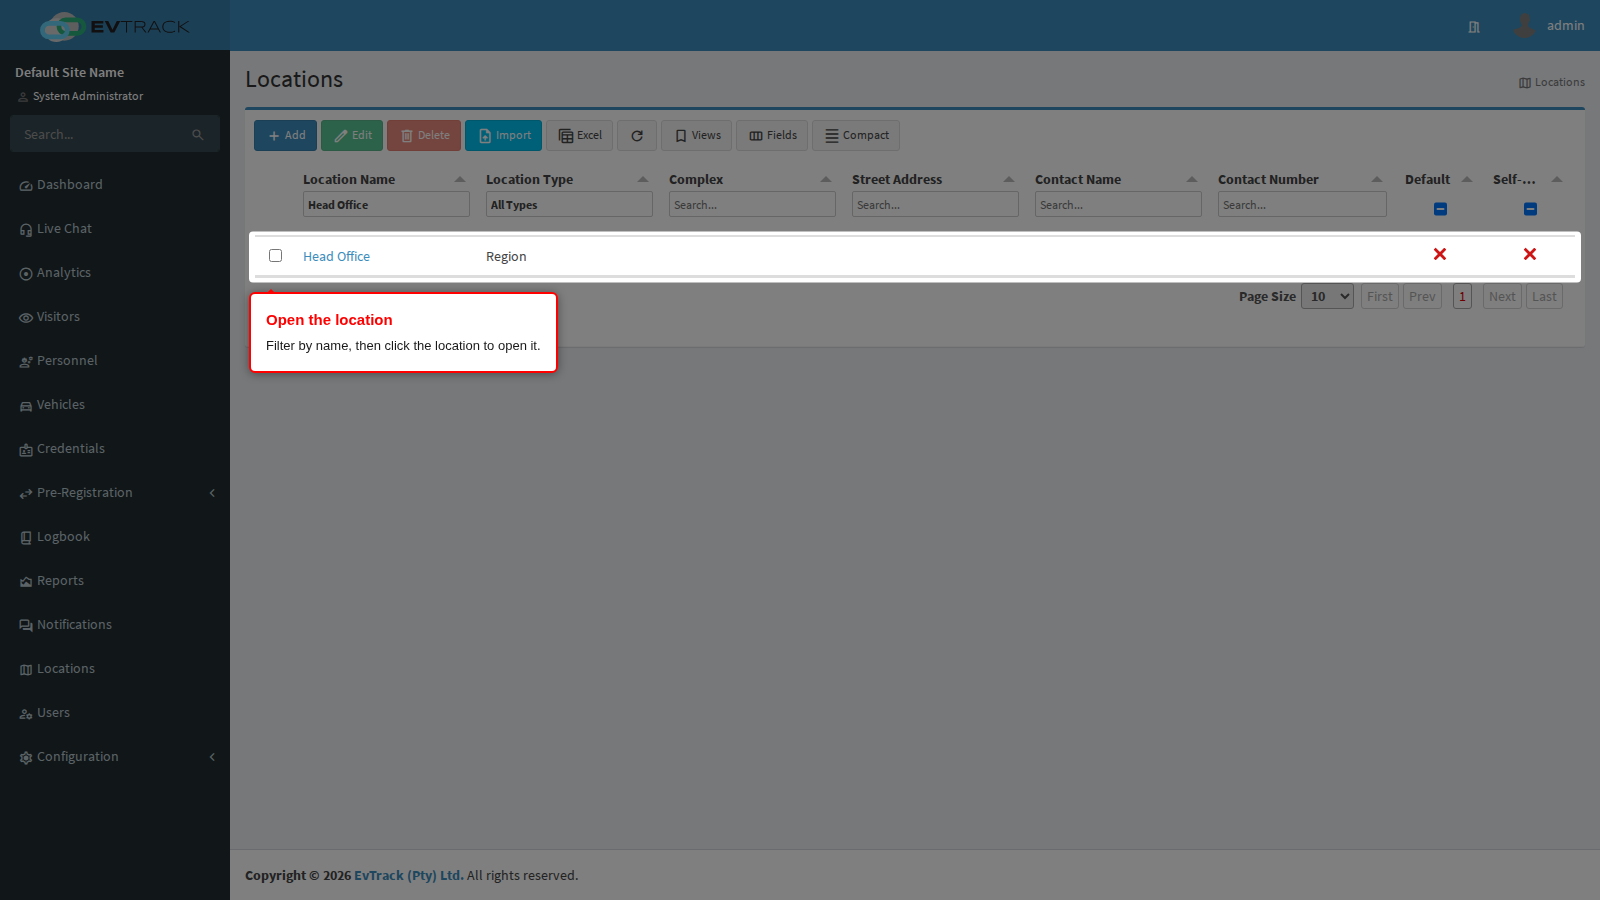
Type the location’s name into the search field under the Name heading; the list narrows as you type. Click the location’s name to open it.
Step 3: Go to the Documents tab
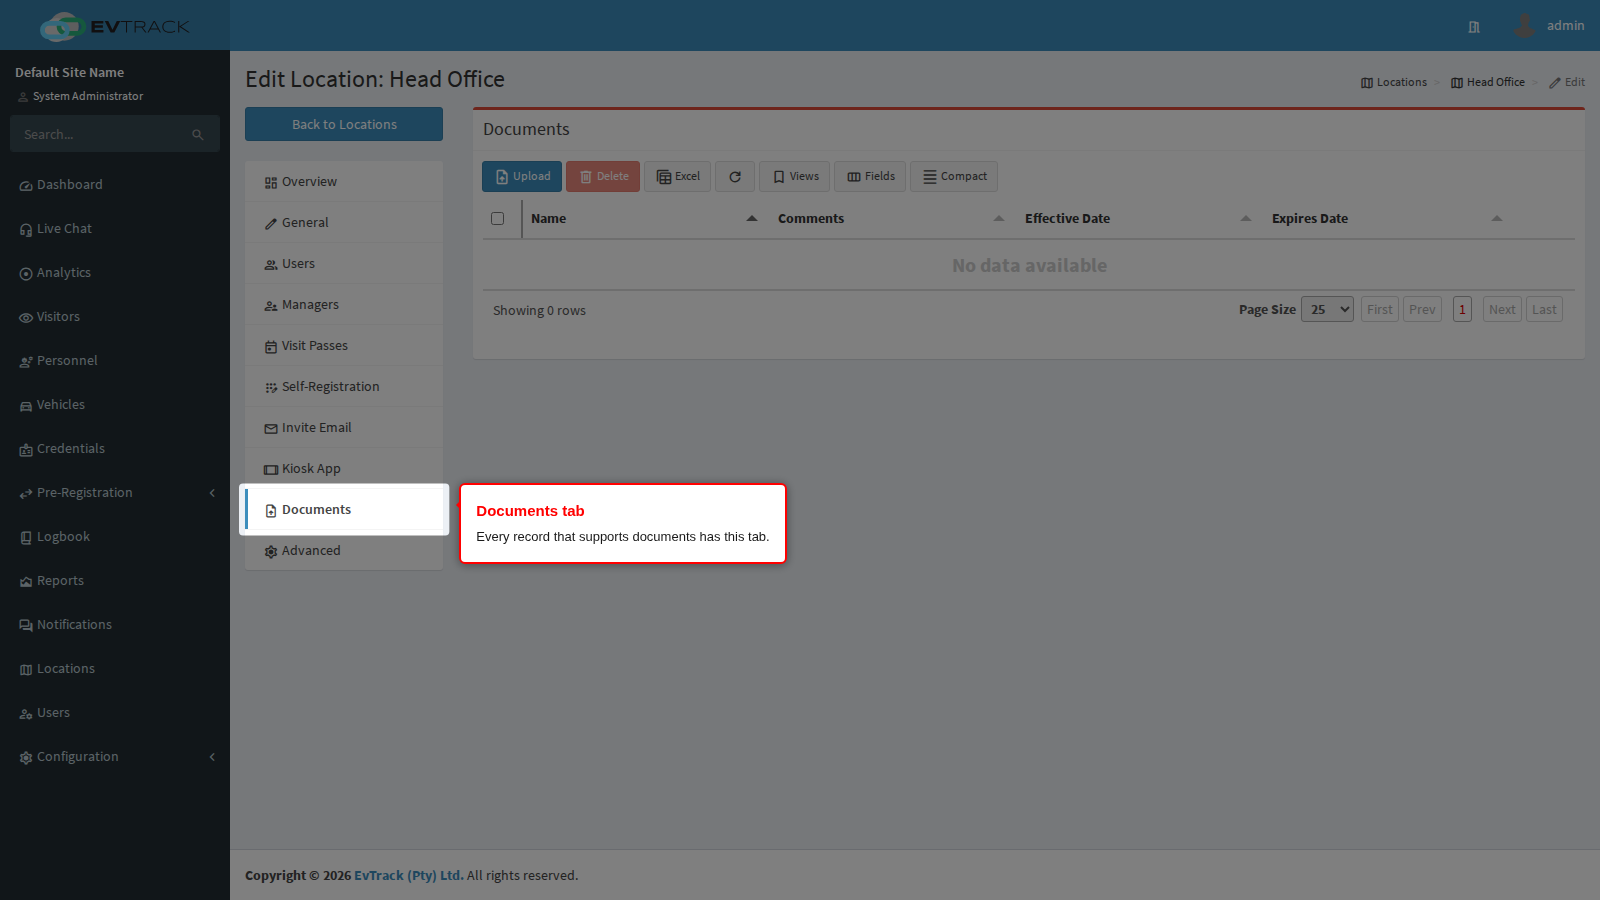
In the tab list on the left of the location, select Documents.
Step 4: The Documents panel
This is the shared panel. It looks and behaves the same on a visitor, a person, a user, a location and a vehicle.
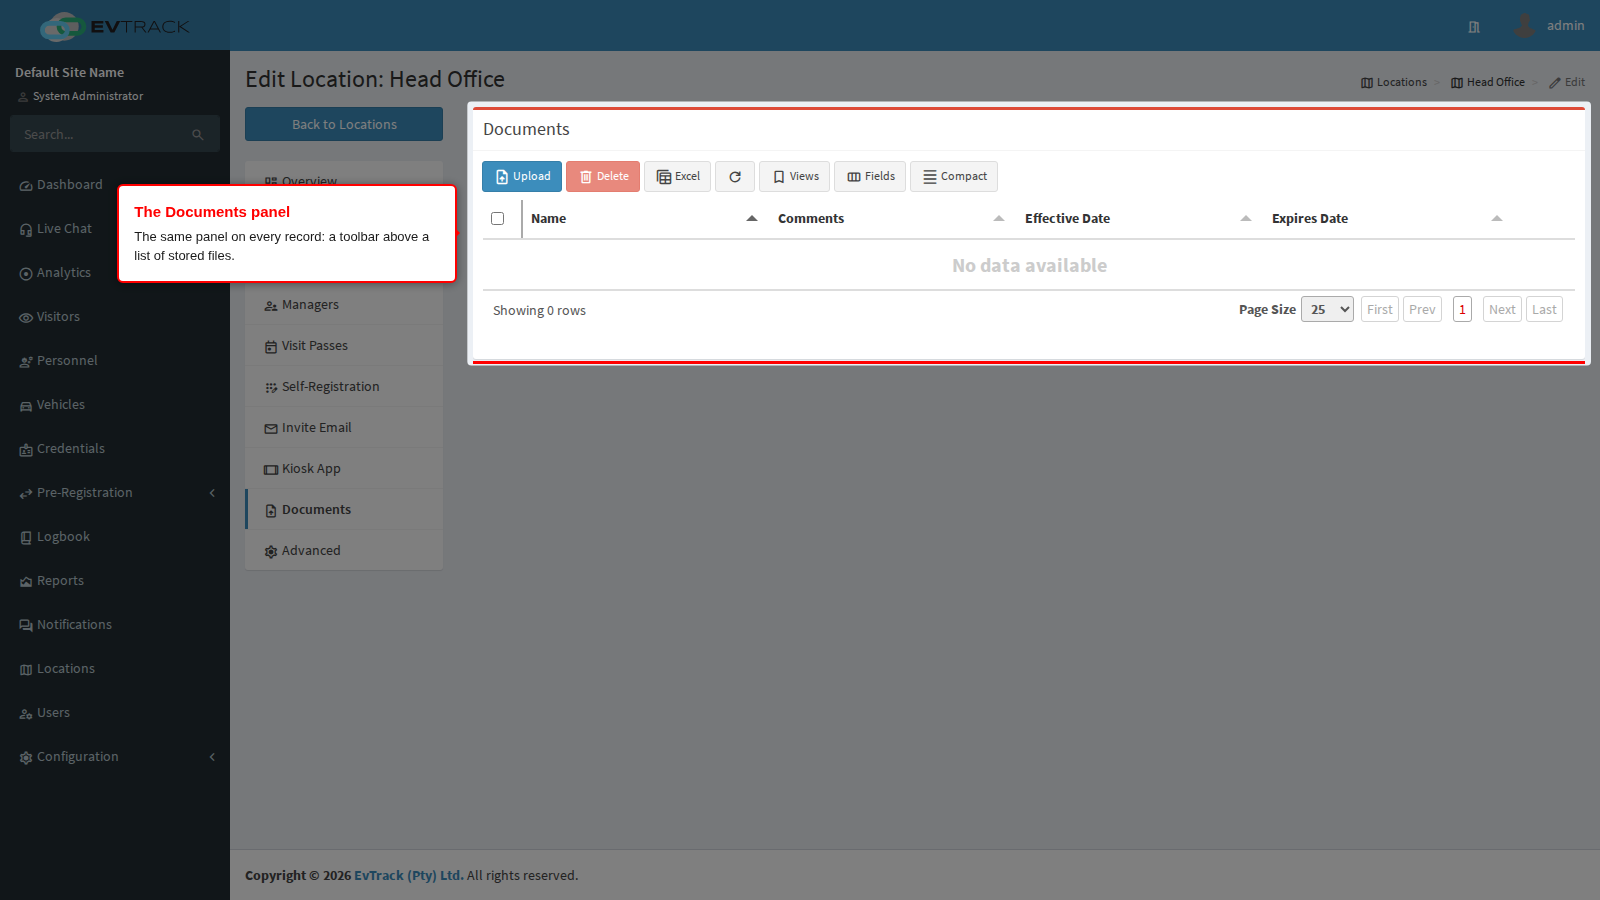
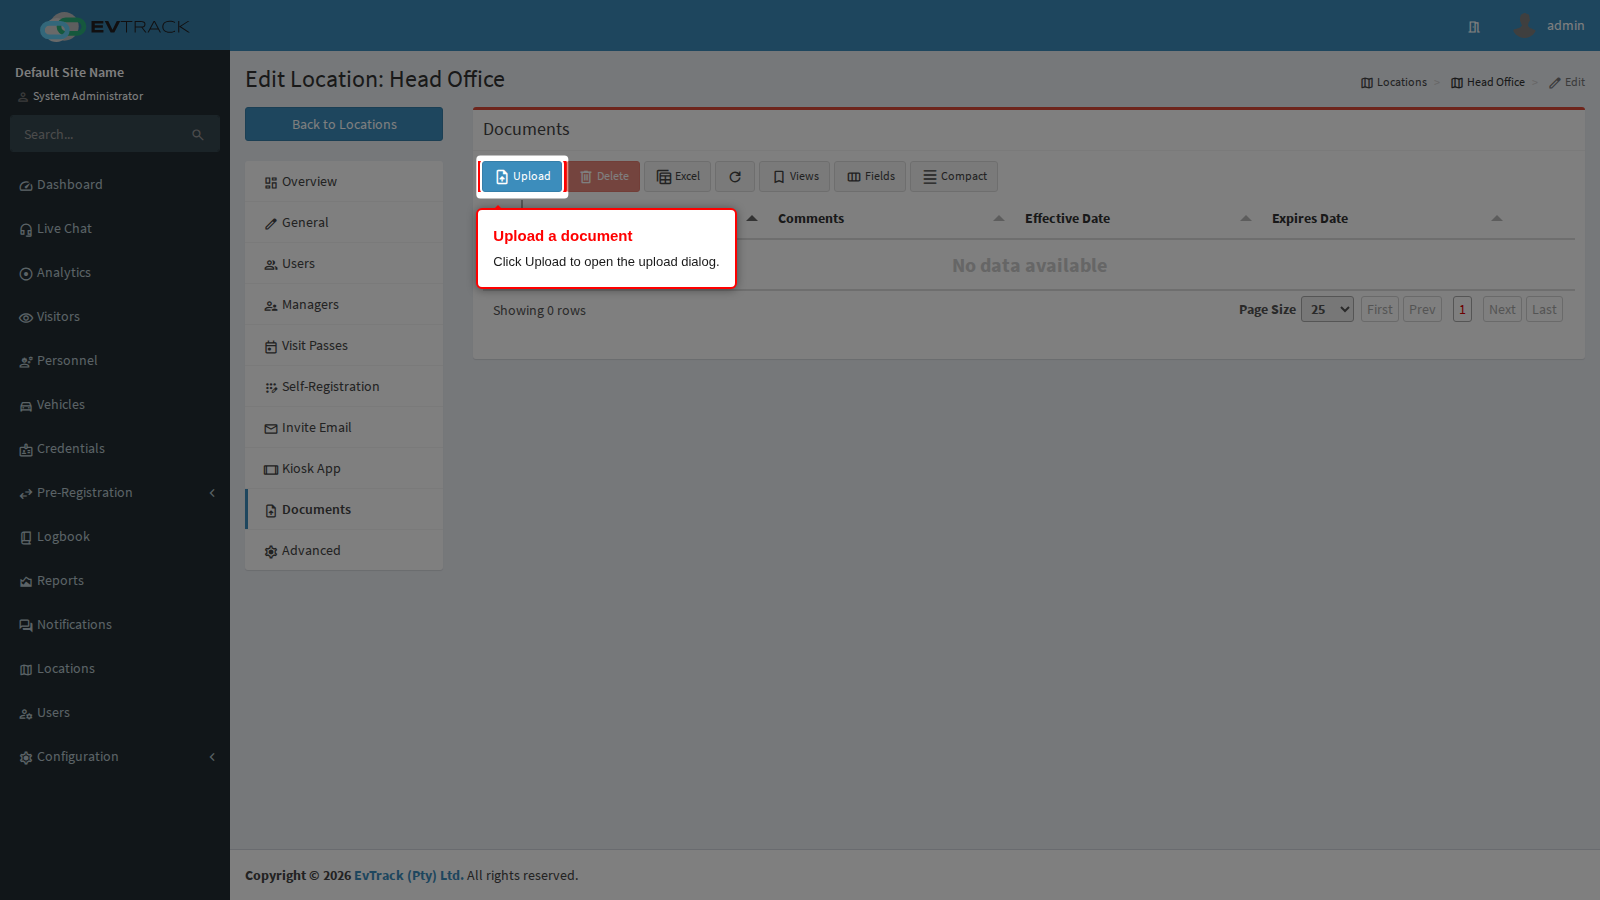
The toolbar holds four buttons:
- Upload - opens the upload dialog.
- Delete - removes the selected document. It remains disabled until exactly one document is selected.
- The refresh icon - reloads the list.
- The spreadsheet icon - exports the list of documents (the file names, comments and dates, not the files themselves) to a spreadsheet.
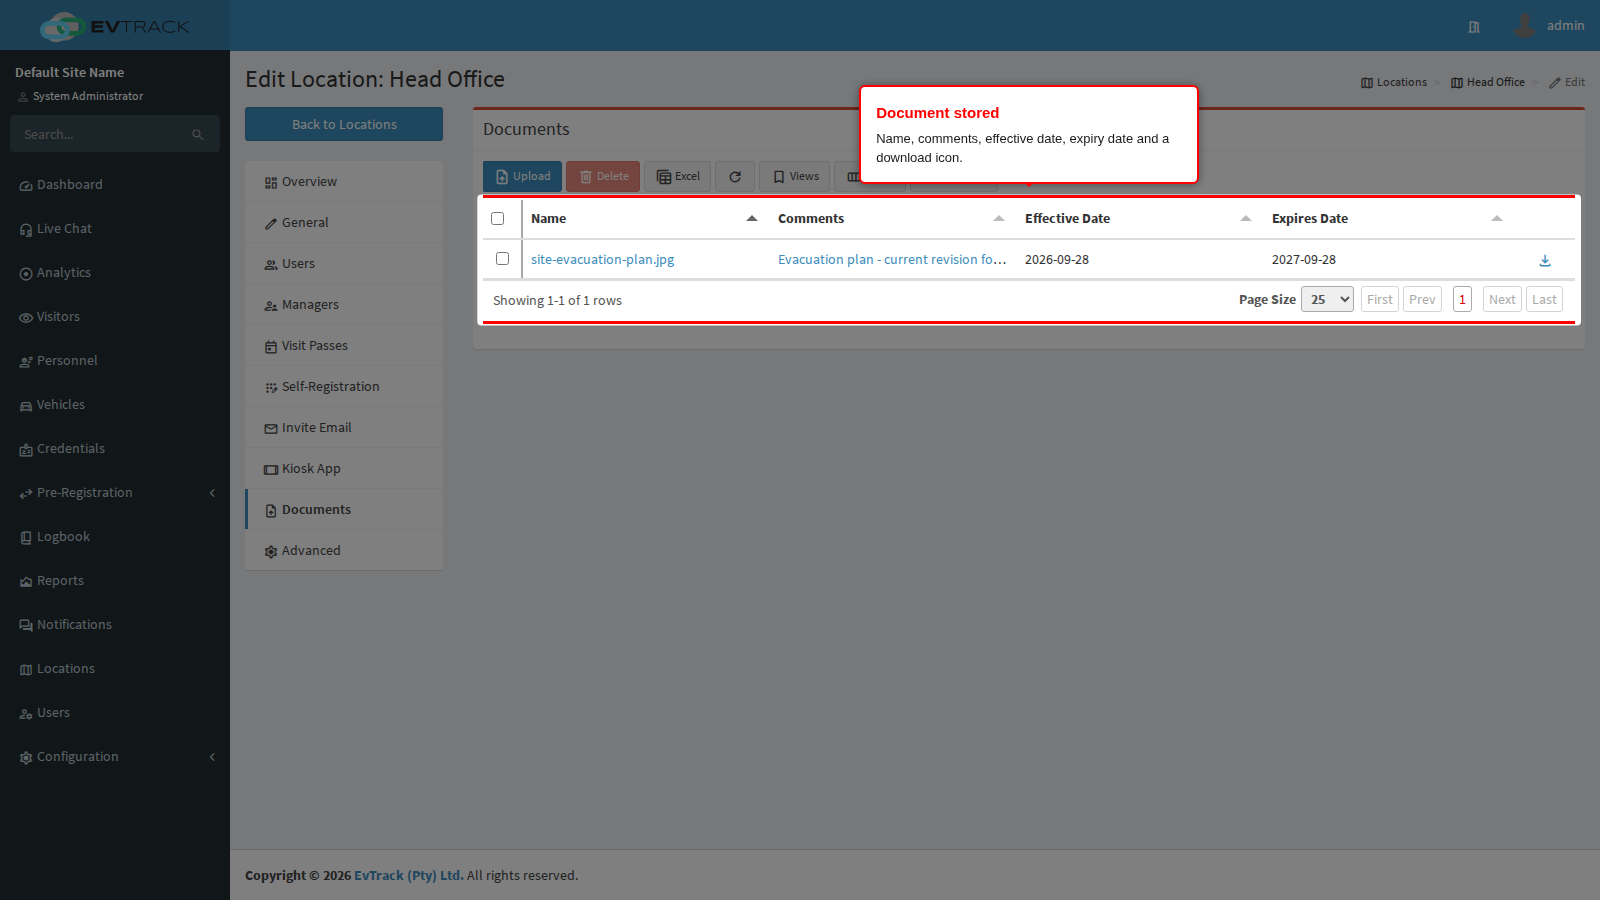
Each row shows:
- Name - the file name. Click it to open the document. Images open in a preview window; other file types download.
- Comments - the description captured at upload time.
- Effective Date - the date from which the document is considered current.
- Expires Date - the optional date after which it is considered outdated.
- The download icon at the end of the row saves a copy to your computer.
Step 5: Click Upload
Click the blue Upload button in the toolbar.
Step 6: Complete the upload dialog
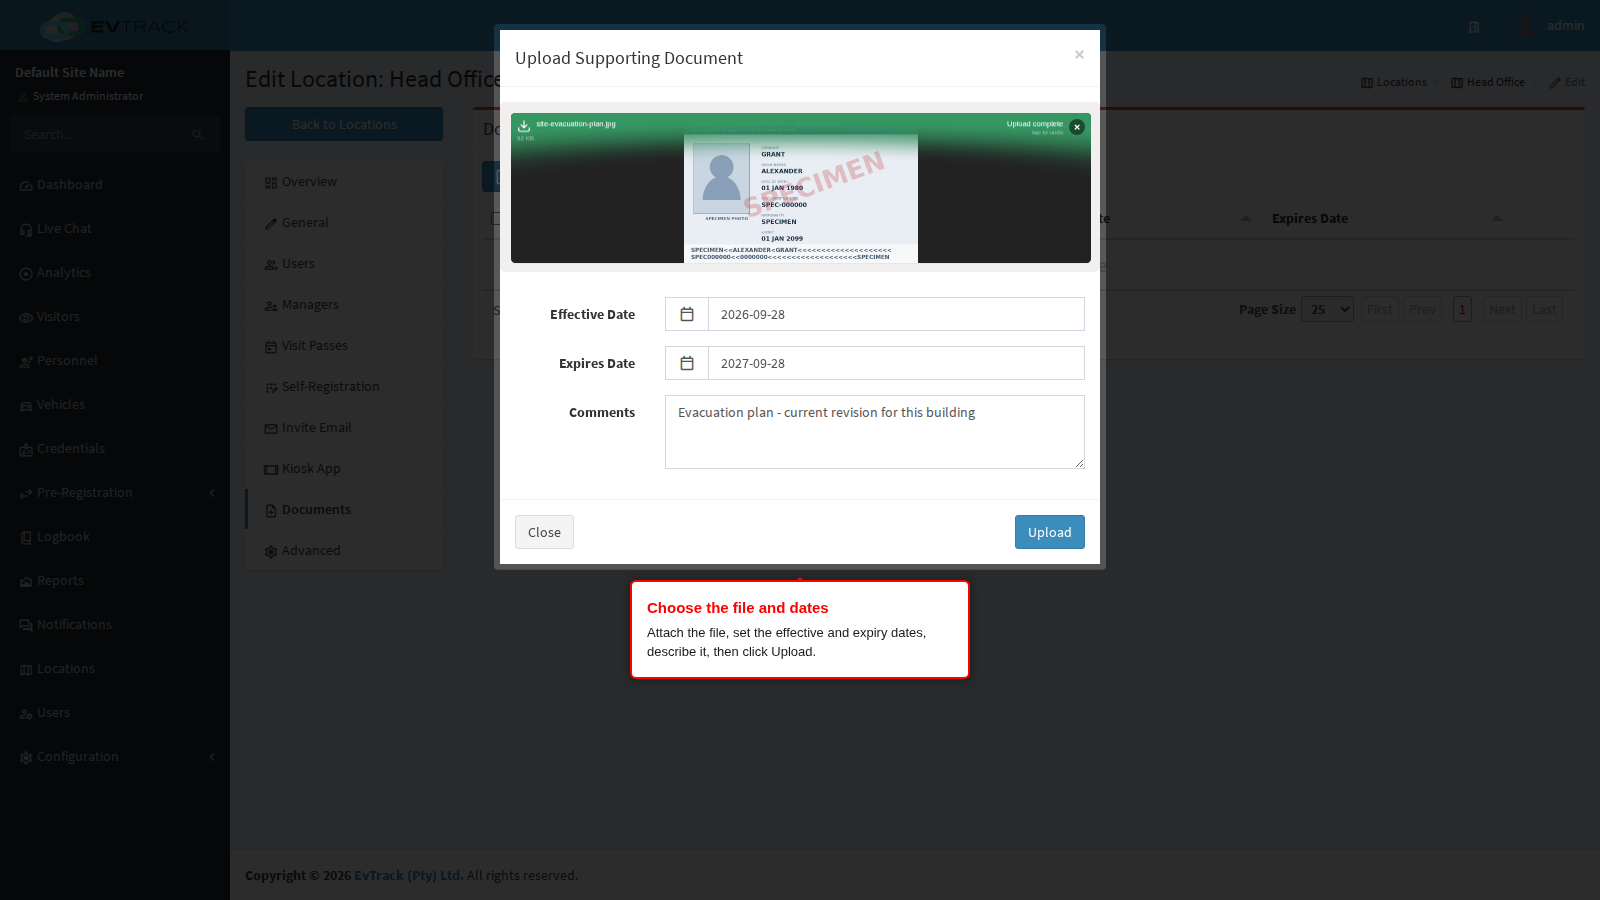
- Drag and drop your file or Browse - drop the file onto the panel, or click Browse and pick it from your computer. Wait for the upload progress to finish; the file is only attached once it completes. Accepted formats are JPG, PNG and PDF, up to 10 MB.
- Effective Date - required, and defaults to today. Set it to the date the document was issued or the revision took effect rather than the date you scanned it.
- Expires Date - optional. Set it to the date the document lapses or has to be reissued.
- Comments - a short description of what the document is. This is what everyone else reads next to the file name, so describe the document rather than the file.
Click Upload. The dialog closes and the list refreshes.
Step 7: The document is stored
Step 8: Deleting a document
Tick the selection box at the start of the document’s row - the red Delete button becomes available once exactly one document is selected - then click Delete. A confirmation window asks you to confirm.
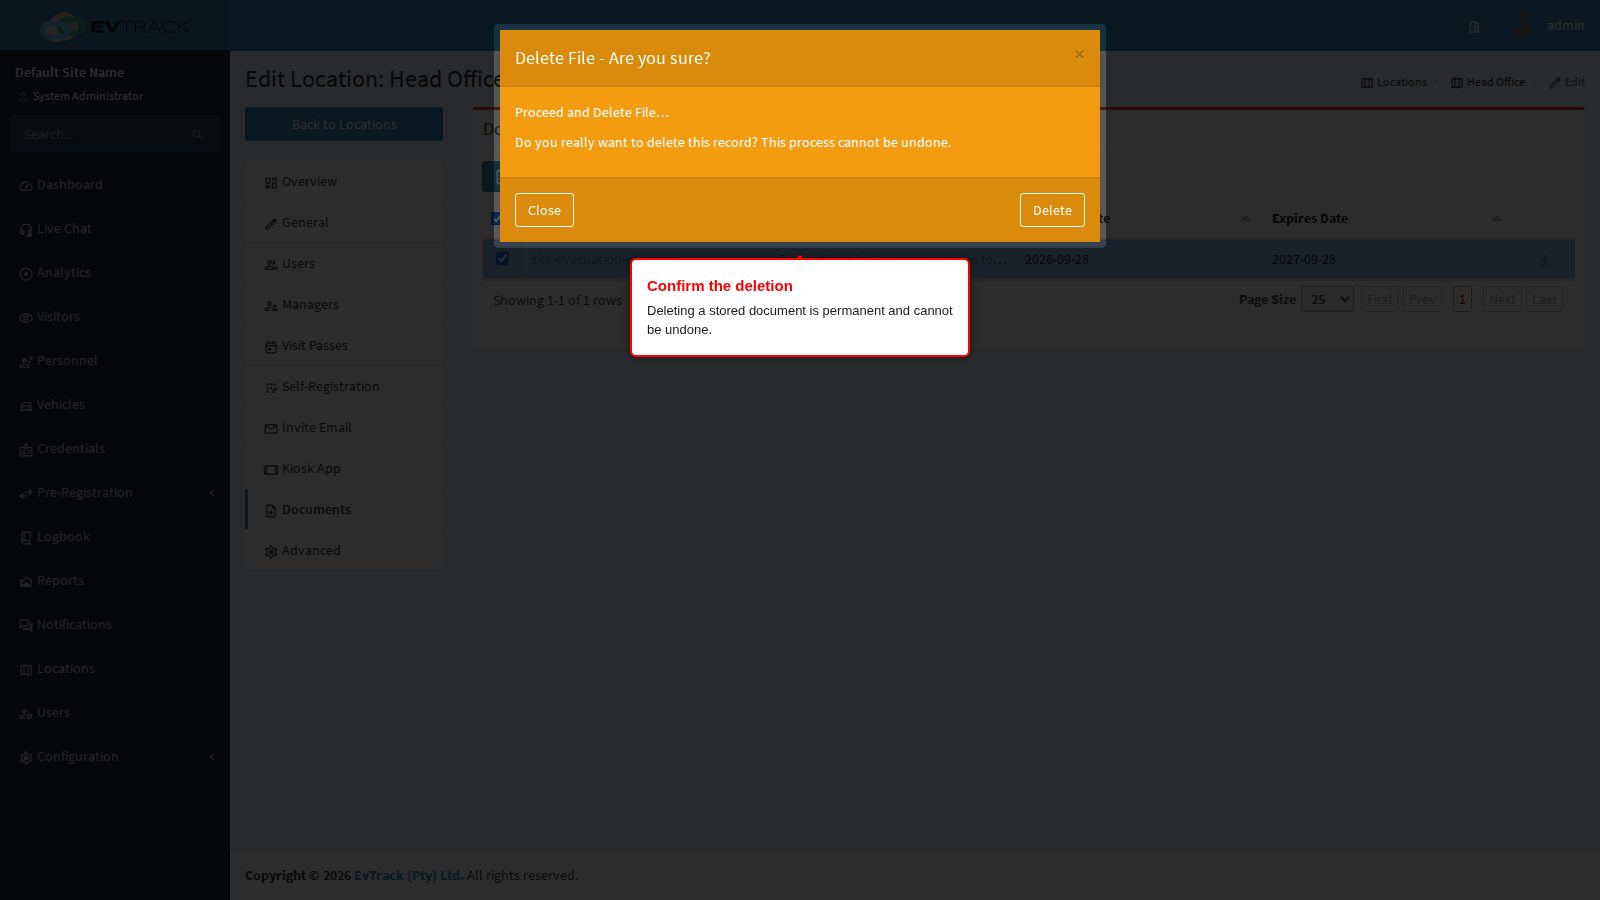
Deleting a document is permanent and cannot be undone. Download a copy first if you may need the file again. Click Delete in the confirmation window to proceed, or Close to keep the document.
Vehicle documents
A vehicle record holds the paperwork that has to be valid before the vehicle is allowed on site: the vehicle licence document, the roadworthy certificate, the insurance schedule, a hazardous-goods permit for a tanker, or the hire agreement for a rented vehicle. All of these expire, which is exactly what the Expires Date field is for.
Step 9: Open Vehicles
Select Vehicles in the sidebar. The vehicle list opens, with a search field under the plate and VIN column headings.
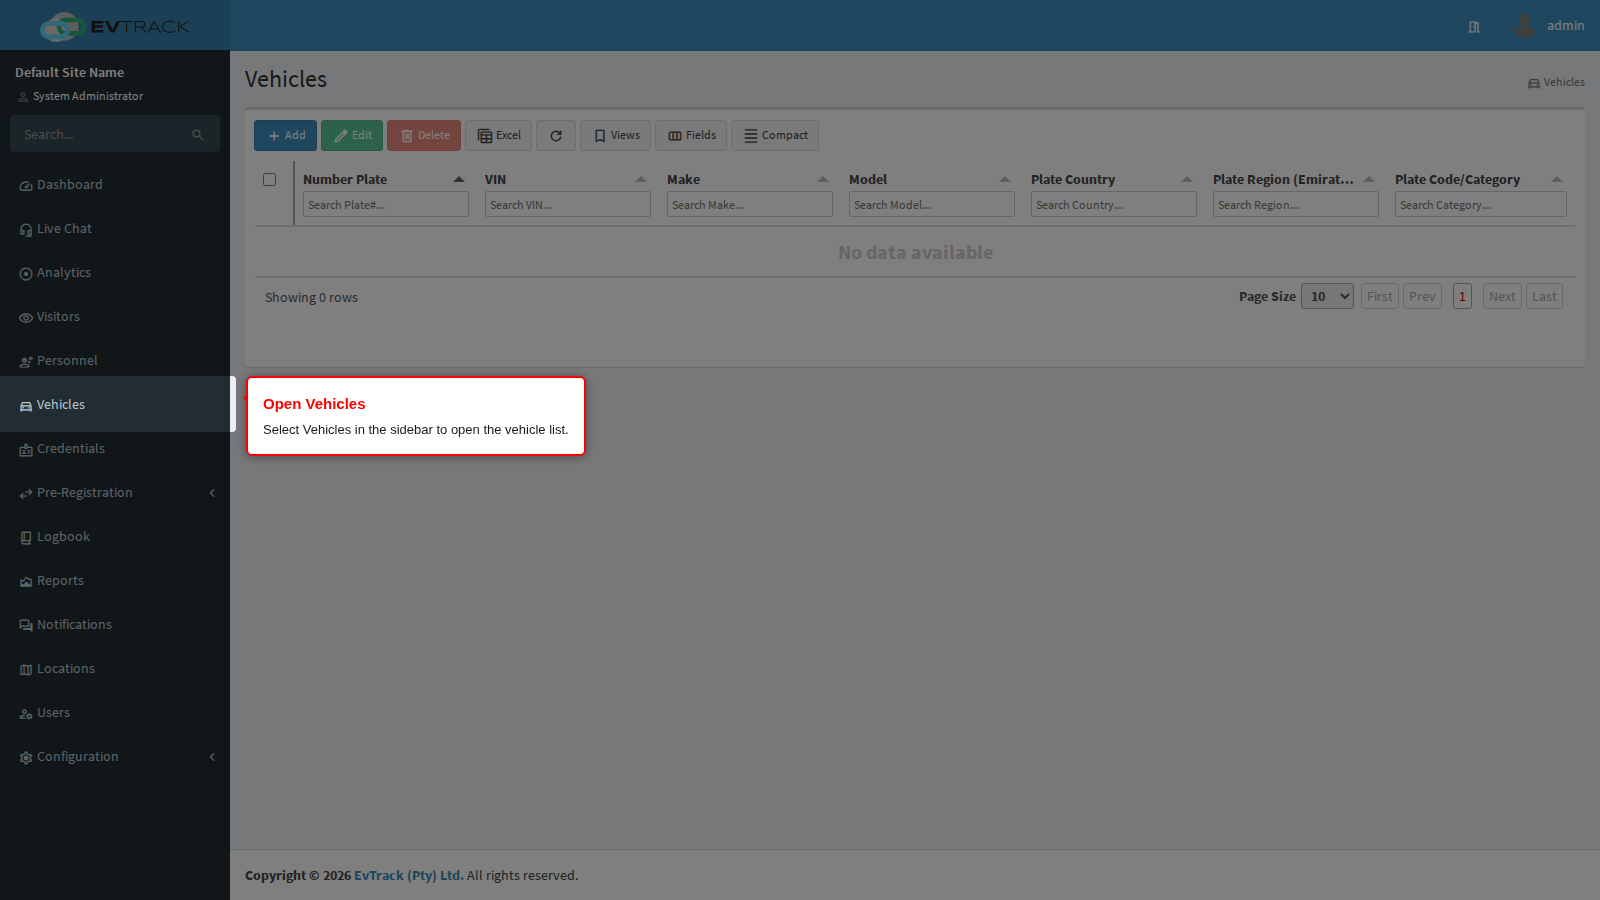
If the vehicle is already on record, search for its plate and click it to open the record, then continue at Step 11.
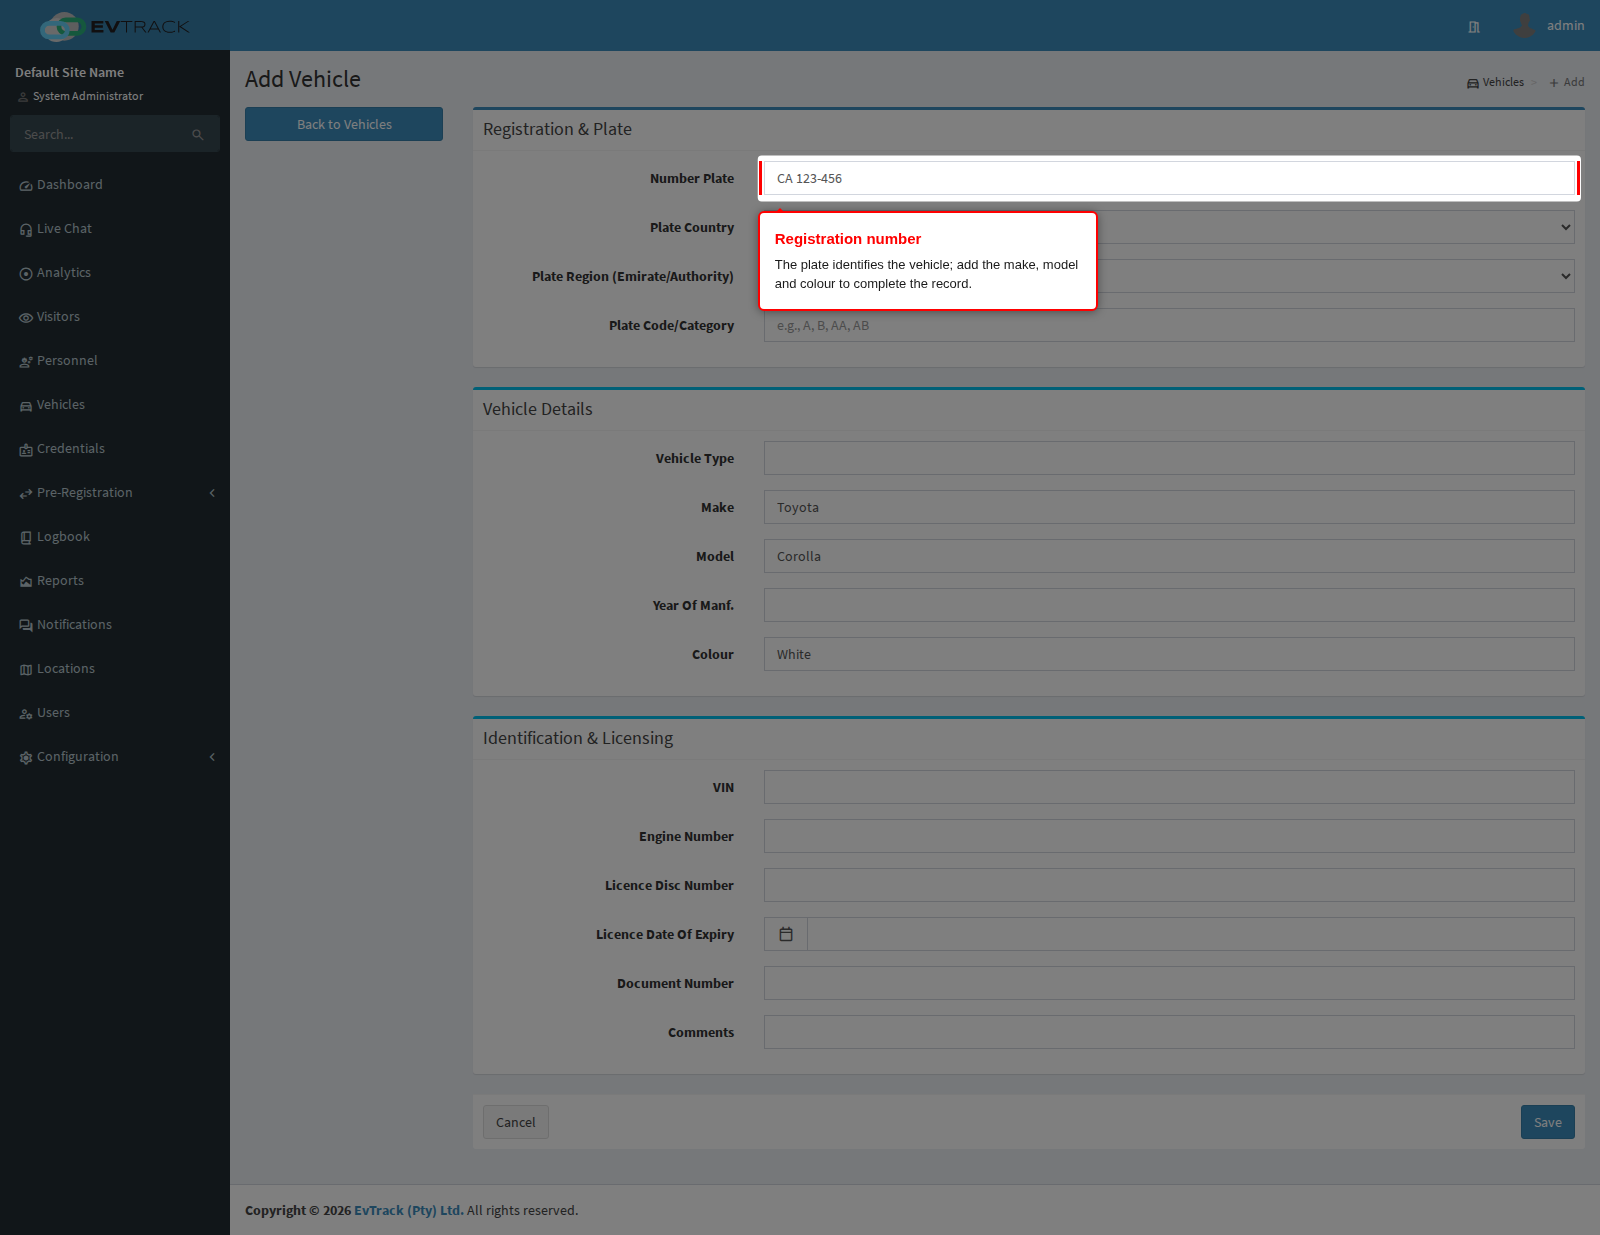
Step 10: Add the vehicle
To add a vehicle that is not on record yet, click Add in the toolbar. Enter the Vehicle Registration Number (the plate) and, where you have them, the make, model, colour and year. A vehicle needs either a registration number or a VIN; the rest is optional. Click Save - the saved vehicle opens on its own record.
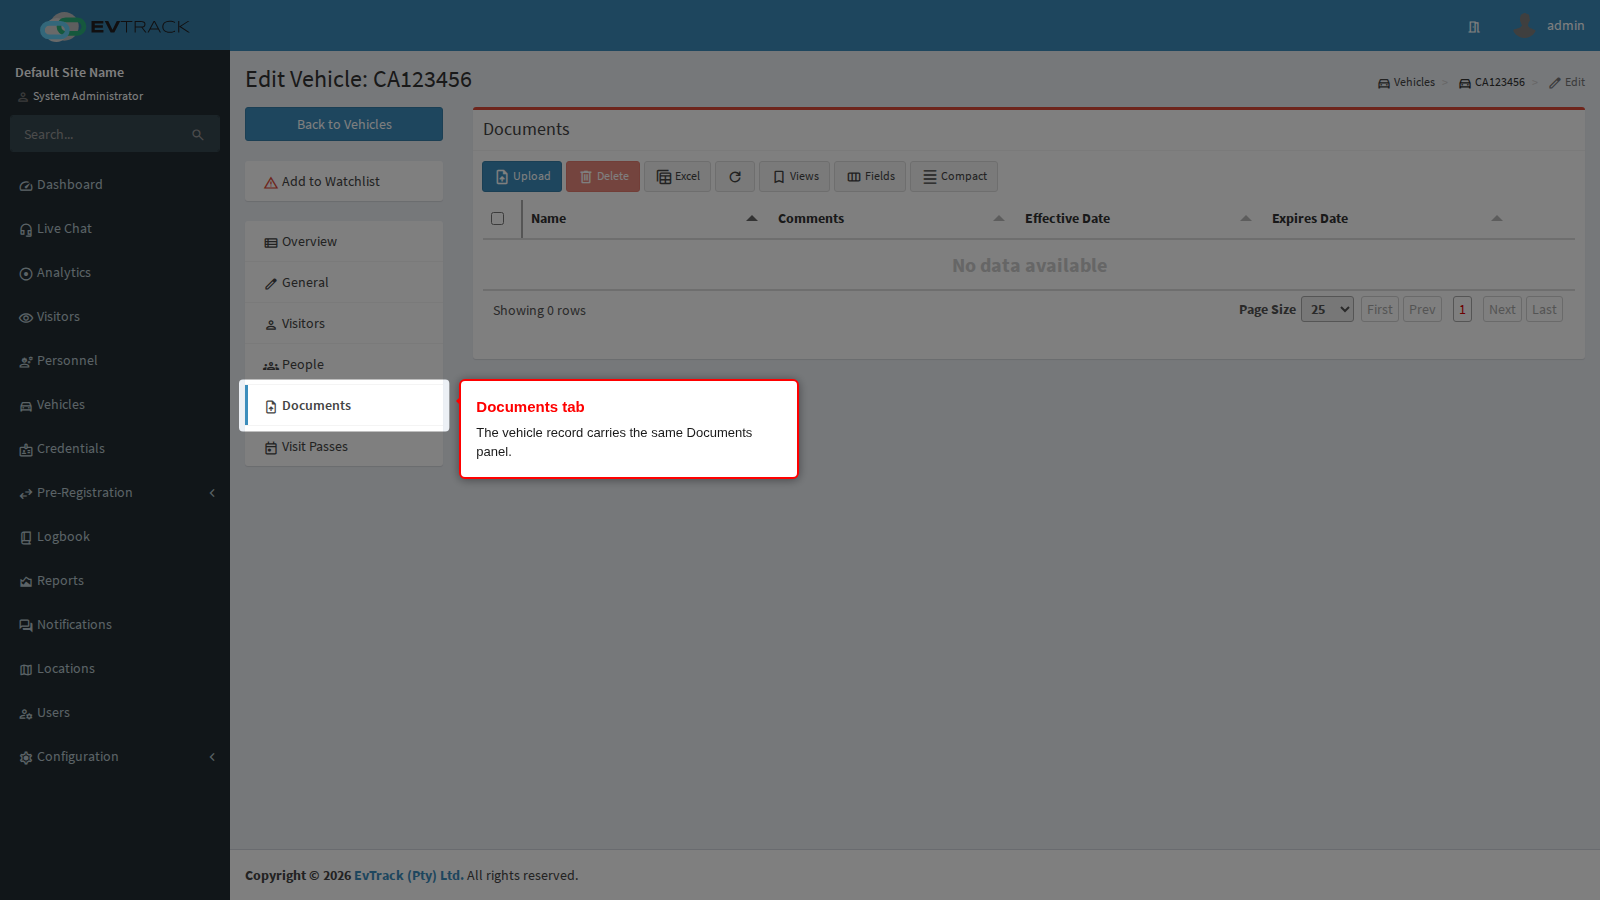
Step 11: Go to the vehicle’s Documents tab
In the tab list on the left of the vehicle, select Documents. It is the same panel again.
Step 12: Upload the vehicle’s paperwork
Click Upload, attach the licence document, set the Effective Date to the date it was issued and the Expires Date to the date it runs out, describe it in Comments, then click Upload.
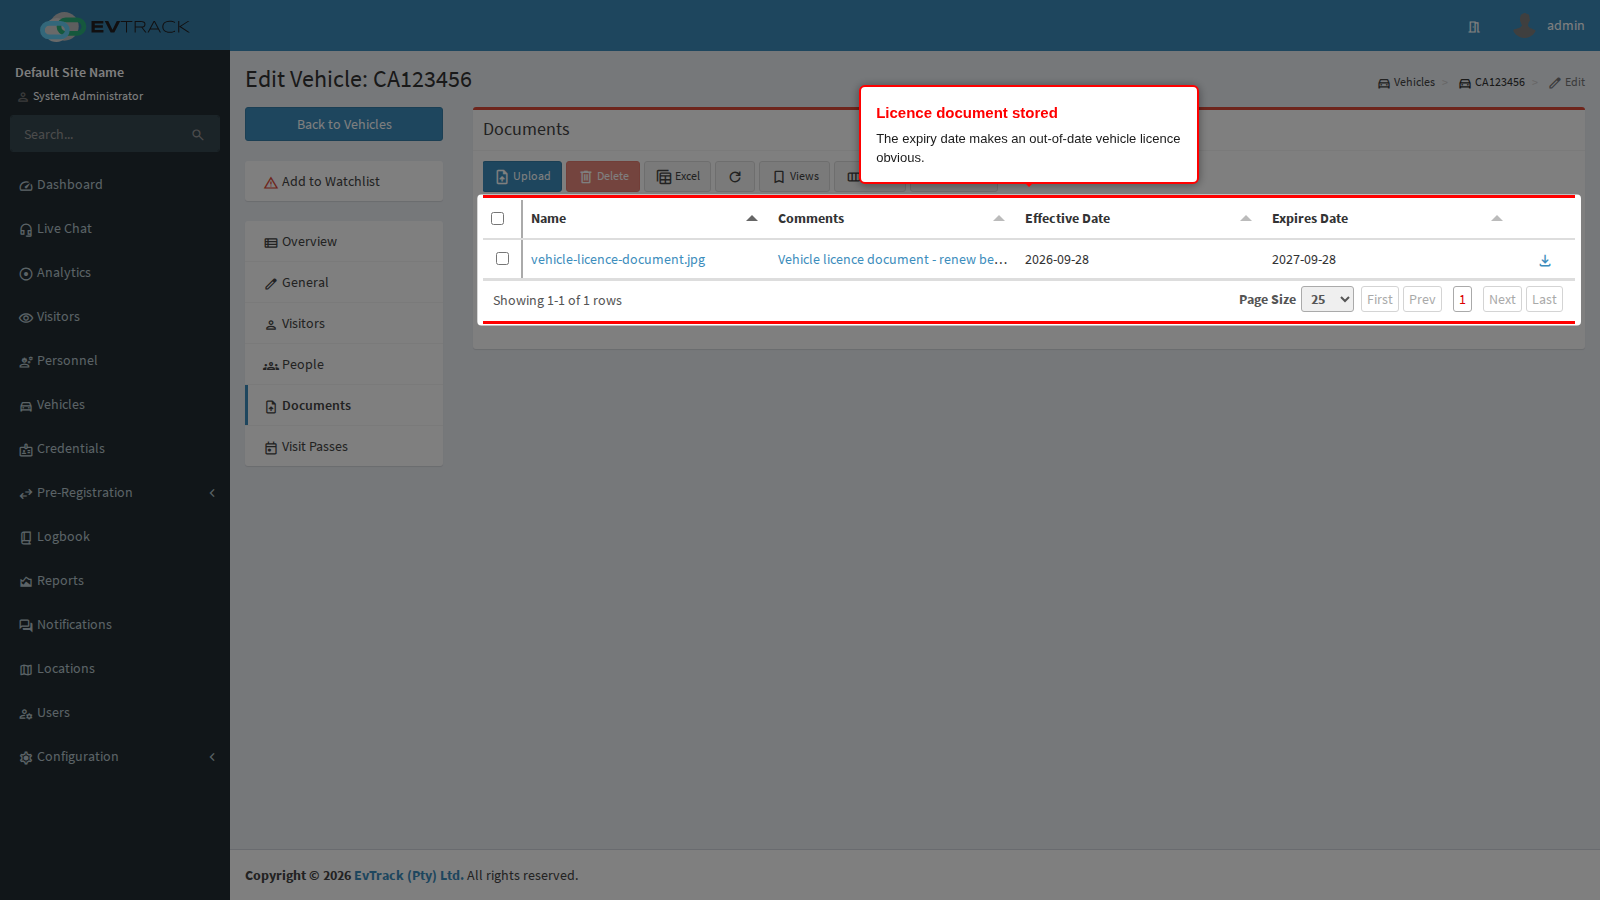
Deleting works exactly as in Step 8: tick the row, click Delete, confirm.
Notes on dates, downloads and deletion
- Effective and expiry dates are information, not enforcement. They are stored with the document and shown in the list so lapsed paperwork stands out. Sort on the Expires Date column to bring what needs renewing to the top. They do not by themselves block access; to withdraw access, change the person’s validity window or their credential.
- Replace before you remove. Upload the new revision first, confirm it is listed, then delete the superseded one. That way there is never a moment with no valid document on the record.
- Deletion is permanent. There is no recycle bin and no undo. Download a copy before deleting anything you might need again, and before deleting the record the documents are stored on.
- Documents can hold personal information. Only give the upload, download and delete permissions to roles that are supposed to see identity documents and certificates.
See also
- Documents on a Visitor, Documents on Personnel, Documents on a User
- Site Documents - site-wide files and invitation email attachments