An access control point (ACP) is a controlled opening - a door, gate, turnstile or checkpoint - with its readers. ACPs are what ACLs grant access to.
Before you start: you need an administrator account with access control administration rights. To bind a point to hardware you also need its device registered first, and at least one of that device’s readers still unassigned - a reader can only belong to one point at a time. See Devices.
Step 1: Open Access Control Points
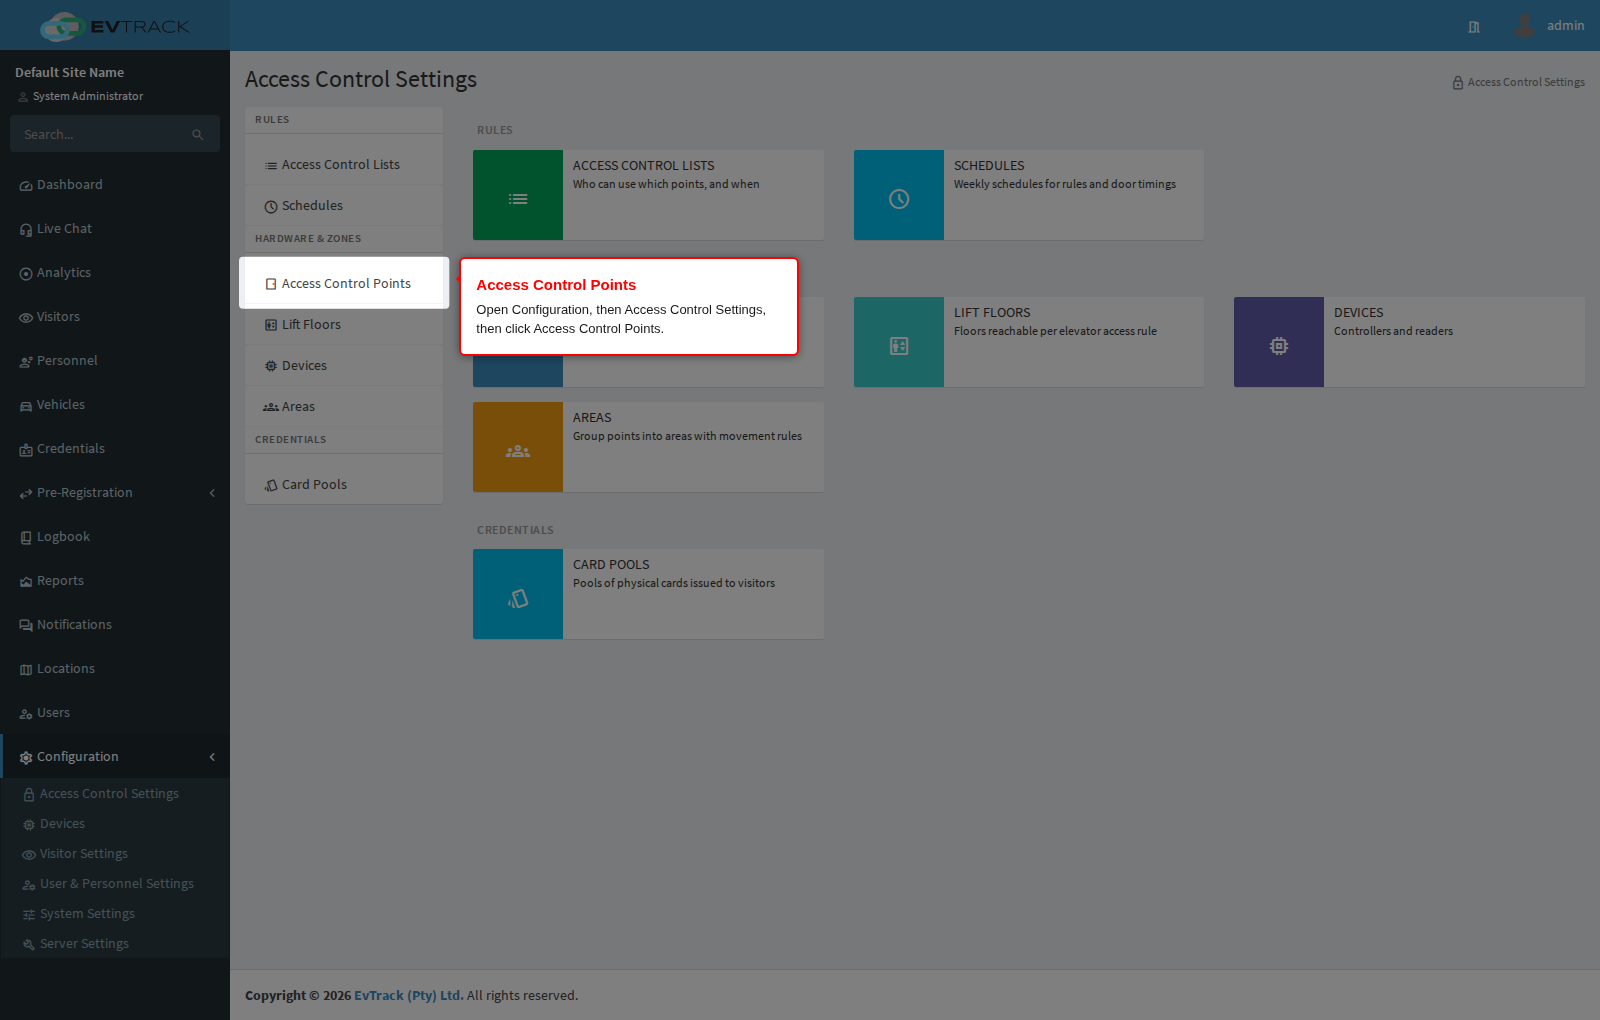
In the left sidebar open Configuration, click Access Control Settings, then click Access Control Points in the section menu. The Access Control Points page opens.
Step 2: Review the points
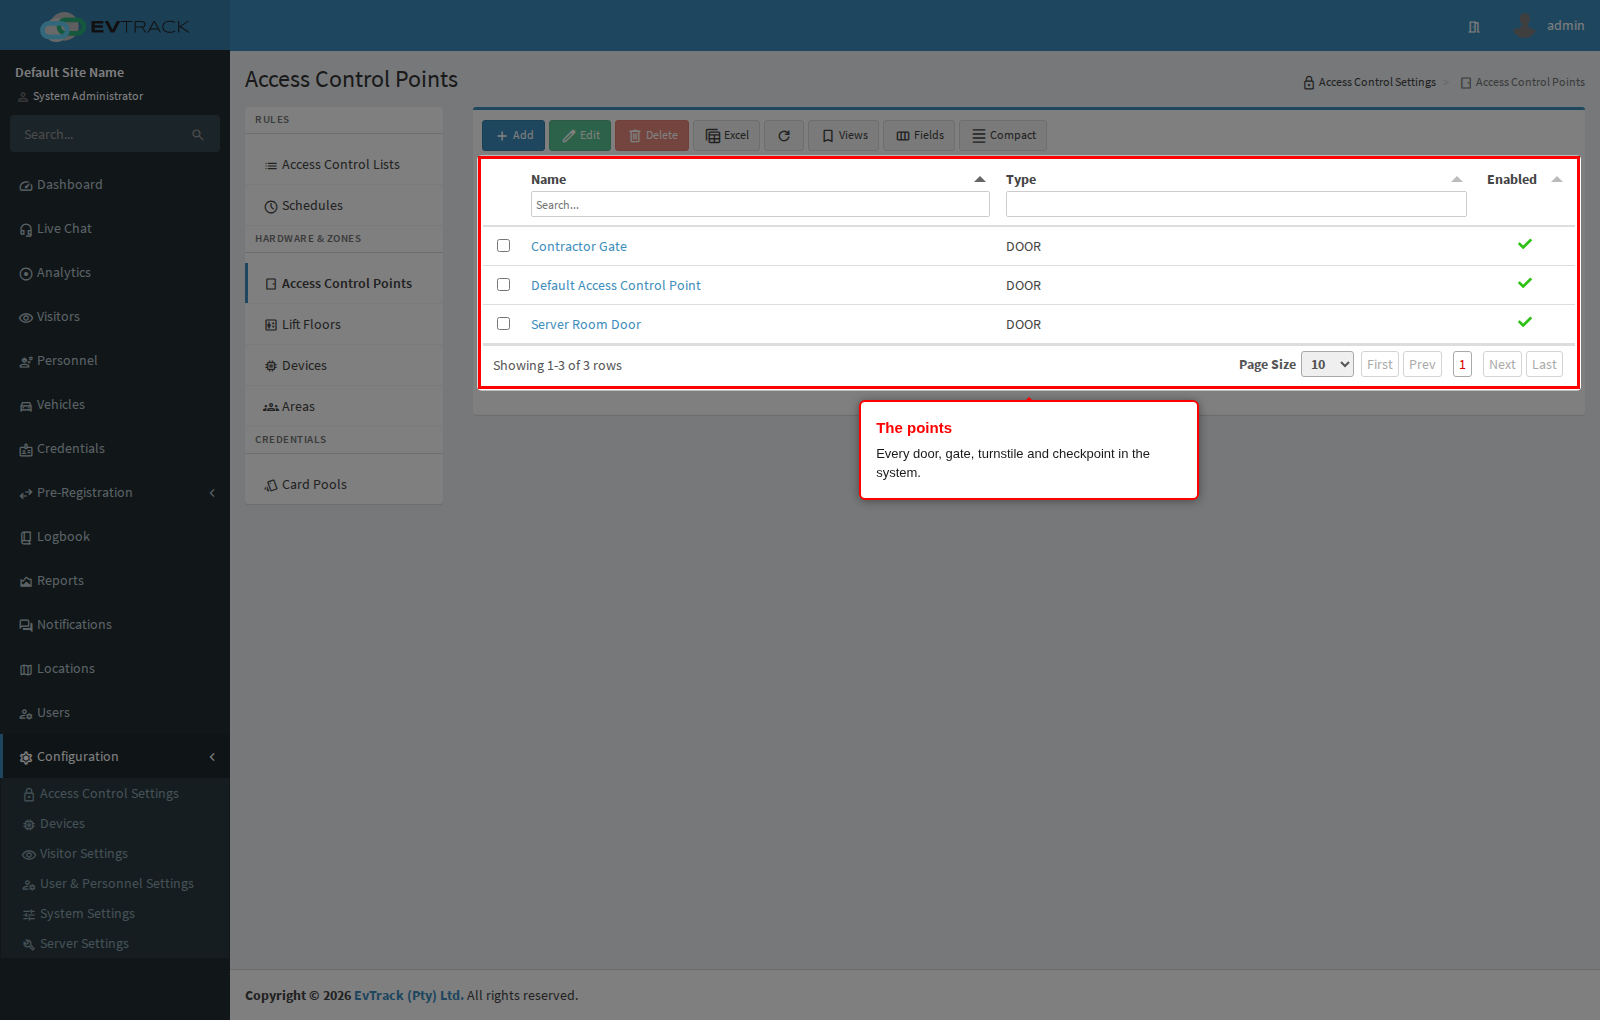
The table lists every point. A new system ships with a default Visitor access control point; kiosk pairing creates a CHECK_POINT ACP automatically with virtual IN/OUT readers.
Step 3: Click Add
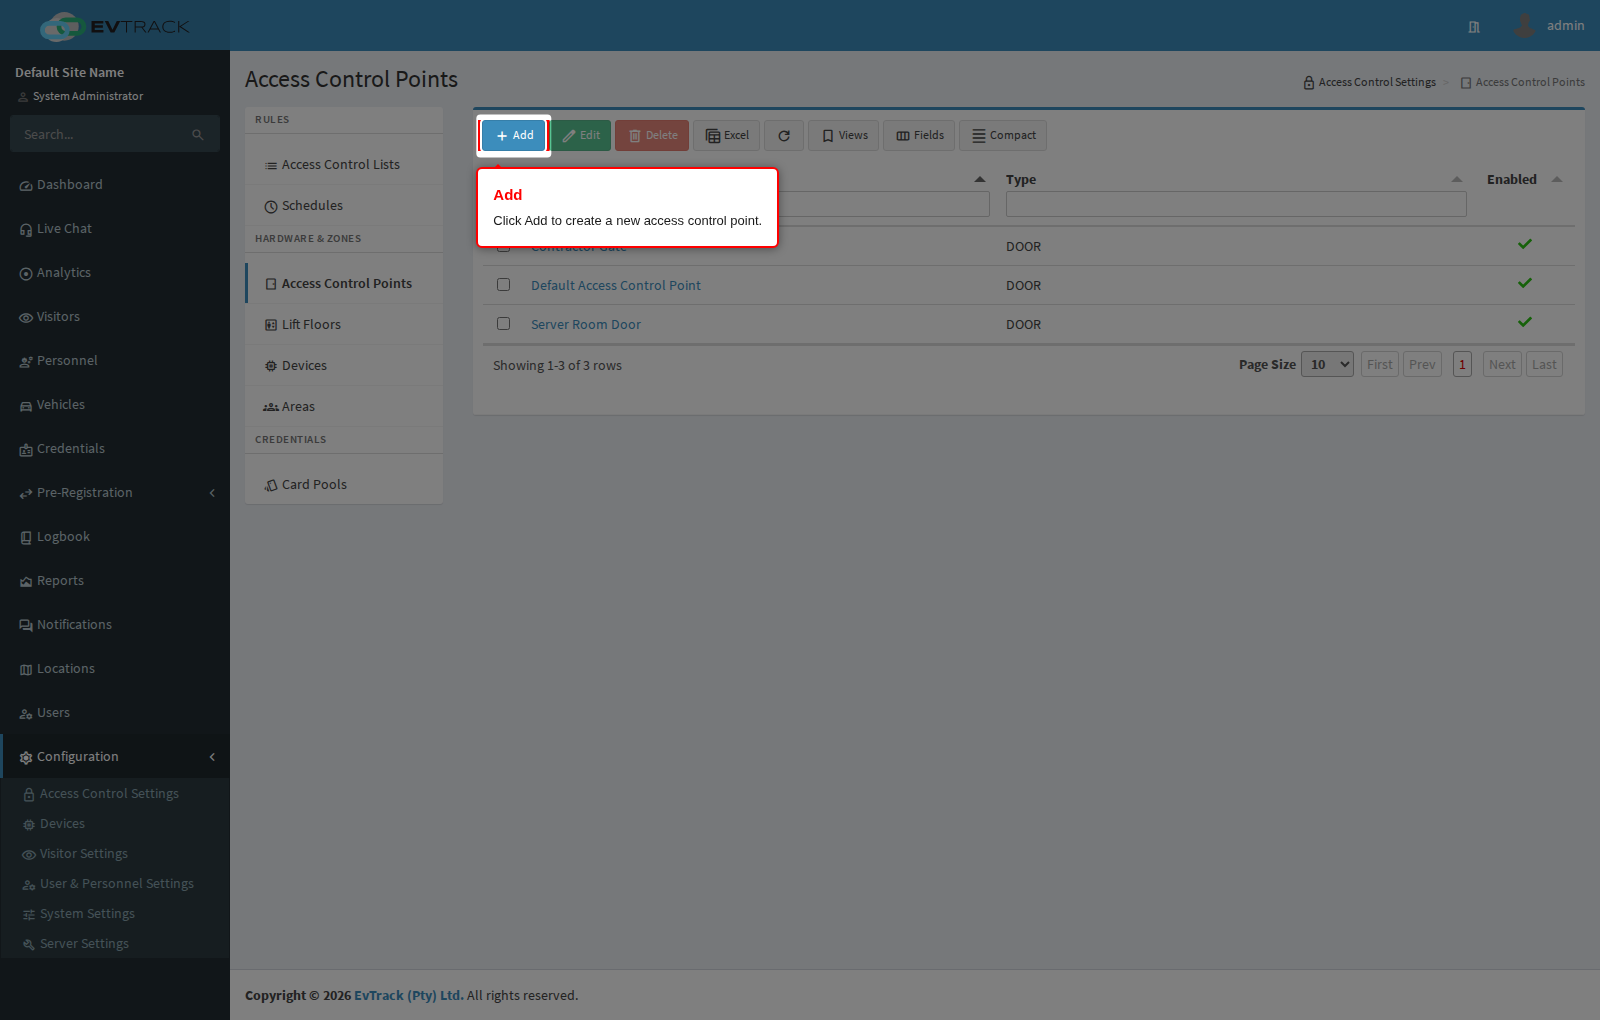
Click the Add button above the table. The new access control point form opens.
Step 4: Name the point, choose its type and save
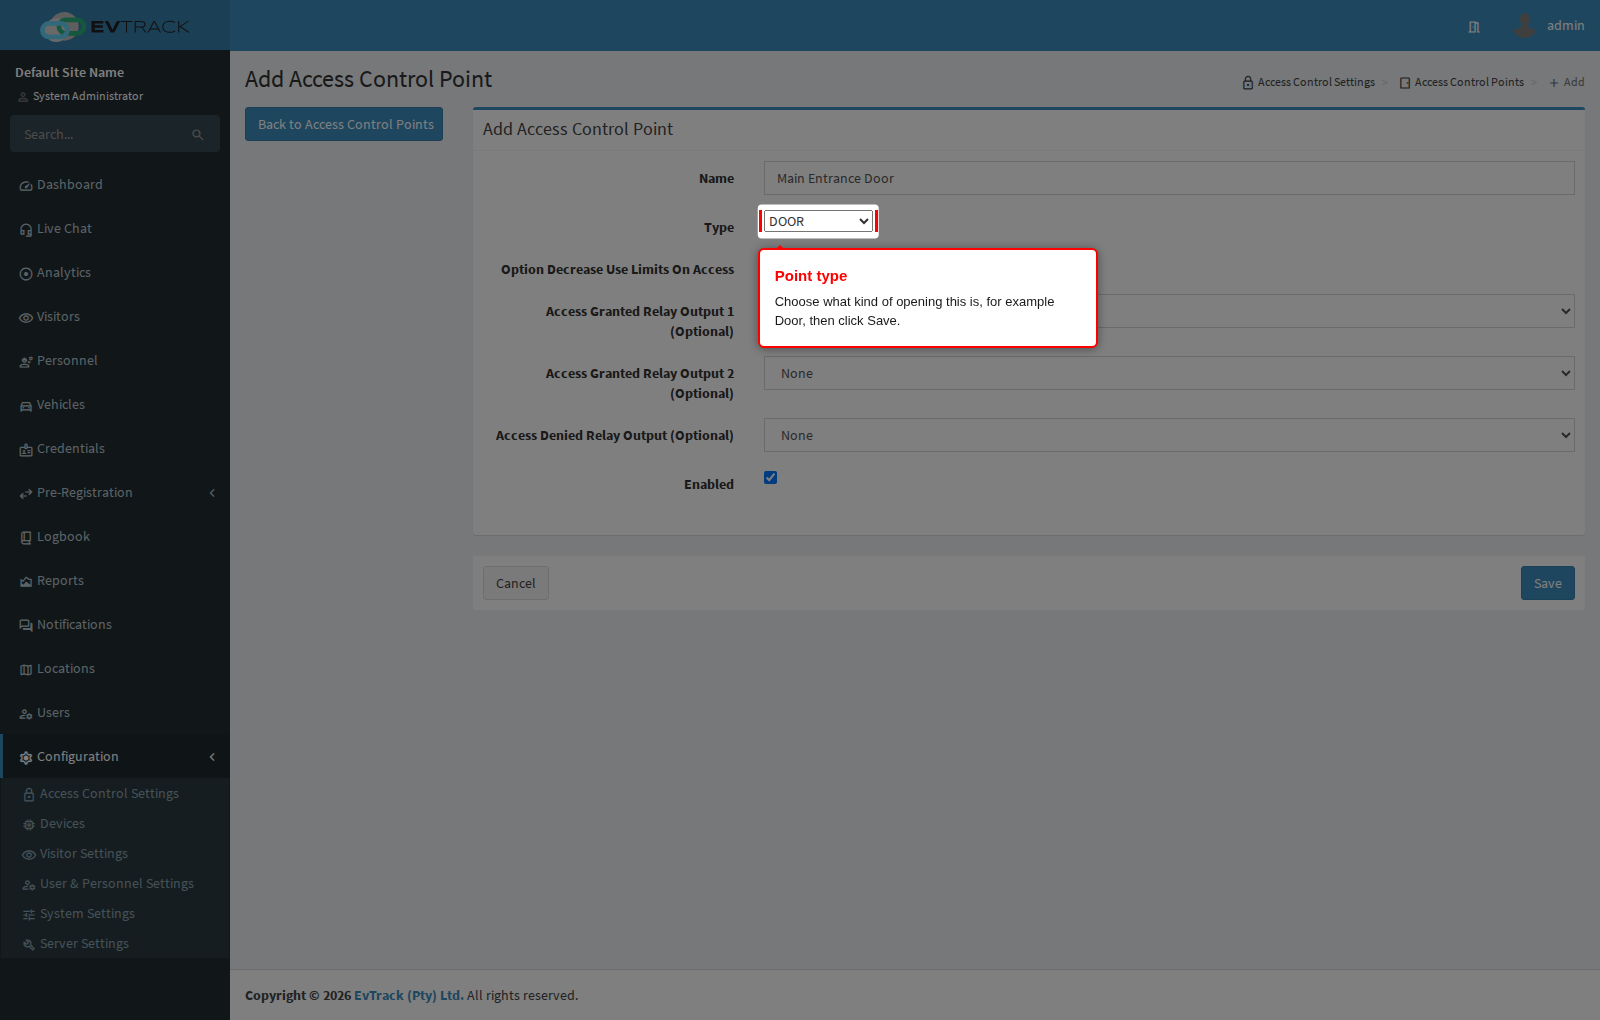
Name the point (for example “Main Entrance Door”) and choose its type (for example Door). Option Decrease Use Limits On Access controls whether a passage through this point consumes an entry from a limited-use pass; it is explained in full in step 14. Click Save; you are returned to the list with a success message.
Step 5: Open the point and go to Readers
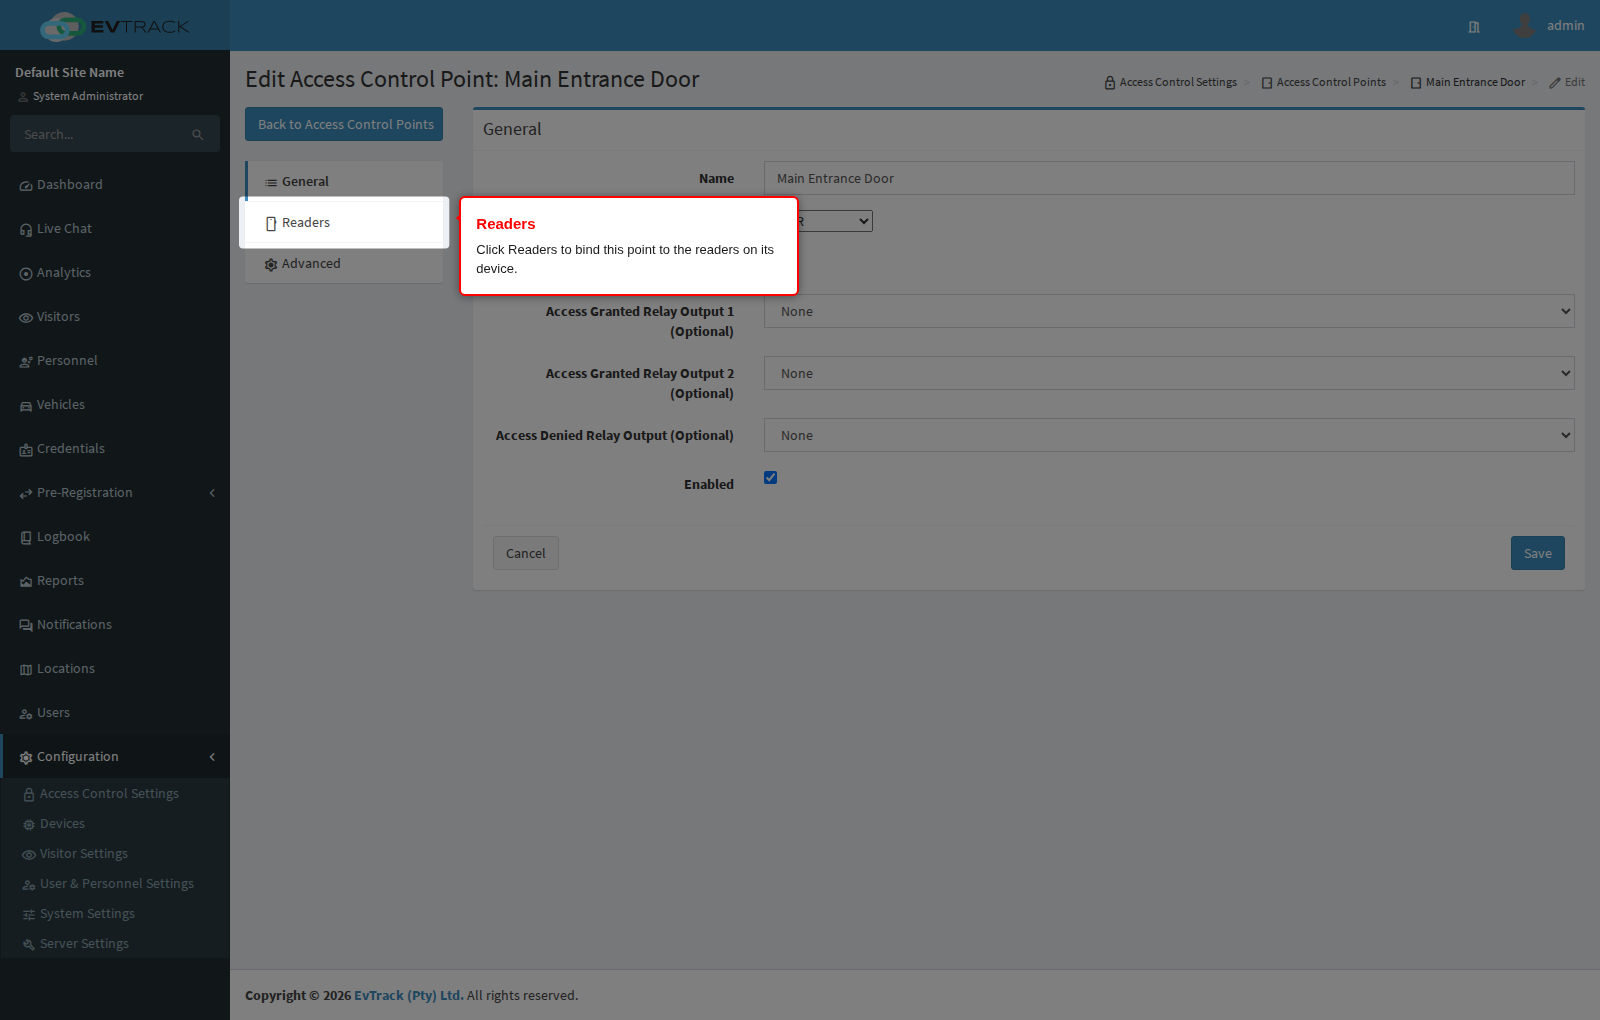
Open the point by clicking its name in the list (or select its row and click Edit). In the panel menu on the left of the edit page, click Readers. The Readers panel opens.
Step 6: Review the readers
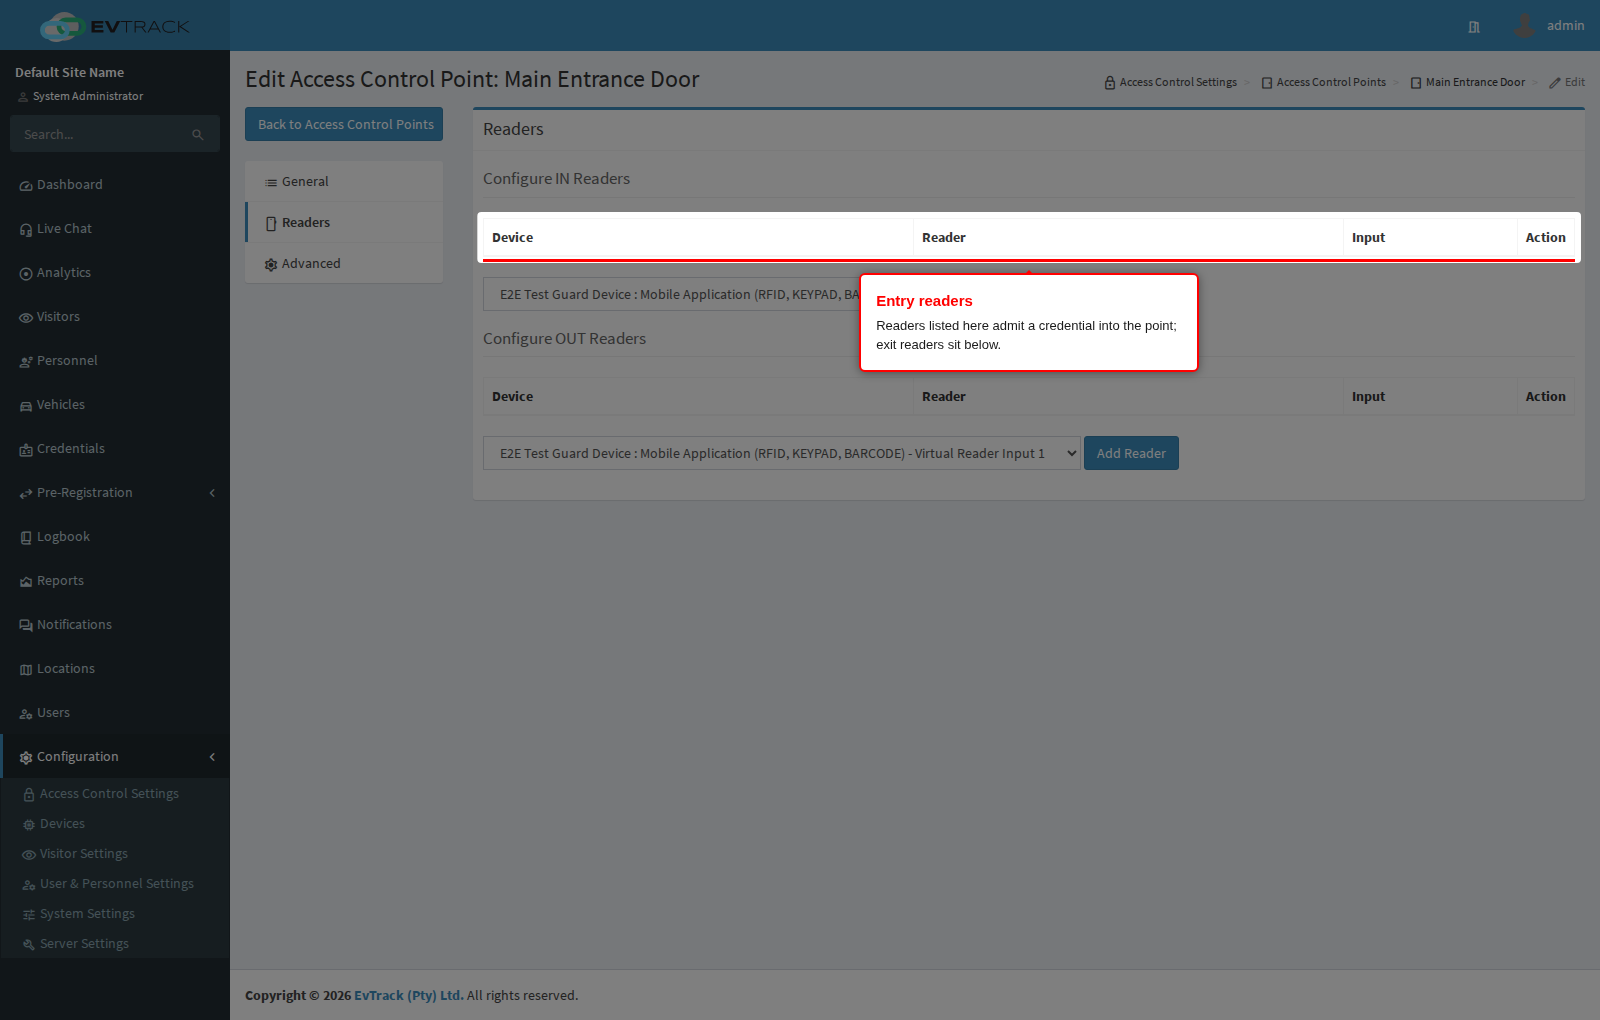
The Readers panel has two sections. Entry readers are the readers a person presents a credential to in order to come in through this point; exit readers, listed below them, are the readers used to leave through it. A point with no readers exists in the system but nothing on site is wired to it, so a new point starts empty.
Step 7: Pick a reader and add it
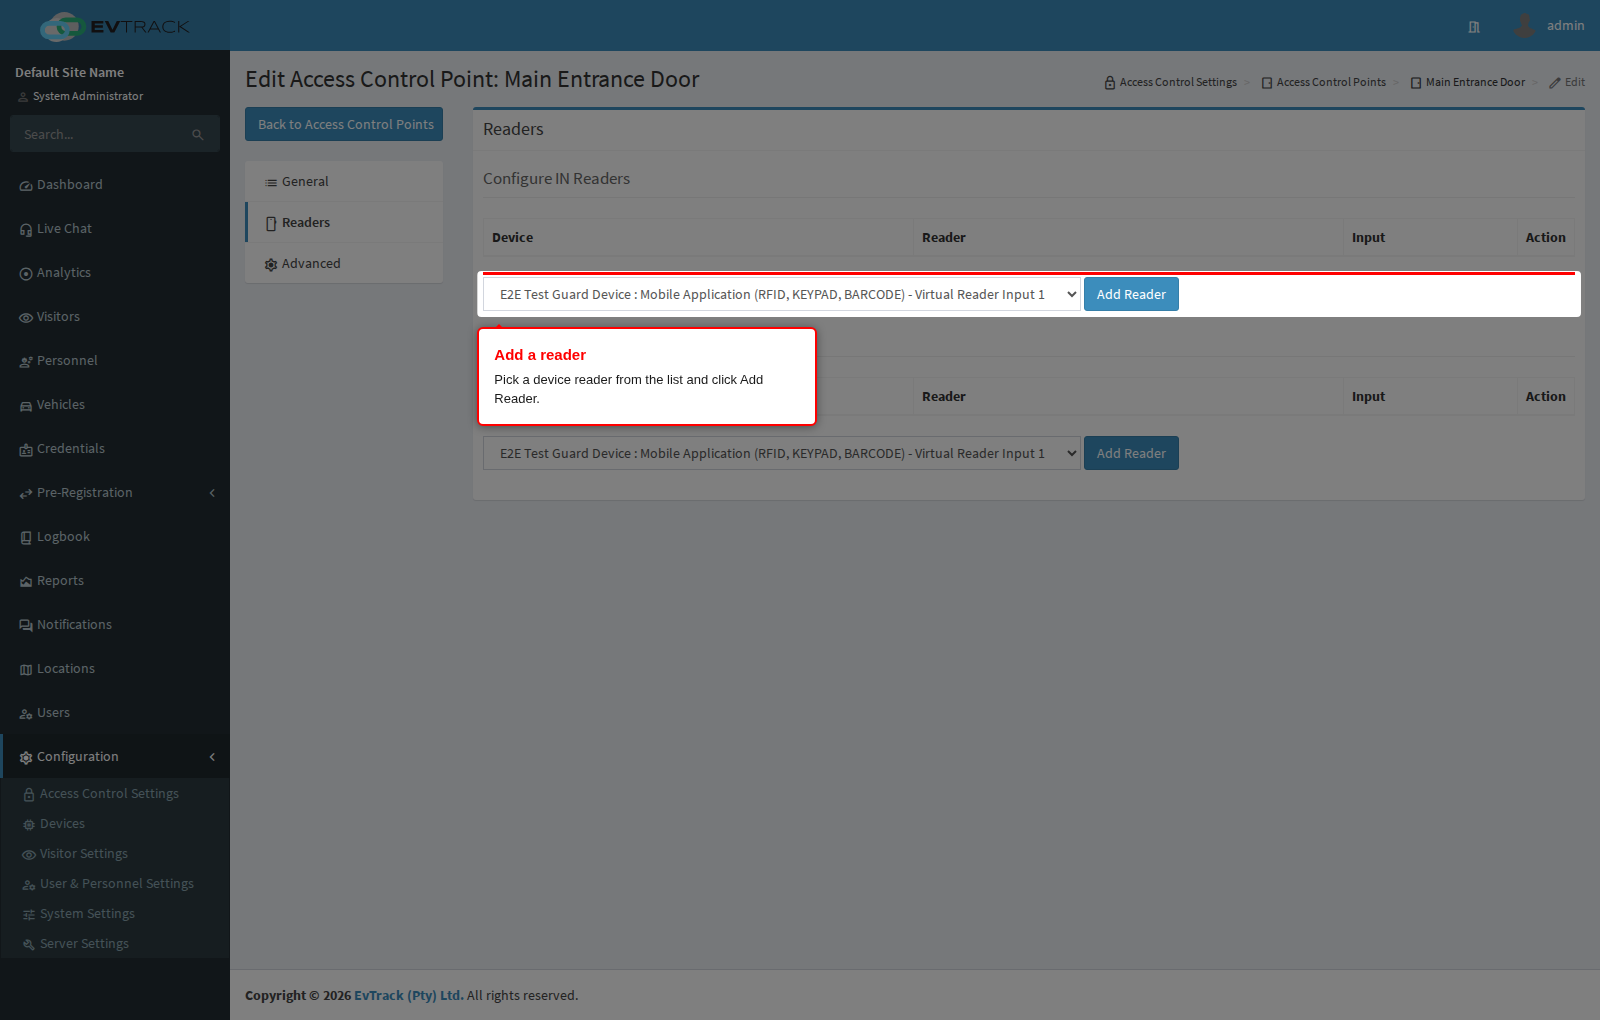
Under Configure Entry Readers, open the drop-down list below the table. It offers every reader that is not yet assigned to another point, named “device : reader” so you can tell two identical readers apart. Choose one and click Add Reader.
Step 8: Confirm the reader is bound
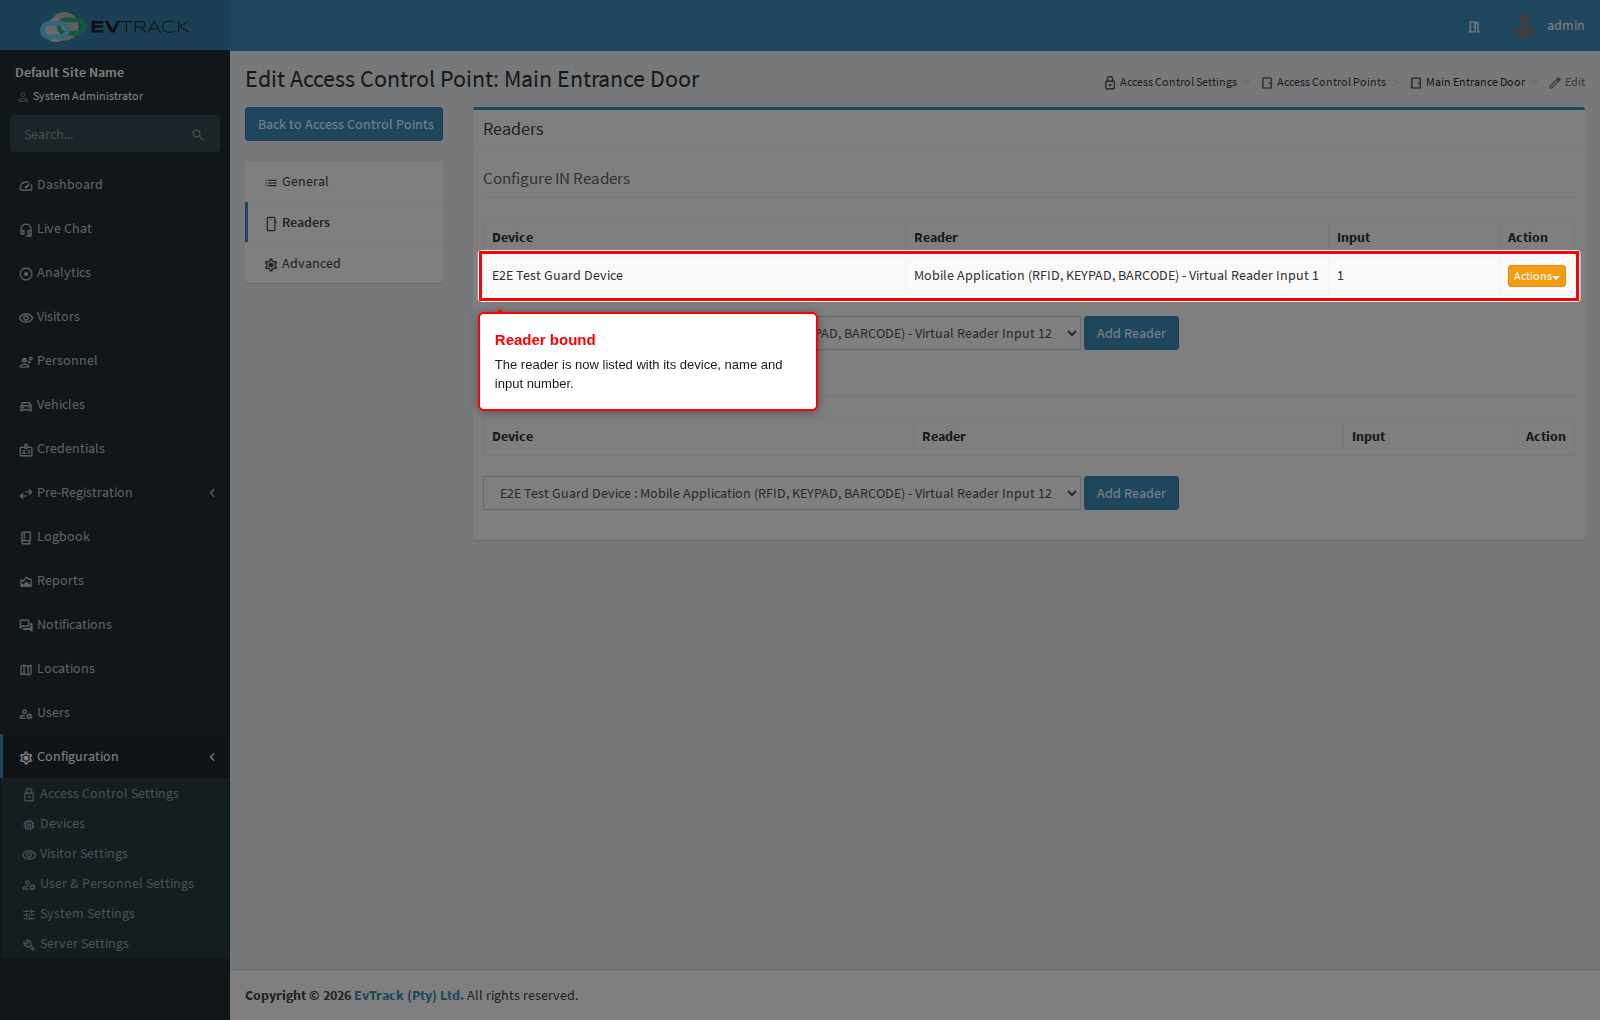
The page reloads with a success message and the reader is listed in the entry readers table with its device, reader name and input number. Repeat steps 7 and 8 for every reader that admits through this point. Exit readers work identically: use the drop-down under Configure Exit Readers.
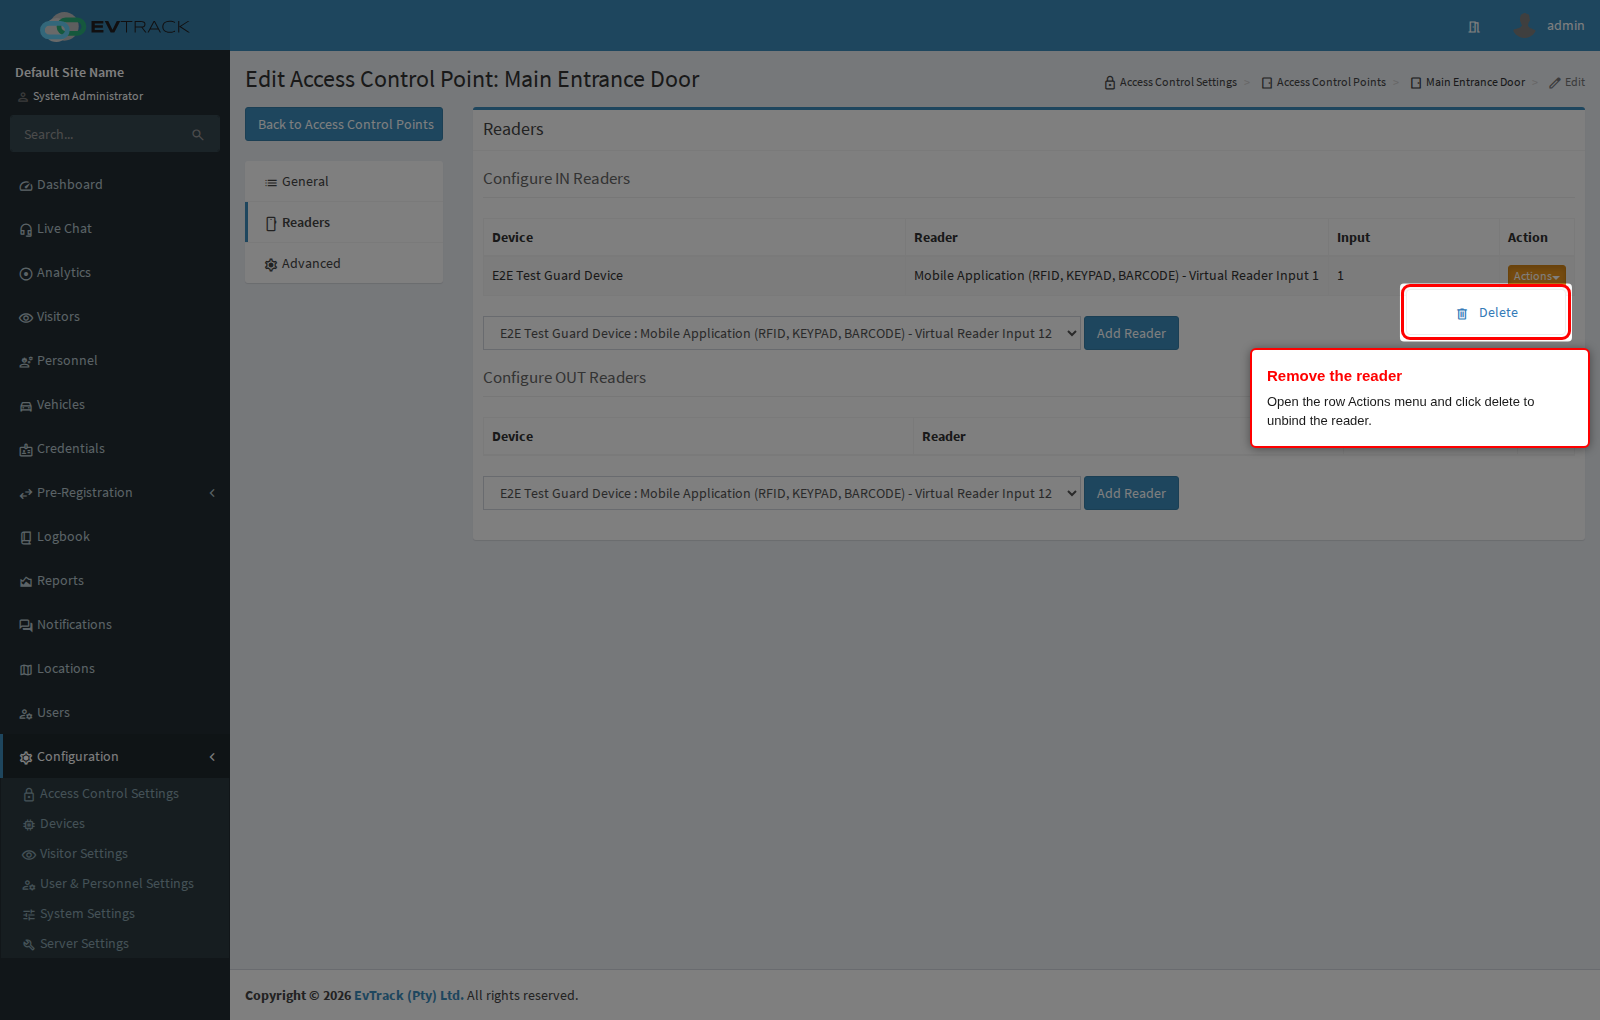
Step 9: Open the row Actions menu to remove a reader
To unbind a reader, click Actions at the end of its row and click delete in the menu that opens.
Step 10: Confirm the removal
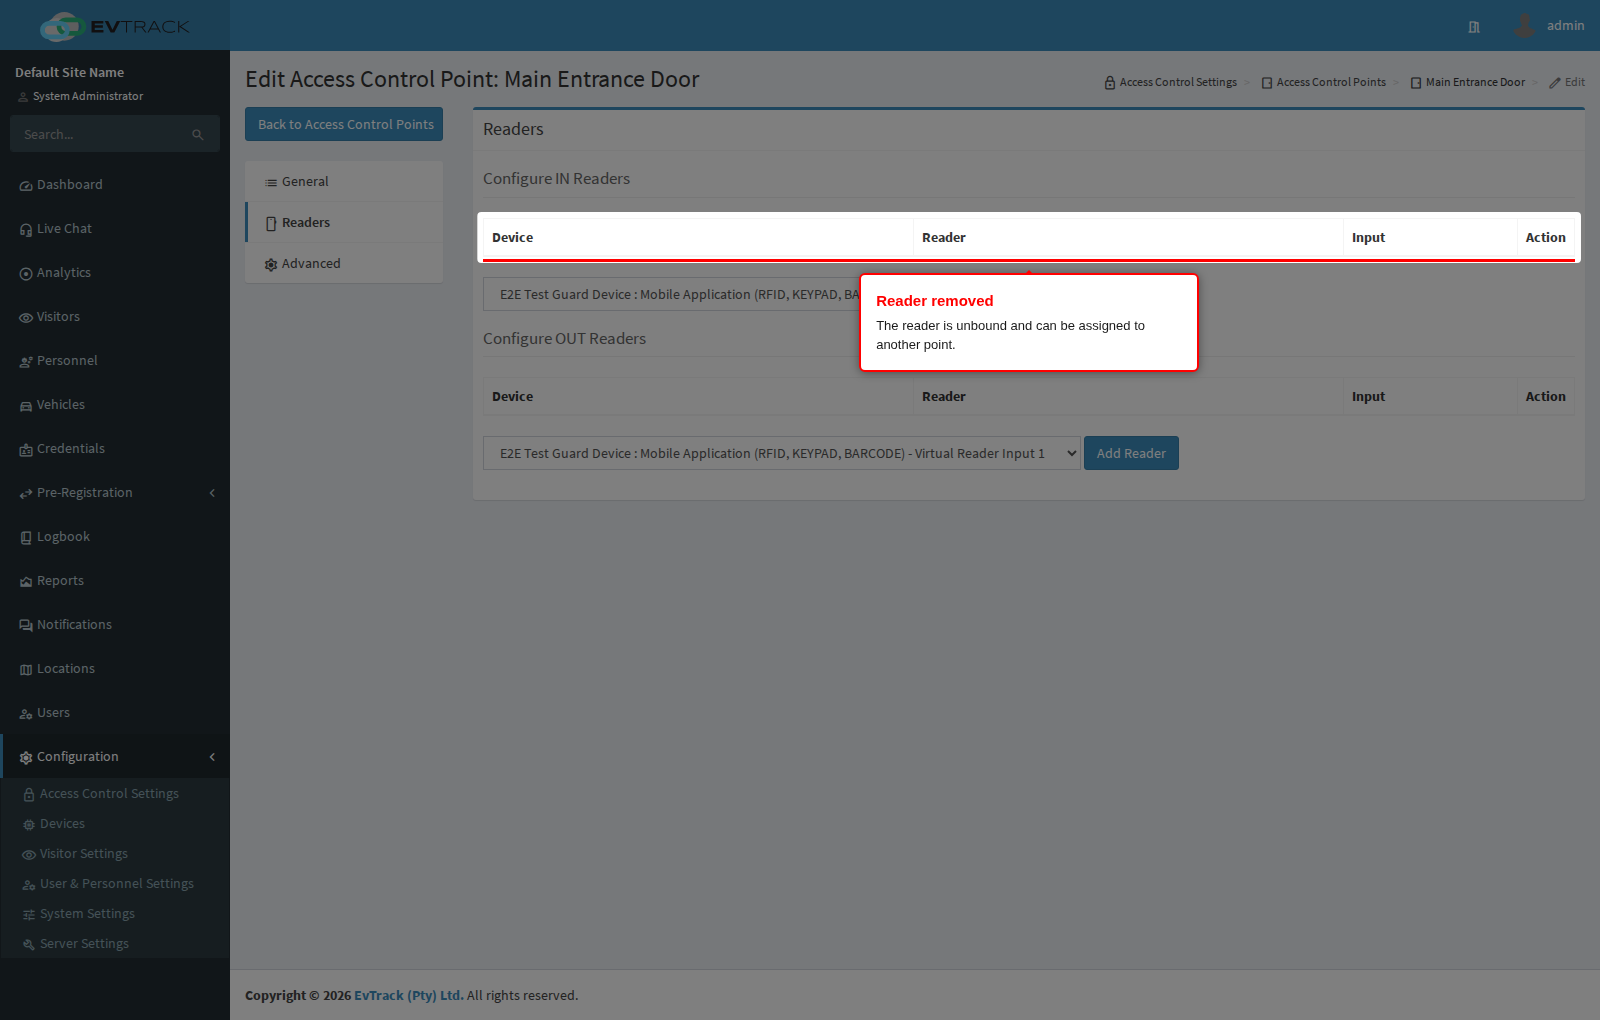
There is no confirmation prompt: the reader is unbound immediately, the page reloads and a success message confirms it. The reader disappears from the table and becomes available again in the drop-down, so it can be assigned to another point.
Step 11: Advanced options
The Advanced panel holds the behaviour of a granted passage: the visit status to apply in the IN and OUT direction, the location update to apply in each direction, optional parking-based overrides, ANPR auto-enrolment, and the temperature-check thresholds used by the Guard and FrontDesk apps. Change what you need and click Save on that panel.
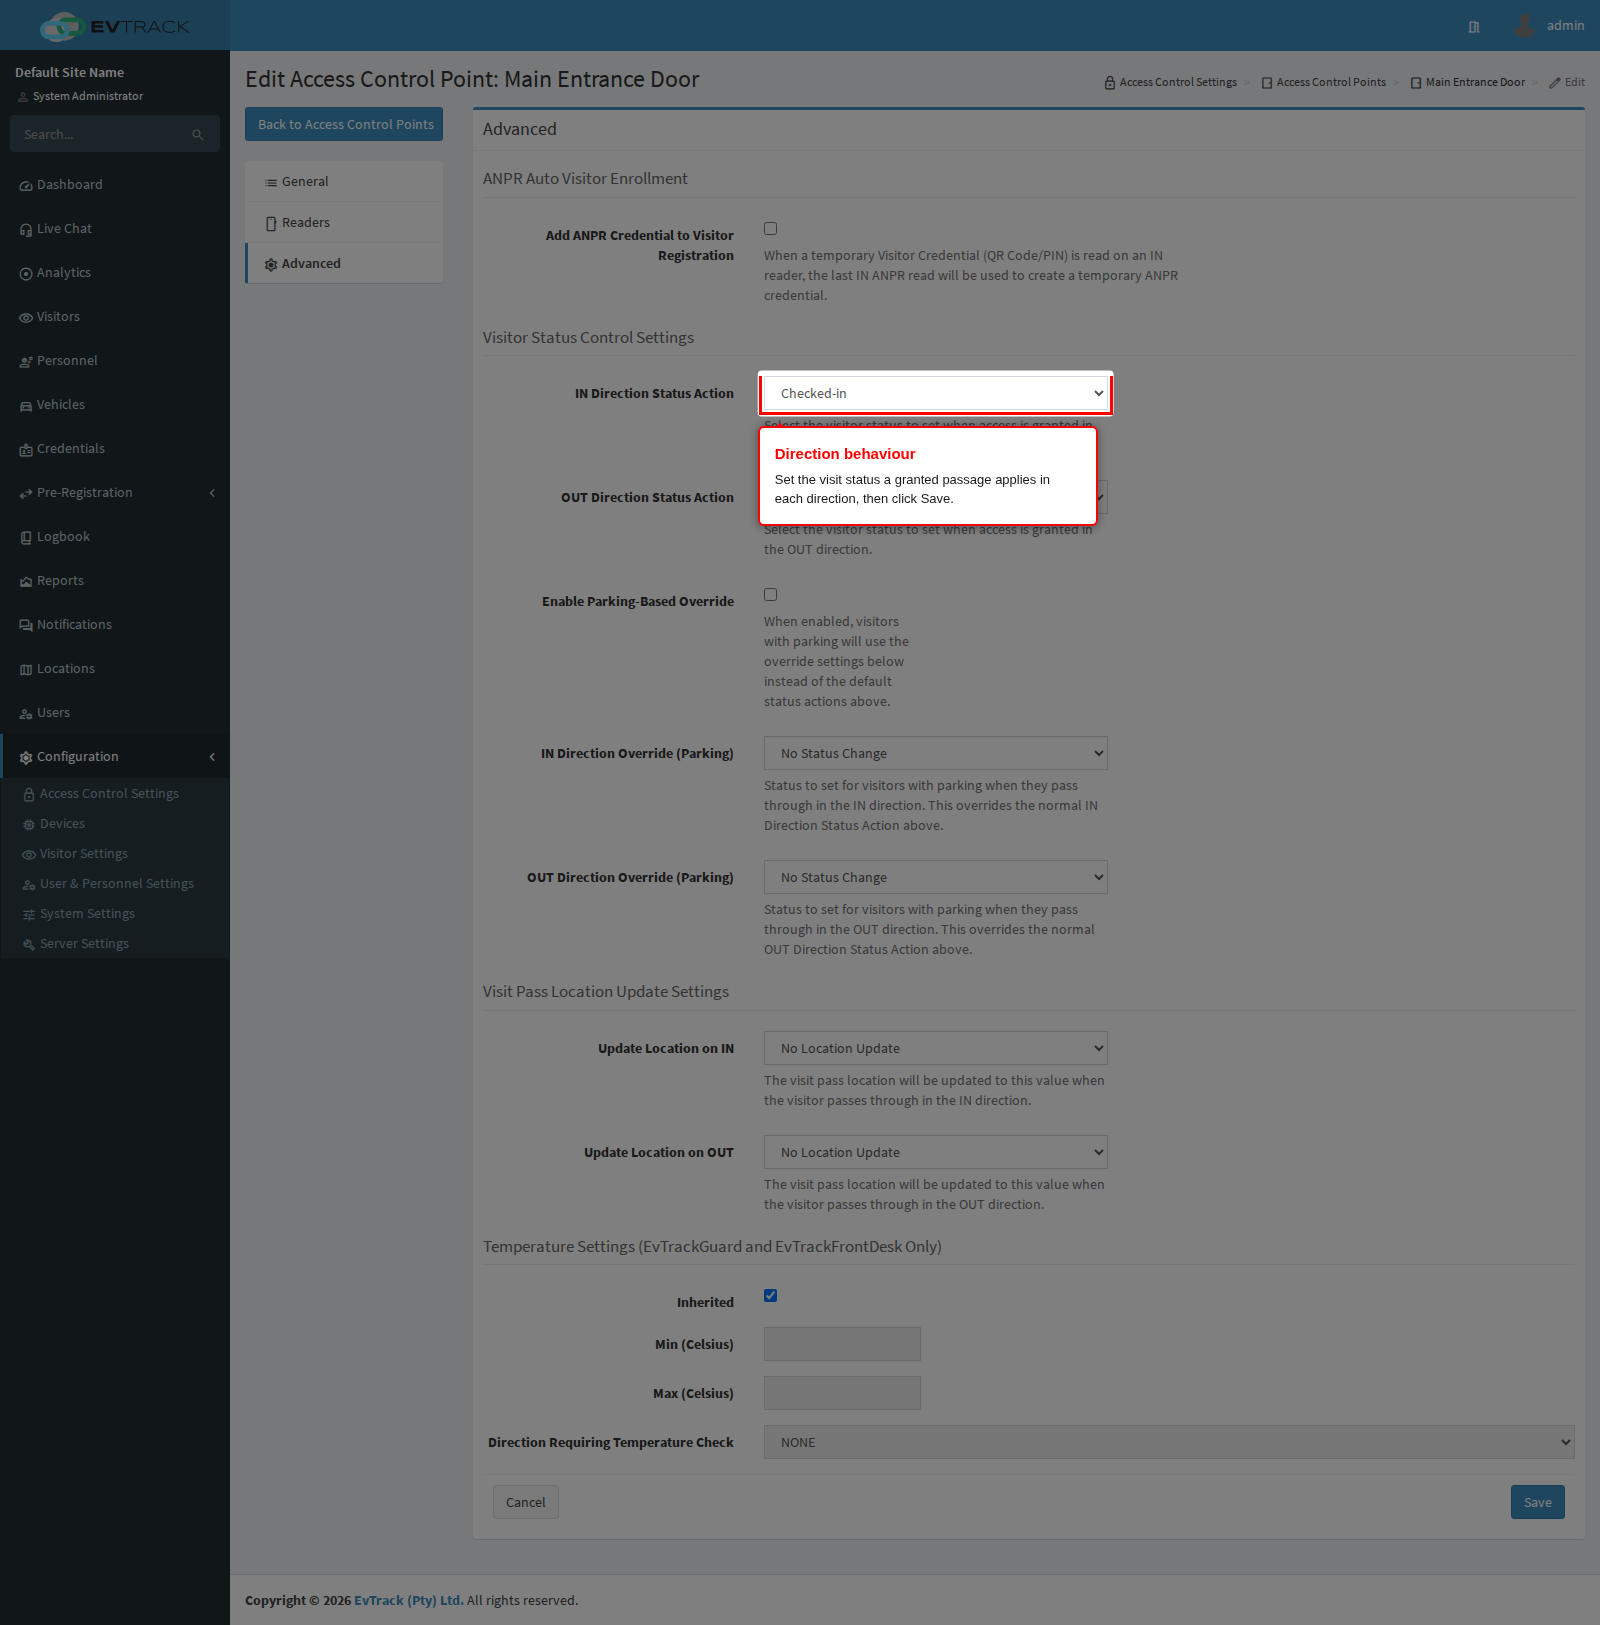
Everything on this panel is per point, so the same reader hardware behaves differently depending on which point it is bound to. All of it applies only after access has already been granted; a denied read changes nothing.
Visitor Status Control Settings
IN Direction Status Action is the visit status the product writes onto the visit when a visitor is granted access through this point in the IN direction. The list offers, in this order, Checked-in, On-Site, Checked-out, No Status Change, In Parking and Hosted. Pick the one that describes where the person now is:
- A lobby turnstile or reception door is Checked-in - that is what puts the visitor on the on-site list and starts their visit.
- A parking boom is In Parking - the visitor is on site but has not reached reception yet, so they show separately on the dashboard and on an evacuation list.
- An inner door deeper into the building is usually No Status Change, because the visitor was already checked in at the perimeter and you do not want every internal door rewriting the visit.
- Hosted marks that the visitor has met the person they came to see, for sites that track that separately.
No Status Change is the option to reach for whenever a point should open but not move the visit along. A point that has never been given a value behaves as Checked-in on the way in.
OUT Direction Status Action is the same choice for the OUT direction, and behaves as Checked-out until it is given a value. The usual mistake here is setting an inner door to Checked-out: the visitor walks from one room to another and the product closes their visit, releases their card and stops their pass working. Use No Status Change on every point that is not your actual exit.
The status is only rewritten when it would actually change; presenting a pass twice at the same point does not produce a second status change.
Enable Parking-Based Override, and the two override selectors under it, apply a different pair of statuses to visitors who hold a parking allocation. When the override is on and the visitor has parking, the override statuses replace the two above; everybody else keeps the normal ones. This is how a shared boom can put parking visitors In Parking while non-parking traffic is left alone.
Visit Pass Location Update Settings
Update Location on IN re-files the visit against a location when the visitor is granted access through this point in the IN direction. The list contains every location you have defined, plus No Location Update, which is the default and means the visit keeps whatever location it already had.
Set this on the points that mark a real change of site or building, so reports, host notifications and evacuation lists show where the person actually is rather than where they were booked. Leave it on No Location Update everywhere else. Update Location on OUT does the same in the OUT direction, and is normally used to file a visitor back to a main site when they leave a sub-area.
Because a location change can alter which access rules apply, the visitor credentials are recalculated when the location is updated, so a pass may gain or lose doors as a result. Do not point several unrelated points at different locations unless you actually want the pass rebuilt at each one.
ANPR Auto Visitor Enrollment
Add ANPR Credential to Visitor Registration turns a plate the camera has already seen into a working number plate credential for the visitor who has just checked in. When a visitor presents a temporary credential (their QR code or PIN) on an IN reader at this point, the product takes the most recent plate read from the same point in the same direction, records it as the visitor vehicle, and issues a plate credential on the visit.
Enable it at a vehicle entrance where a camera and a code reader cover the same lane, so a visitor who scans in once at the boom is recognised by plate for the rest of their visit and does not have to present anything on later passes through the same lane.
Prerequisites and behaviour worth knowing before you turn it on:
- A number plate camera must be bound to this same point in the IN direction, and it must have read a plate recently. How recently is set by LPR Last Read Cool Down Period on the Guard App ANPR panel. If nothing was read inside that window, nothing is enrolled and the check-in proceeds normally.
- It only triggers for visitor check-ins that used a temporary credential such as a QR code or PIN, and only in the IN direction.
- The plate is also saved as a vehicle against the visitor record, so it is available on their next visit.
- If the visitor record is missing details that a credential needs, no credential is issued and the check-in still succeeds. There is no error at the checkpoint; check the visit record to confirm the plate credential appeared.
- A pedestrian who checks in while a car happens to be sitting in front of the camera can pick up that car plate. Only enable it on lanes where every check-in is a driver.
Step 12: Confirm the result
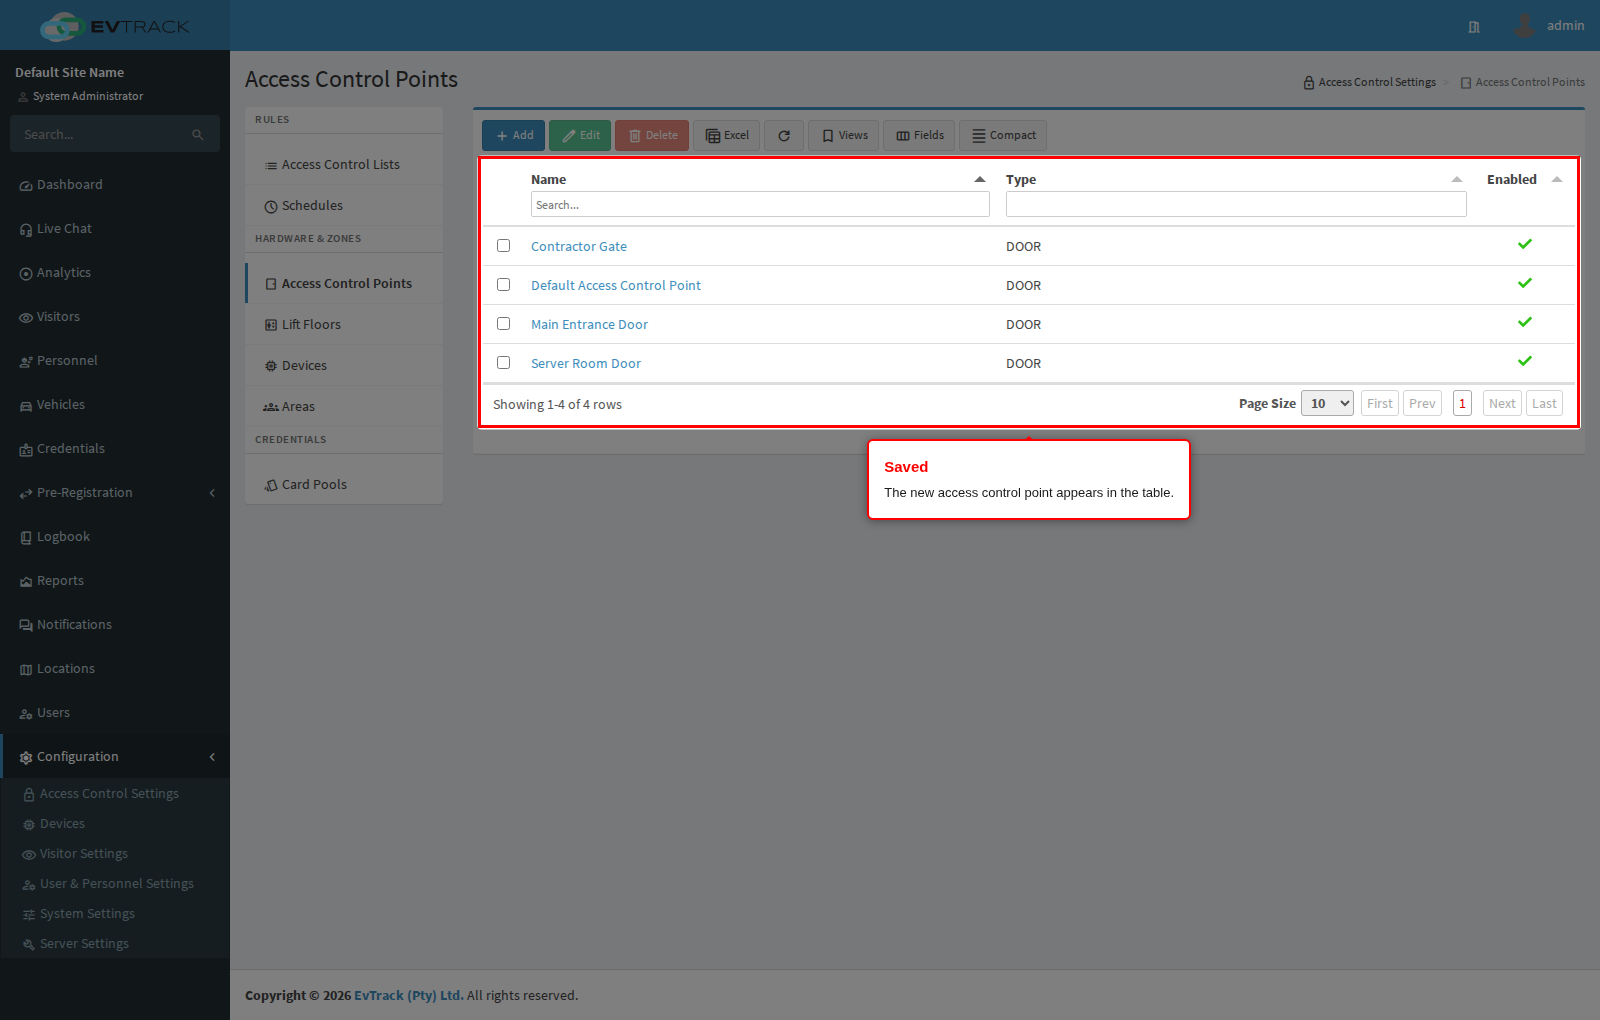
Back on Access Control Points, the new point appears in the table and can now be added to Access Control Lists.
Step 13: Open an existing point to edit it
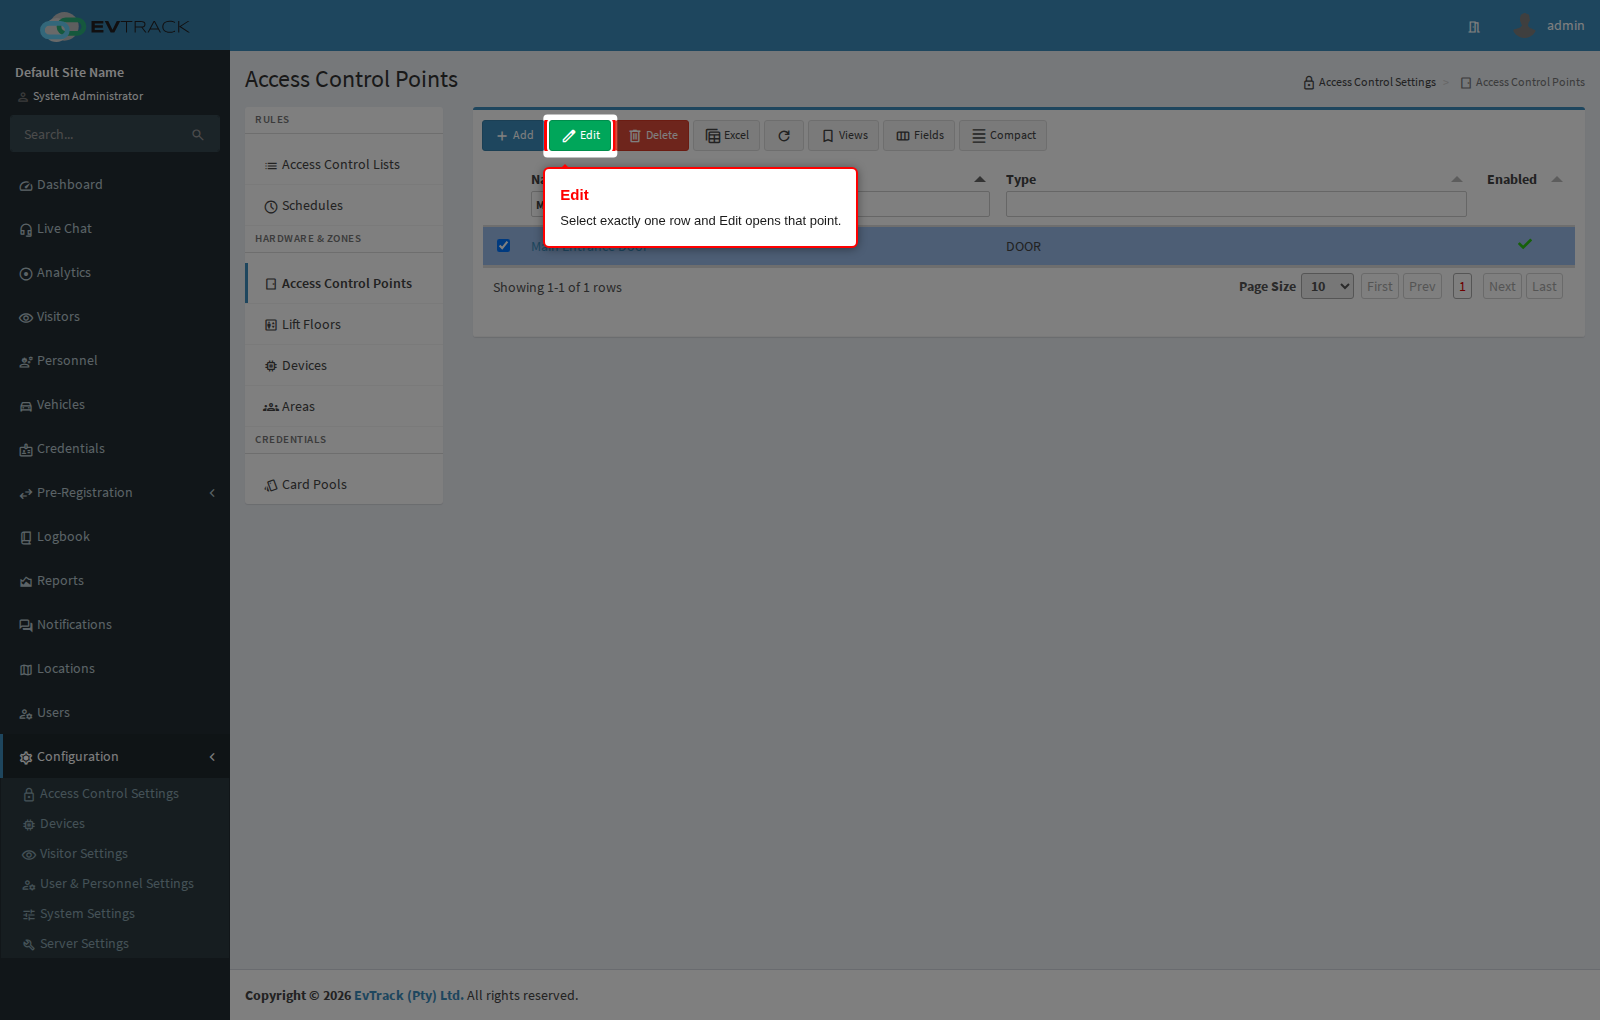
Back on Access Control Points, click the row of the point you want to change. The toolbar Edit and Delete buttons remain greyed out until exactly one row is selected. Click Edit (clicking the point’s name in the table does the same thing).
Step 14: Change the point
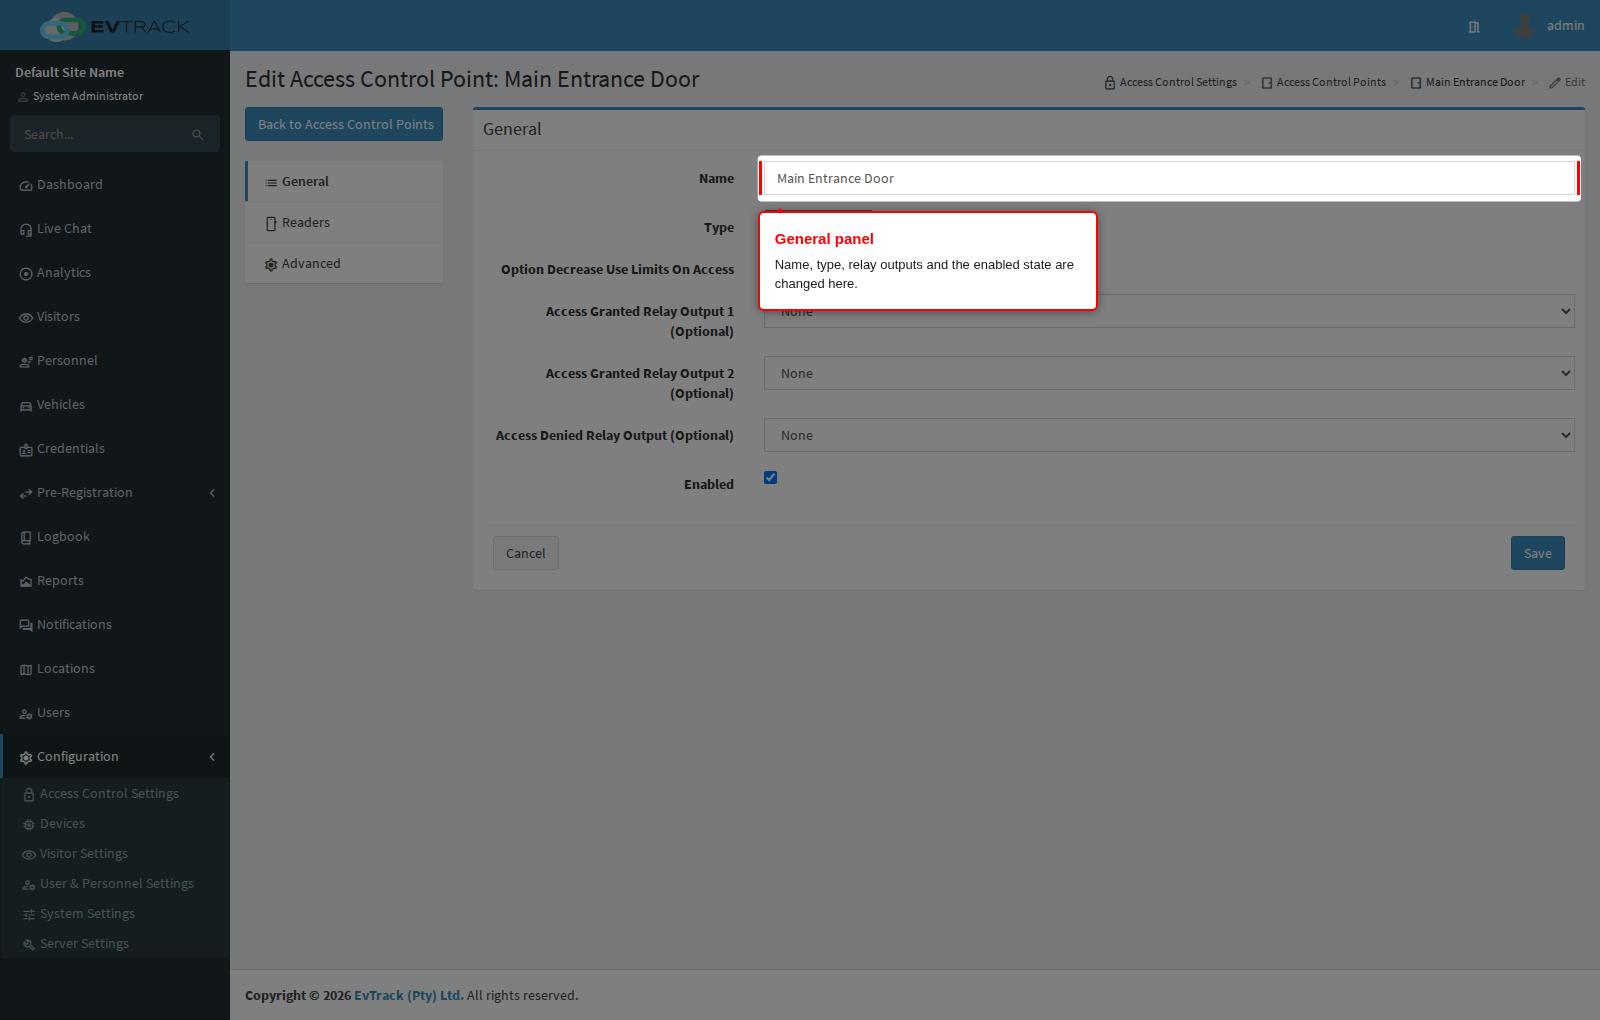
The edit page has three panels in the menu on the left: General, Readers (steps 6 to 10) and Advanced (step 11). General holds everything the point itself carries: its Name, its Type, Option Decrease Use Limits On Access, the relay outputs used to release the opening on a granted read and on a denied read, and the Enabled state. Change what you need and click Save on that panel.
Option Decrease Use Limits On Access decides whether passing through this point spends one of the uses on the credential that was presented. A visit pass carries a use limit - set by Use Limit (Per Day) under Visit Pass, multiplied by the number of days on a multi-day visit - and when the count is exhausted the credential stops opening anything.
- Tick it on the points that should consume a use: your main entrance and your exit, so a pass issued for one entry and one exit is spent by the time the visitor leaves.
- Leave it clear on internal doors, lift landings and parking booms, otherwise a visitor who walks around the building for an afternoon exhausts their pass and is refused at the exit.
Two details decide whether the use is actually spent. First, only a granted read counts; a denied read never touches the limit. Second, the count is only decremented if the point actually released the opening, which means at least one of its relay outputs fired. A point with no relay output configured, or one whose relay could not be triggered, records the passage but leaves the use limit untouched, and logs that it did so. If you find that limited-use passes never run out, check the relay outputs on this panel before you suspect the limit itself.
Clearing Enabled is the usual way to take a point out of service temporarily: the point, its readers and its rules all remain in place, but the opening stops responding.
Step 15: Confirm the change
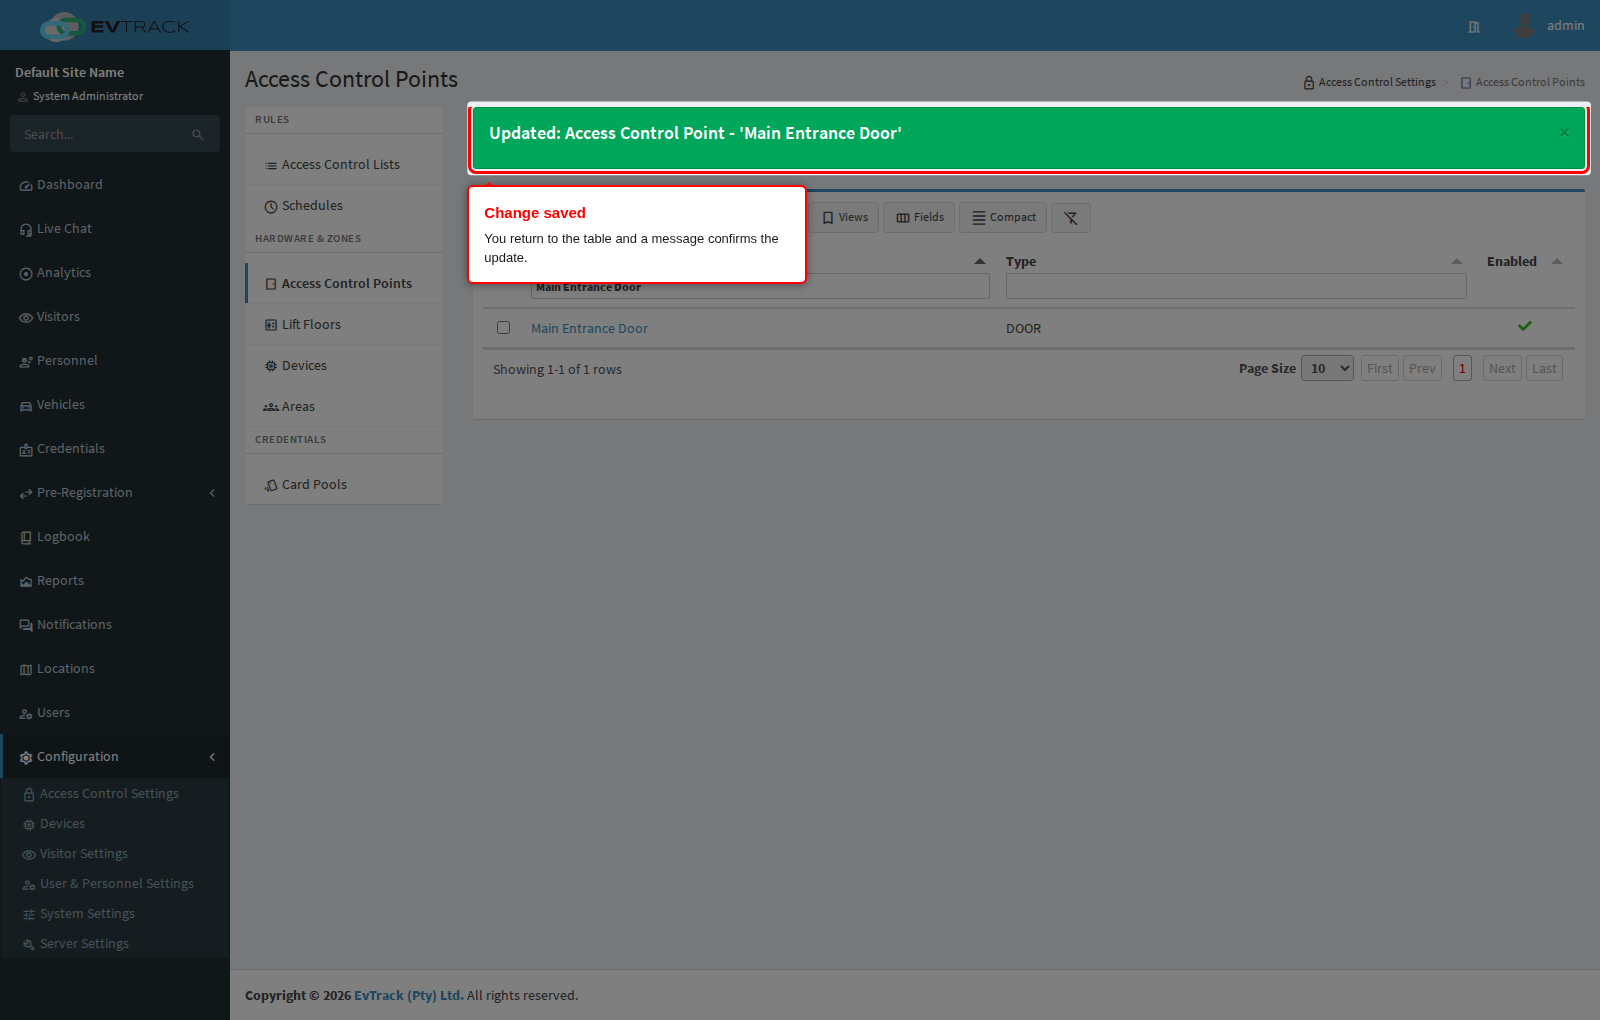
You return to the table with a success message and the row shows the updated values.
Step 16: Select a point to delete it
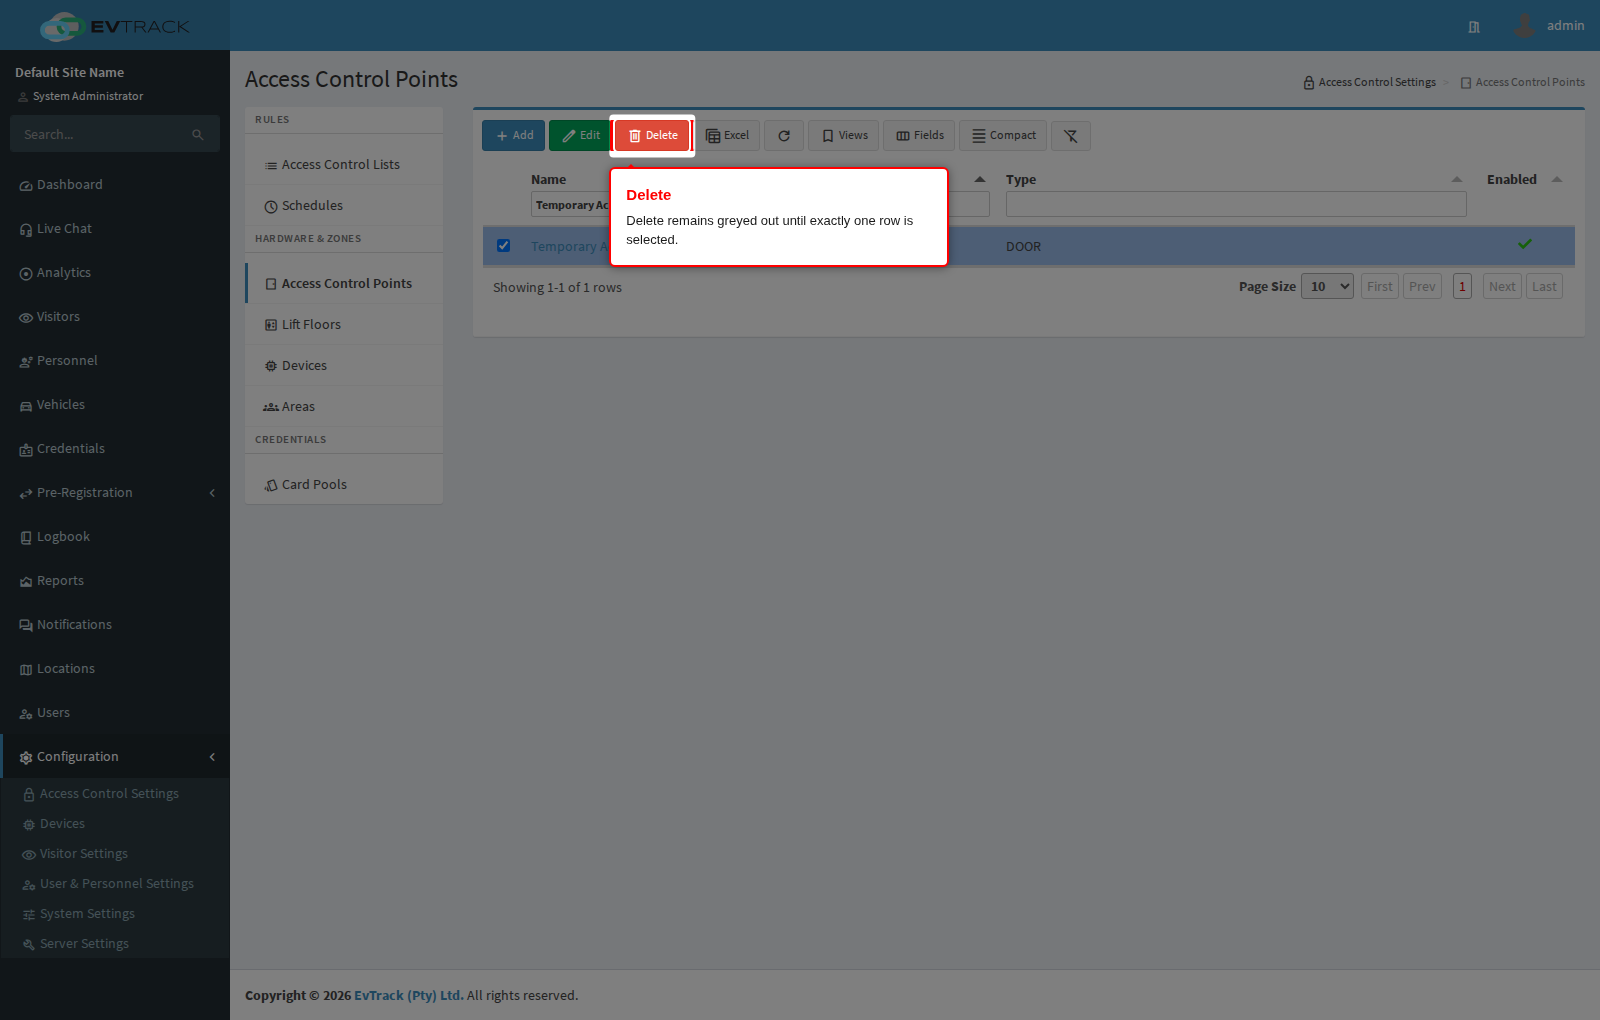
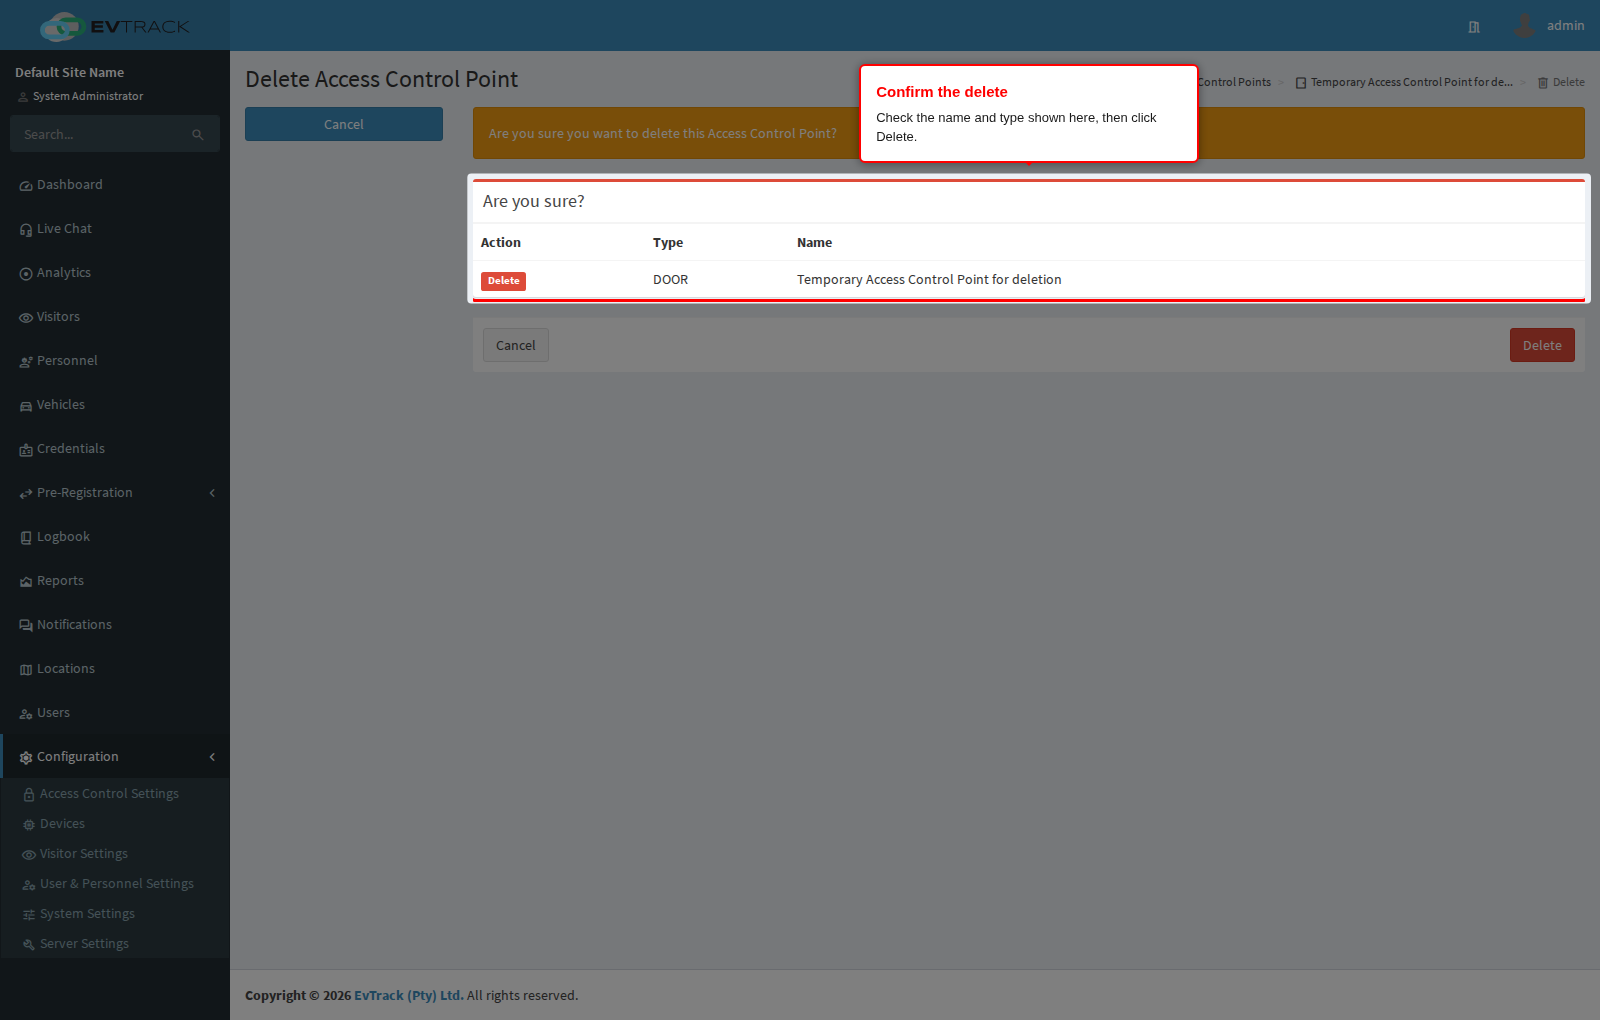
To remove a point, select its row in the table and click Delete. Like Edit, the button only becomes active with exactly one row selected. In the example below a disposable point, “Temporary Access Control Point for deletion”, is being removed.
Step 17: Confirm the deletion
A confirmation page opens showing the point’s reference, type and name so you can check you picked the right one. Click Delete to remove it, or Cancel (or Back to Access Control Points) to leave it alone. Deletion is permanent - there is no undo. If you only want to stop the opening from responding, clear Enabled on the General panel instead.
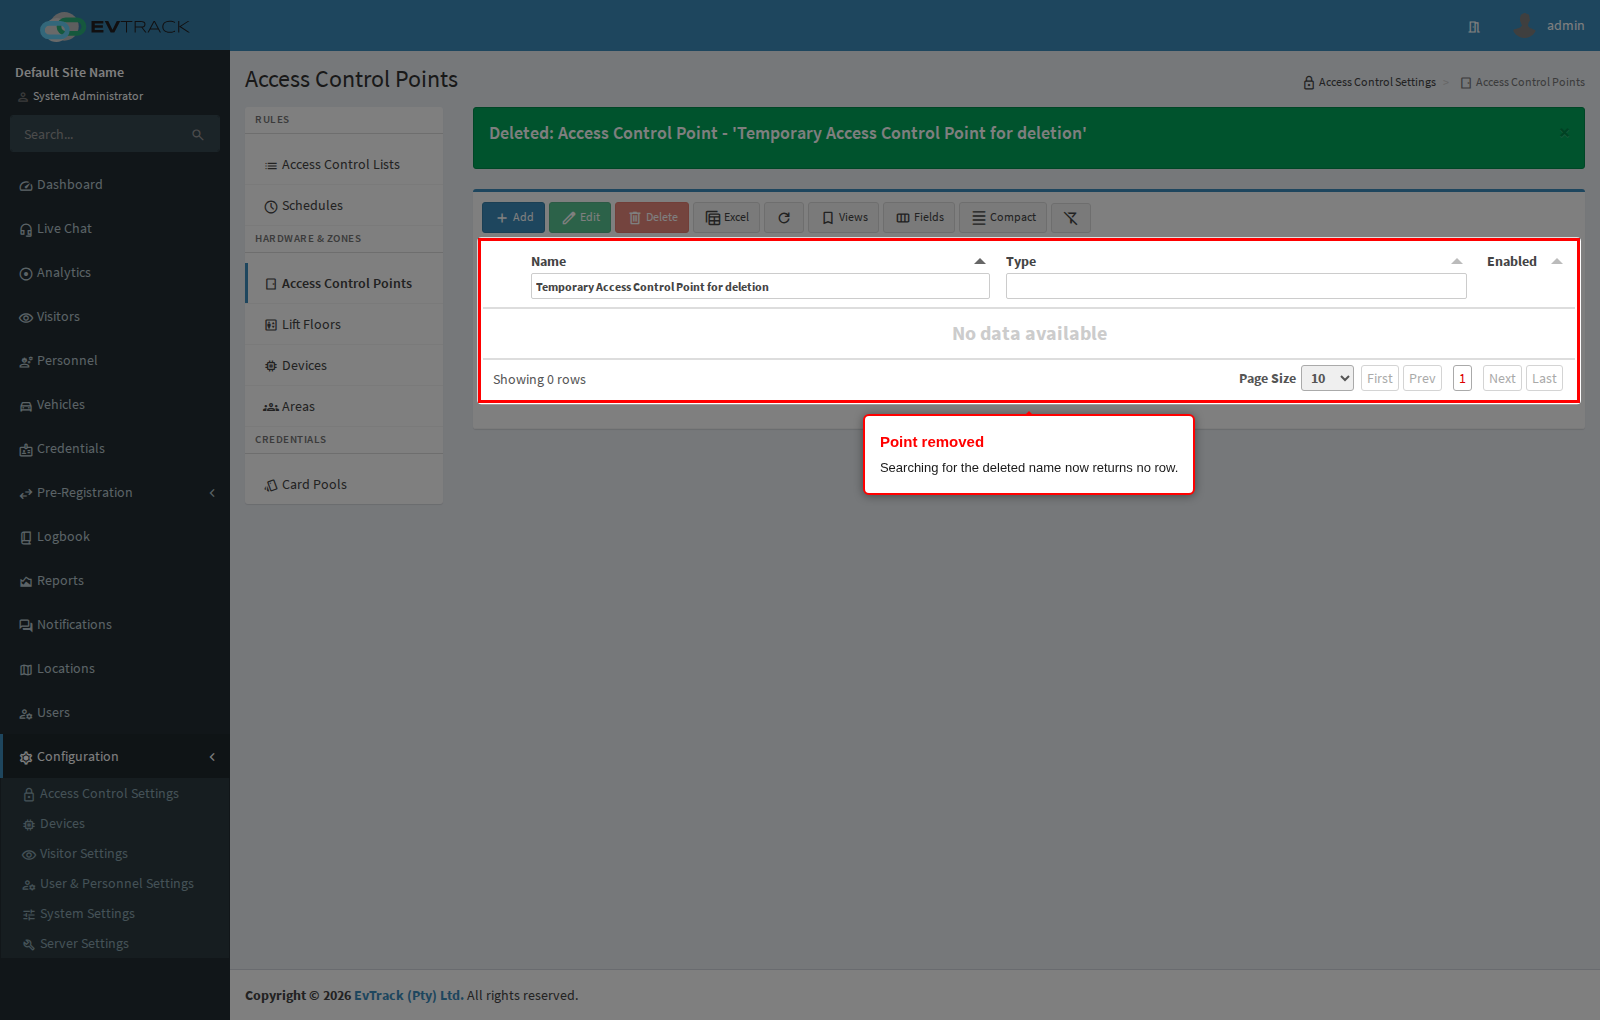
Step 18: Confirm the result
You return to the table with a success message and the point is gone: search for its name and no row is found.
When a point cannot be deleted
Three conditions block deletion. The confirmation page still opens, but clicking Delete returns you to the table with a red message instead of a success message:
- The point still has readers. Unbind every entry and exit reader first, as shown in steps 9 and 10.
- The point is still used by an access control list. Remove the access rules that reference it on each Access Control List first.
- The point is still used by an area restriction. Remove it from the area’s restriction list first.
Note: after re-binding readers, device synchronisation pushes the change to the hardware - allow a moment before testing at the reader.