A visitor who walks up to reception with no invitation is normally handled by the quick check-in dialog on the Visitors Dashboard: look them up, fill in what is missing, hand them a card, done. This page covers what happens when that dialog is asked to hold the walk-in for the host instead of checking them straight in: the request that opens, the waiting screen the operator sees, the host’s own decision screen, and the three ways it can end - approved, declined, or timed out.
Before you start: you need the same permissions as Walk-in Registration - the dashboard quick check-in permission, plus permission to add a visitor and issue a visit pass. Approval requests are addressed to a host, so the host named on the visit must exist as a user with a working email address (and the mobile app, where you use it, for the fastest answer).
What is affected: this page is about the dashboard’s own walk-in check-in only. It is a separate switch from the kiosk and guard app host approval covered in Host Approval Settings, and turning one on does not turn the other on.
Upgrade note: before this feature existed, a system that required host approval for kiosk or guard app walk-ins also blocked a dashboard quick check-in outright, with no way to send it for approval. That refusal is gone. If your system relied on it to keep dashboard walk-ins from being checked in unannounced, turn on Require Host Approval for Dashboard Check-ins after upgrading - nothing is switched on for you automatically.
Step 1: The system-wide setting
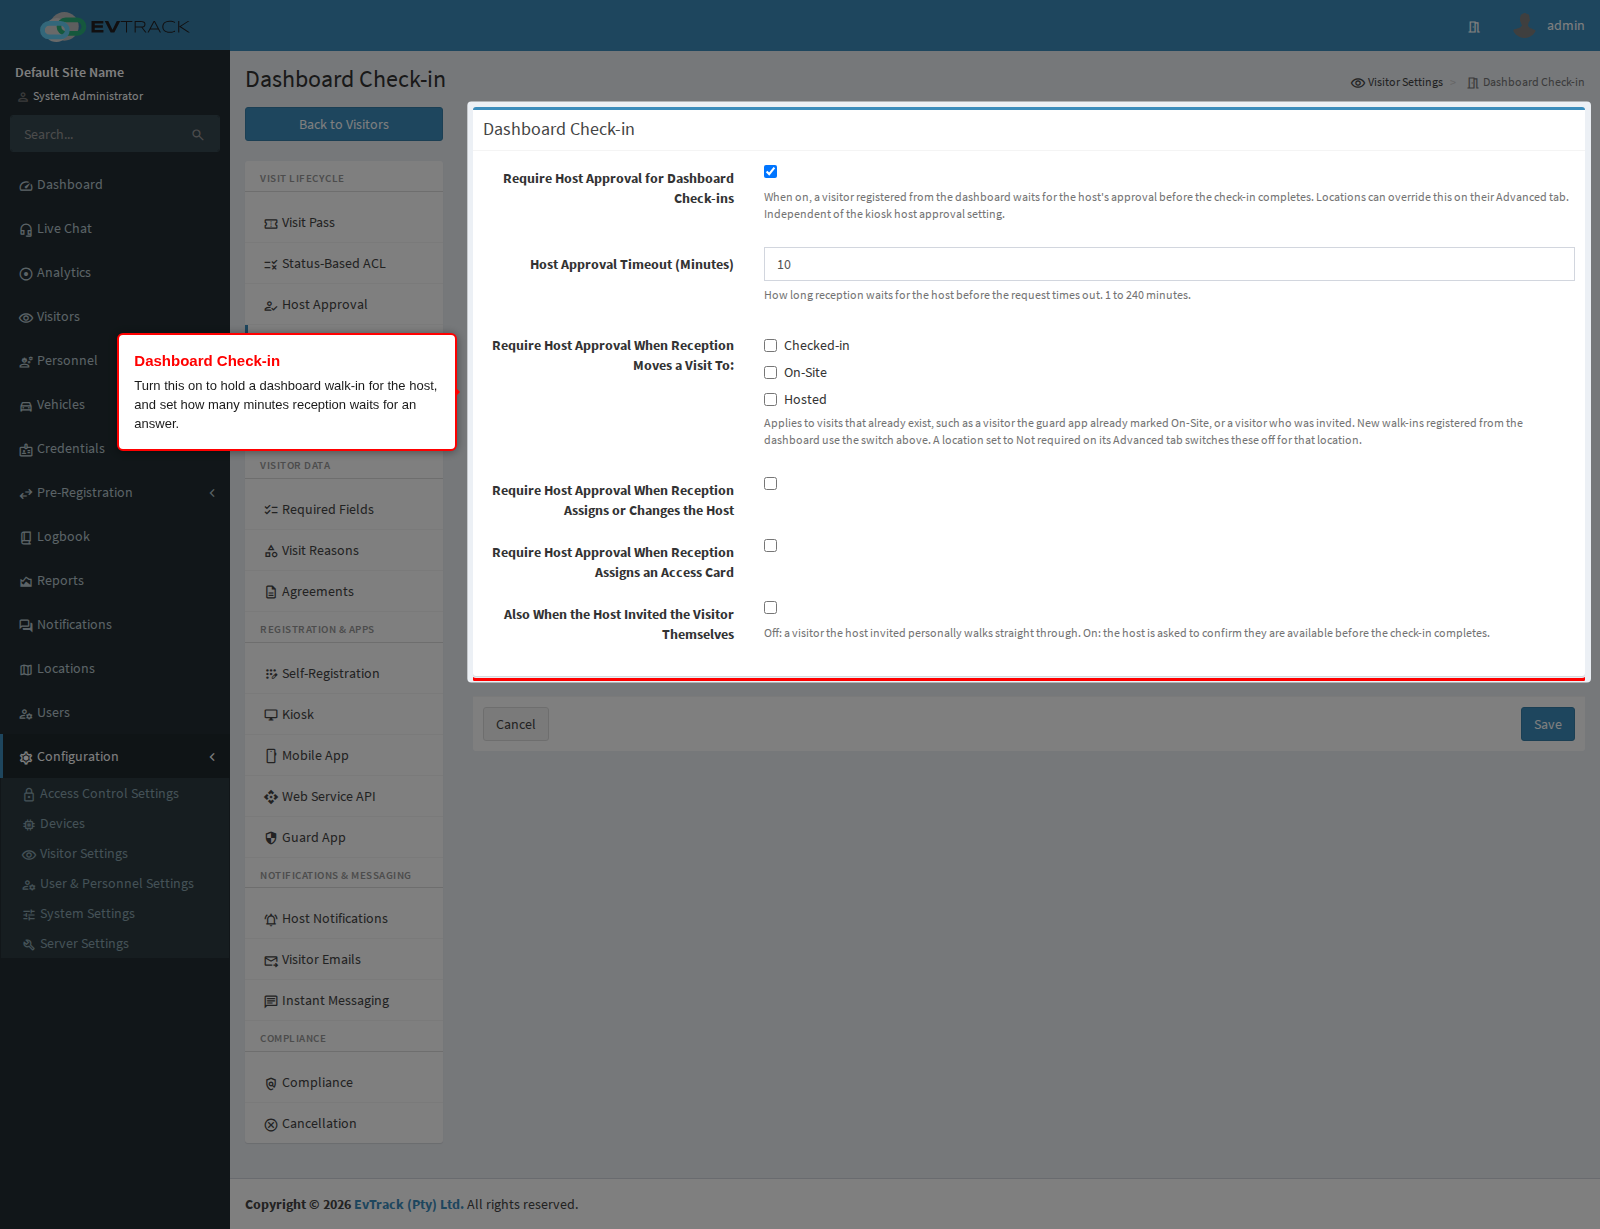
Open Configuration, click Visitor Settings, then click the Dashboard Check-in tile.
Require Host Approval for Dashboard Check-ins is the master switch. With it on, a walk-in captured through the dashboard’s Check-in dialog waits for its host to decide instead of being checked in on the spot. Host Approval Timeout (Minutes) sets how long the request remains open, from 1 to 240 minutes, before it is marked as timed out.
Below the master switch, four further switches gate host approval separately, for a change reception makes to a visit that already exists rather than a fresh walk-in: Require Host Approval When Reception Moves a Visit To: covers moving the visit to Checked-in, On-Site or Hosted; Require Host Approval When Reception Assigns or Changes the Host covers picking or replacing the host on a visit; and Require Host Approval When Reception Assigns an Access Card covers handing over a card. Each works the same way as the master switch above it - the change is held until the host approves - but is switched on or off independently. A visit the host invited personally is normally let through without asking, since the invitation already gave permission; Also When the Host Invited the Visitor Themselves turns that exemption off, so even an invited visitor’s host is asked to confirm they can receive them before the check-in completes.
Step 2: The per-location override
A single site can be pinned away from the system-wide answer. Open Locations, edit the site, and click the Advanced tab.
Host Approval for Dashboard Check-ins offers three choices: Use system setting follows Step 1, Required turns the gate on for this site regardless of the system-wide setting, and Not required turns it off for this site regardless. Timeout Override (Minutes) sets a timeout just for this site; leave it blank to use the system-wide timeout from Step 1.
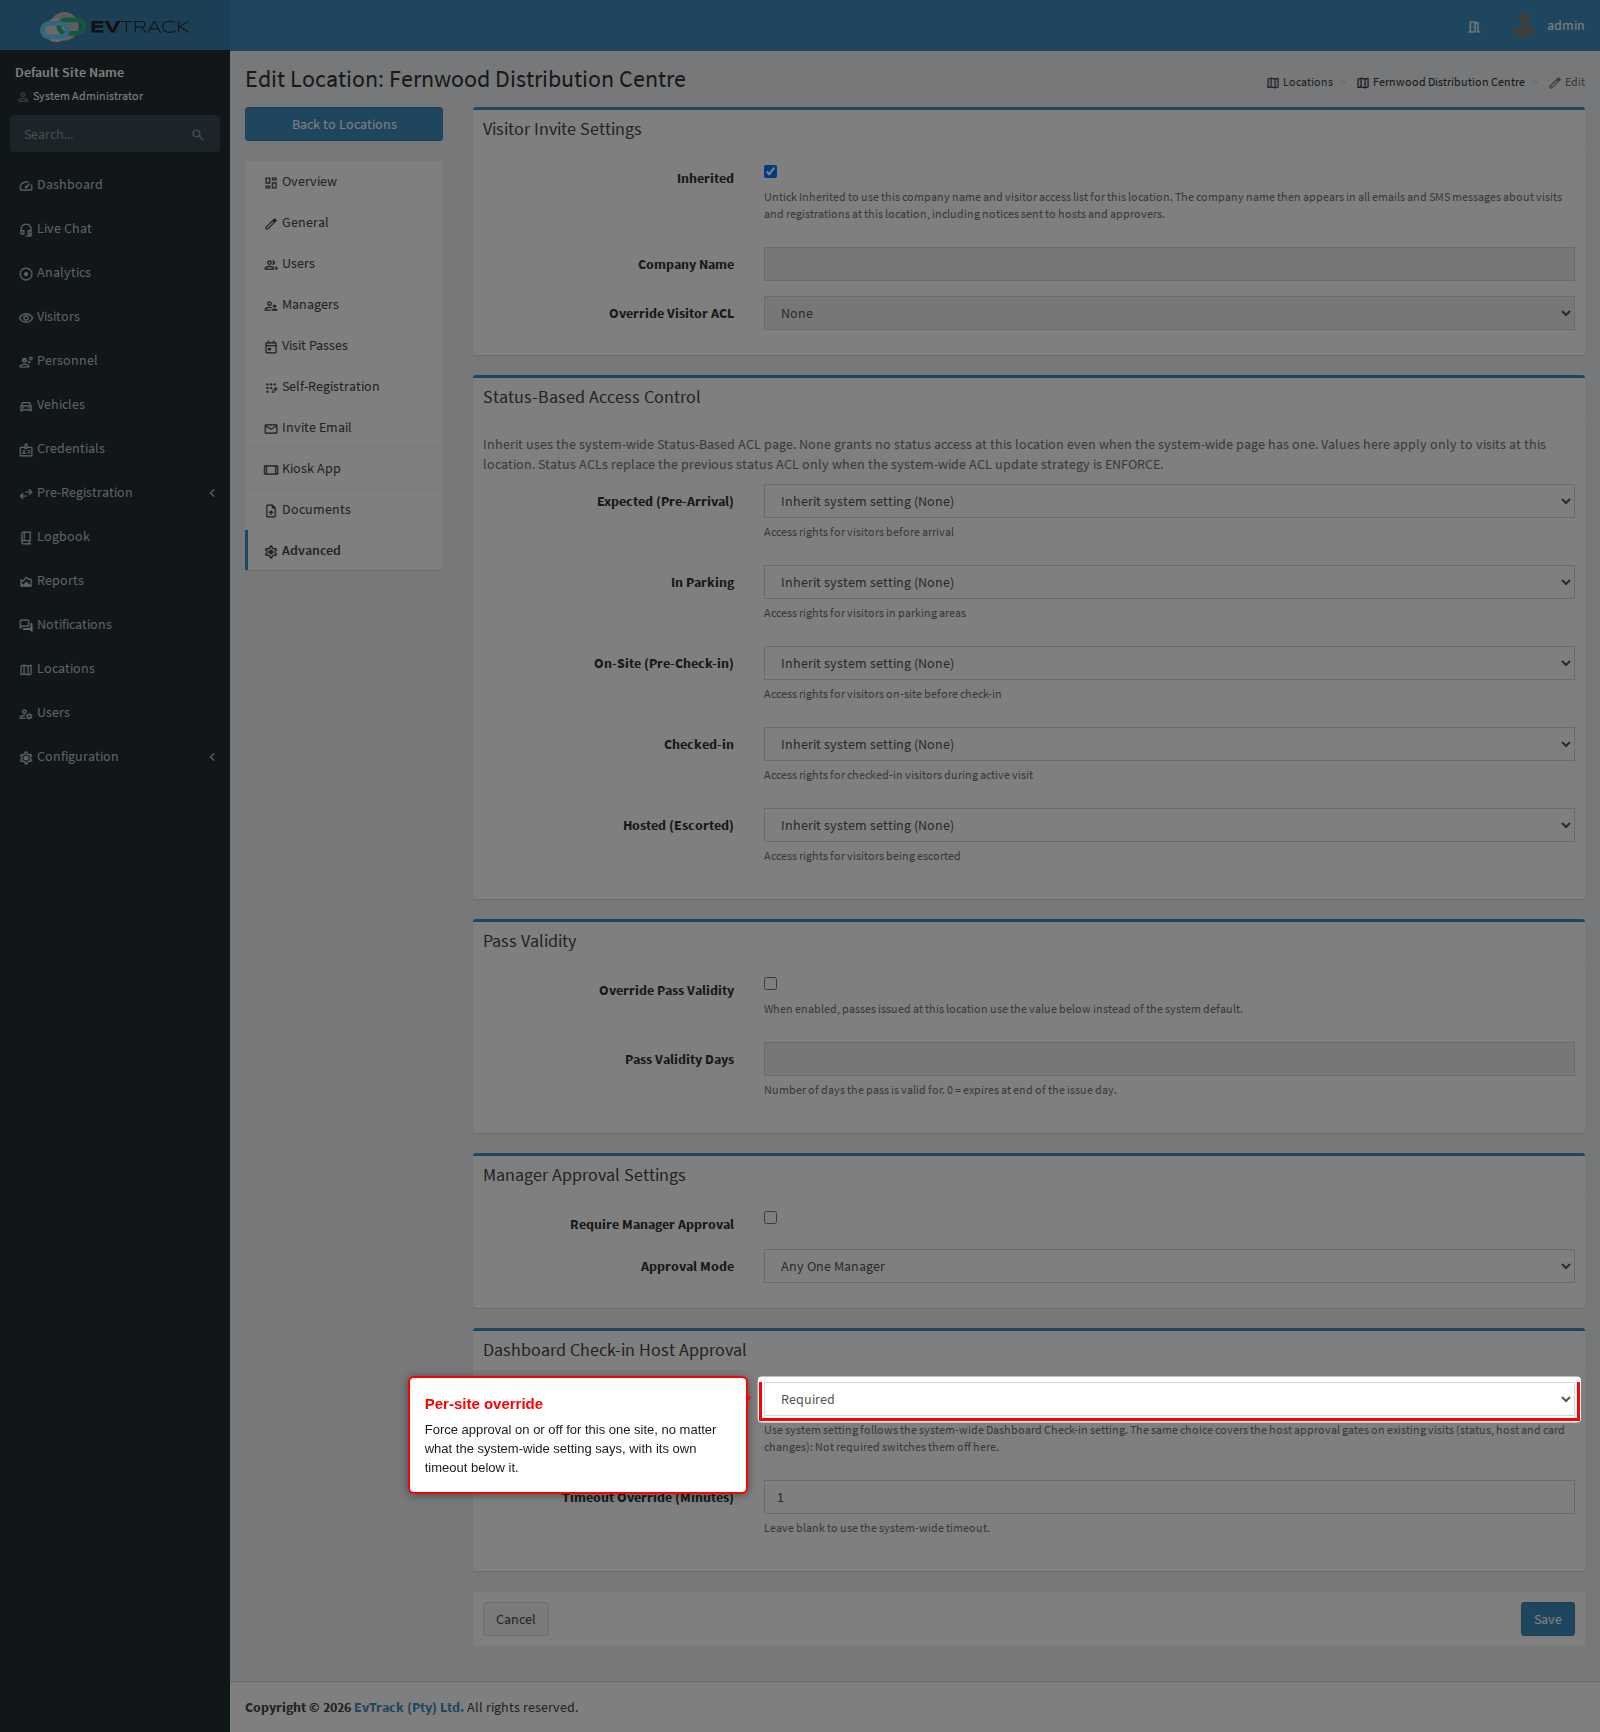
Use the override for a site with different staffing from the rest of the system - a reception desk that is never unattended can remain off the gate while every other site requires it, or the other way around for a site nobody is physically watching.
Step 3: Capturing the walk-in
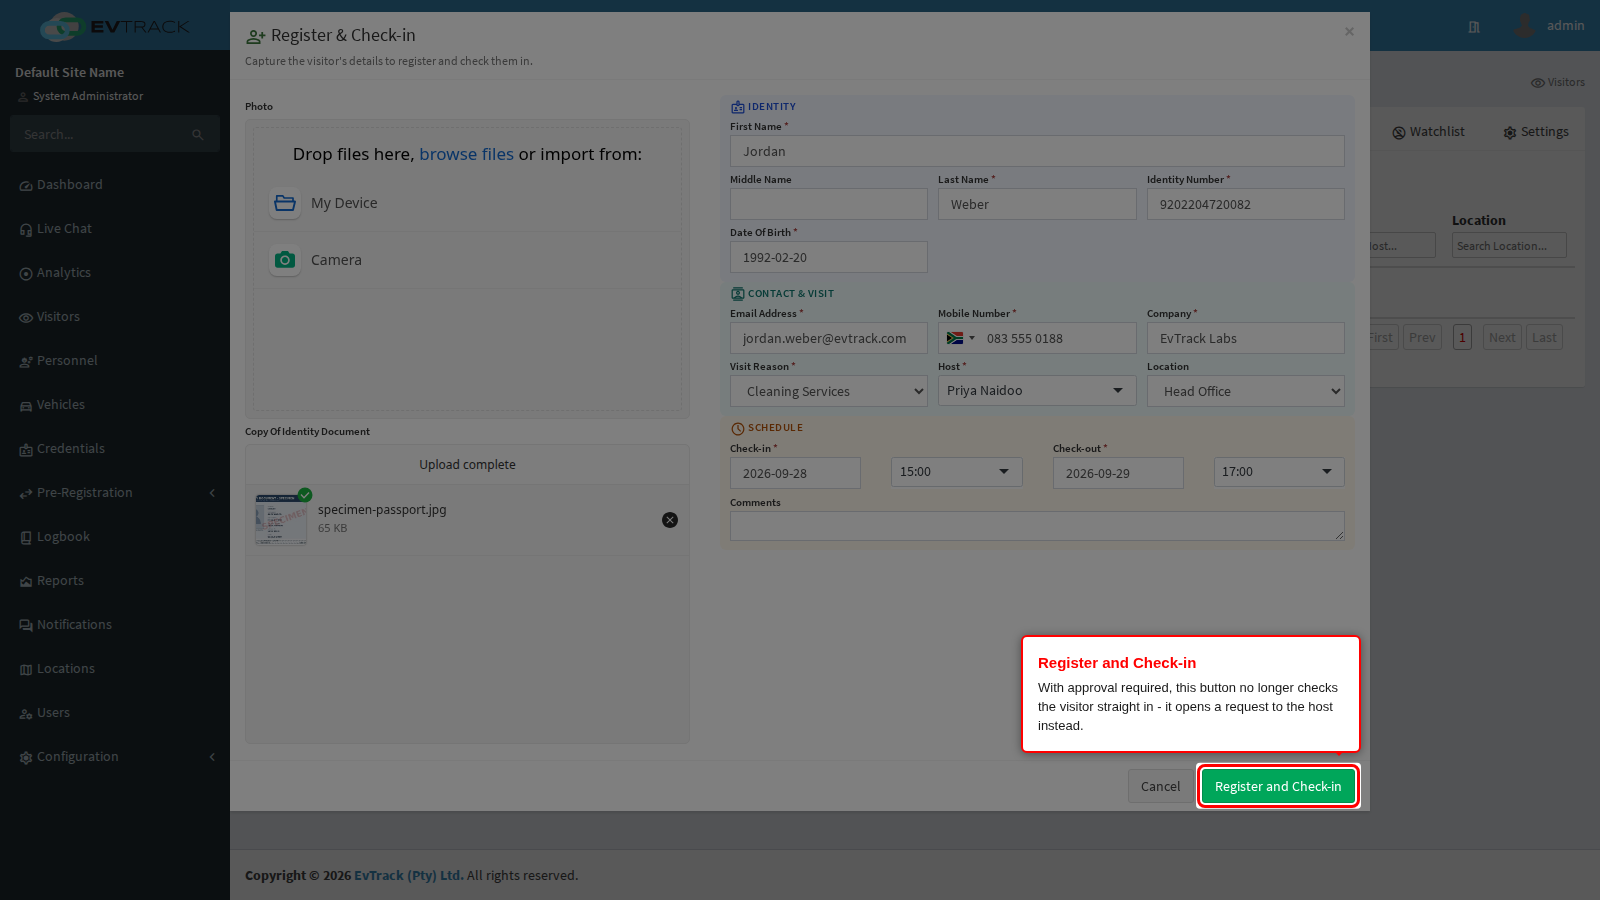
Nothing changes about how the walk-in is captured. Open the Visitors Dashboard, click Check-in with nothing selected, and fill in the visitor’s details exactly as described in Walk-in Registration and Check-in. The only difference is what Register and Check-in does next.
Step 4: Waiting at reception
When approval is required, the button no longer checks the visitor in. It opens a request and the dialog switches to a waiting panel: the visitor’s name, the host they are here to see, and a running clock since the request was sent.
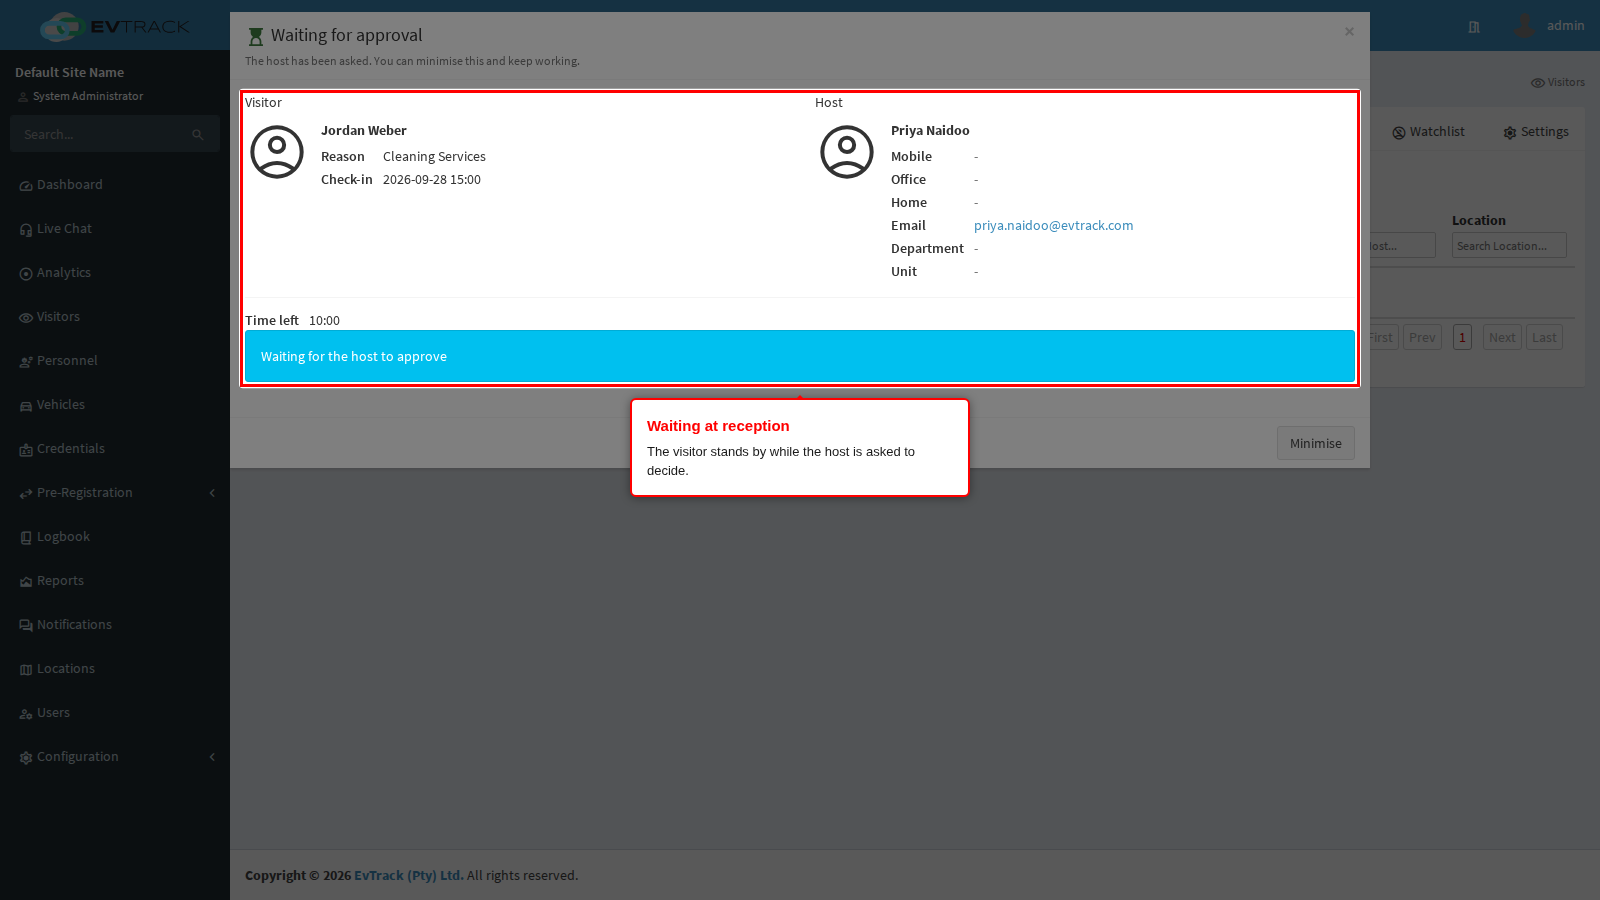
The visitor remains at the desk until the panel reports an answer. There is nothing to click while you wait; the panel checks for a decision on its own.
Step 5: The badge that flags outstanding requests
The main dashboard’s Approve button carries a badge naming how many requests are waiting on a decision, reception walk-ins included alongside the requests covered in Approval Workflow.
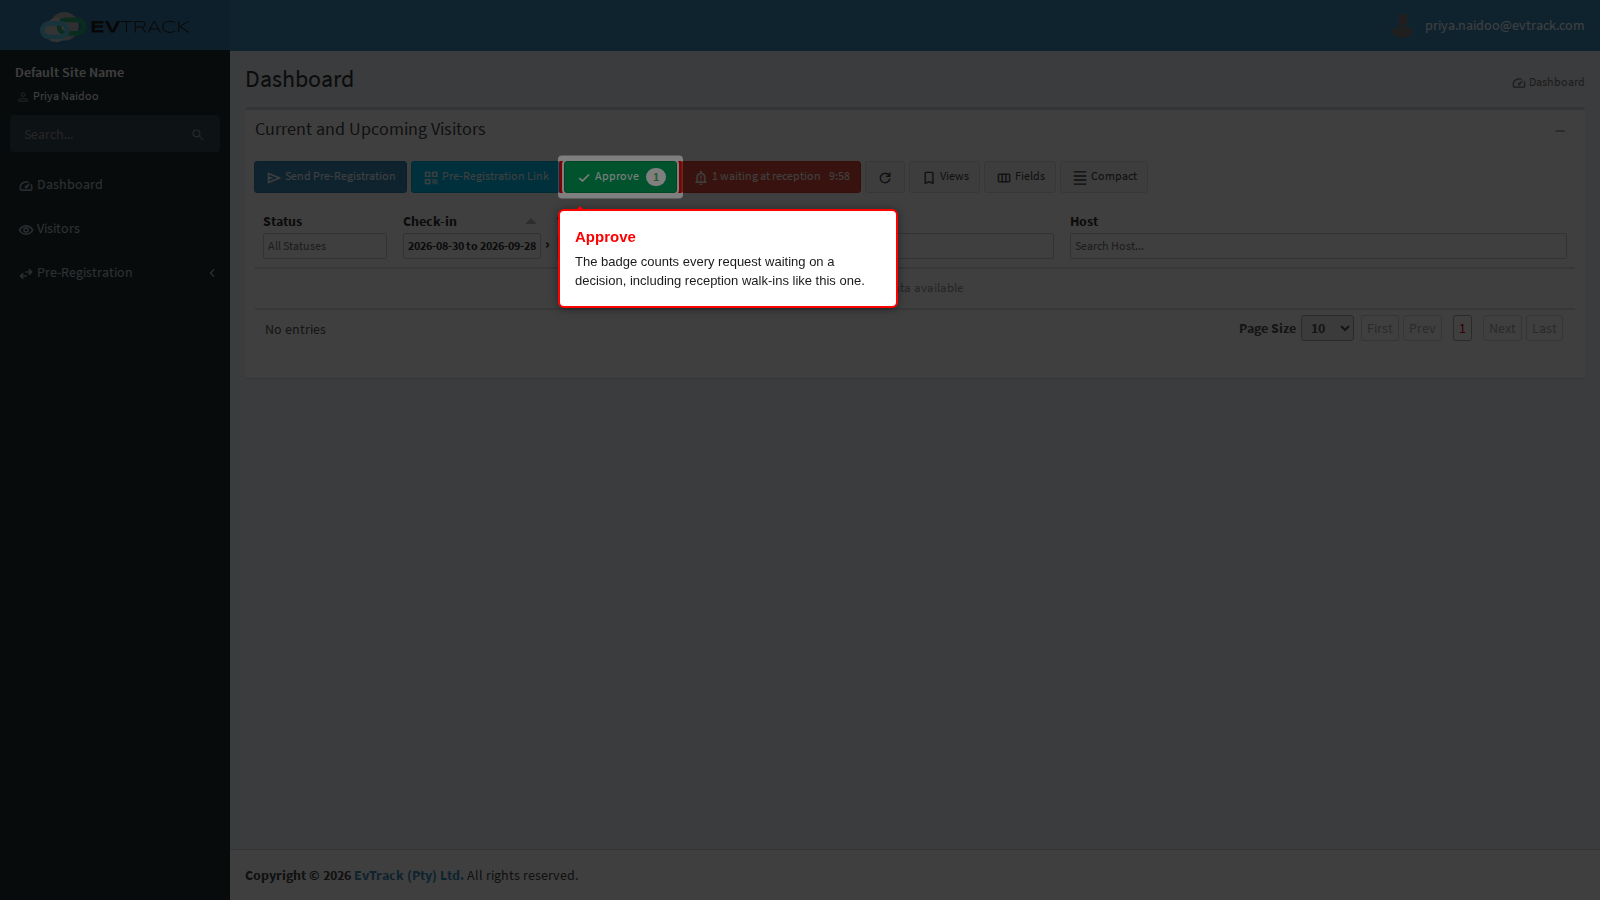
Clicking it opens the registration queue, where the same request can also be opened and decided from a desk other than reception.
Step 6: The host’s decision screen
The host opens the same processing screen used for every approval request, whether from a link in their approval email, the mobile app, or the queue itself. A banner names how long the visitor has been waiting.
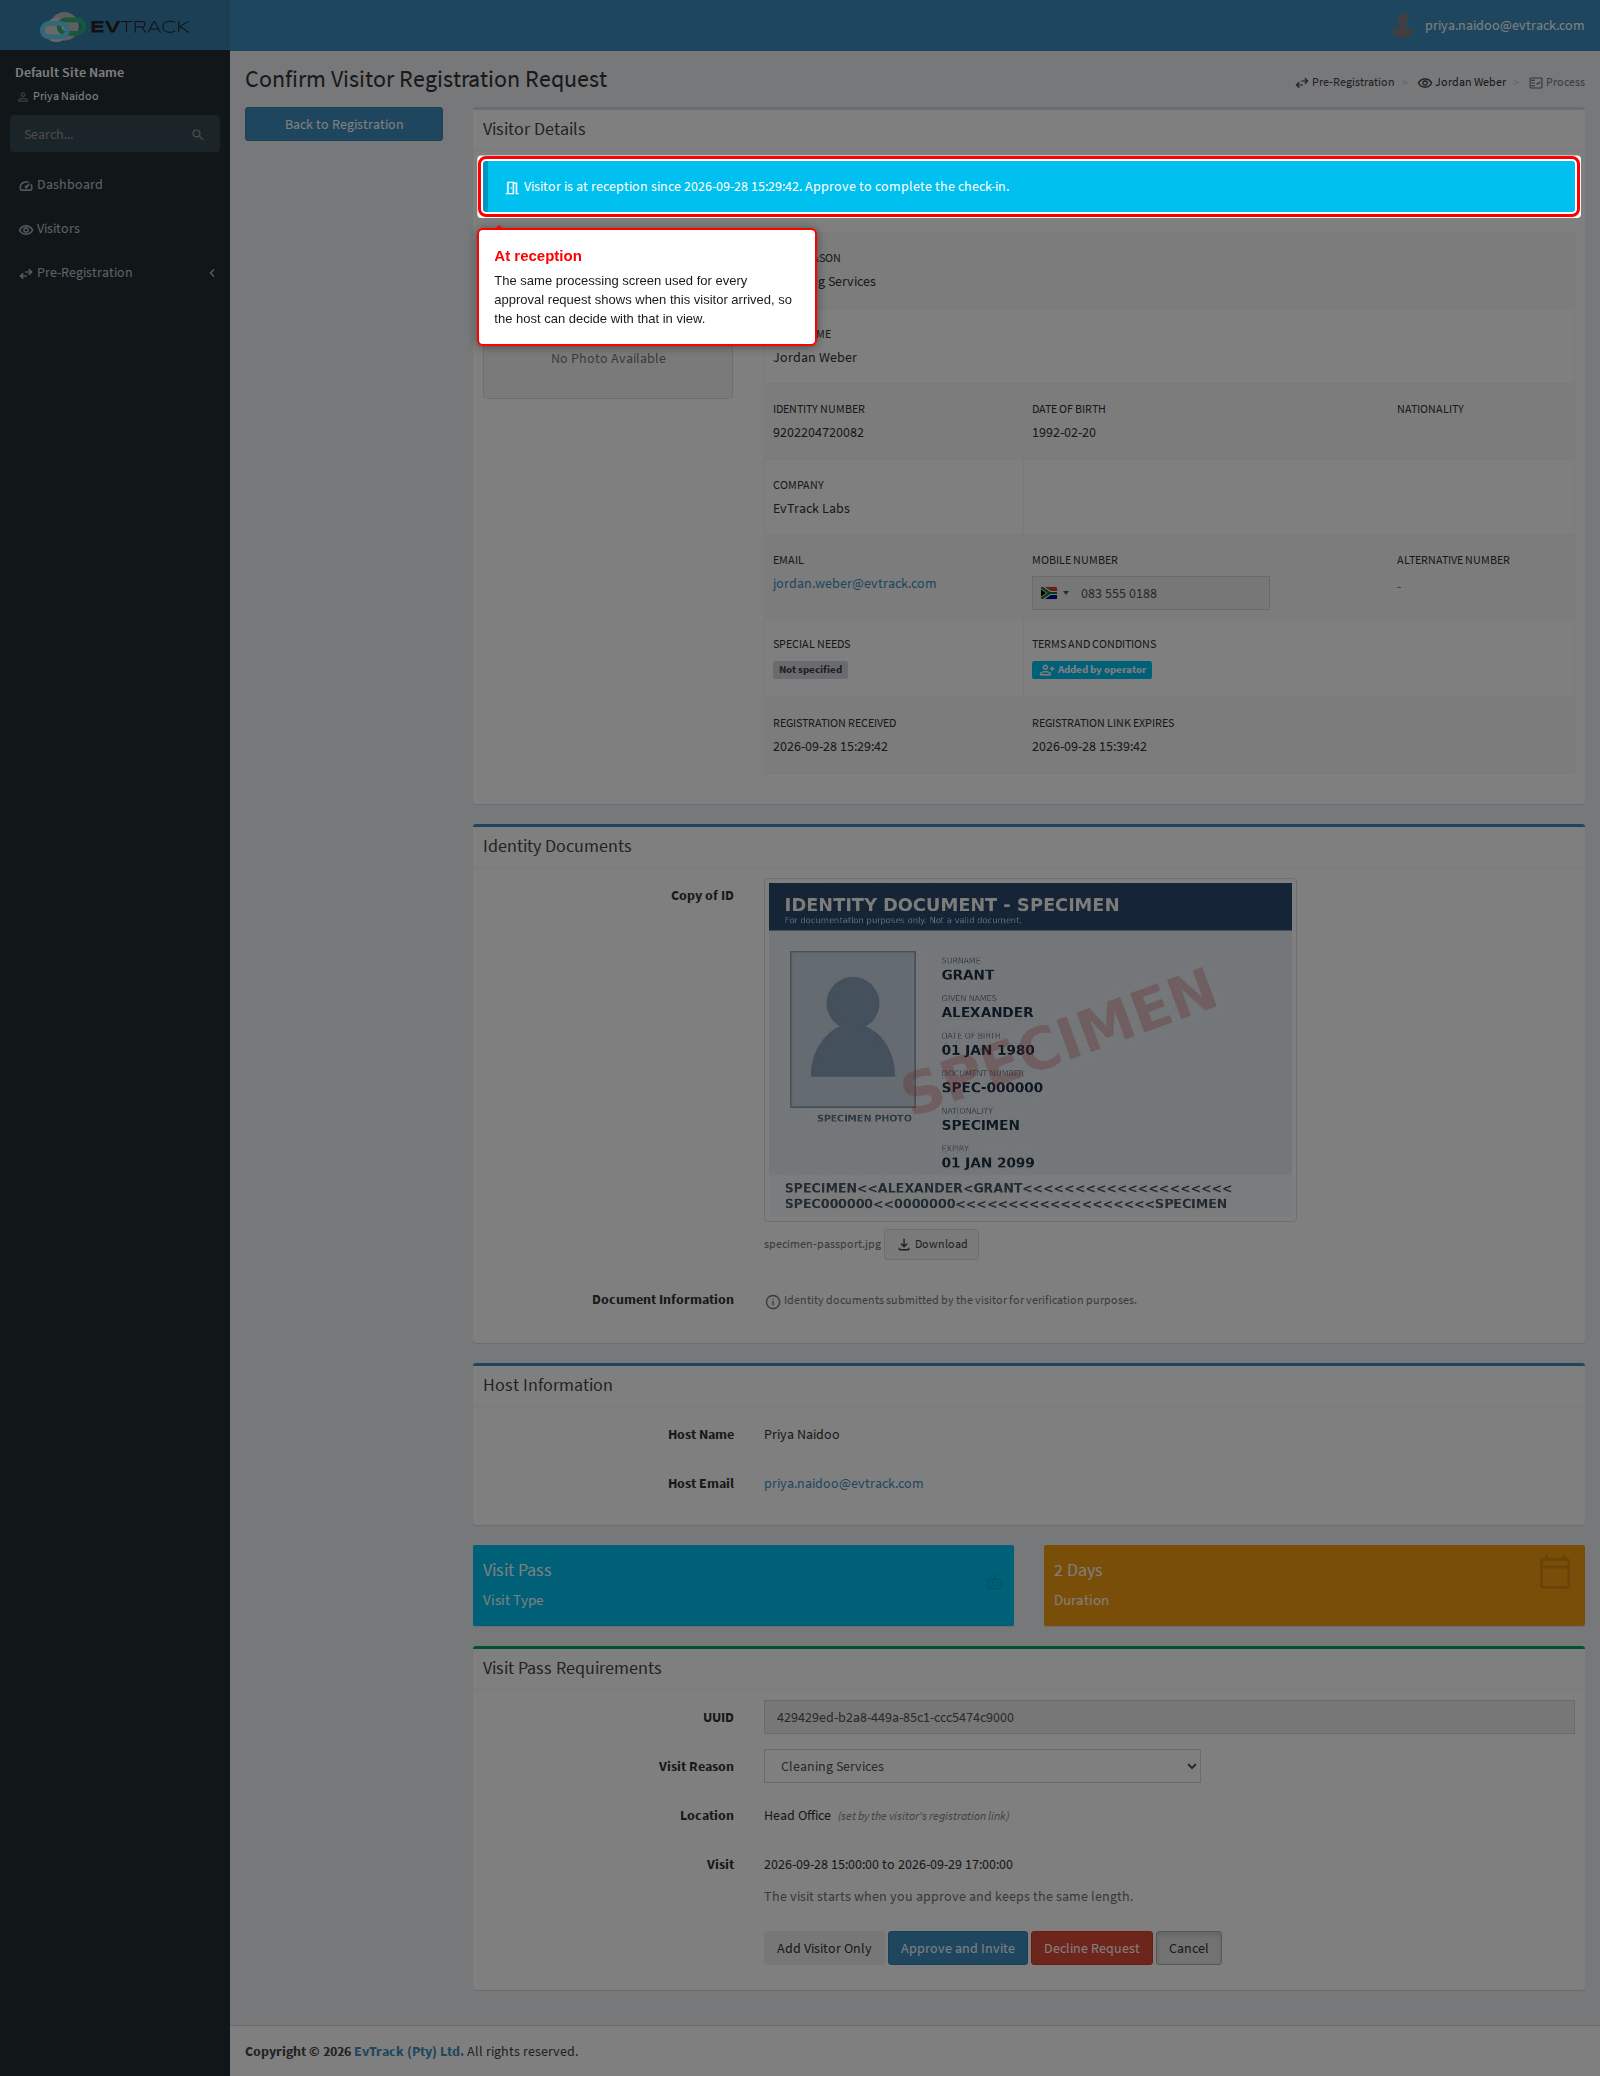
From here the host has the same Approve and Invite and Decline Request buttons documented in Approval Workflow. Approving on a site that also requires manager review or compliance follows that same routing before the visitor is let through; a straightforward site resolves in one step.
Step 7: Approved
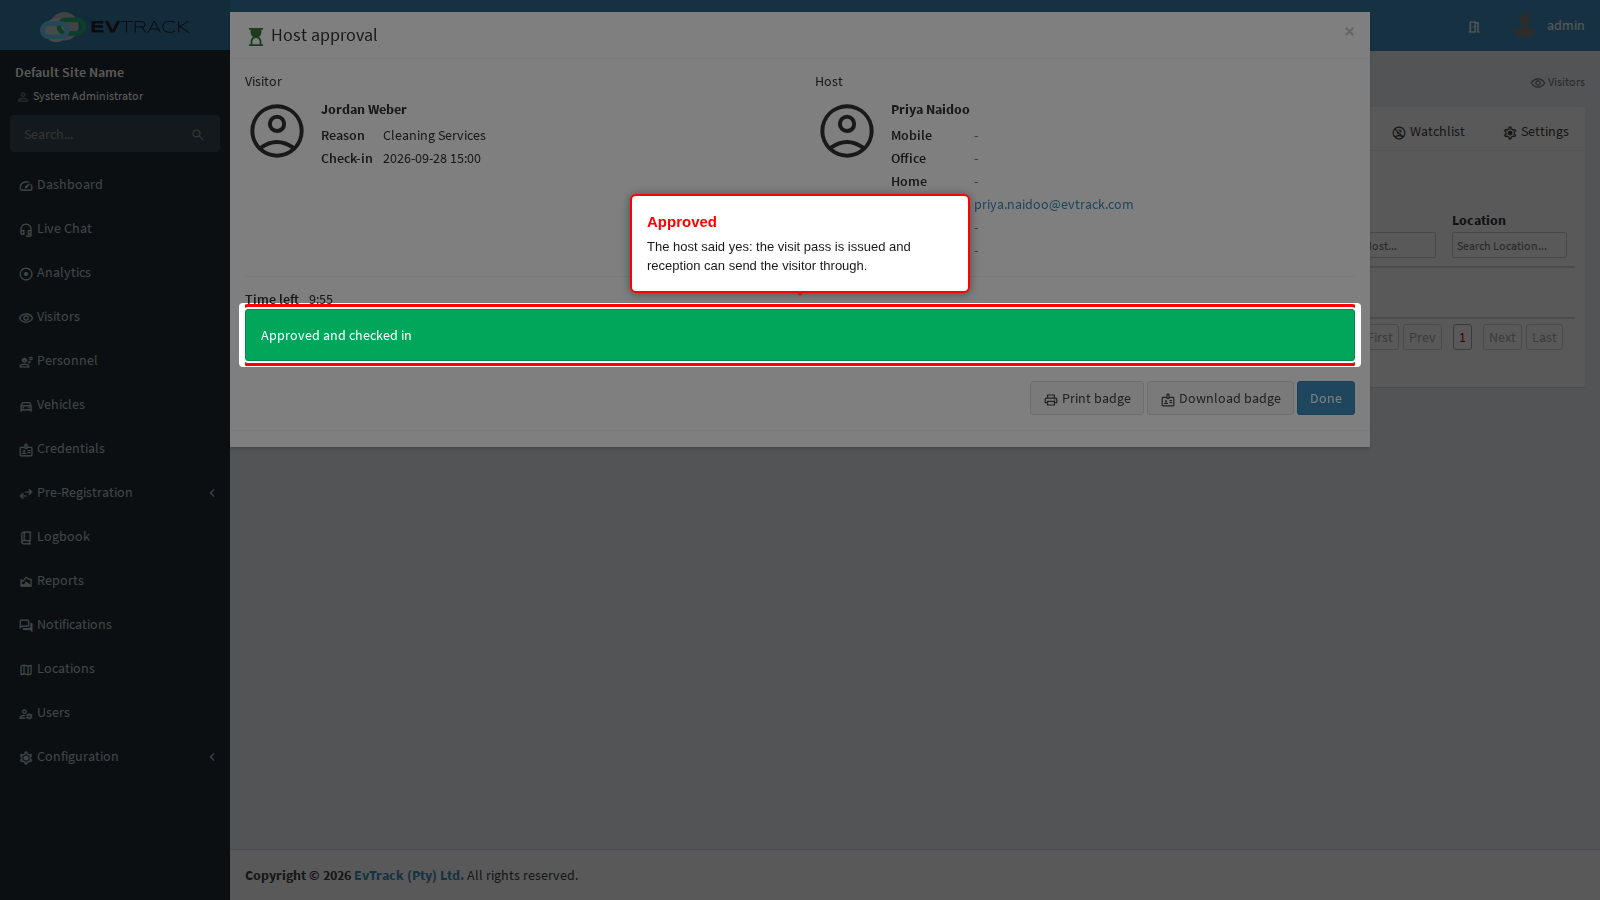
The moment the host approves, the waiting panel at reception turns green: the visit pass is issued and reception can send the visitor on.
Step 8: Declined
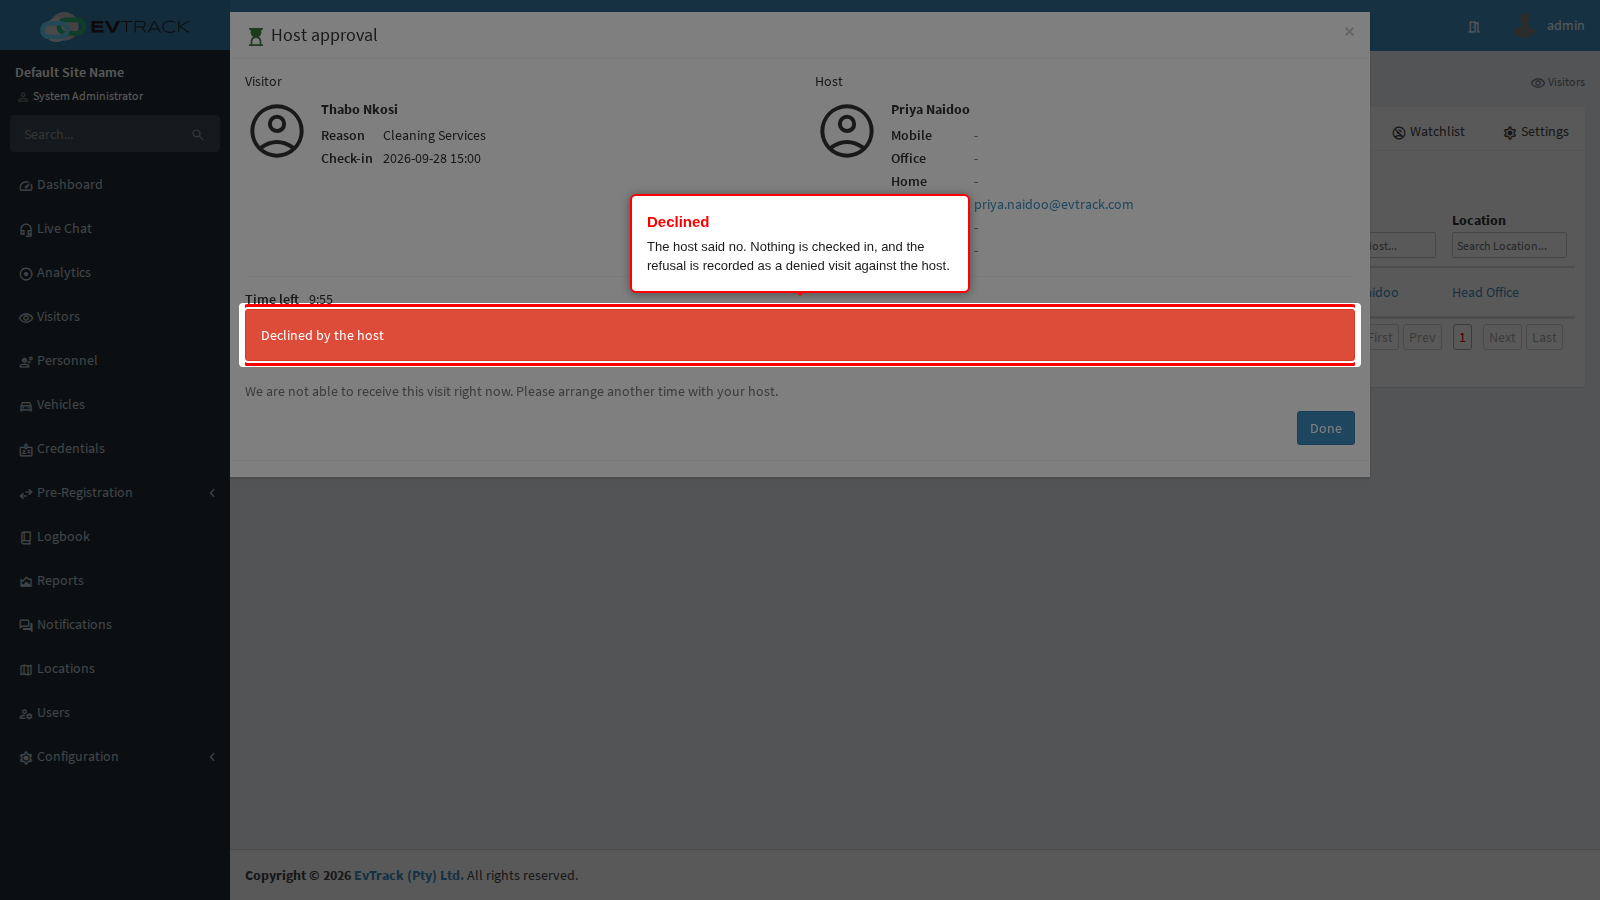
If the host declines, the panel turns red instead. Nothing is checked in, and unlike a queue decline, this refusal is recorded as a denied visit against the host - it appears in the visit list and in reports, so there is a record of who was turned away and by whom.
Step 9: Timed out
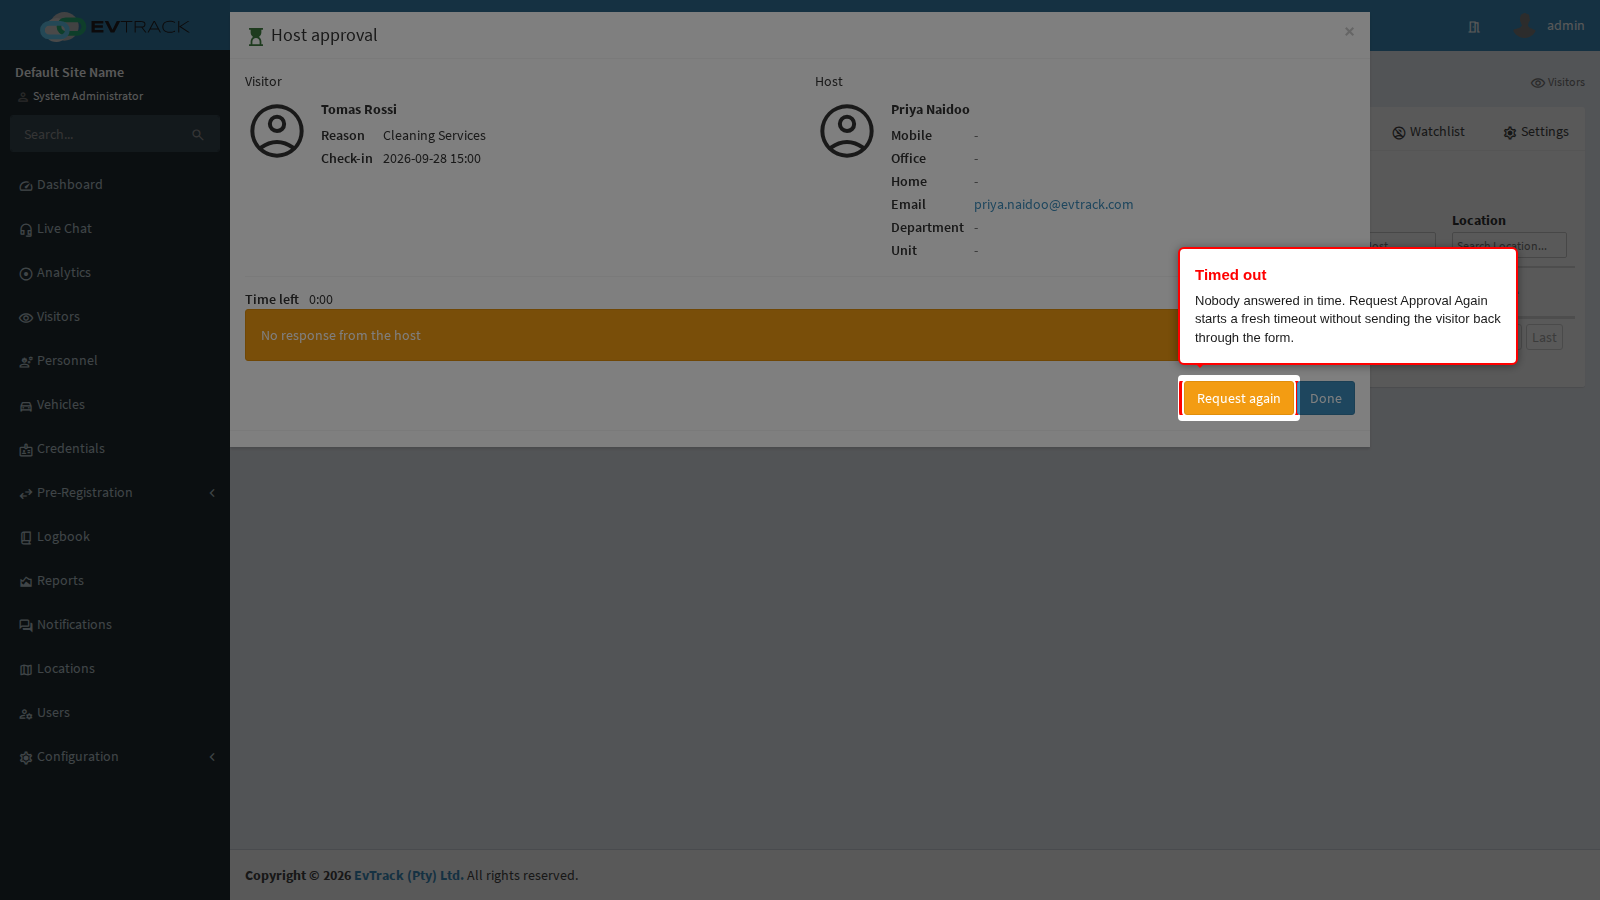
If nobody answers before the timeout from Step 1 or Step 2 runs out, the panel turns amber and offers Request Approval Again. Clicking it opens a fresh request to the same host with a fresh timeout, without sending reception back through the registration form.
Troubleshooting
- The Register and Check-in button still checks visitors in directly. Confirm Require Host Approval for Dashboard Check-ins is on under Configuration > Visitor Settings > Dashboard Check-in, and check the site being used does not carry a Not required override on its Advanced tab.
- A request is answered on the process page but the waiting panel at reception never updates. The panel polls for a decision every few seconds; give it a moment. If it still does not move, confirm the decision was made on the same request - a duplicate request created by re-submitting the form leaves the original one still waiting.
- The visitor is timed out almost immediately. The timeout in minutes is at its minimum of 1, either system-wide or through a site override. Raise it under whichever panel set it.
- A declined walk-in does not show up as a denied visit. Confirm the decline was made from the process page’s own Decline Request, not by deleting or cancelling the request some other way.
Related chapters
- Walk-in Registration and Check-in - the dashboard capture form this page builds on, and the direct check-in path when approval is not required.
- Approval Workflow - the shared queue and processing screen the host decides on.
- Host Approval Settings - the separate kiosk and guard app host approval gate.
- The Visitors Dashboard - the Approve badge and the rest of the dashboard toolbar.