Visitors can register themselves ahead of a visit using the public self-registration form. Registration requests appear in the Registration list, where operators review and process them.
Step 1: Open the Registration list
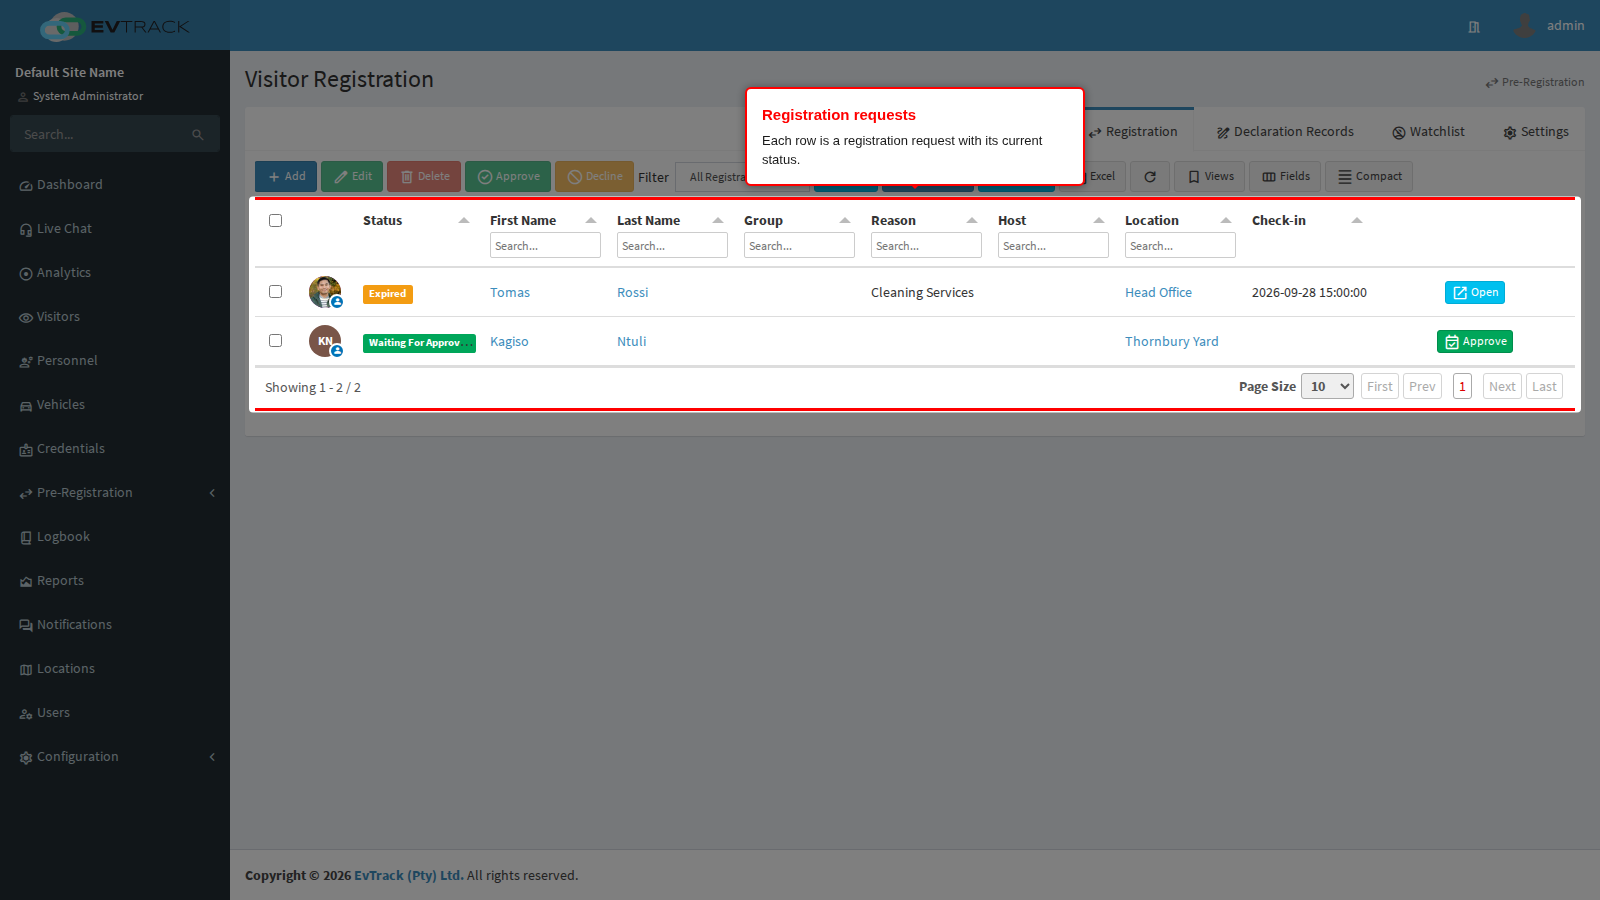
Select Visitors in the sidebar, then the Registration tab. Each row is a registration request with its status.
Step 2: Share the registration link
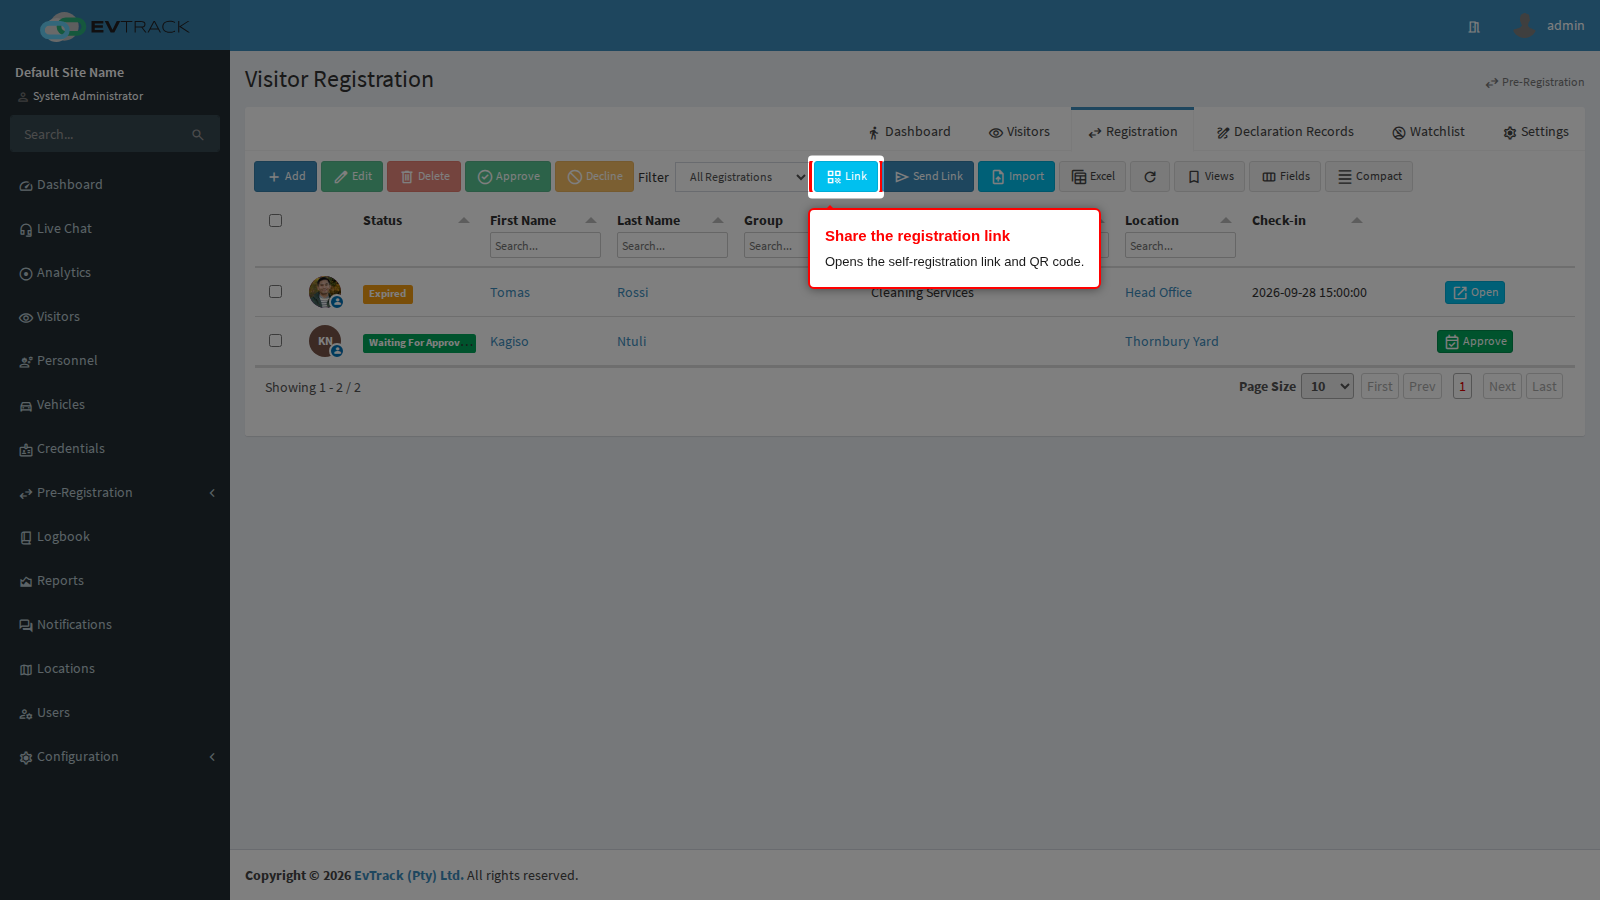
Click the Link button in the toolbar to open the sharing dialog for the public self-registration form.
Step 3: Send the link or QR code to visitors
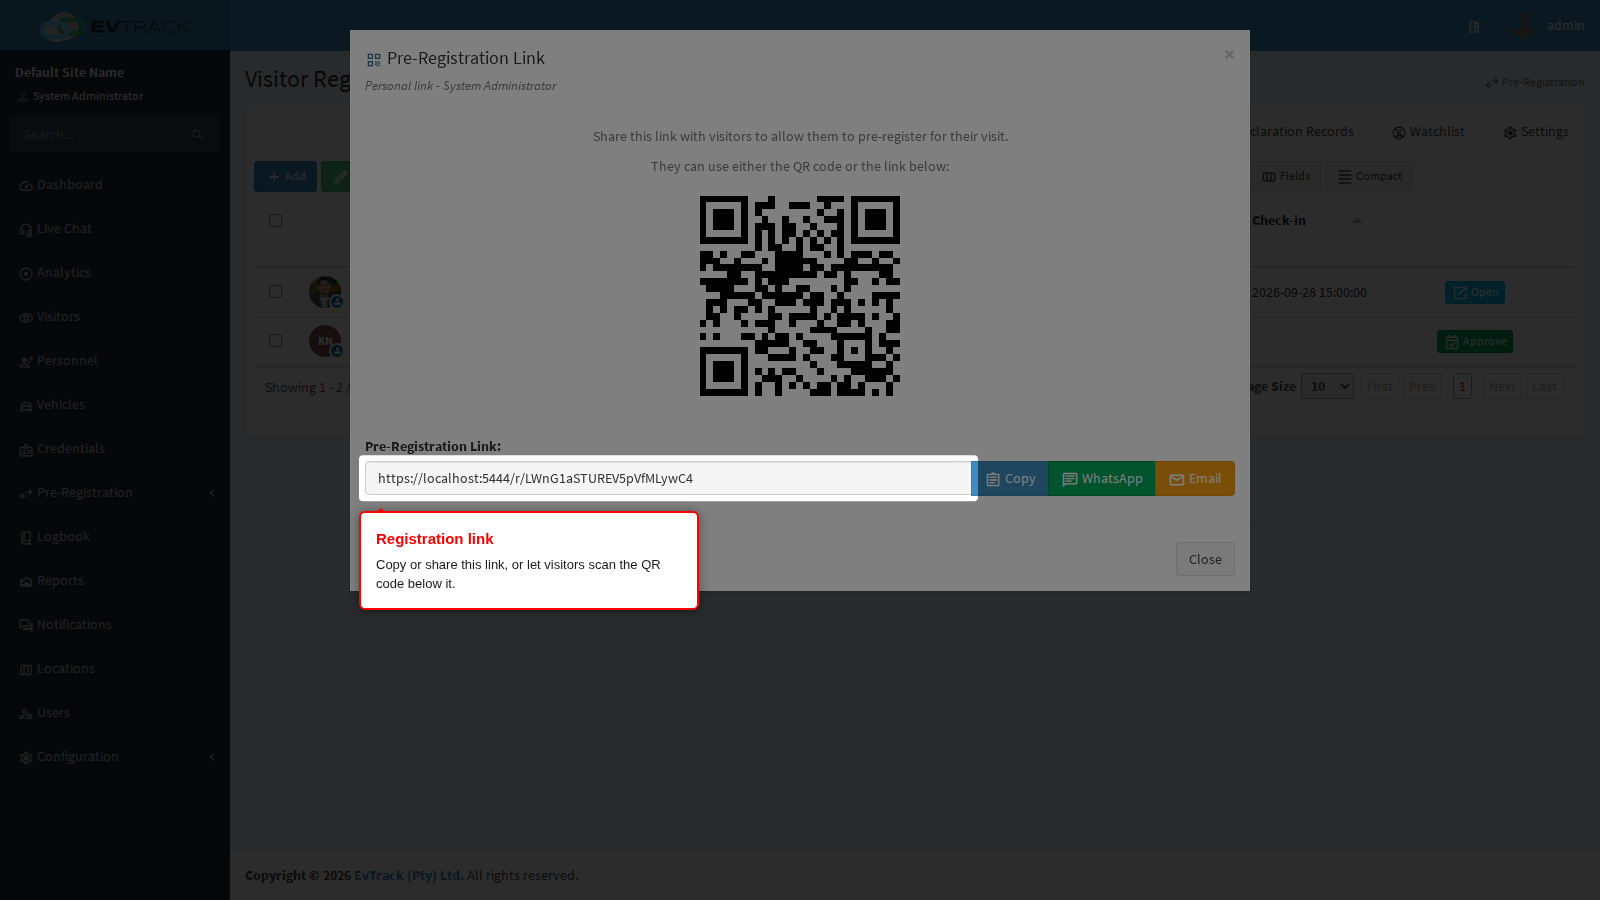
Share the registration link directly, copy it, or let visitors scan the QR code - for example printed at the checkpoint or embedded in an email signature. Visitors complete the form themselves, and their requests appear in the Registration list for processing.
Step 4: Invitations carry the location’s branding
When you send a registration invitation by email, it uses the branding of the location the link belongs to: the location’s email logo and company name, plus its address and key contact where the email template includes them. A personal link uses your own location, or the default location when you have none. Text message invitations carry the same company and location name. When no location applies, or the location uses the global settings, the invitation uses the global logo and company name.
The rest of the registration follows the link too. A visitor who registers through a location’s link receives the verification code email with that location’s company name, and the notices sent to hosts and approvers and the outcome emails about the registration carry the location’s logo and company name. A personal link is the exception: its invitation email carries your location’s branding, but the registration it produces has no location until an operator processes it, so its verification code email, notices and outcome emails use the global logo and company name.