An area groups access control points into one zone - a workshop, a server room, a compound, a car park - so the system can track who has gone in and not yet come out, and optionally refuse a second entry to someone the system already believes is inside.
An area does two things:
- Presence tracking. Every granted read at one of the area’s points in the entry direction records the credential holder as inside; a granted read in the exit direction takes them out again. The result is a live list of who is in the zone, which is what you print for a roll call.
- Anti pass-back (APB). On top of the tracking, the area can instruct the connected access control hardware to refuse a credential that is already inside, so a badge cannot be passed back through a fence or window for a second person to use.
Areas do not enforce an occupancy limit. There is no maximum-occupants setting on the area form, and nothing refuses entry because a zone has reached a headcount. Use the Presence List to see and export the current headcount.
Before you start: you need an administrator account with access control administration rights, and the access control points that bound the zone must already exist with their readers bound and their direction set - see Access Control Points. An area with no points attached tracks nothing, because it has no boundary to cross.
Step 1: Open Area Restrictions
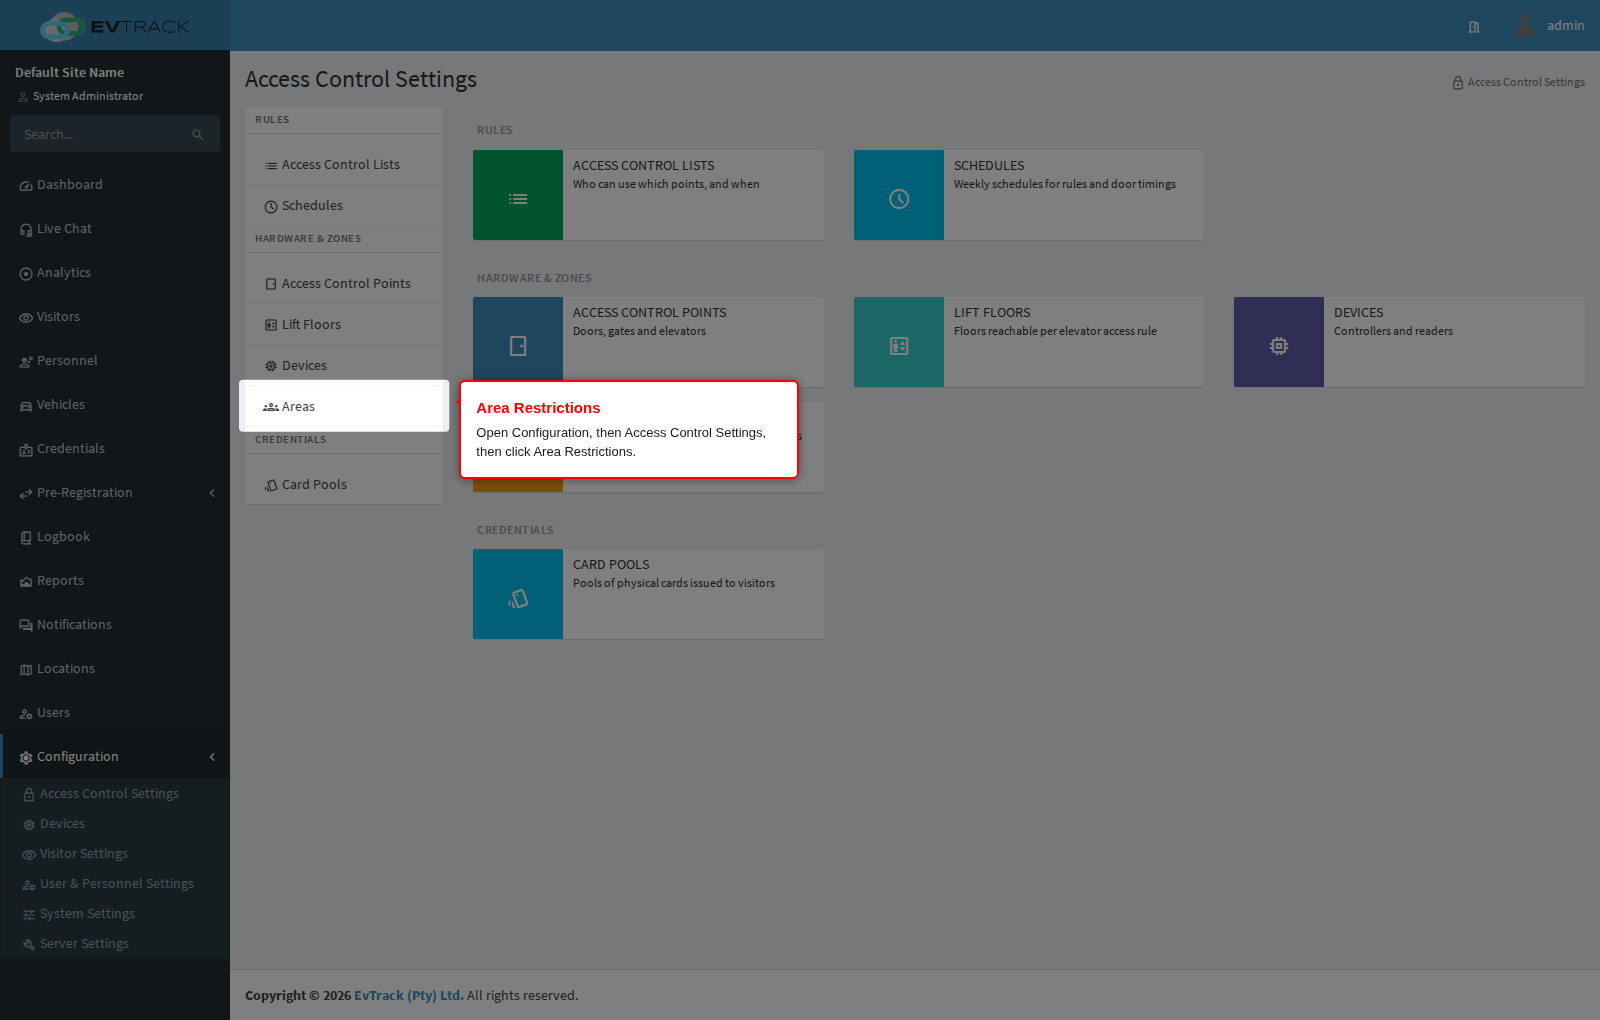
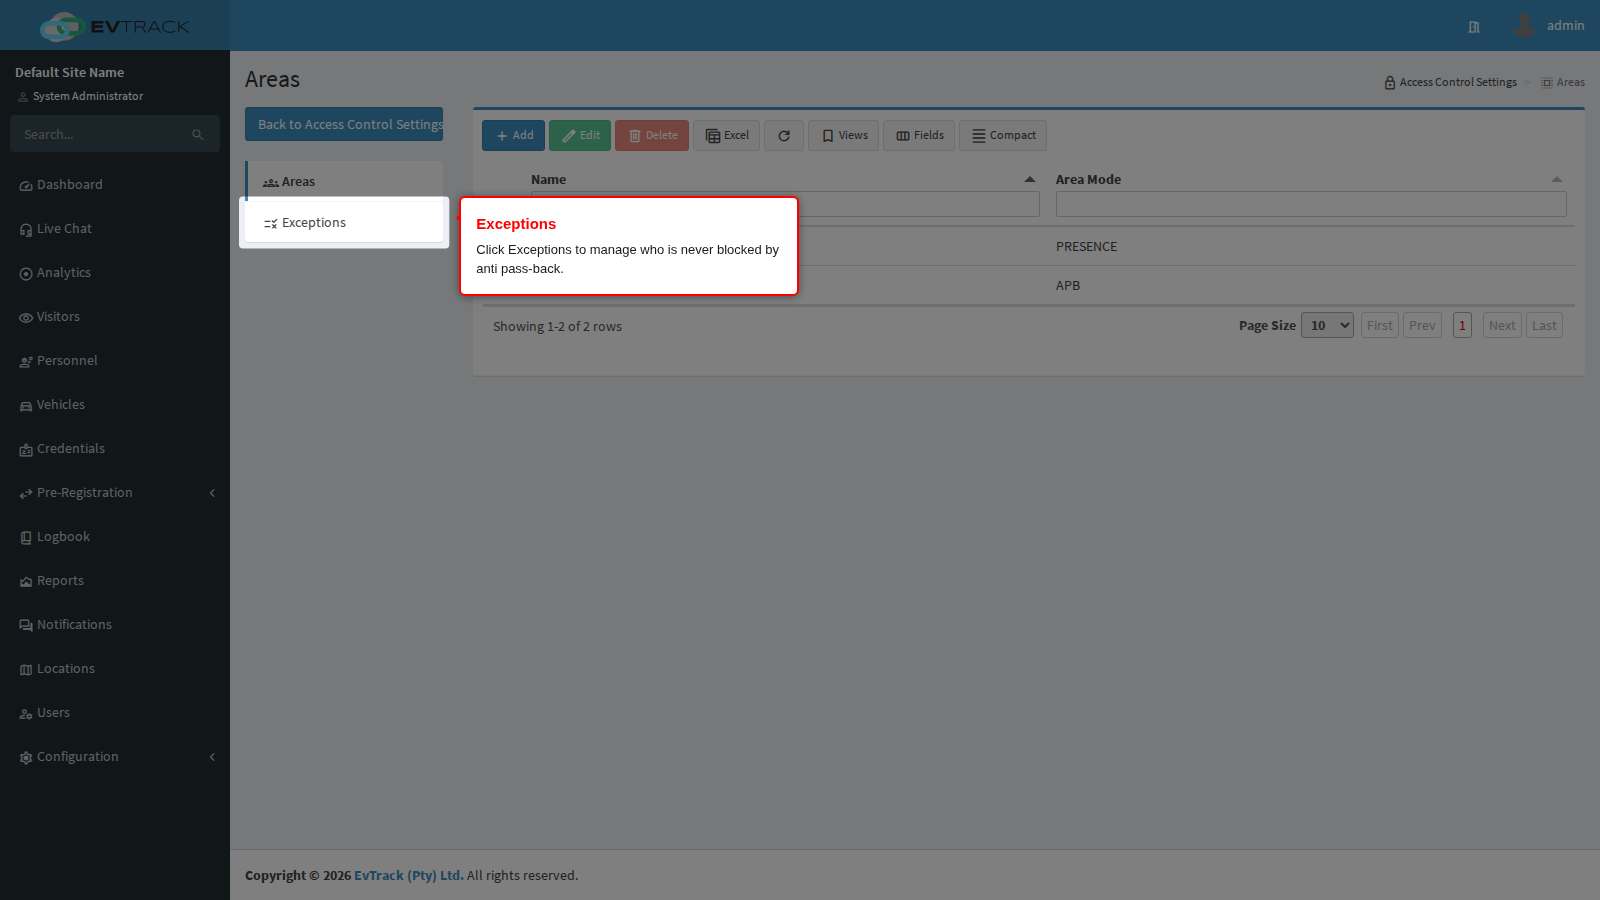
In the left sidebar open Configuration, click Access Control Settings, then click Area Restrictions in the section menu. The area list opens with its own section menu on the left holding Areas and Exceptions.
Step 2: Review the areas
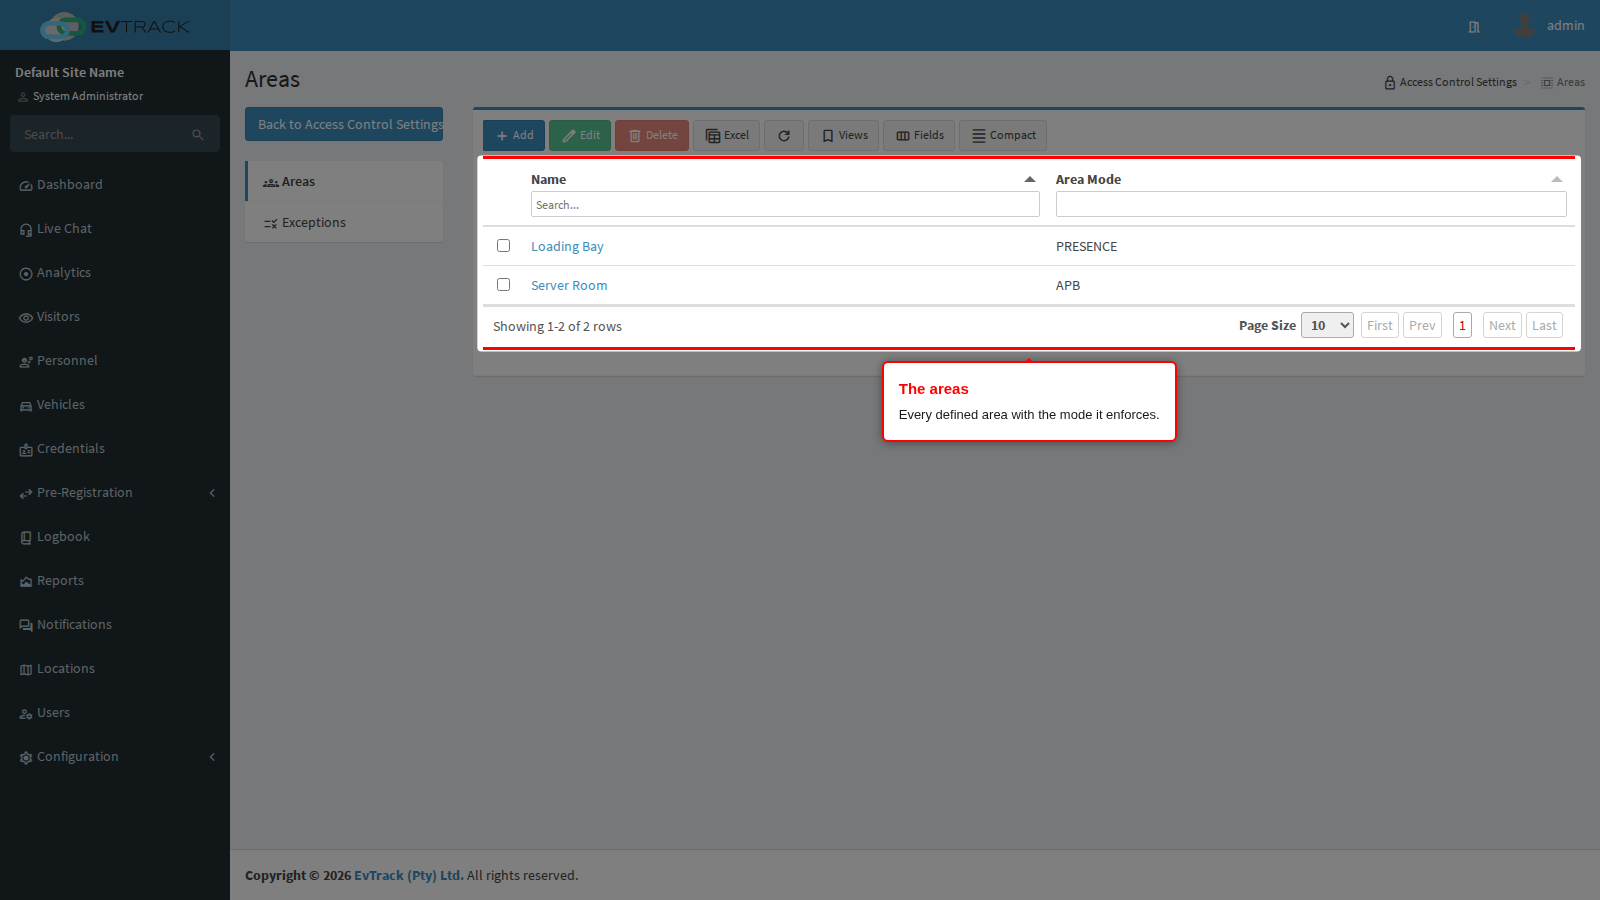
The table lists every defined area with its Name and its APB Mode. Both columns have a search box in the header. The toolbar above the table holds Add, Edit, Delete, Excel and Refresh; Edit and Delete only become available once exactly one row is selected. Click an area’s name to open it.
Step 3: Click Add
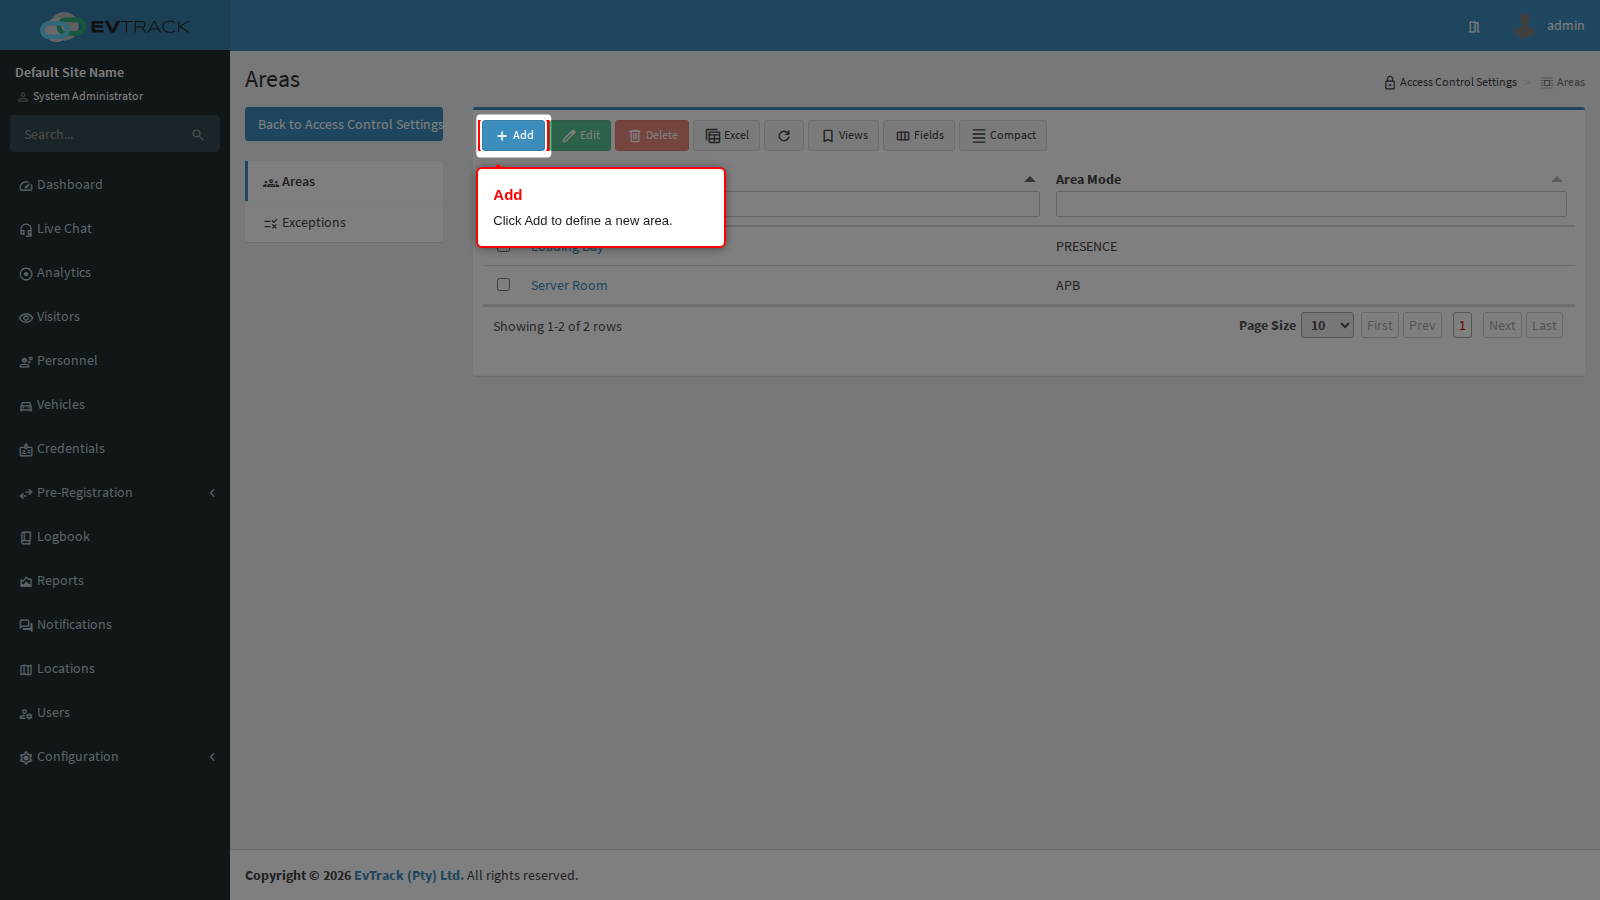
Click the Add button above the table. The new area form opens.
Step 4: Name the area
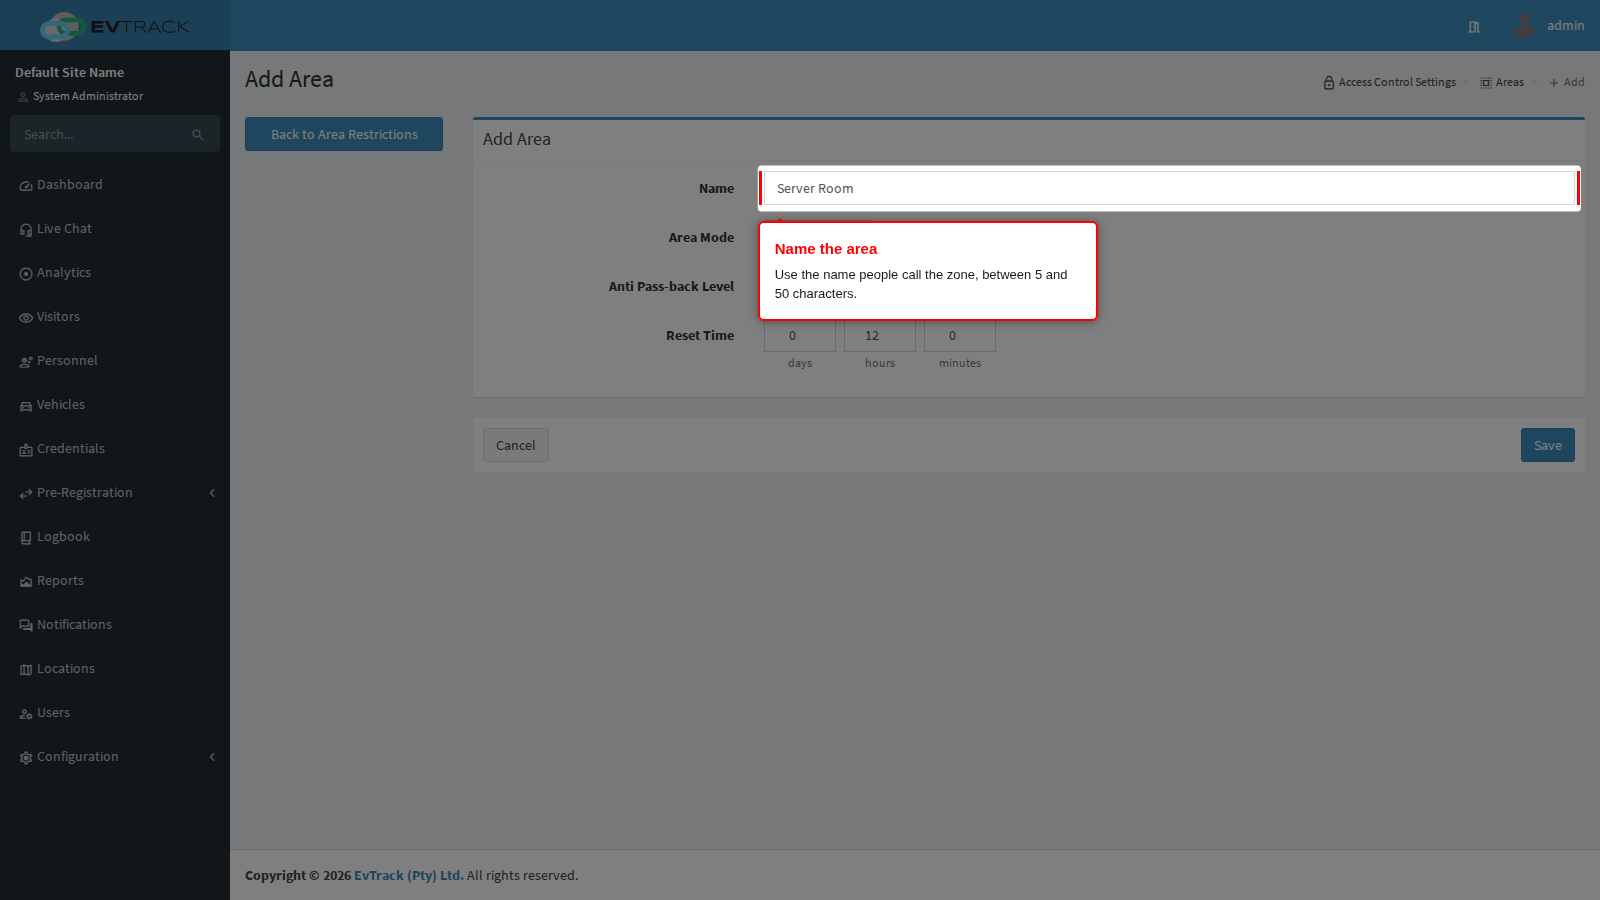
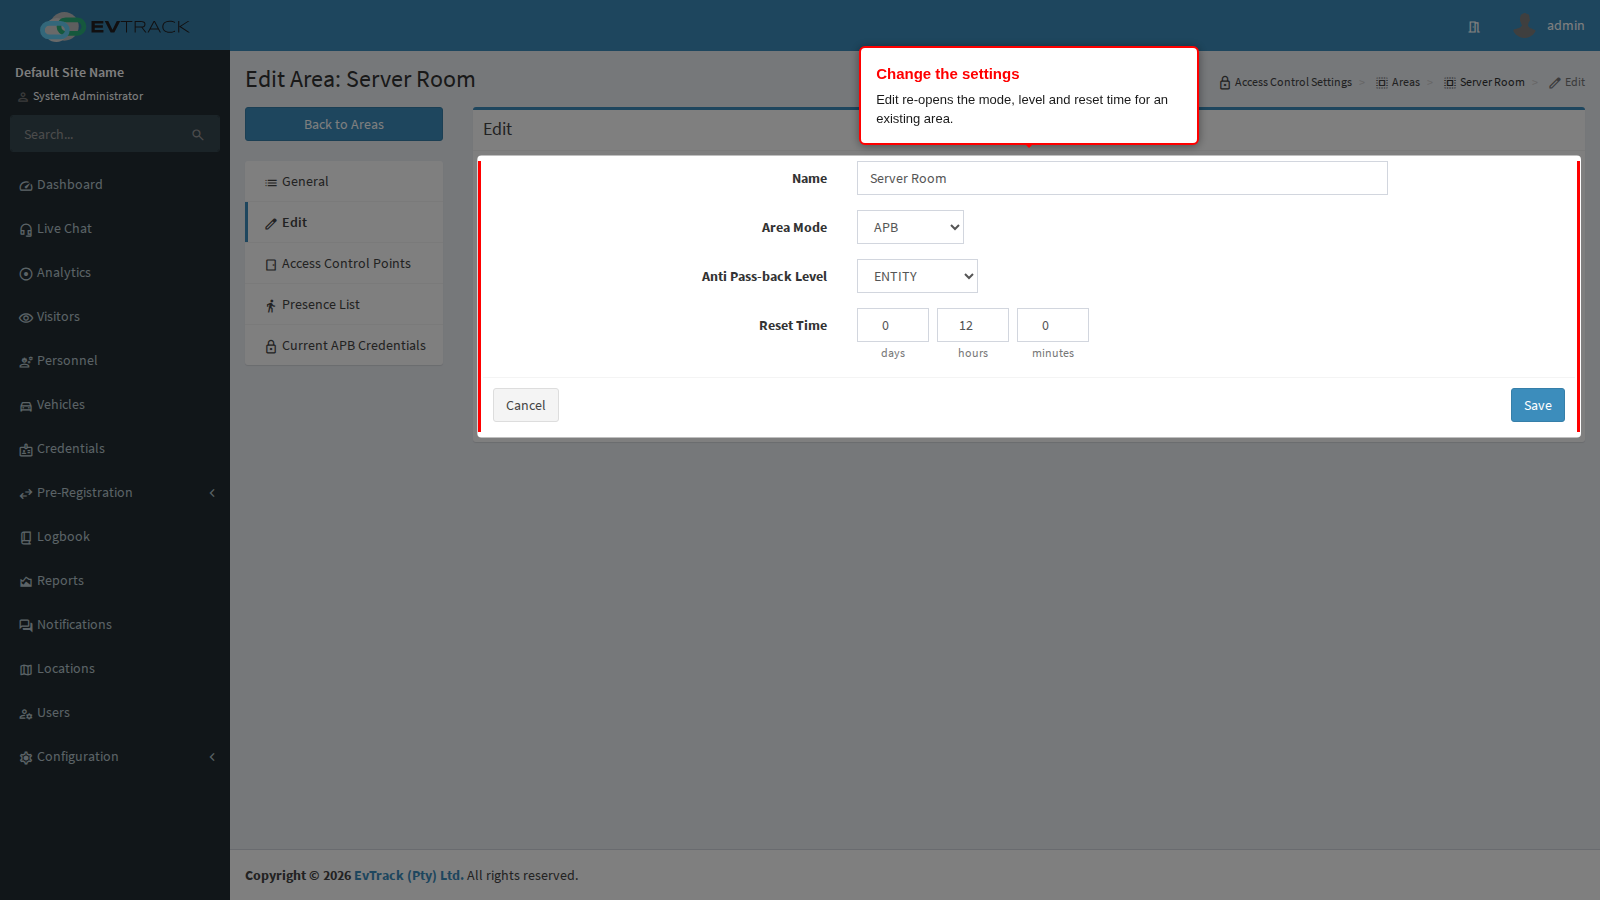
Type an Area Name between 5 and 50 characters, for example “Server Room”. Use the name people actually call the zone: it is what appears in the area list, in the presence list heading and in anything you export.
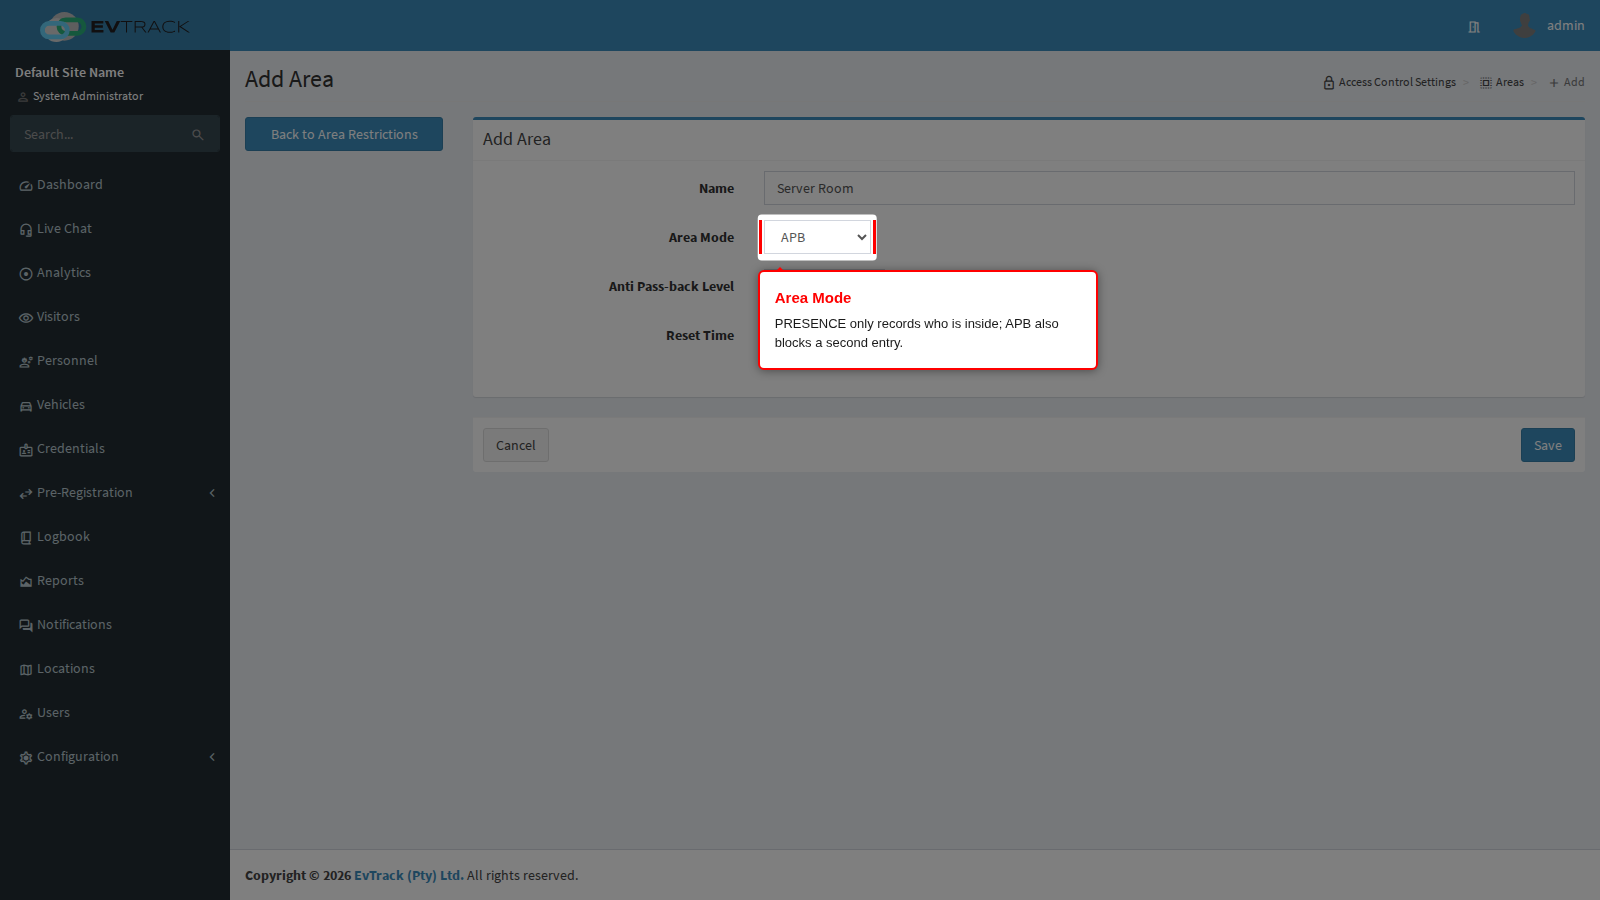
Step 5: Area Mode - PRESENCE or APB
Area Mode decides whether the area only watches, or also enforces.
PRESENCE - track only. An entry read records the holder as inside and an exit read removes them. Nothing is sent to the reader, and nobody is ever refused because of this area. Use it when you want to know who is in a zone (evacuation roll call, contractor headcount, “is anyone still in the plant room?”) but do not want the area to be able to lock anyone out.
APB - track and enforce. On top of the presence record, the system tells the connected access control hardware to refuse that credential at the area’s entry readers for as long as the holder counts as inside. Presenting the badge again at an entry reader is denied. The block is lifted the moment a valid exit read is recorded at one of the area’s points, or when the reset time (Step 7) runs out.
Which to pick:
- Start a new zone on PRESENCE. Run it for a few days and look at the presence list. If people regularly appear stuck inside, your exit readers are not covering every way out, and switching to APB would start locking real people out of a real building.
- Move to APB once entry and exit are reliably paired, and only where badge sharing is a genuine risk: turnstiled site entrances, high-value stores, contractor compounds, paid parking.
- APB is only as good as the exit reads. If a zone has a door that people can walk out of without badging, use PRESENCE, or fit that door with an exit reader first.
The mode is enforced per area, so the same badge can be tracked-only in one zone and hard-blocked in another.
Step 6: Anti Pass-back Level - CREDENTIAL or ENTITY
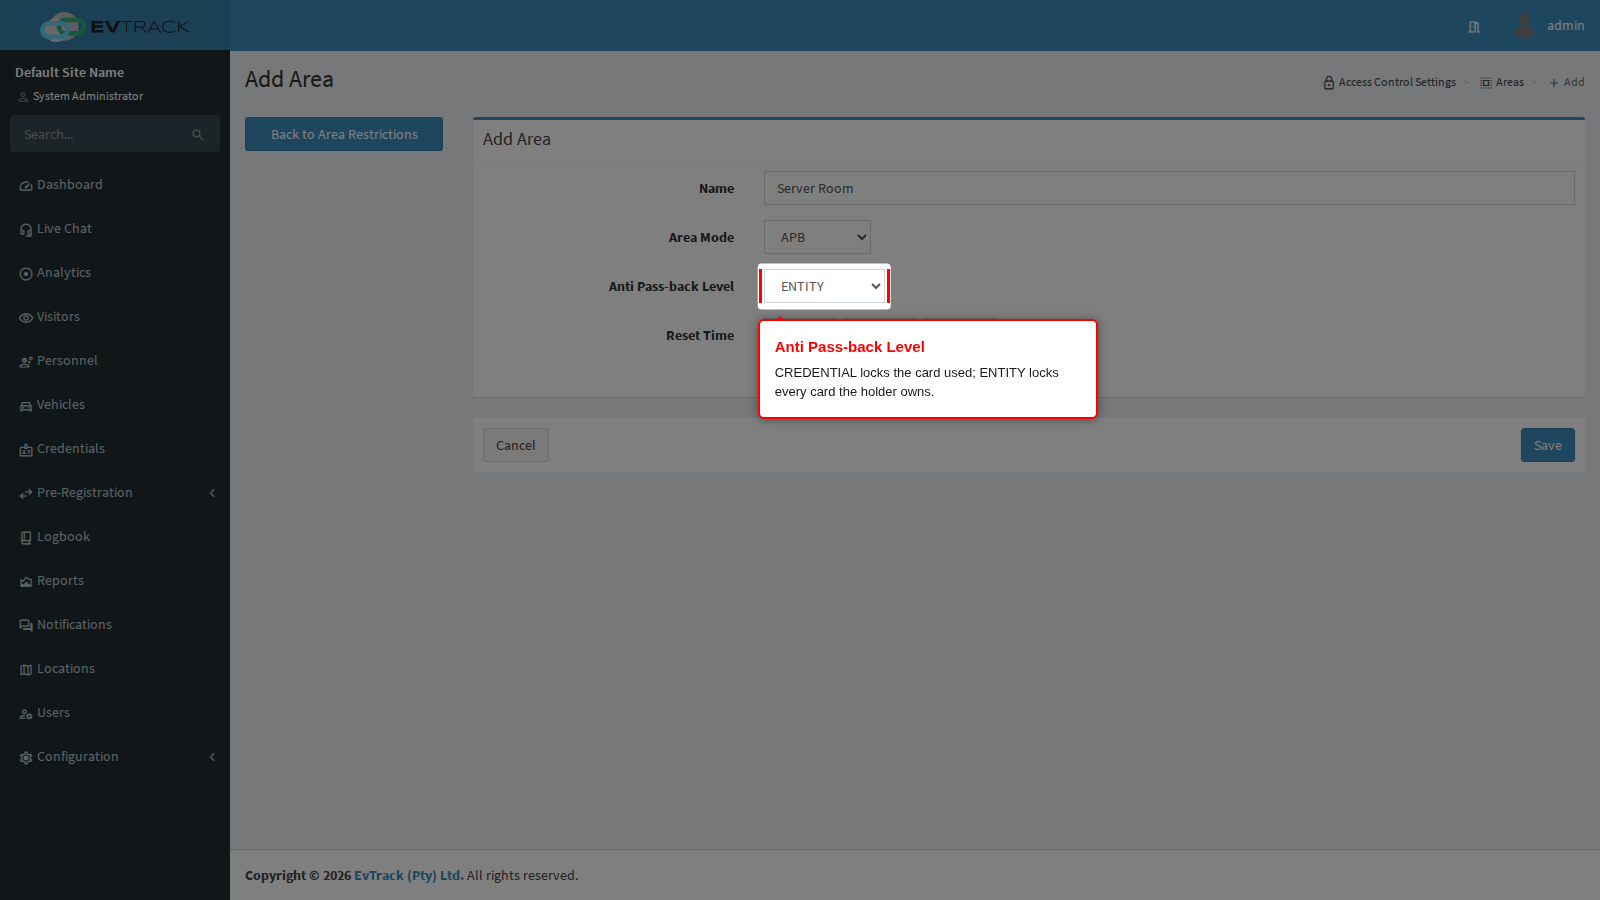
Anti Pass-back Level decides how wide the block reaches when the area is in APB mode.
CREDENTIAL - only the credential that was actually presented is affected. Someone who badges in with their card is blocked on that card, but a face, PIN or second card belonging to the same person is unaffected and would still let them in again.
ENTITY - every credential belonging to the holder is affected. Badging in with the card also blocks the same person’s face, PIN, licence plate and any other card they hold, until they read out.
Choose ENTITY wherever people carry more than one credential, which today is most sites: a staff card plus face enrolment, a visitor badge plus a vehicle plate, a contractor with a temporary and a permanent card. With CREDENTIAL the entire anti pass-back rule is trivially defeated by handing the card back over the fence and walking in on your face instead. CREDENTIAL is the right choice only where one holder deliberately owns several independent credentials that are meant to be used in different zones at the same time, for example a vehicle plate that remains in a car park while the driver walks into the building.
The level is only used in APB mode. In PRESENCE mode the area always tracks per credential, whatever the level says, because nothing is being blocked.
Step 7: Reset Time
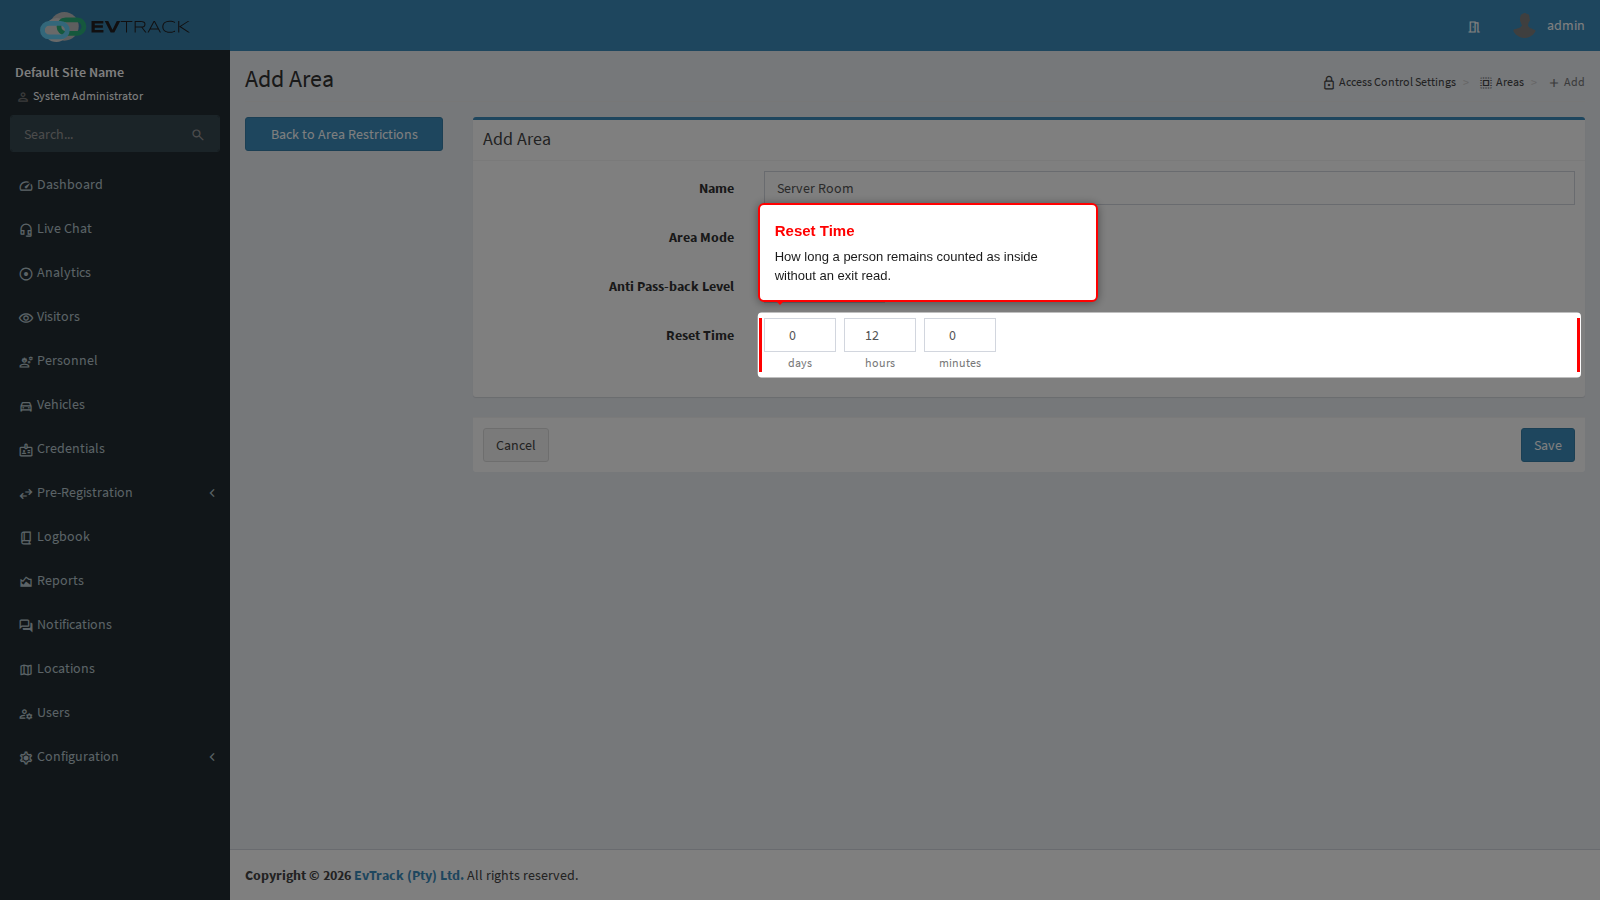
Reset Time is how long a person keeps counting as inside the area without an exit read. You enter it as days, hours and minutes.
When someone reads in, the area stores a record with the time they entered and an expiry time equal to that entry time plus the reset time. That record is what makes them “inside”: it puts them on the presence list, and in APB mode it is what keeps them blocked at the entry readers. If a matching exit read arrives, the record is removed straight away and the block clears. If no exit read ever arrives, the record is cleared when the reset time runs out.
Why the timeout has to exist. Exit reads go missing all the time: someone tailgates out behind a colleague, leaves through a fire door, the exit reader is offline for an hour, or a visitor simply walks off site with the badge. Without a timeout, every one of those people would be stuck inside forever - permanently on the roll call, and in APB mode permanently locked out on their next visit. The reset time is the automatic clean-up that keeps one missed read from becoming a support call.
What to set it to. The rule of thumb is: a little longer than the longest legitimate stay in that zone, and no longer.
- Too short, and the area forgets real people while they are still inside. The roll call under-reports, and anti pass-back stops protecting anything because everyone is quietly reset before they try again.
- Too long, and one missed exit read follows someone around for the rest of it. A 7-day reset on a turnstile means a visitor who left through the fire door on Monday is refused entry until the following Monday.
Practical starting points:
| Zone | Suggested reset time | Reasoning |
|---|---|---|
| Turnstiled site entrance, single shift | 12 hours | Covers a long shift plus overtime, clears overnight |
| Two-shift or 24-hour operation | 24 hours | Nobody legitimately remains longer than a day |
| Server room, store, plant room | 1 to 2 hours | Visits are short; a stuck record should clear quickly |
| Contractor compound, multi-day project | 2 to 3 days | Long visits are normal, but not indefinite |
| Car park | Length of the longest permitted stay | Vehicles sit still far longer than people |
The field accepts between 5 minutes and 7 days. Anything outside that is rejected and the form comes back with the field flagged. The default for a new area is 1 hour.
Two details worth knowing:
- The expired records are cleared by a background sweep that runs periodically, so a record disappears shortly after its expiry time rather than to the second.
- Expiry is measured from the moment the person read in, not from when you changed the setting. If you shorten the reset time on an area that already has people inside, their records are recalculated from their original entry times, so some of them may expire immediately.
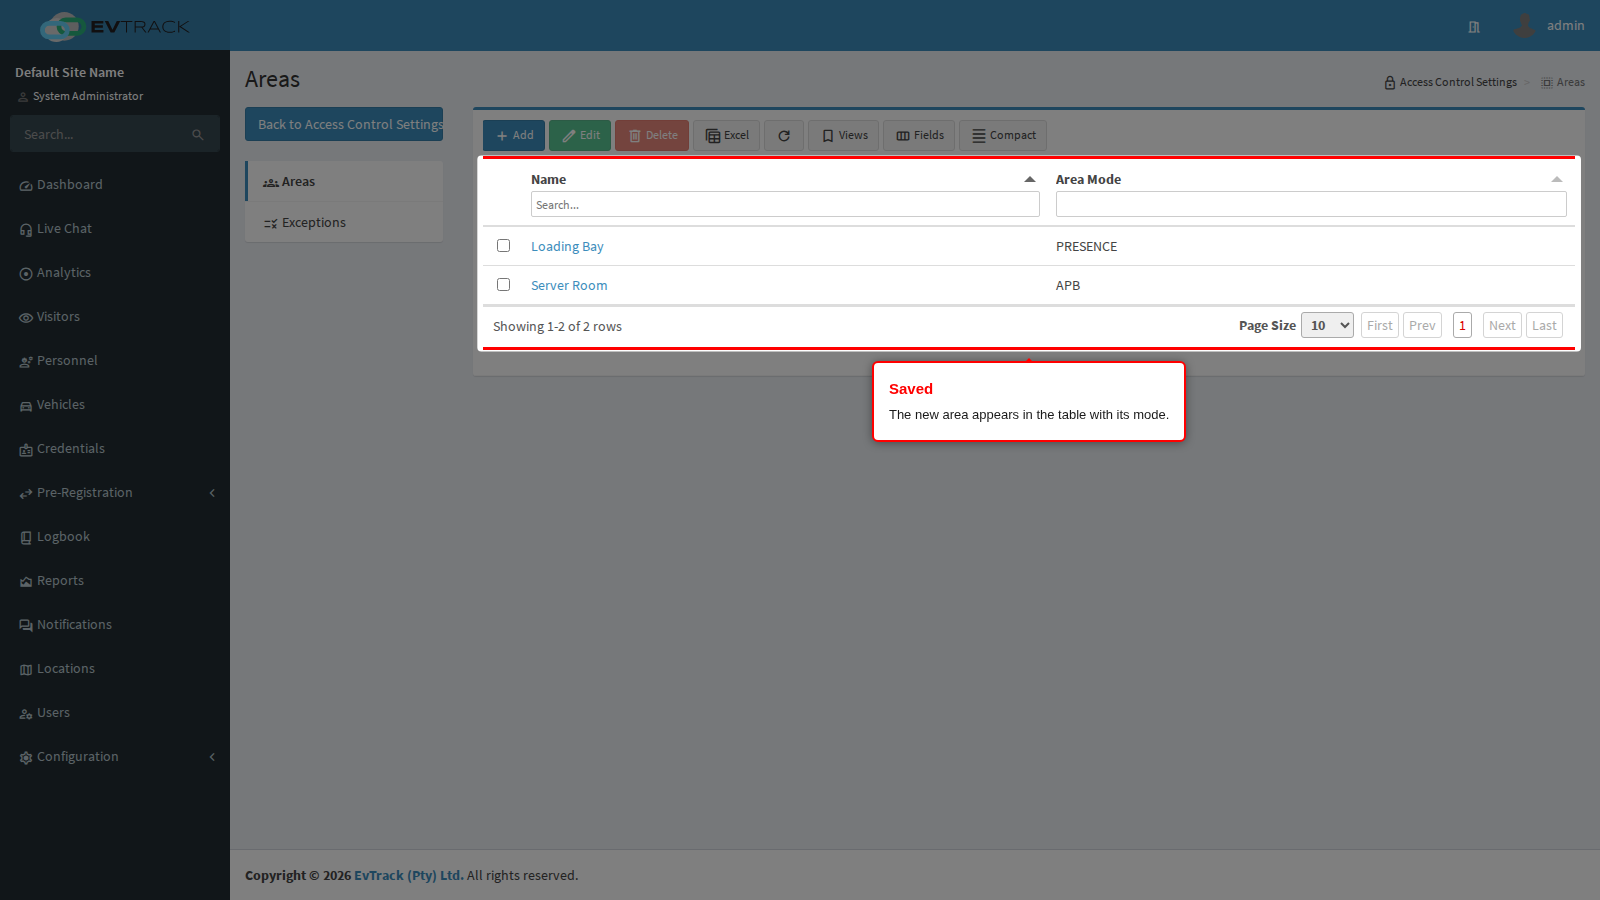
Click Save. The new area appears in the list.
Step 8: Confirm the result
Back on Areas, the new area is in the table with the mode you chose. It does nothing yet: an area only starts tracking once you give it a boundary in Step 11.
Step 9: Open the area
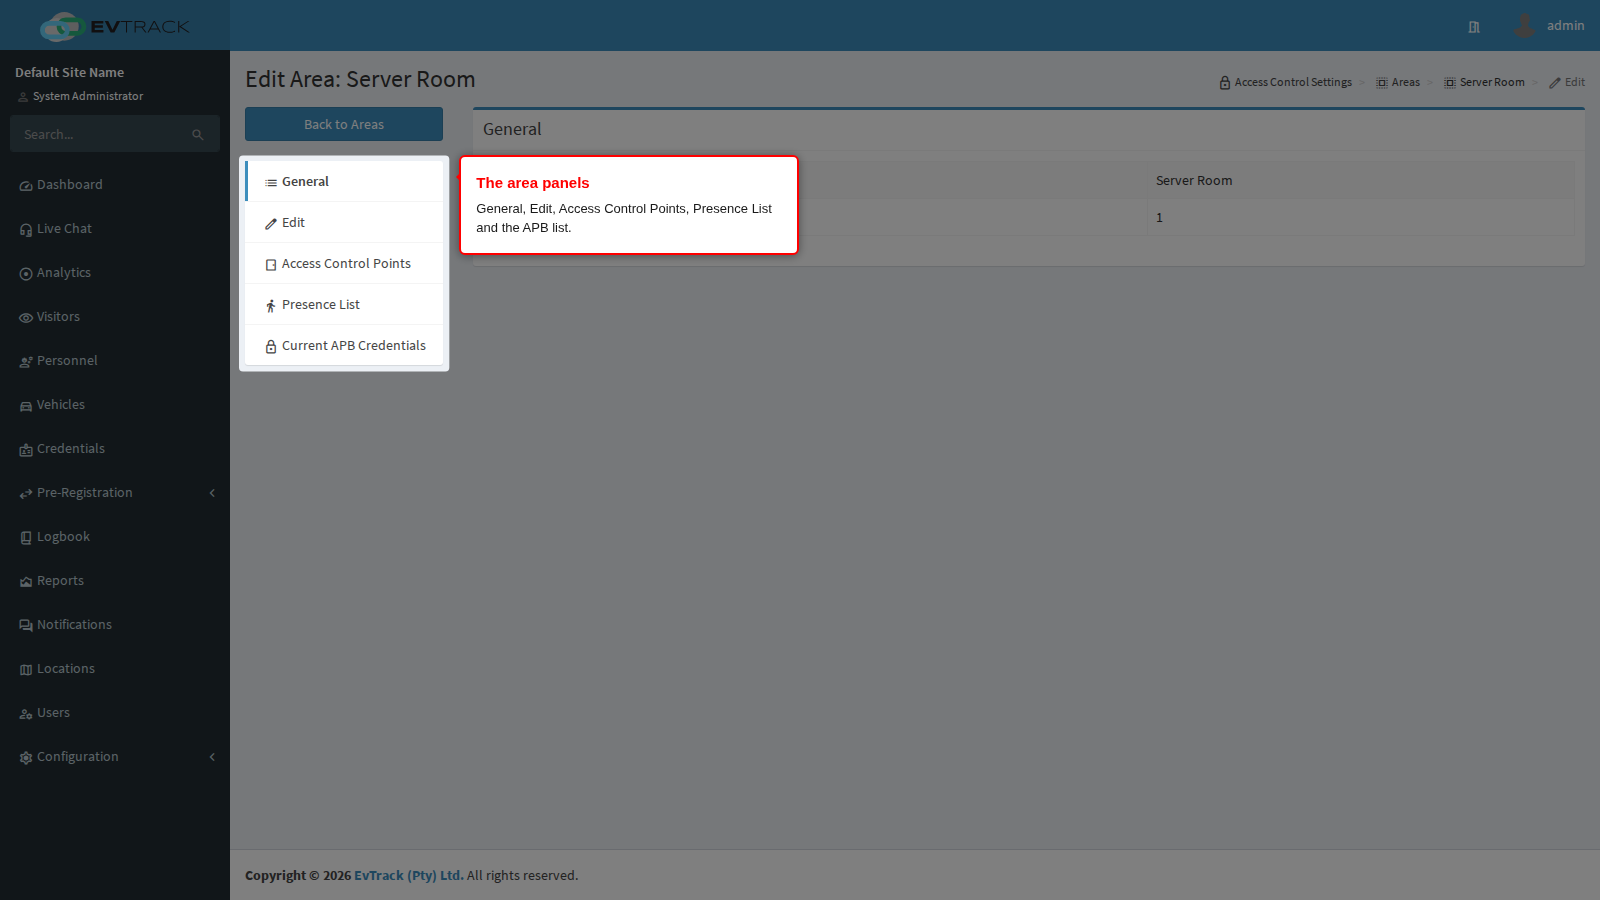
Click the area’s name (or select its row and click Edit). The area opens with its panels in the left menu:
- General - a read-only summary: the area name and how many access control points are attached.
- Edit - the name, mode, level and reset time from Steps 4 to 7.
- Access Control Points - the boundary of the area.
- Presence List - who is inside right now.
- Current APB Credentials - the underlying per-credential records, with the manual exit tool.
Step 10: Change the settings later
The Edit panel re-opens the same four fields. Two changes have side effects worth planning for:
- Changing Area Mode clears the area’s inside list. Everyone currently counted as inside is dropped, and in APB mode their hardware blocks are lifted. This is deliberate: records created under one mode should not be enforced under another. Expect the presence list to be empty immediately after a mode change, and to rebuild as people badge in again.
- Changing Reset Time recalculates the people already inside. Each existing record keeps its original entry time and gets a new expiry time based on the new reset time, as described in Step 7.
Changing the name or the level leaves the inside list untouched.
Step 11: Attach the bounding access control points
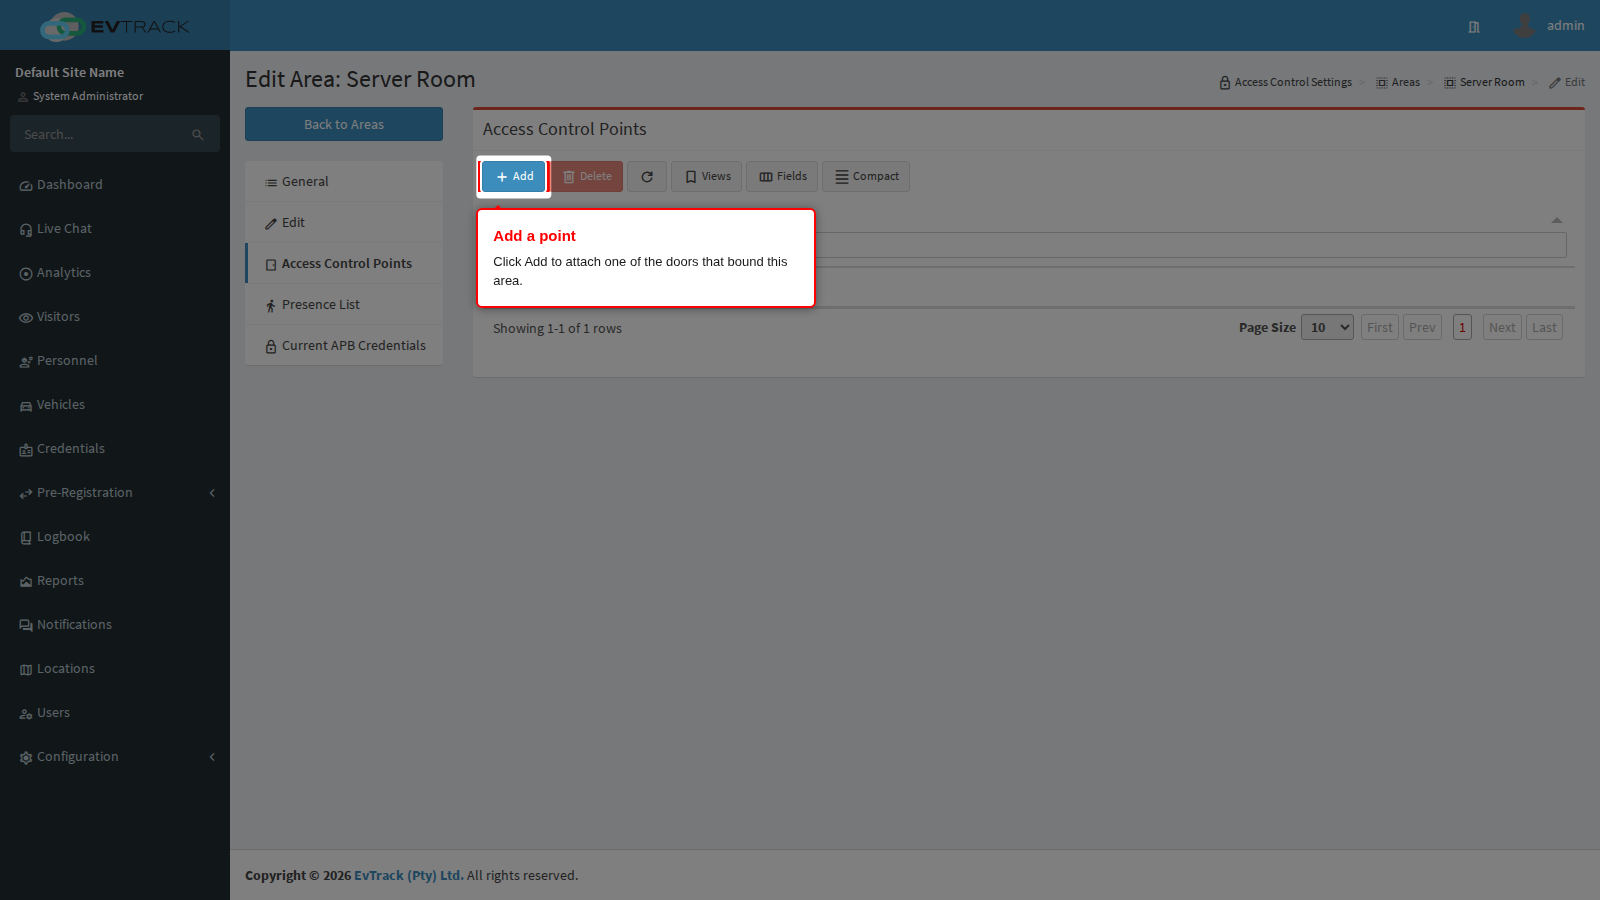
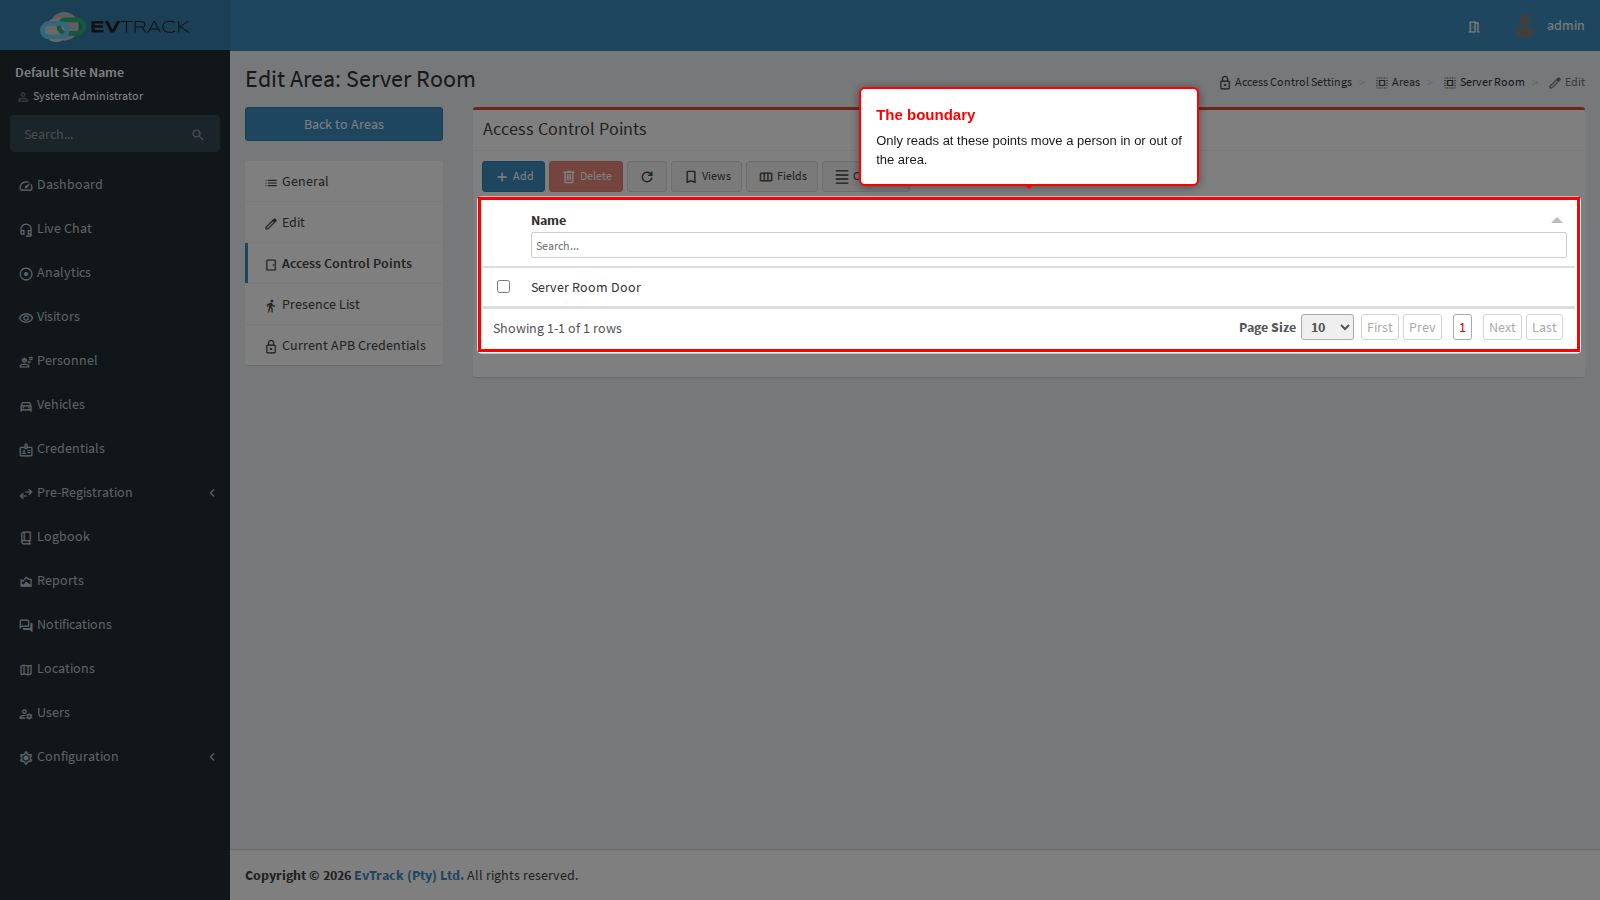
Click Access Control Points. This panel is the area’s boundary: only reads at the points listed here move anybody in or out. The table has one column, Access Control Point, with a search box, and a toolbar with Add, Delete and Refresh (Delete needs exactly one selected row).
Click Add.
Step 12: Choose a point
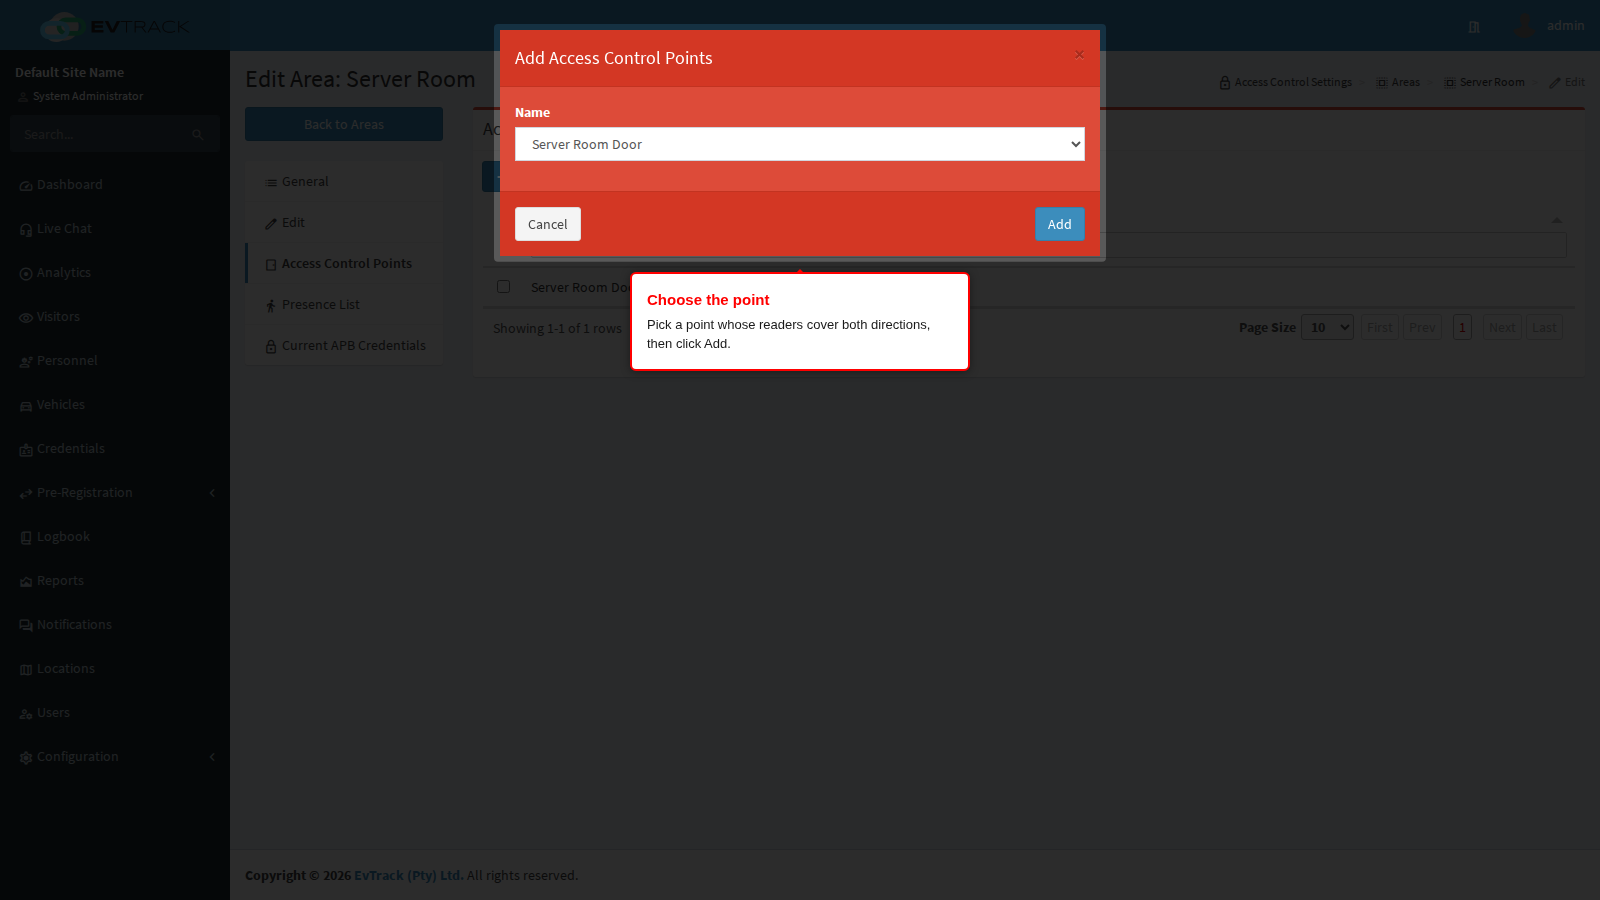
The dialog lists every access control point defined in the system. Pick the one you want and click Add.
Add every point a person can use to enter or leave the zone. A point whose readers are configured for entry moves people in; a point configured for exit moves them out. Miss an exit route and people will appear stuck inside; miss an entry route and they will never be counted at all. If a door has readers on both sides, one point covers both directions.
Step 13: The boundary
The point now appears in the table. Repeat for every other door, gate or turnstile on the zone’s perimeter. To take one out, select its row and click Delete; the point itself is untouched, it simply stops being part of this area’s boundary.
Step 14: Presence List - who is inside
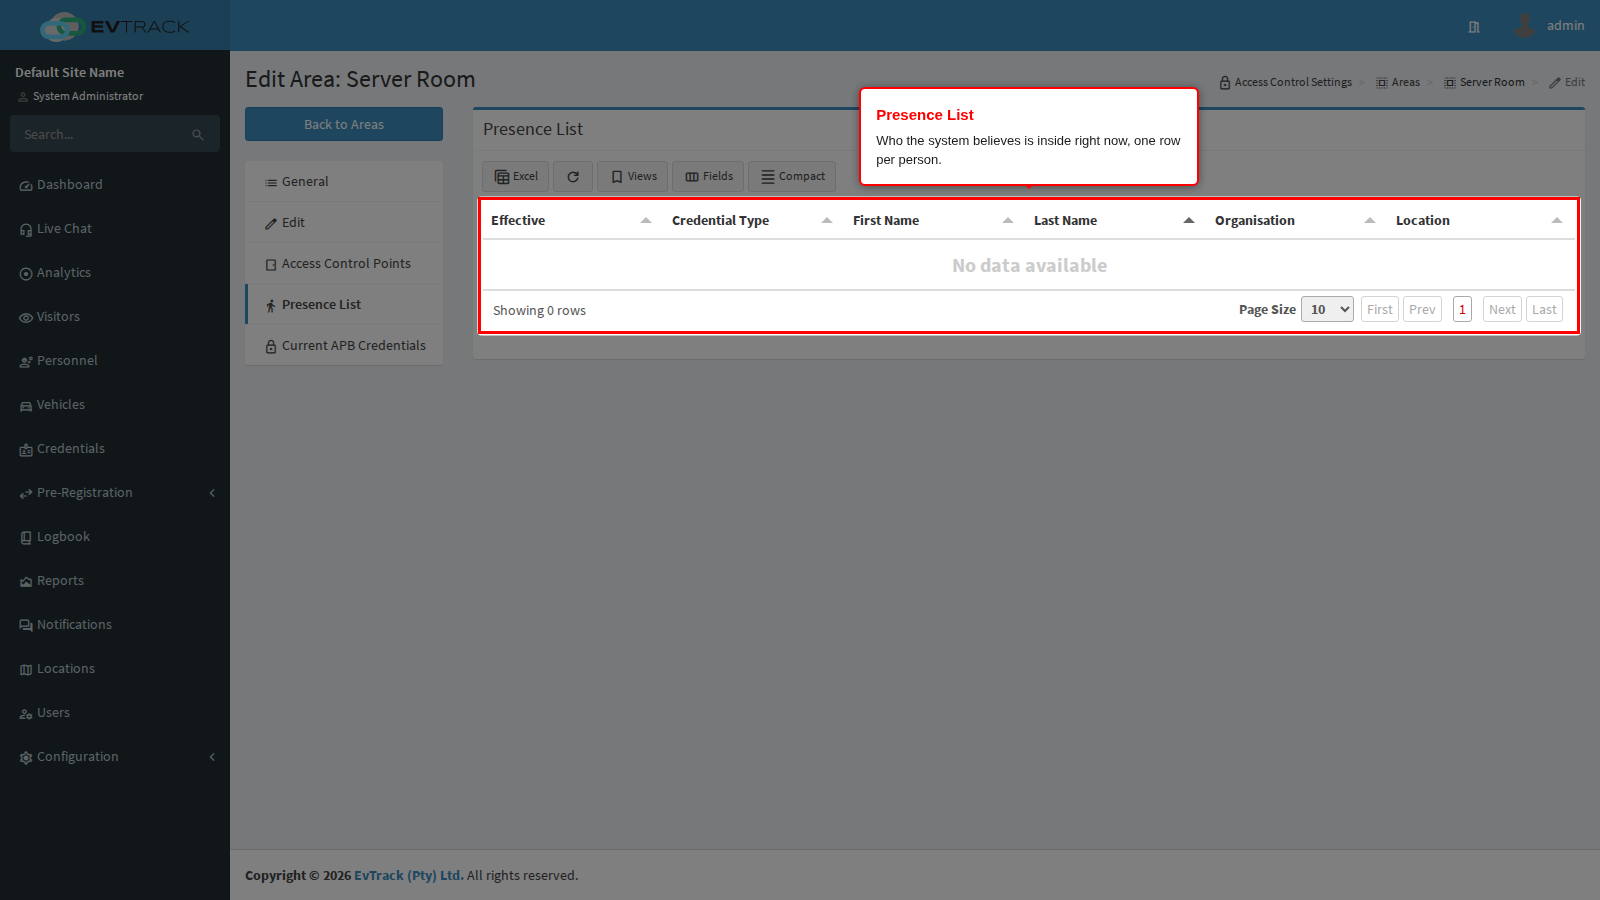
Presence List is who the system currently believes is in the zone: one row per person, showing Effective Date (when they read in), Type (visitor, personnel or user), First Name, Last Name, Organisation and Location. Someone holding several credentials appears once, not once per badge.
Use Excel in the toolbar to download the list, and Refresh to pull the latest state. On a system where nobody has read through the area’s points yet, the panel shows the empty-list placeholder.
Step 15: Current APB Credentials - and fixing a stuck record
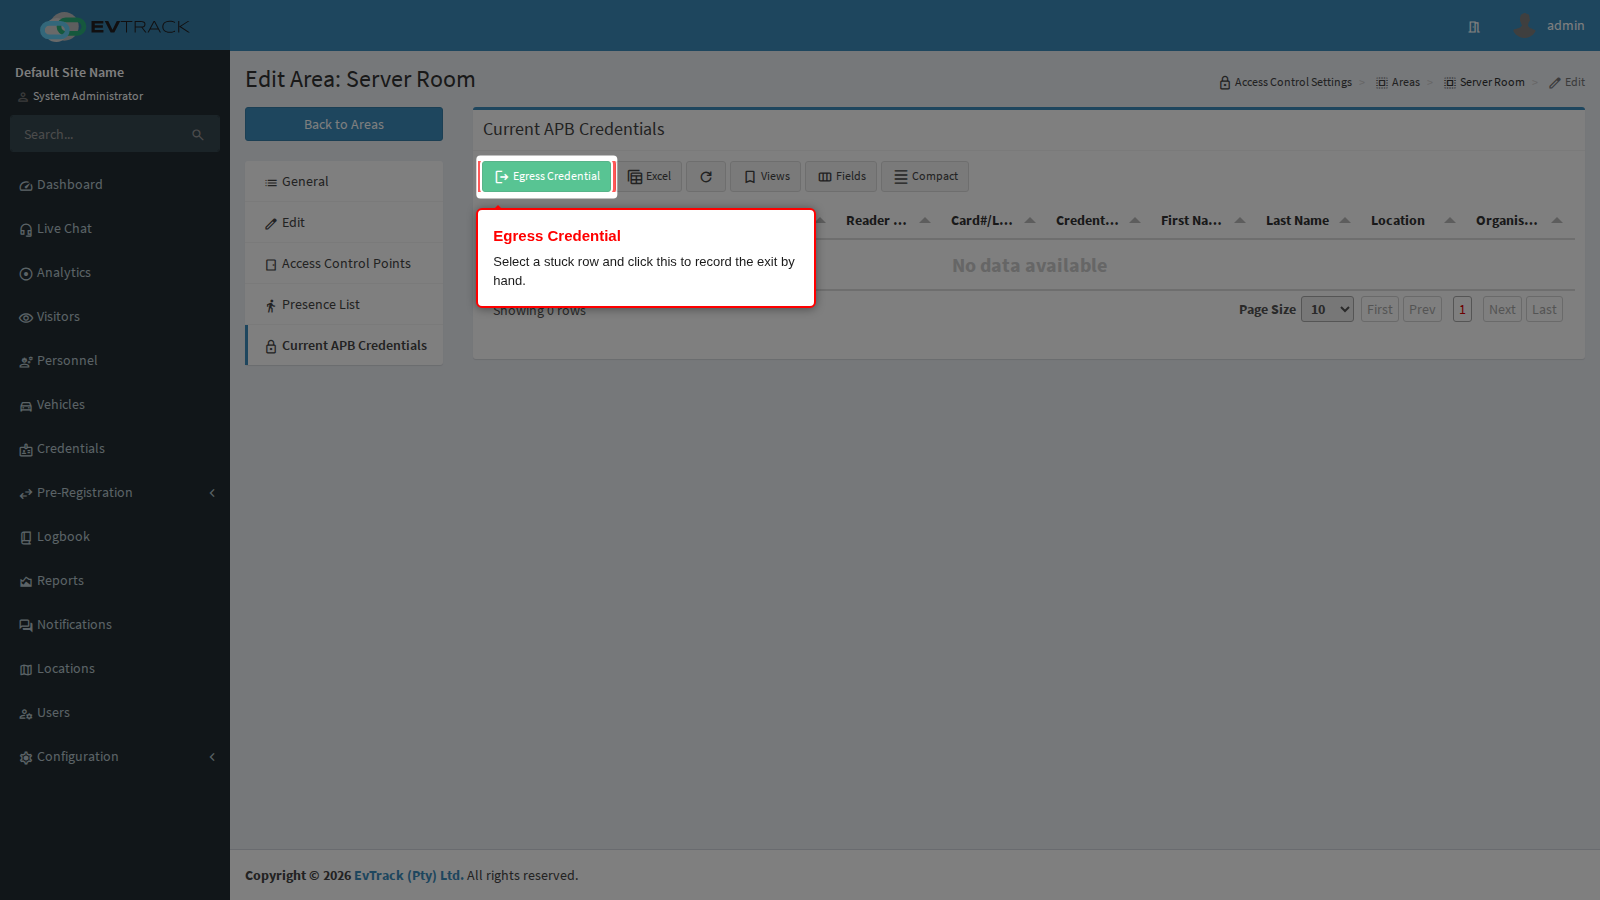
Current APB Credentials shows the same information one level lower down: one row per credential rather than per person, with Effective Date, Expiry Date (the entry time plus the reset time), the Mode the record was created under, the credential’s Reader Type, Unique Identifier and Type, and the holder’s name, location and organisation. This is the panel to open when you need to know exactly why someone is being refused.
When a record is wrong, select its row and click Egress Credential. That records the exit by hand: the record is removed and, if it was an APB record, the block at the readers is lifted immediately. Use it when:
- Someone left without badging out (fire door, tailgating, an offline exit reader) and is now refused re-entry.
- A visitor left the site with their badge and their record would otherwise sit there until the reset time expires.
- You are testing an area and want to clear your own record without waiting.
Egressing a credential does not change the area’s settings and does not affect anyone else; it is the per-person equivalent of waiting for the reset time.
Step 16: Exceptions - who is never blocked
Some people must never be refused entry, whatever the anti pass-back rules say: security officers who walk the perimeter, cleaning and maintenance staff who go in and out all day, emergency responders, senior management. Click Exceptions in the Area Restrictions section menu.
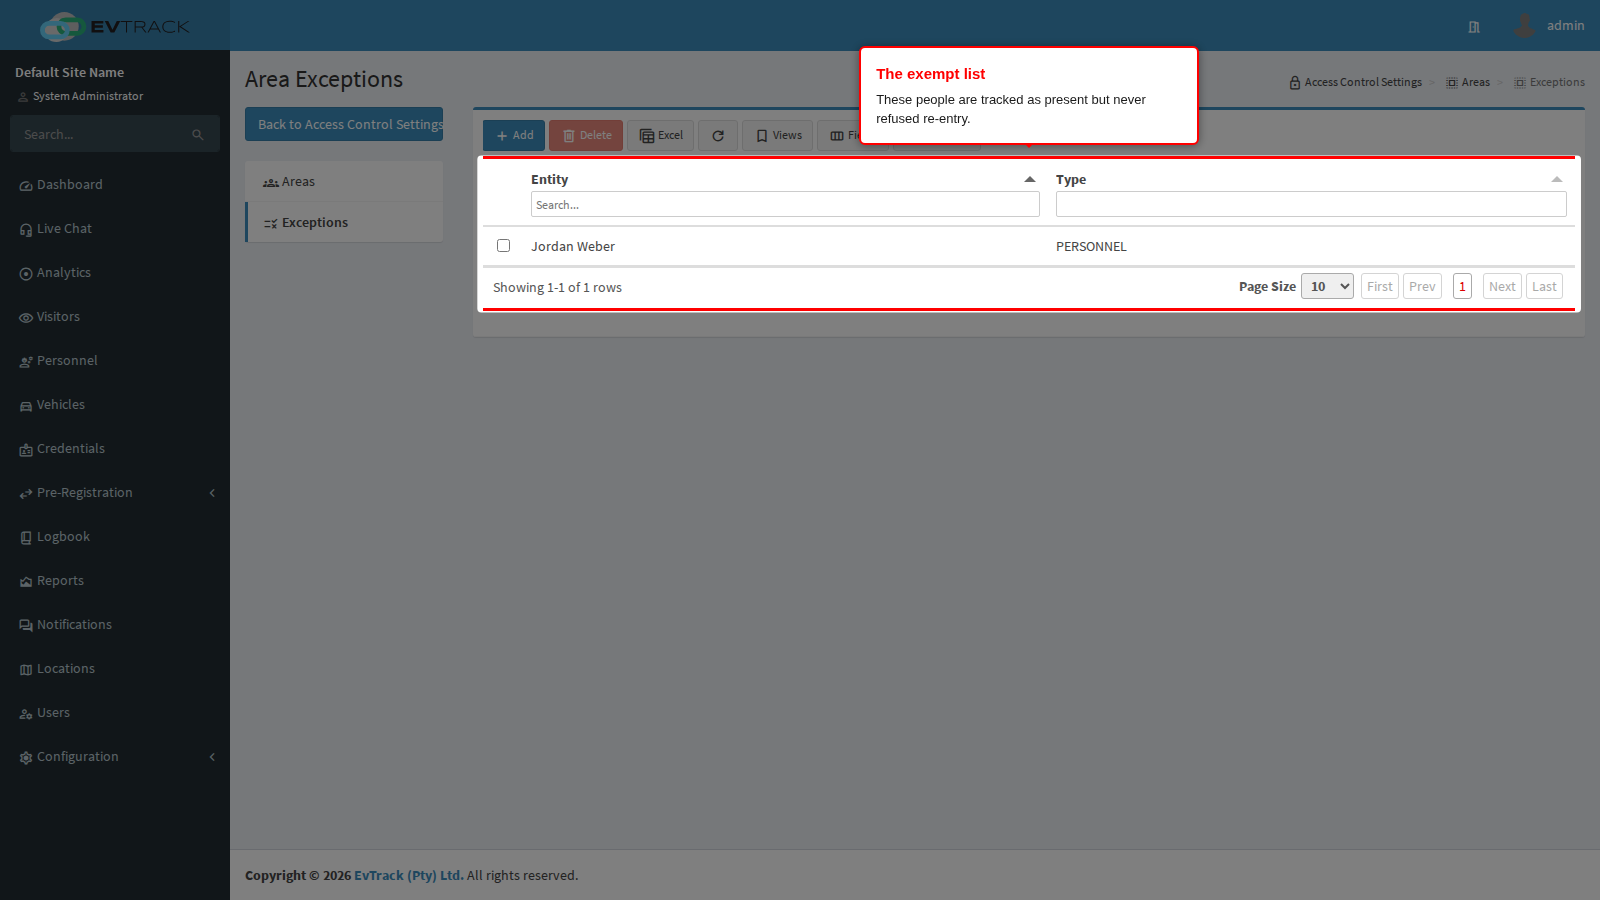
Exceptions are system-wide, not per area. Someone on the exception list is exempt at every area, so keep the list short and review it: each entry is a hole in the anti pass-back protection.
An exception does not make someone invisible. Their entries are still recorded, so they still appear on the presence list and are still counted in a roll call; the entry is simply recorded as a presence record instead of an enforcing one, so nothing is ever pushed to the readers to block them. Exit reads are processed exactly as they are for anyone else.
Step 17: Add an exception
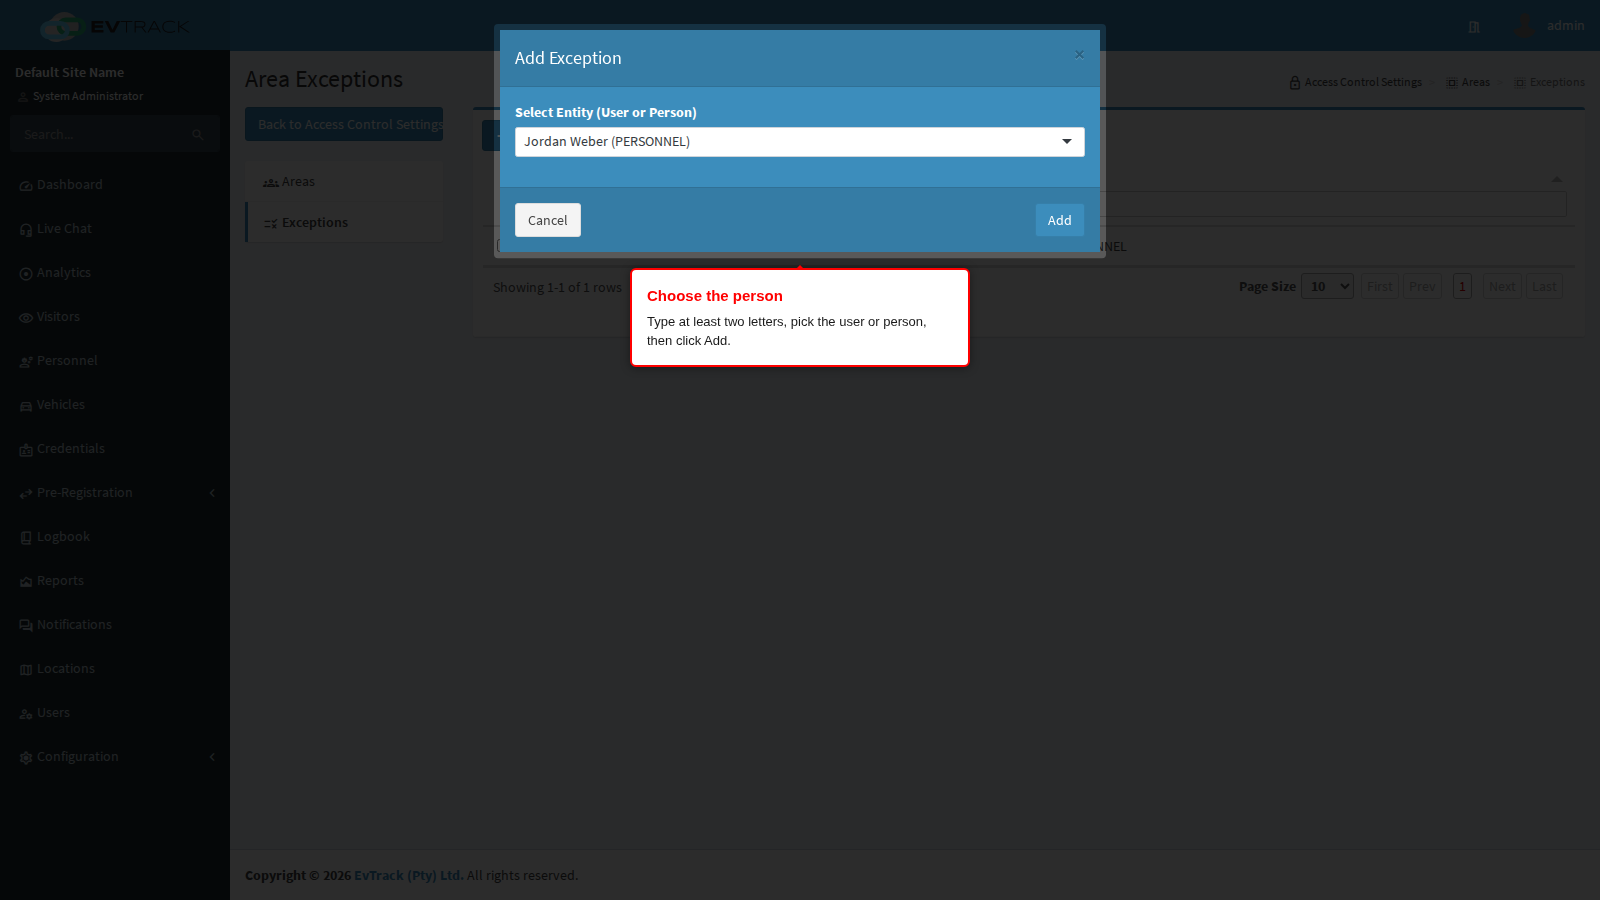
Click Add. In the dialog, type at least two letters of the person’s name; the list searches both users and personnel and shows the match with its type. Pick the person and click Add.
Step 18: The exempt list
The exceptions table lists each exempt Entity and its Type, with a search box on both columns. Select a row and click Delete to put someone back under the normal rules; Excel downloads the list for review.
Step 19: Editing an area
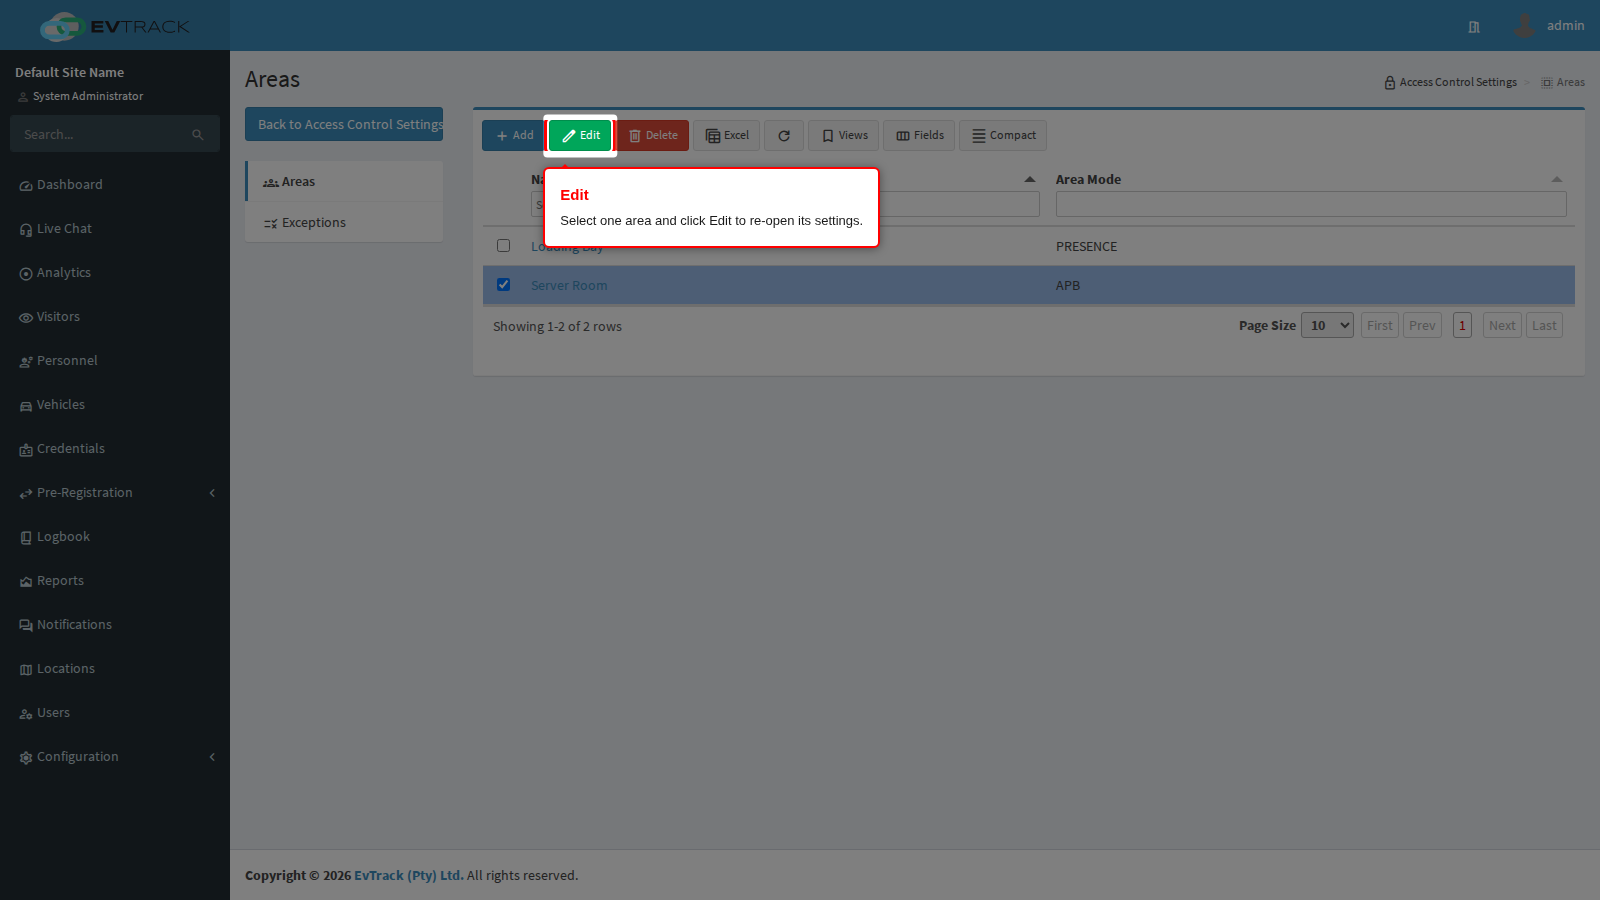
Open Areas, select the area’s row and click Edit in the toolbar (or just click the area’s name), then use the Edit panel shown in Step 10.
Everything can be changed after creation, but the four settings behave differently:
- Area Name - change freely. Nothing depends on it.
- Area Mode - changeable, with a side effect: the area’s inside list is cleared, as described in Step 10.
- Anti Pass-back Level - change freely. Records already inside keep working; the new level applies to entries recorded from then on.
- Reset Time - changeable, and the records already inside are recalculated from their original entry times.
The boundary is not on this panel. Points are added and removed on the Access Control Points panel (Steps 11 to 13), and that too can be changed at any time: adding a point extends the boundary immediately, and removing one stops that door moving people in or out.
Step 20: Deleting an area
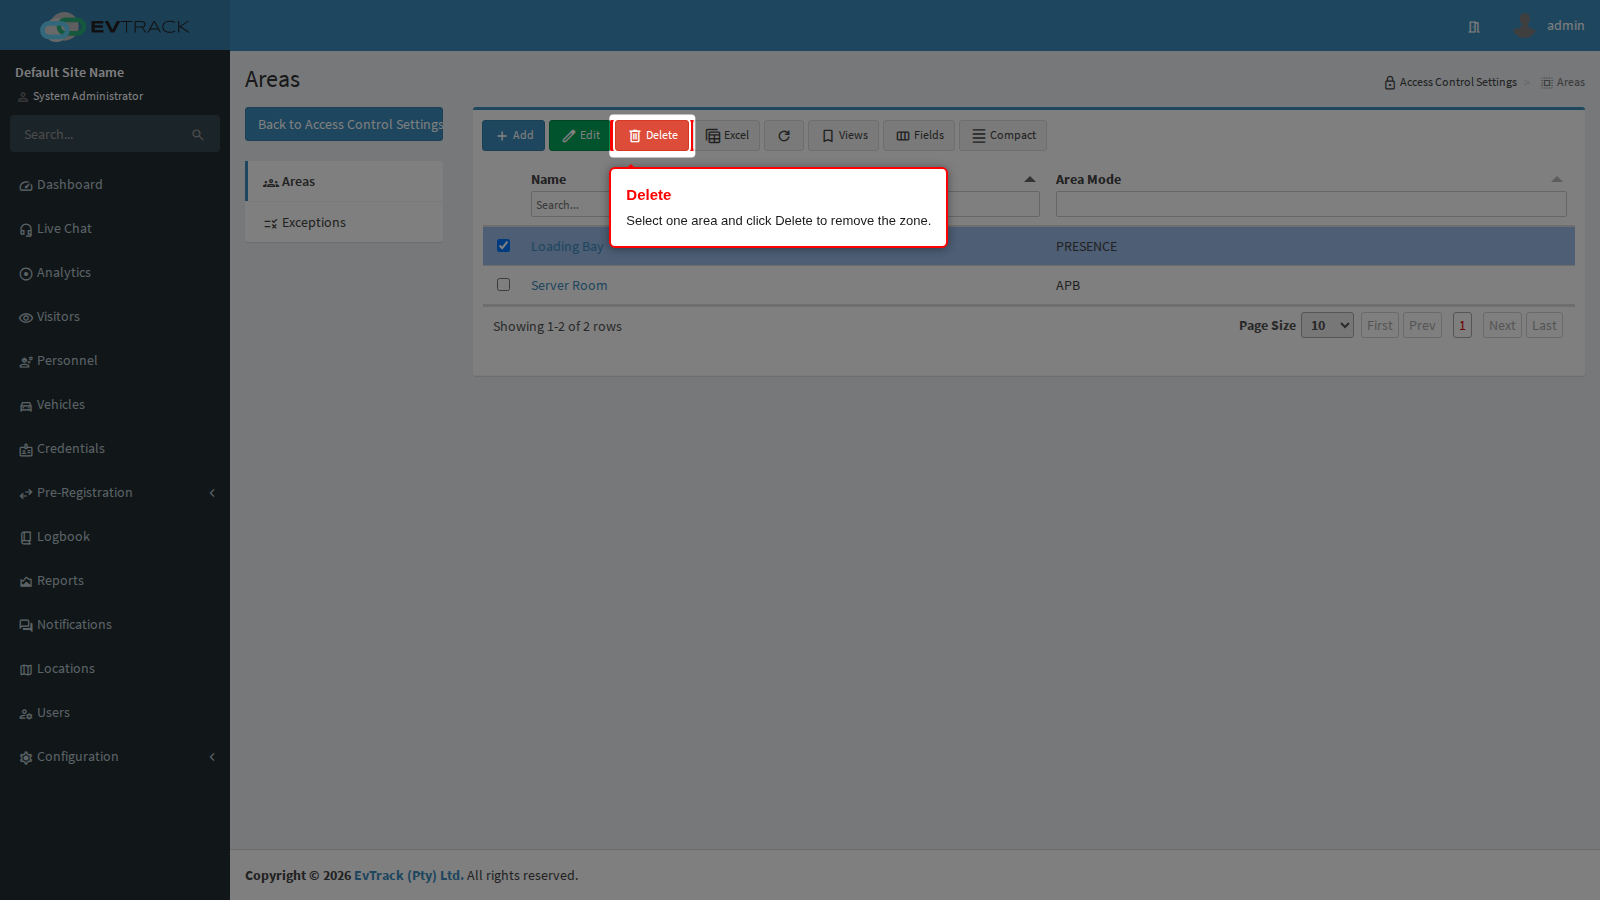
Select the area’s row on the Areas list and click Delete in the toolbar. Delete needs exactly one selected row.
Step 21: Confirm the deletion
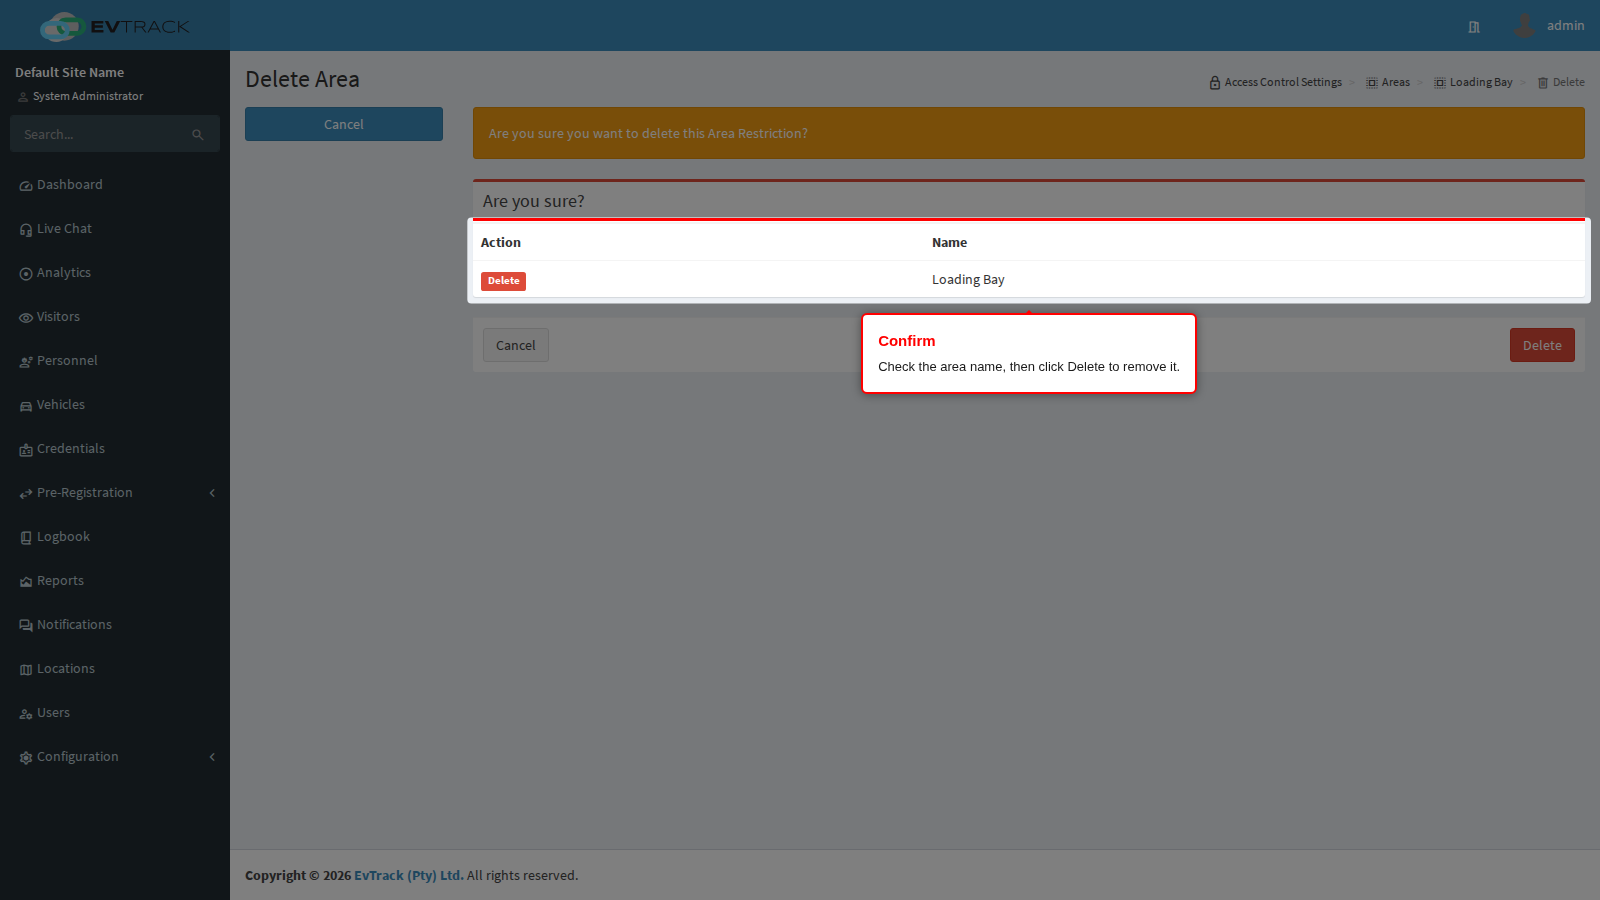
A confirmation page shows the area’s identifier and name before anything happens. Click Delete to remove it, or Cancel to return to the list with nothing changed.
Step 22: An area with points attached cannot be deleted
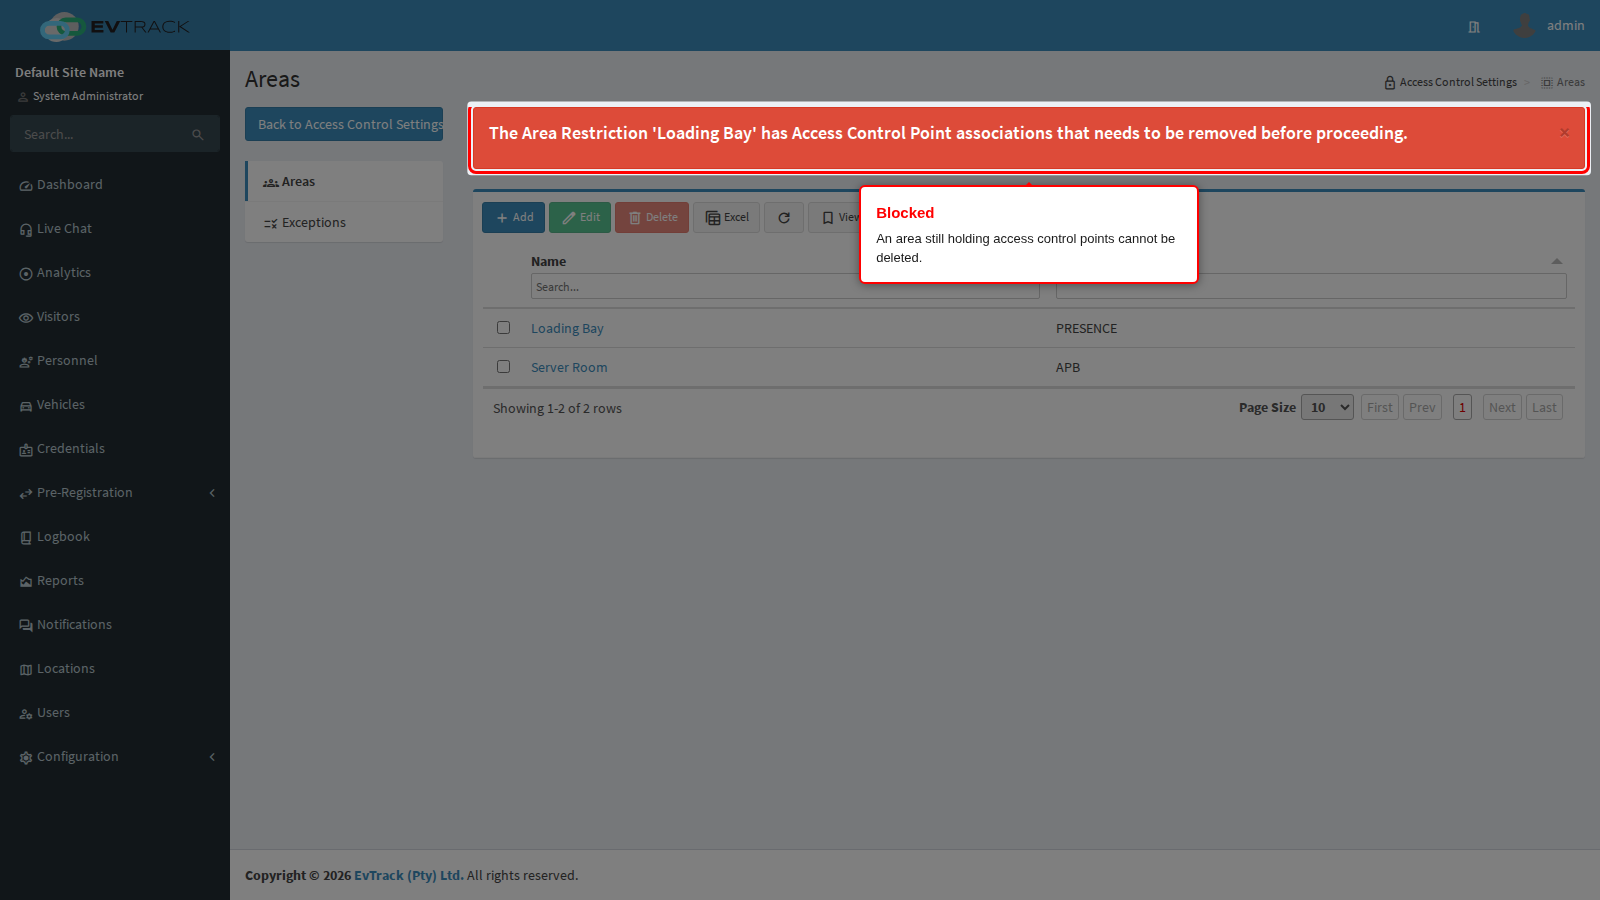
If the area still has any access control points on its boundary, the delete is refused and the list comes back with a message saying the area “has Access Control Point associations that needs to be removed before proceeding”. The guard is there so an area is never removed while it is still actively tracking traffic through live doors.
Step 23: Detach the points first
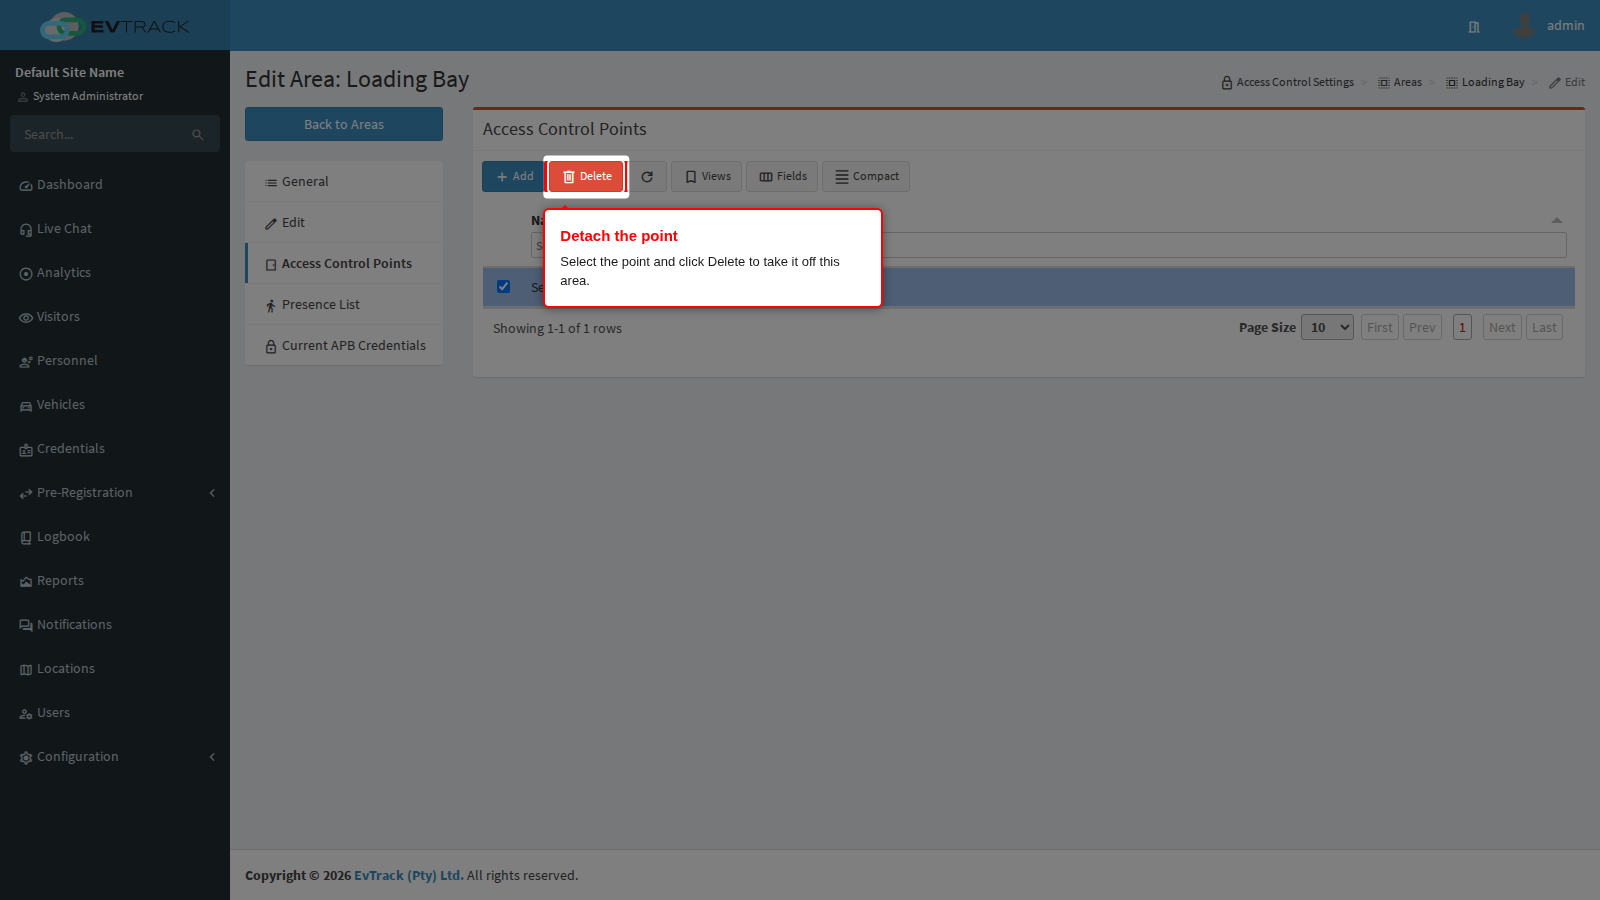
Open the area, go to Access Control Points, select a point and click Delete. Repeat until the table is empty. This only breaks the link between the point and this area: the access control point itself, its readers and any other area that uses it are untouched.
Step 24: The area is gone
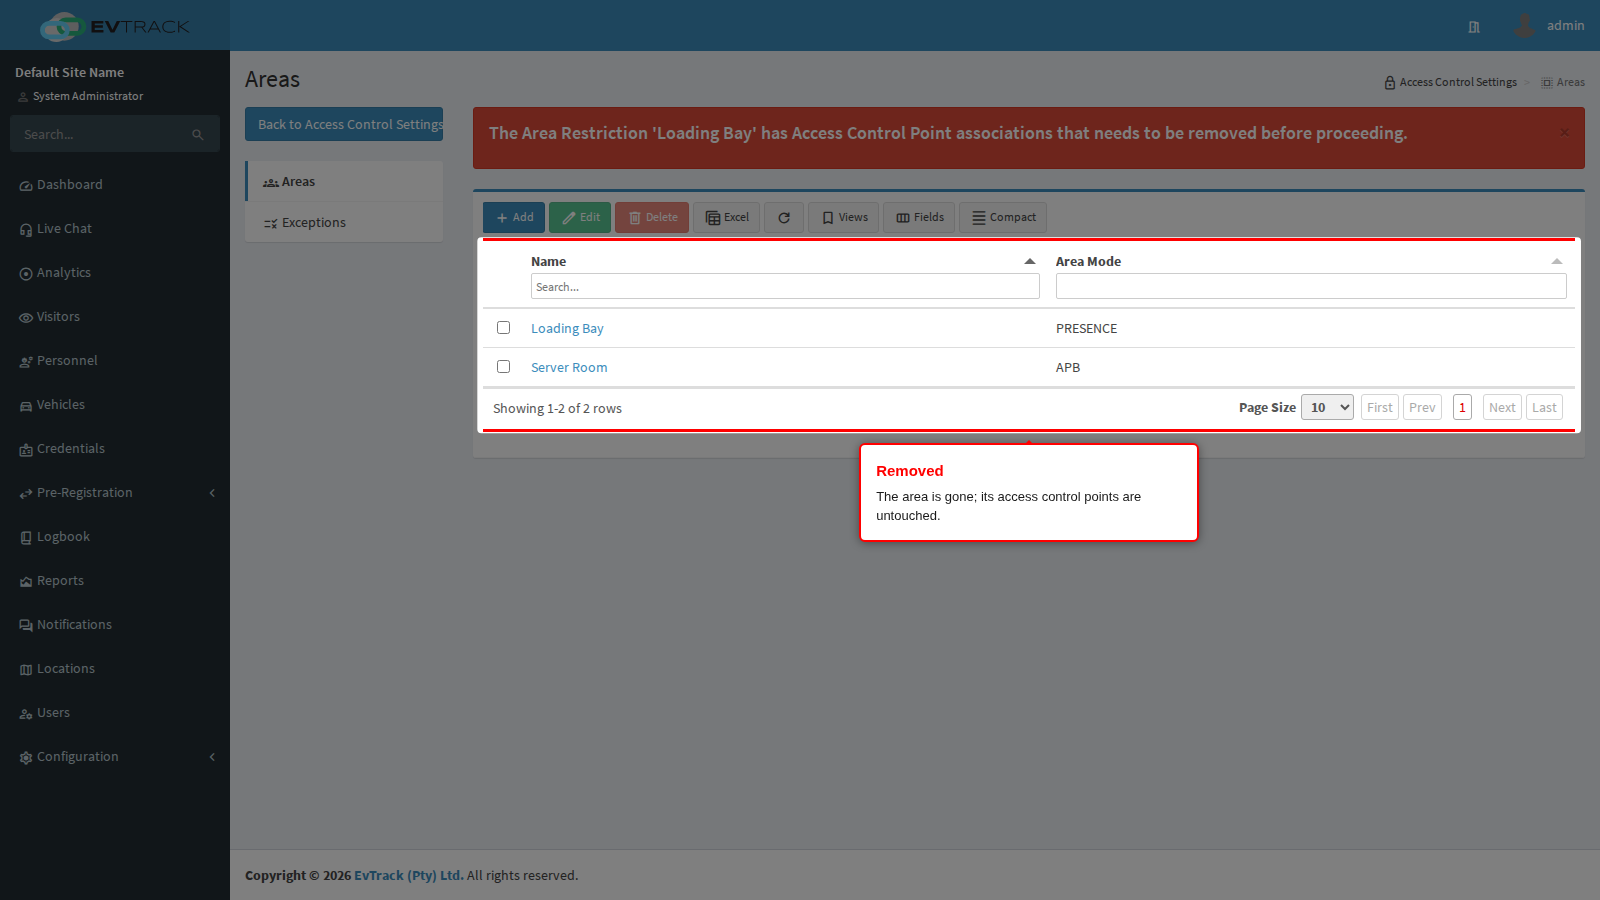
With no points left, the delete goes through. Everyone the area was counting as inside is dropped and any anti pass-back it was enforcing is lifted, so nobody remains blocked by an area that no longer exists. The access control points remain available for other areas.
Most of the time you should not delete an area at all. Switching it to PRESENCE stops all enforcement while keeping the tracking and the roll call, which is almost always what “turn this off” actually means.
Roll call and evacuation
The Presence List is the roll call. During an evacuation, open the area, click Presence List, click Refresh and then Excel to hand a marshal the list of everyone the system believes is still inside. Two things make that list trustworthy, and both are set up above:
- Every exit route is attached as an access control point (Step 12), so people who leave are actually removed.
- The reset time (Step 7) is short enough that a missed exit read does not leave someone on the list for days, but long enough that people still inside have not been quietly dropped.
For a whole-site roll call, repeat per area; areas are independent and a person can be inside more than one at a time (for example the site perimeter and a workshop within it).