Every user record has a Documents tab where you store the paperwork that belongs to that user account: the copy of the identity document used to verify the person, a signed system access or confidentiality agreement, a training or certification record, or the authorisation that granted their role. The file remains on the record, so an auditor can see who was granted access and on what basis without hunting through a shared drive.
Each stored document carries an effective date and an optional expiry date, so anything that has to be renewed (a certification, an annual acknowledgement) can be seen at a glance to be current or lapsed.
Before you start
- Have the file ready as a JPG, PNG or PDF of up to 10 MB.
- Viewing, uploading and deleting documents are three separate permissions. If the Documents tab, or the Upload or Delete button, is missing, ask an administrator to extend your role.
- The user must already exist. To create one, see Add User.
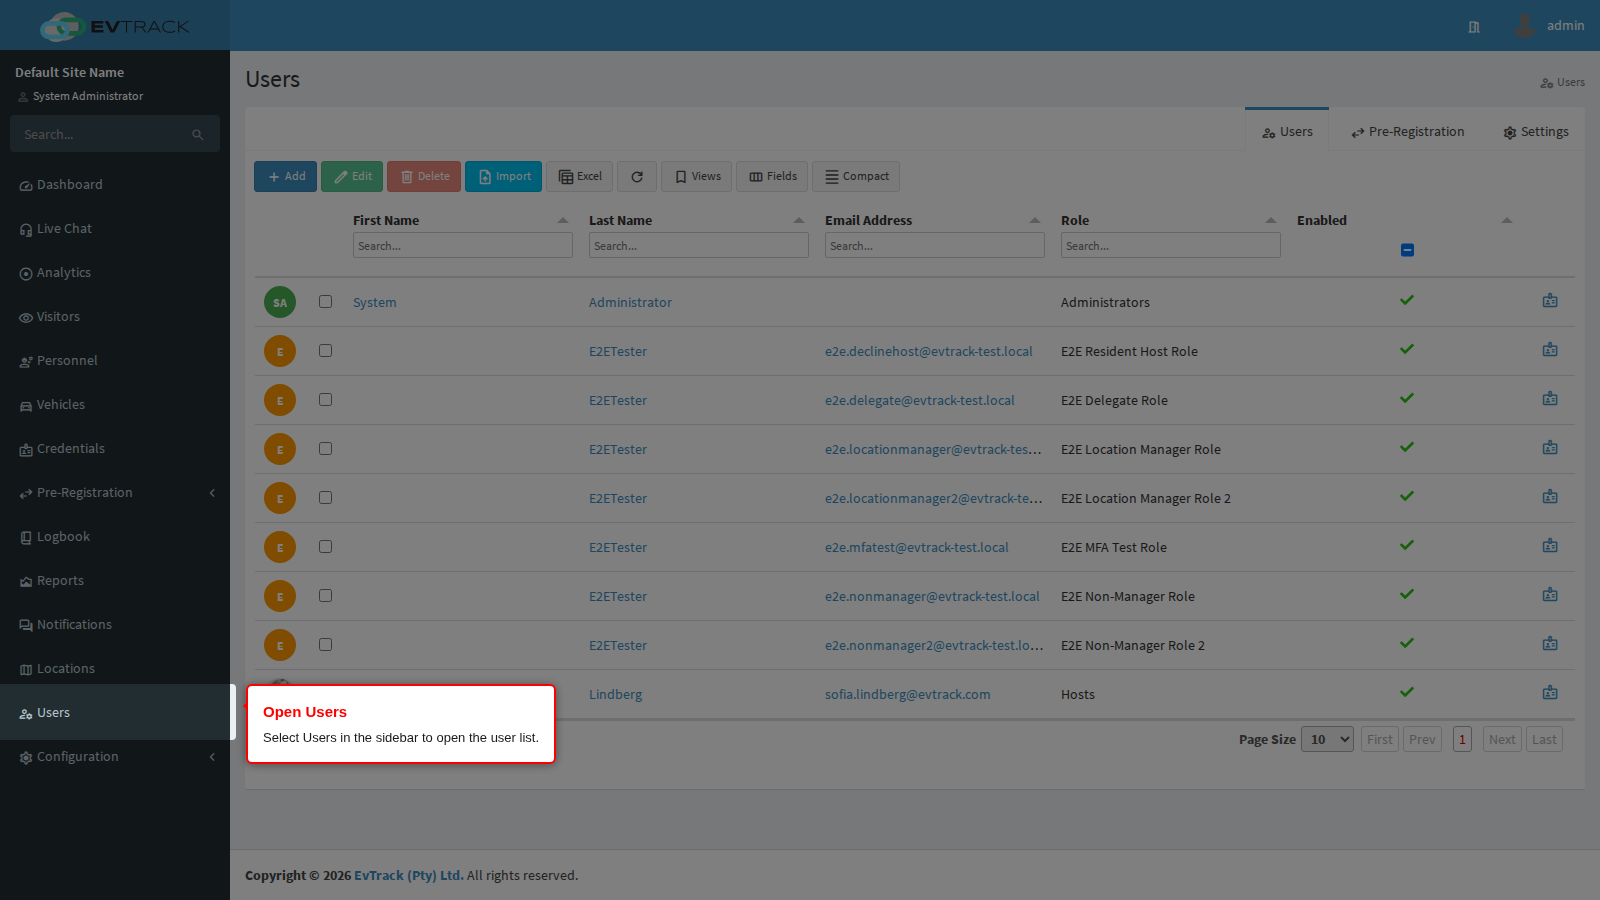
Step 1: Open Users
Select Users in the sidebar. The user list opens, with a search field under each column heading.
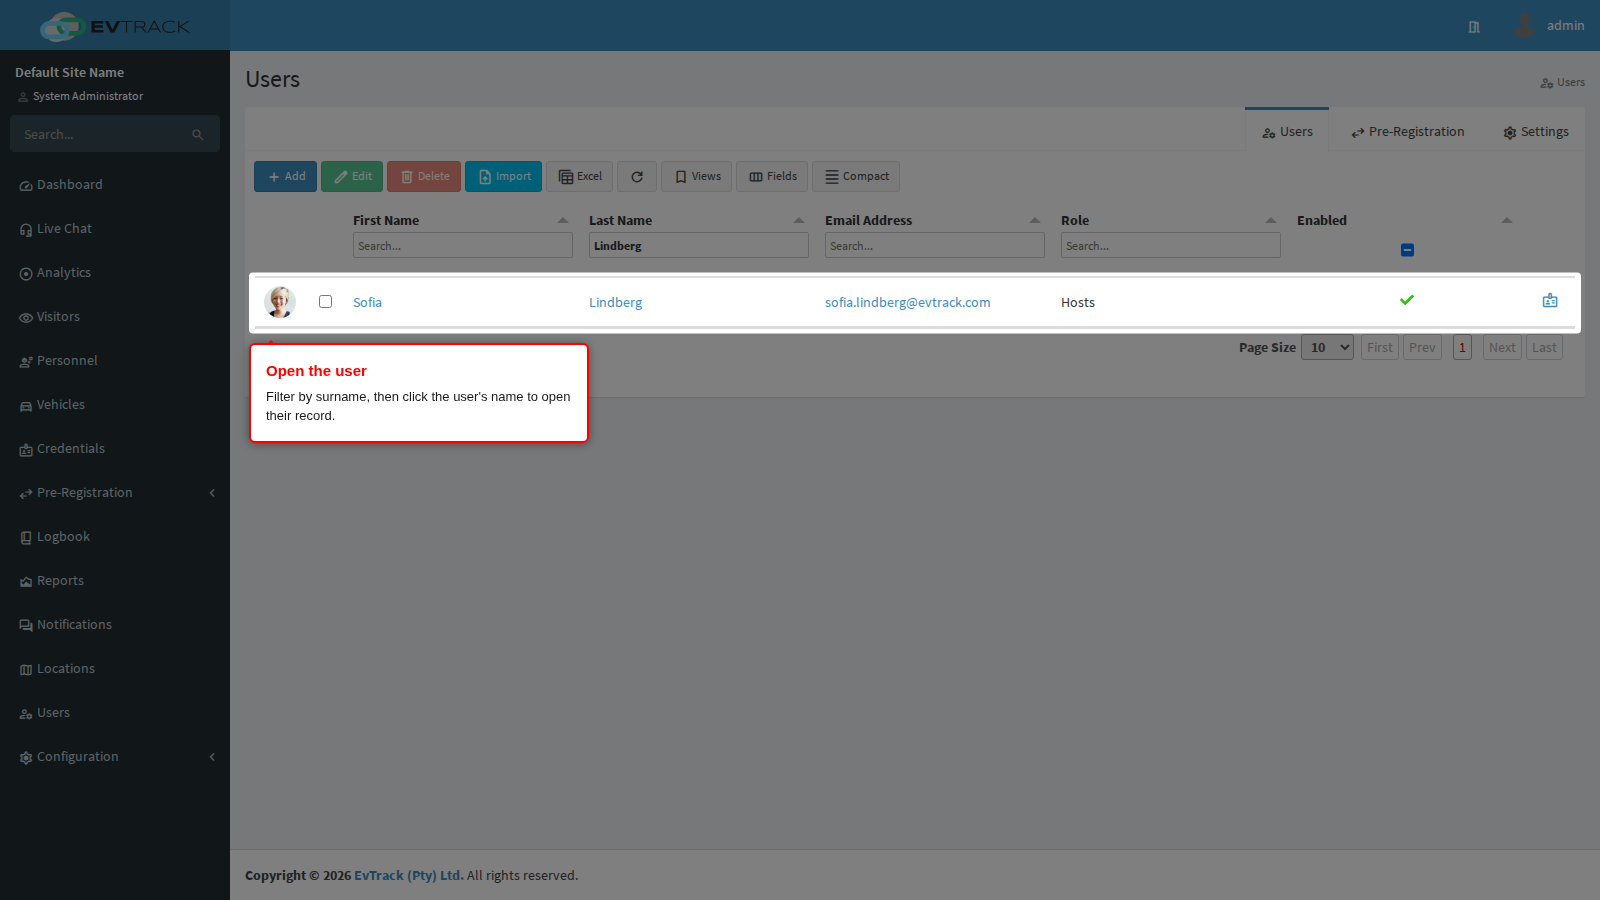
Step 2: Open the user
Type the user’s surname into the search field under the Surname heading; the list narrows as you type. Click the user’s name to open their record.
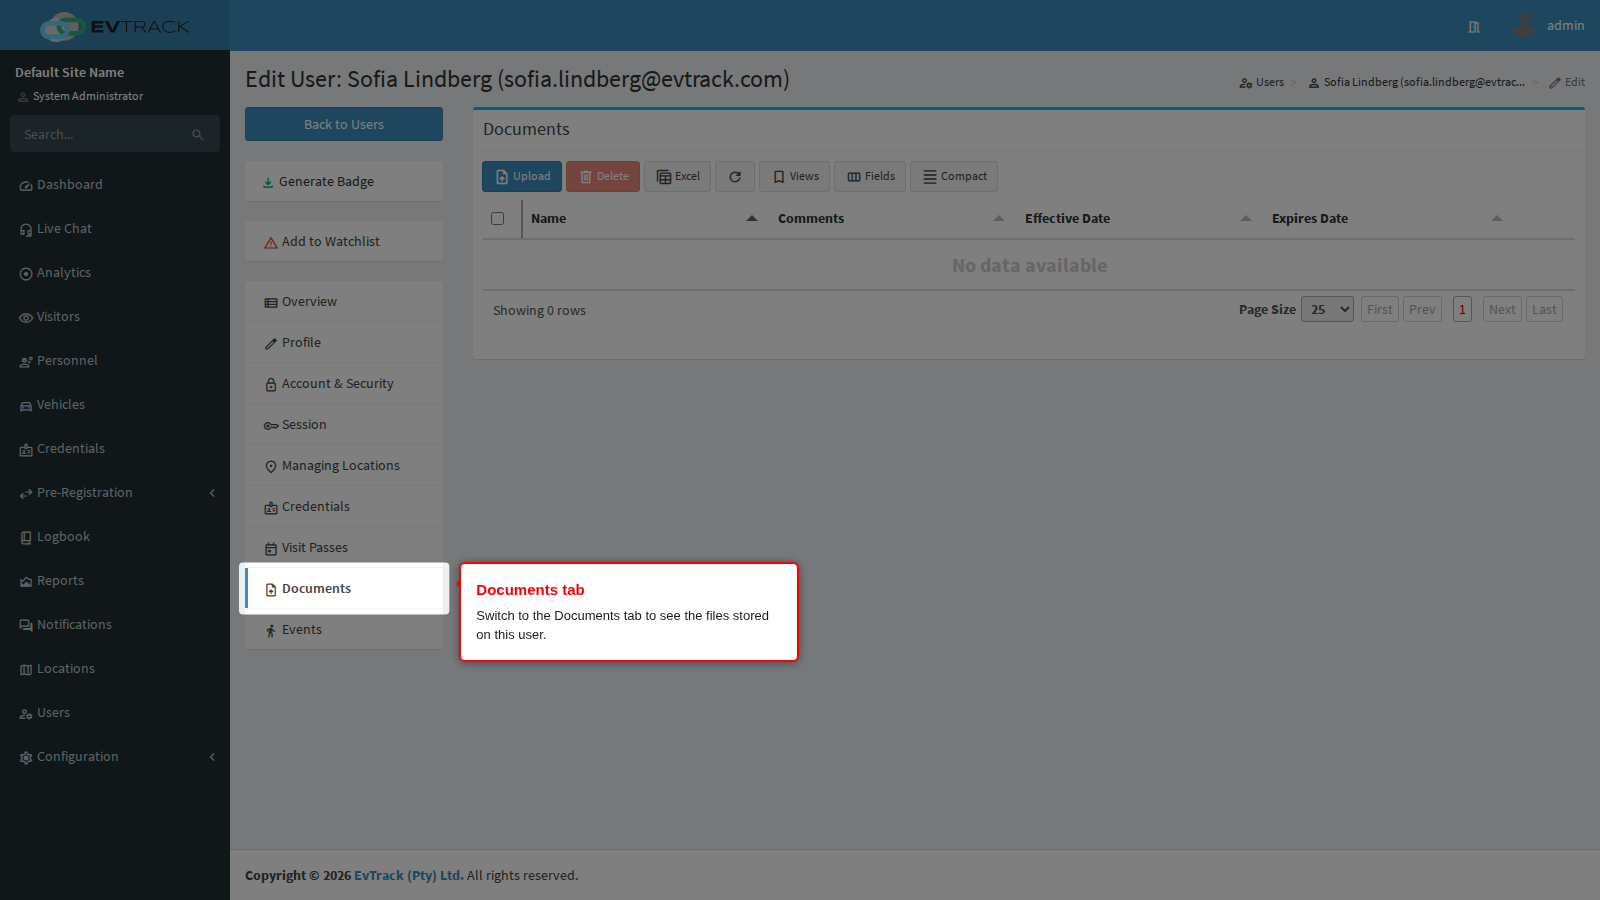
Step 3: Go to the Documents tab
In the tab list on the left of the user’s record, select Documents. The tab shows every document stored on this user, and a toolbar above the list. A user with no documents yet shows an empty list.
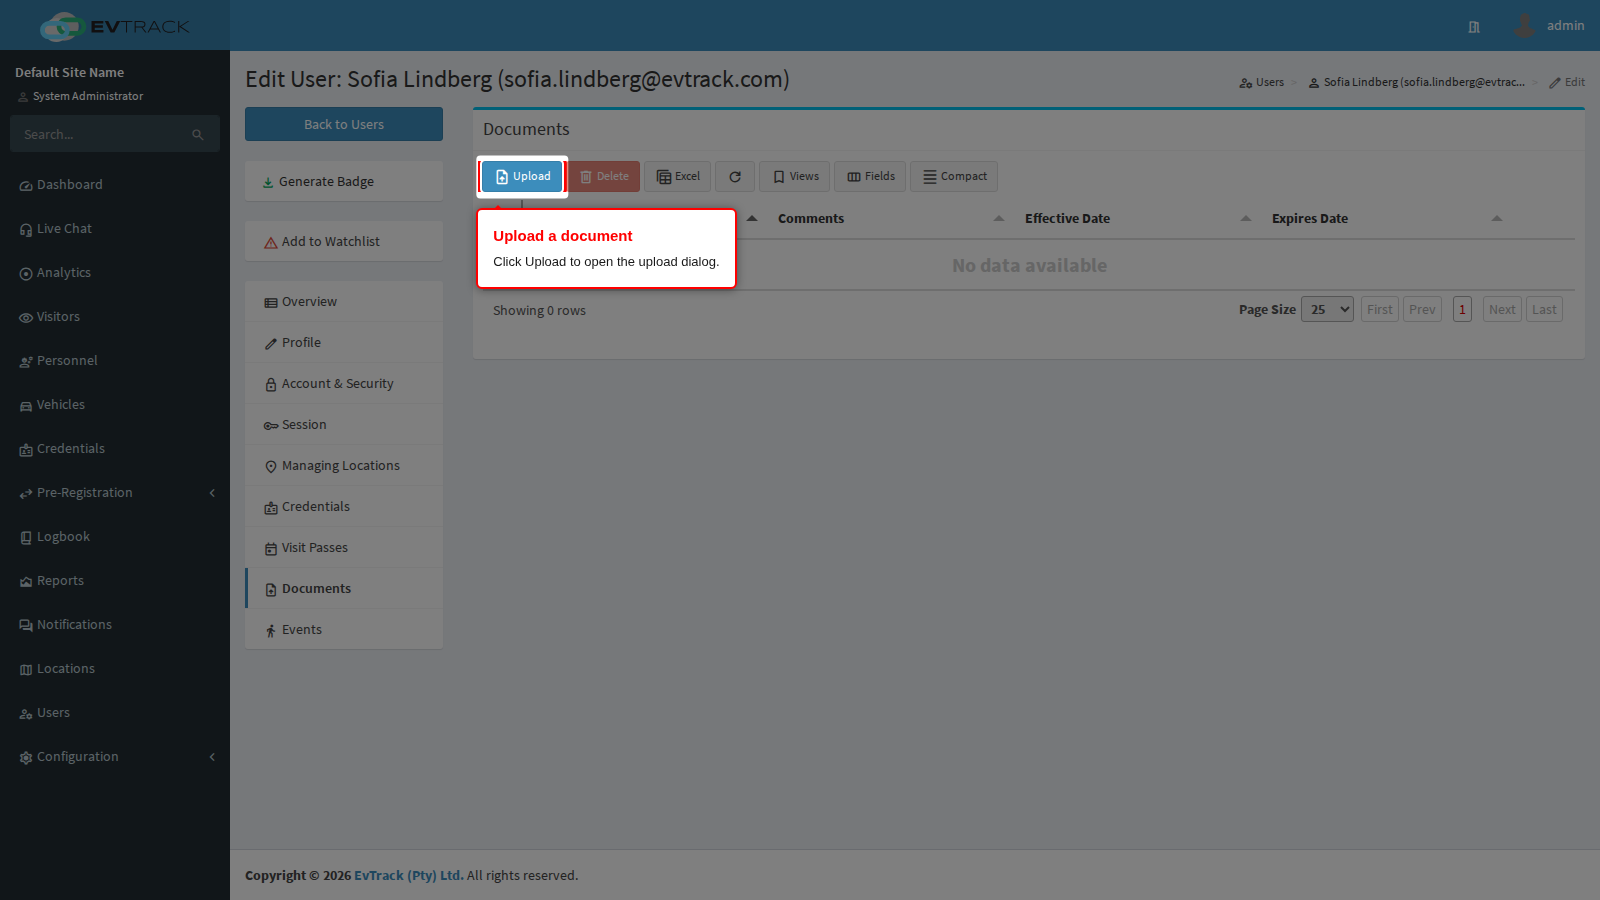
Step 4: Click Upload
Click the blue Upload button in the toolbar. The upload dialog opens.
Step 5: Complete the upload dialog
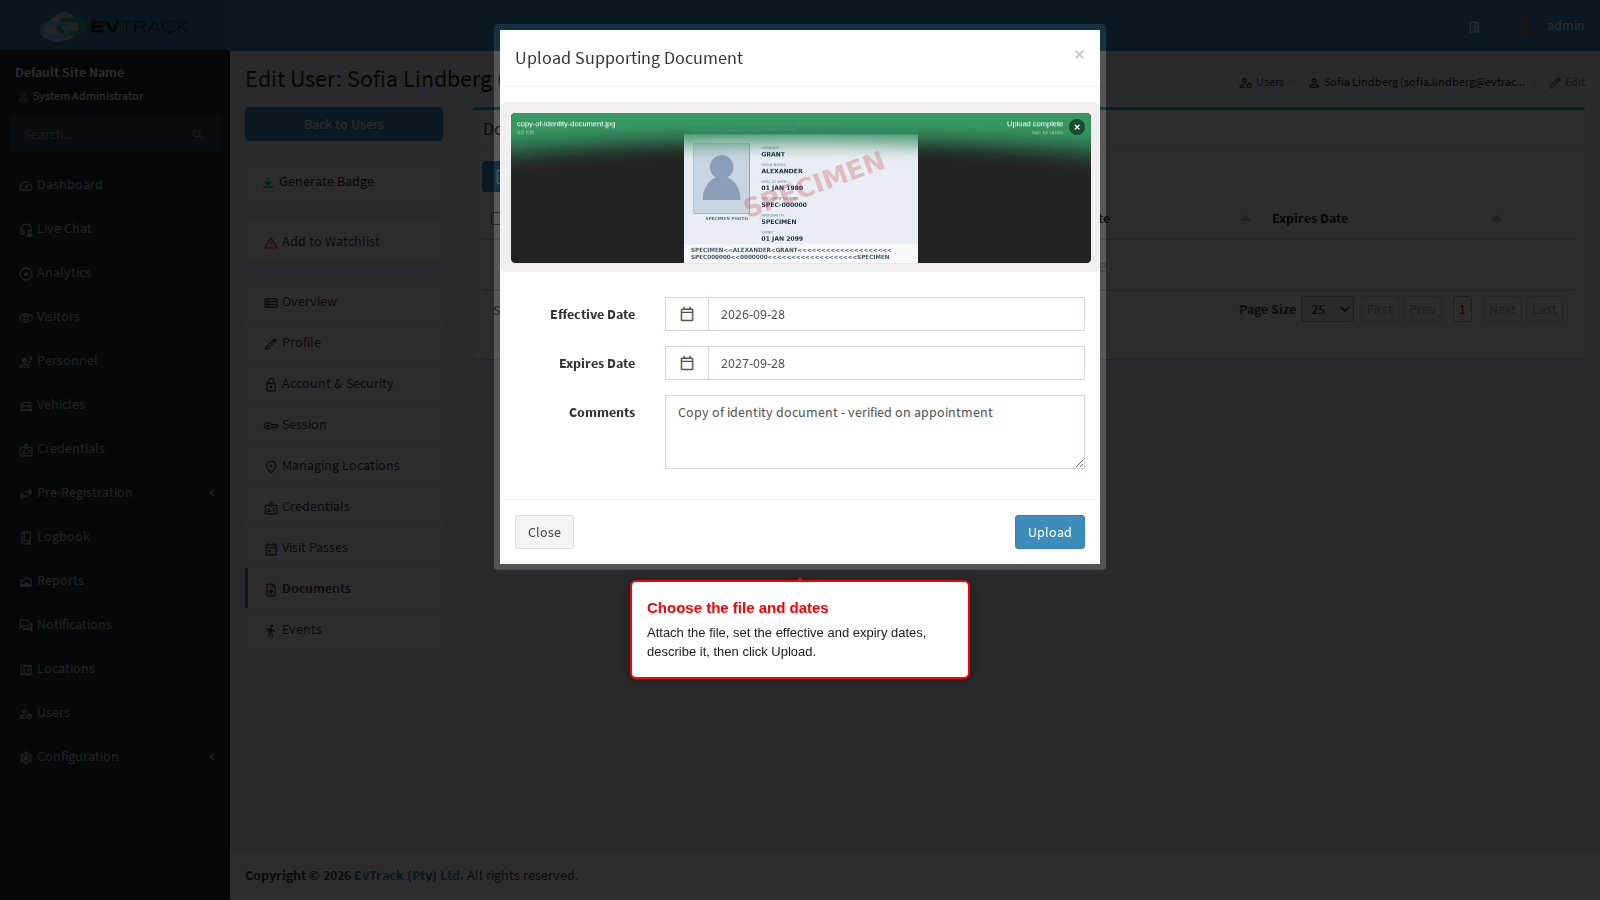
- Drag and drop your file or Browse - drop the file onto the panel, or click Browse and pick it from your computer. Wait for the upload progress to finish; the file is only attached once it completes.
- Effective Date - required, and defaults to today. Set it to the date the document was issued or signed.
- Expires Date - optional. Set it to the date the document has to be renewed, for example the expiry of a certification or the next annual acknowledgement, so lapsed paperwork is obvious in the list.
- Comments - a short description of what the document is. This is what other administrators read next to the file name, so describe the document rather than the file.
Click Upload. The dialog closes and the list refreshes.
Step 6: The document is stored
The document now appears on the user with its comments, effective date and expiry date.
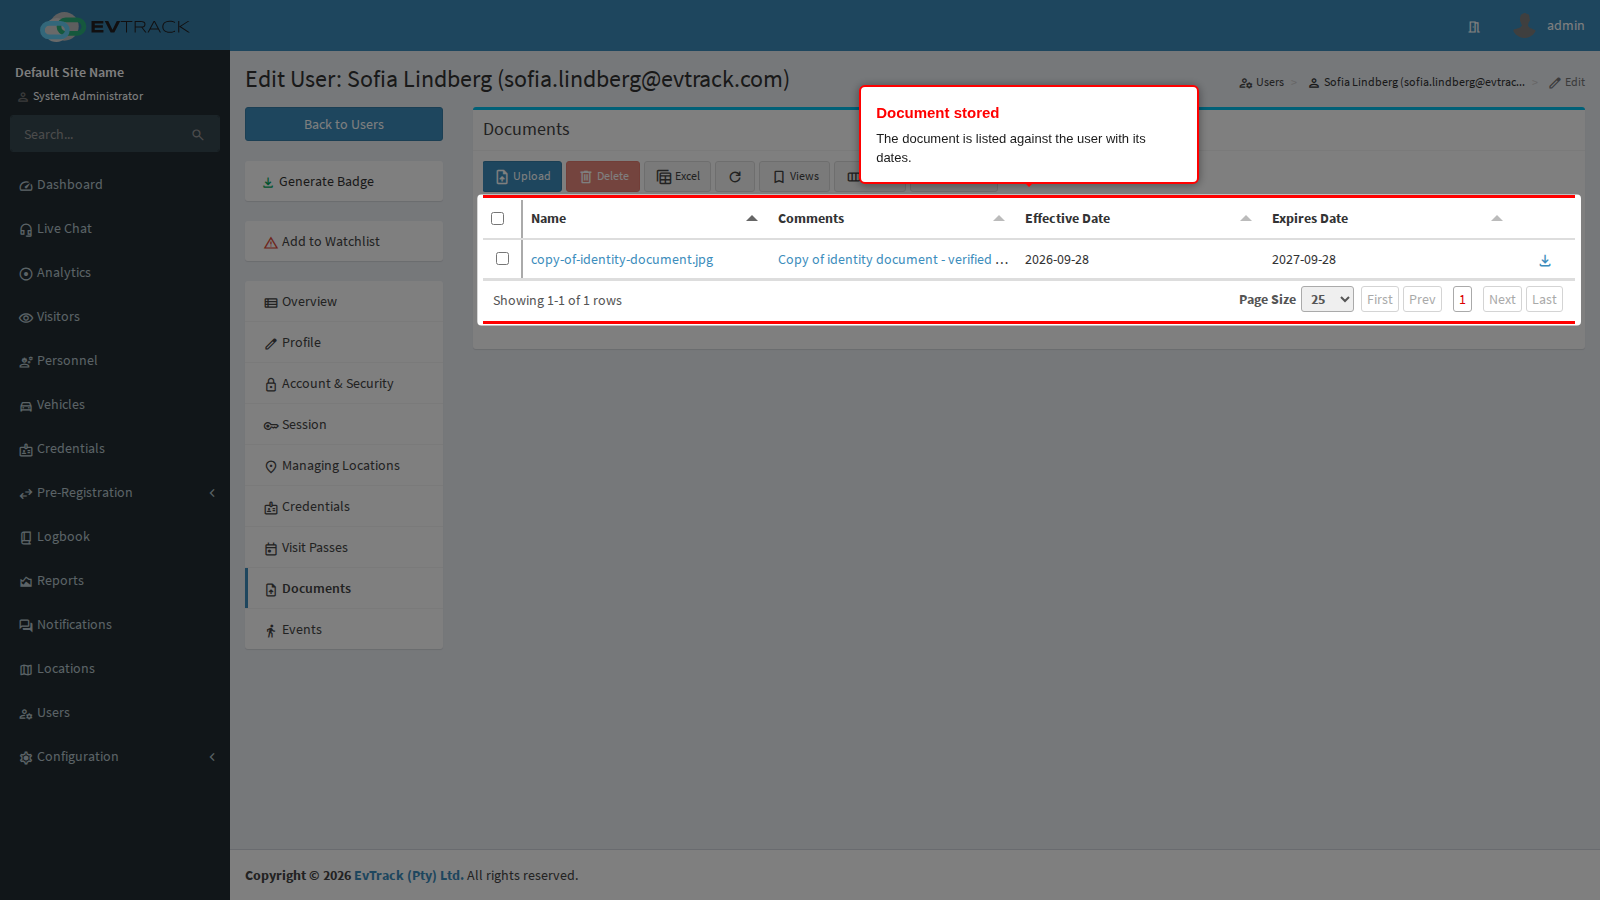
Click the file name to open it. Image files open in a preview window; other files, and the download icon at the end of the row, save a copy to your computer.
Step 7: Select the document you want to remove
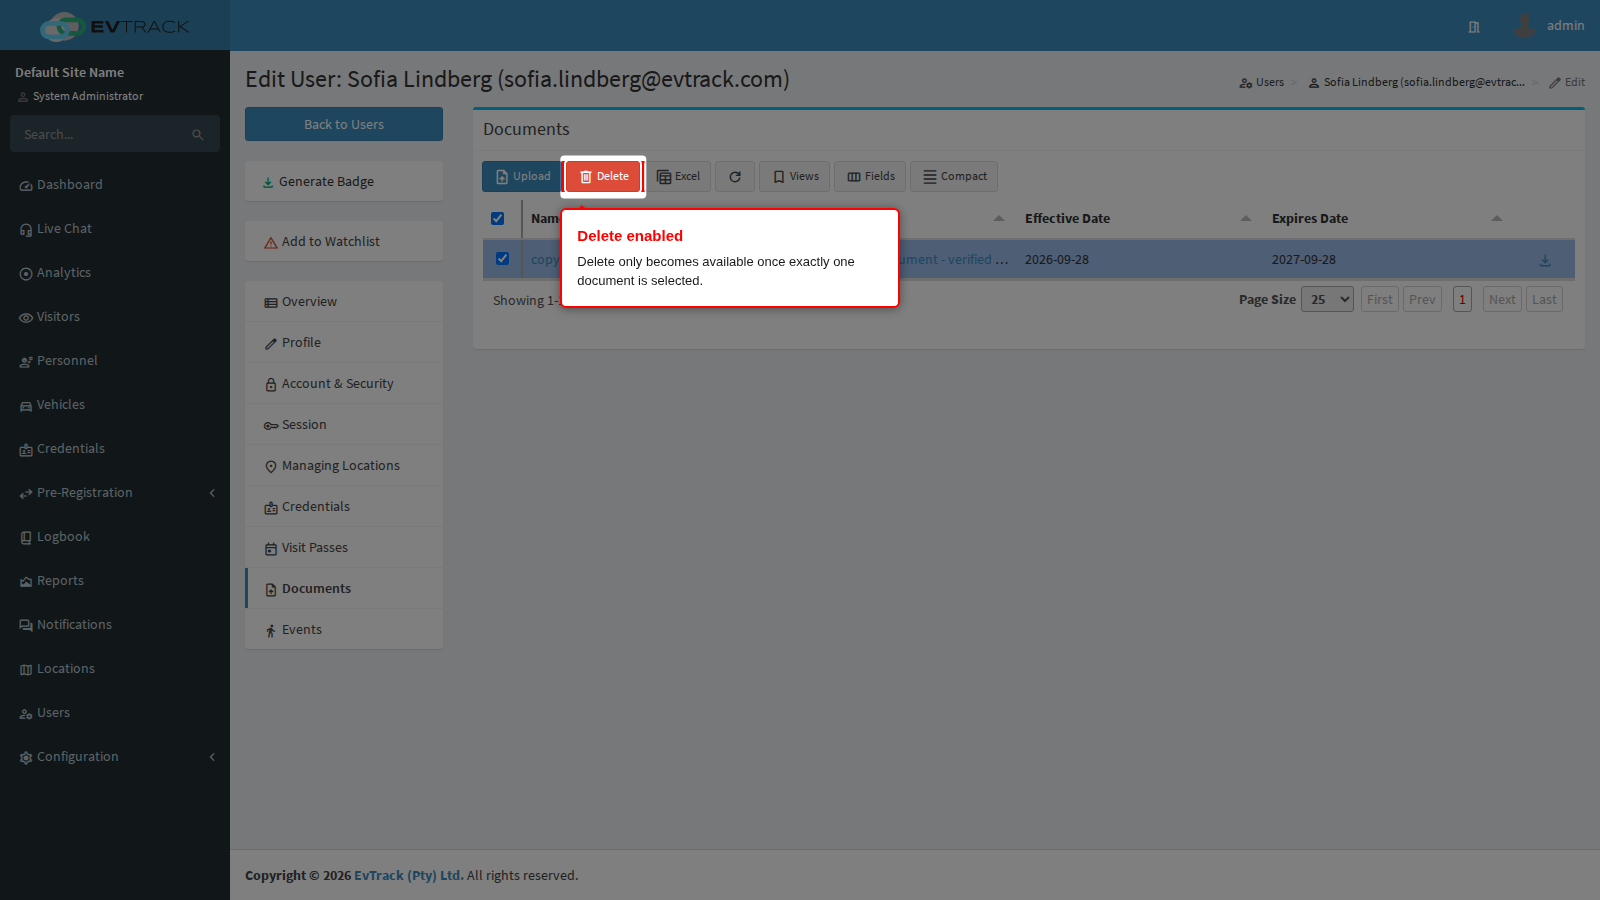
Tick the selection box at the start of the document’s row. The red Delete button remains disabled until exactly one document is selected.
Step 8: Confirm the deletion
Click Delete. A confirmation window asks you to confirm.
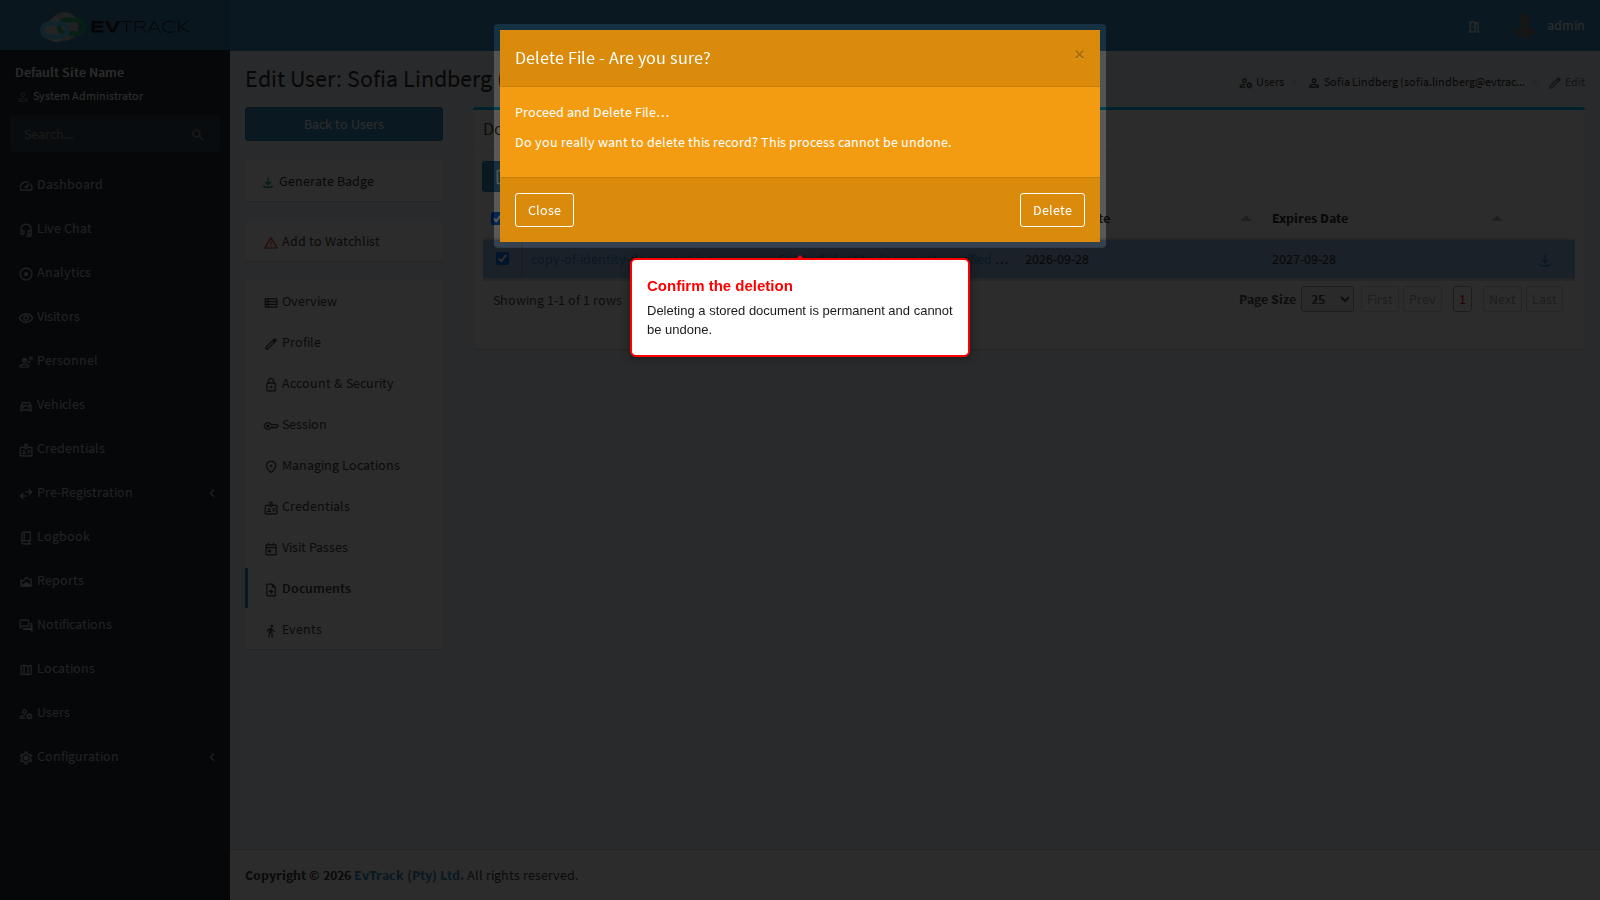
Deleting a document is permanent and cannot be undone. Download a copy first if you may need the file again. Click Delete in the confirmation window to proceed, or Close to keep the document.
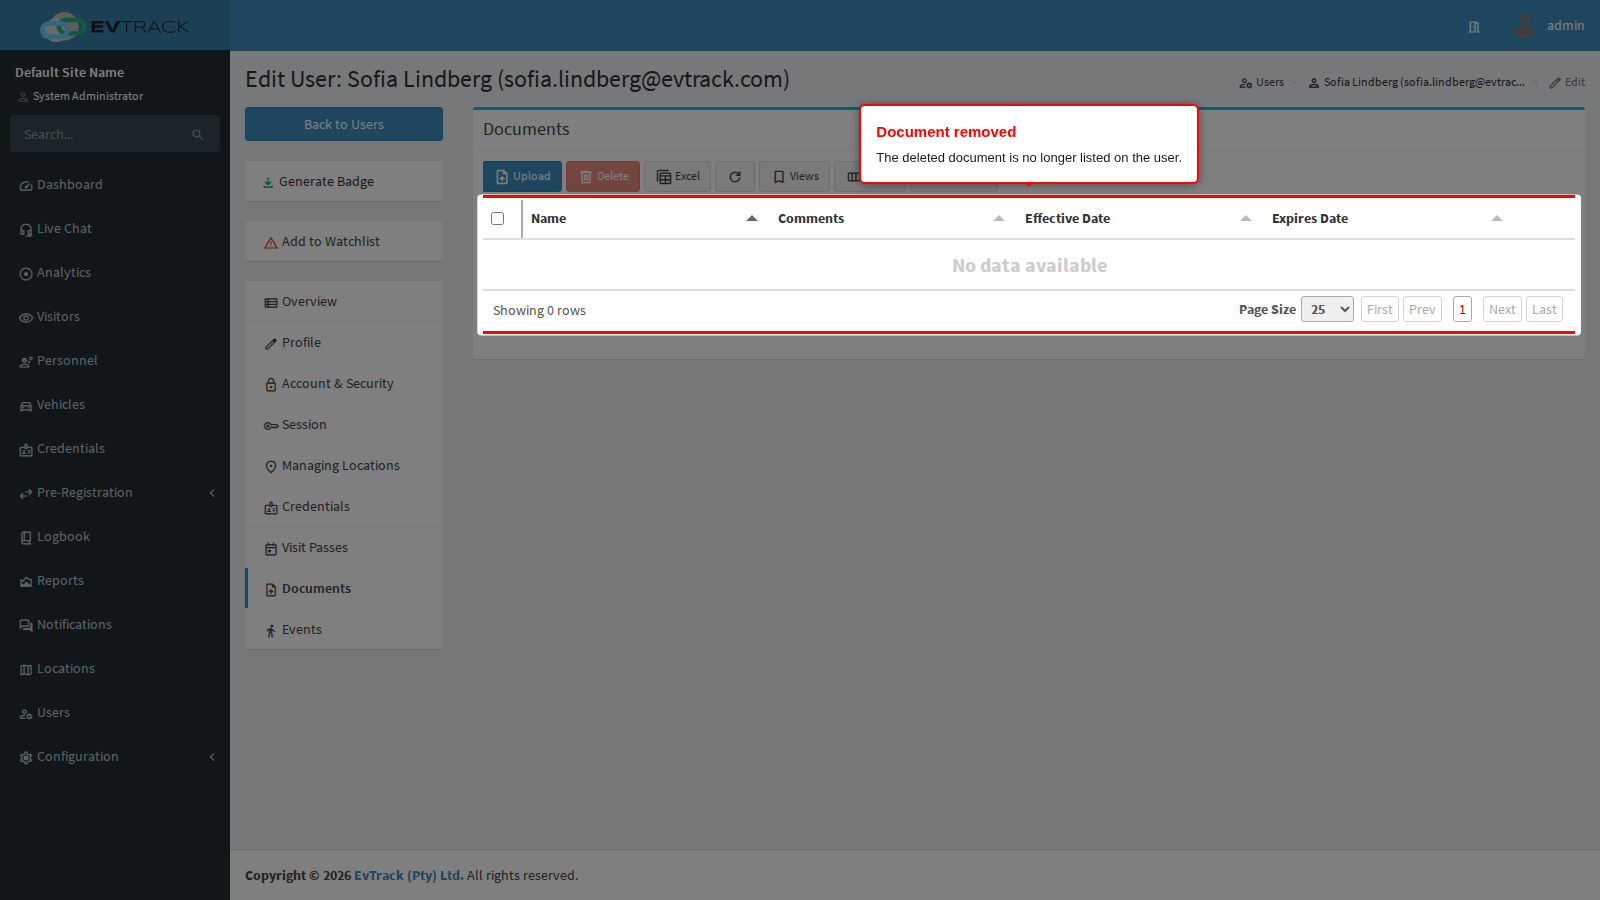
Step 9: The document is removed
The list refreshes and the document is no longer stored on the user.
Notes
- Replacing an outdated document is an upload followed by a deletion: upload the new version first, check that it is listed, then delete the old one.
- A user’s profile photo, uploaded on the Profile tab, is separate from this tab. Use Documents for supporting paperwork that has its own validity dates.
- Download anything you need to keep before deleting the user record itself.
See also
- Documents on Records - the shared Documents panel, plus location and vehicle documents
- Documents on Personnel and Documents on a Visitor
- Site Documents - files that belong to the whole site rather than to one record