EvTrack Visit Relay pushes this system’s visitor invitations to a second EvTrack system over its Web Service API - including the locally issued QR code and PIN, so a pass issued here works at the remote system’s checkpoint unchanged. Every later status change (check-in, check-out, cancellation, no-show and the rest) is pushed too, and a background sync keeps the remote mirror honest if a push is ever missed.
A typical deployment relays from an on-premises system to a cloud system, or between two sites that admit each other’s visitors. The relay is one-way: this system writes to the remote system, never the reverse. To relay in both directions, configure a Visit Relay app on each side.
Prerequisites
- A reachable remote EvTrack system, running the same or a newer product version than this system (older remote versions cannot honour the relayed access codes - see Troubleshooting)
- Administrator access on both systems
- Network access from this system to the remote system over HTTPS
Part 1 - prepare the remote system
Everything in this part happens on the remote system.
Create a dedicated API key
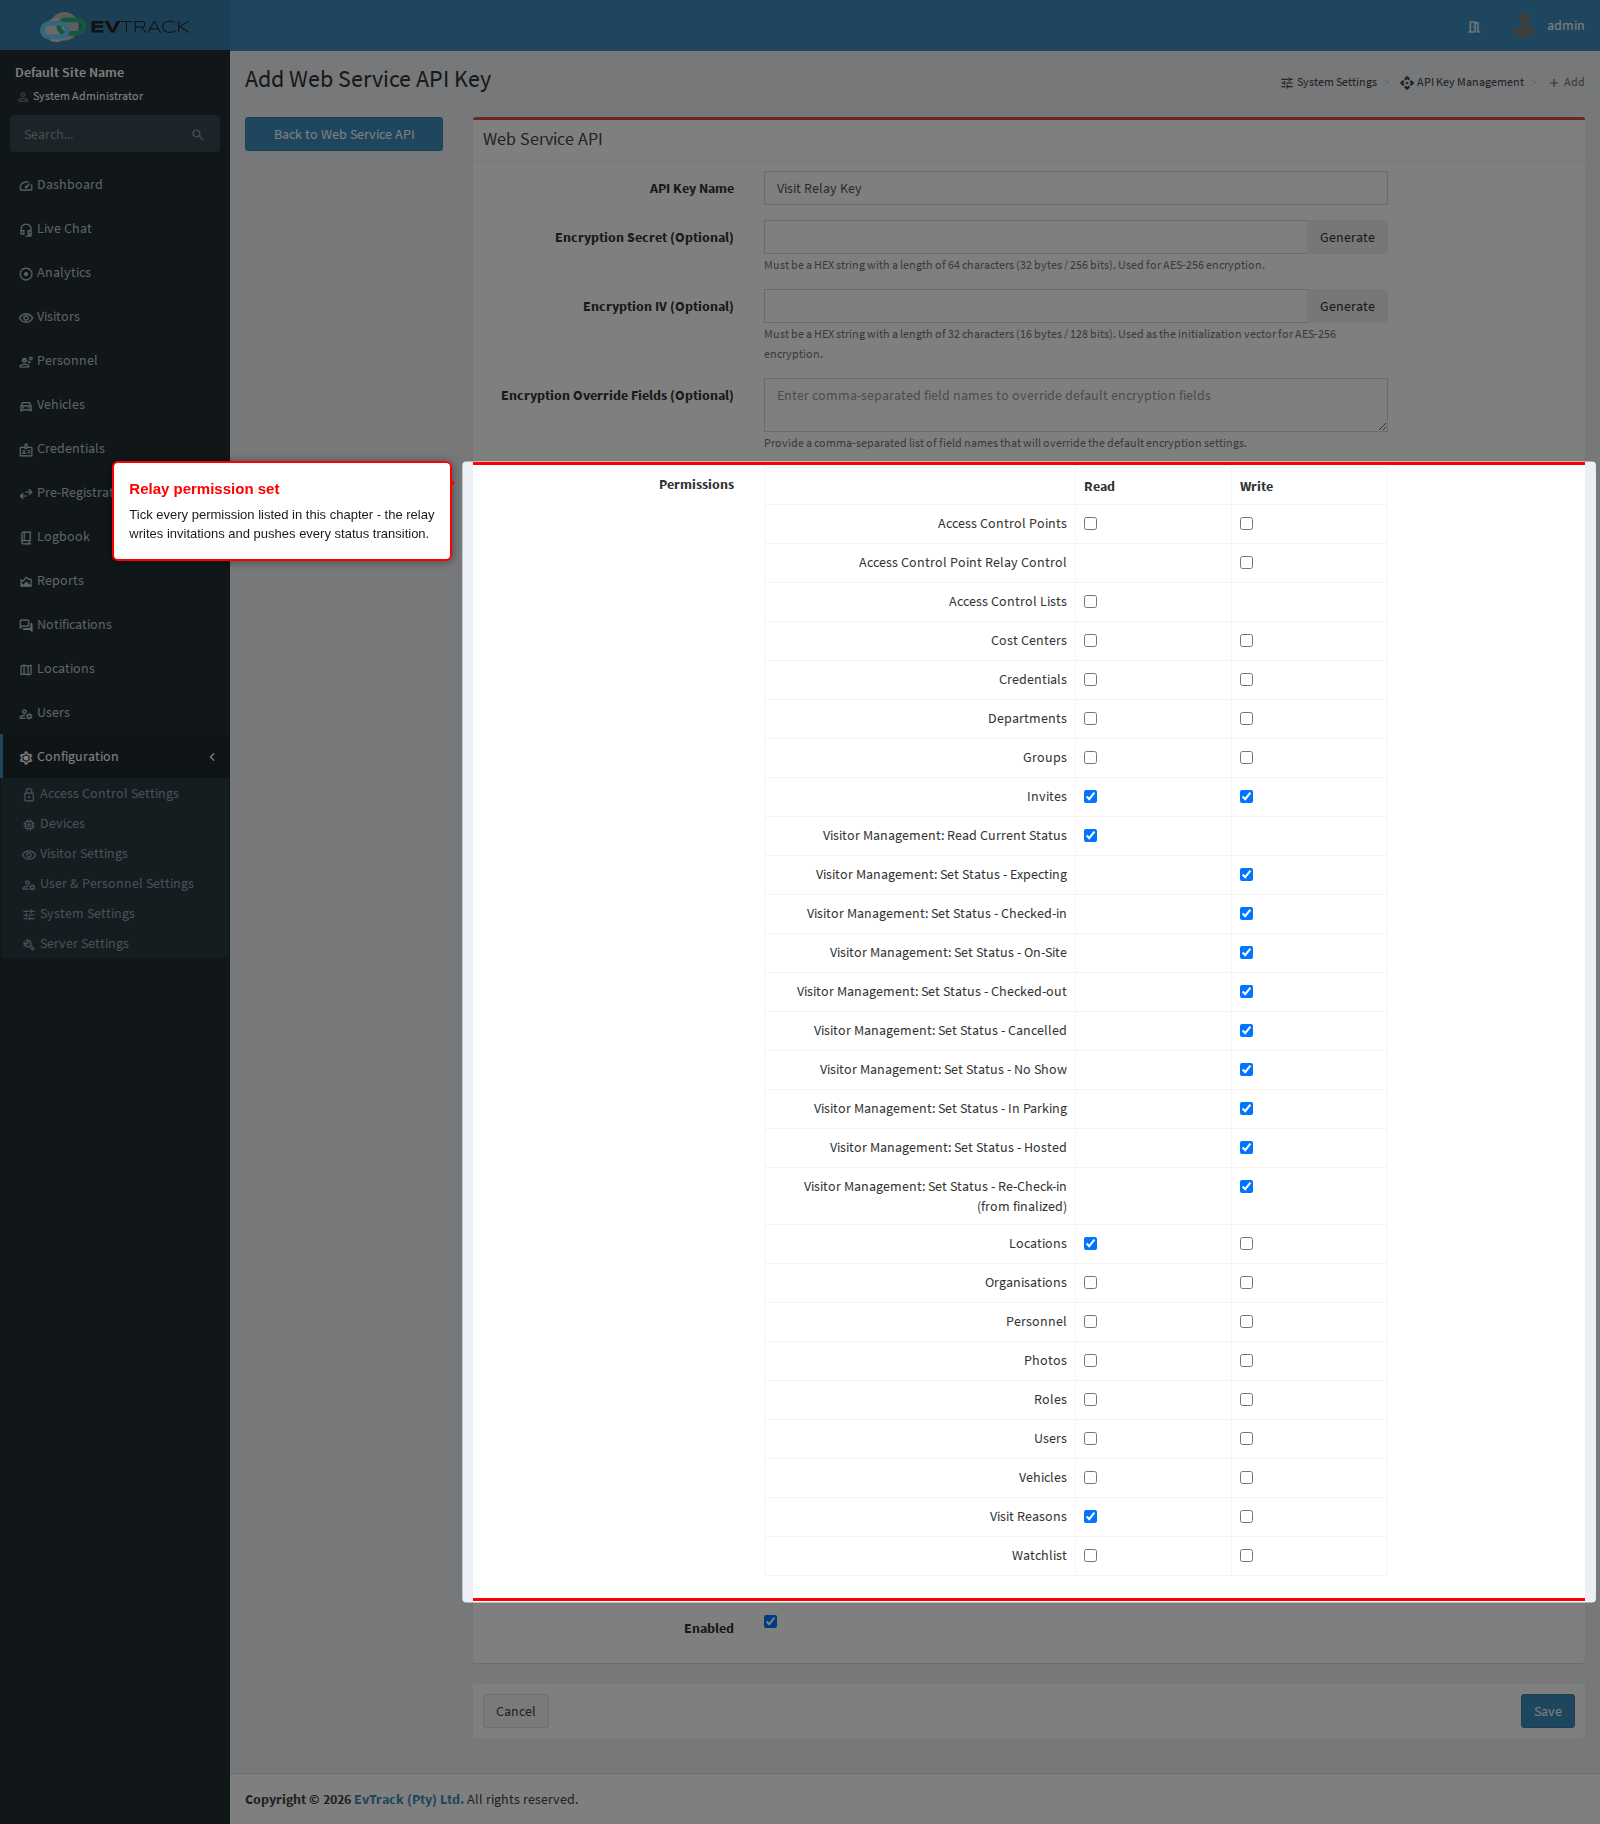
Open Configuration > Web Service API and add a new key. Use one dedicated key per Visit Relay app - do not share it with other integrations. Tick all of the following permissions, plus Enabled:
- Write Invites, Read Invites, Read Invite Status
- Read Locations, Read Visit Reasons
- every Set Status permission: Expecting, Checked-in, On-Site, Checked-out, Cancelled, No Show, In Parking, Hosted, Re-Check-in
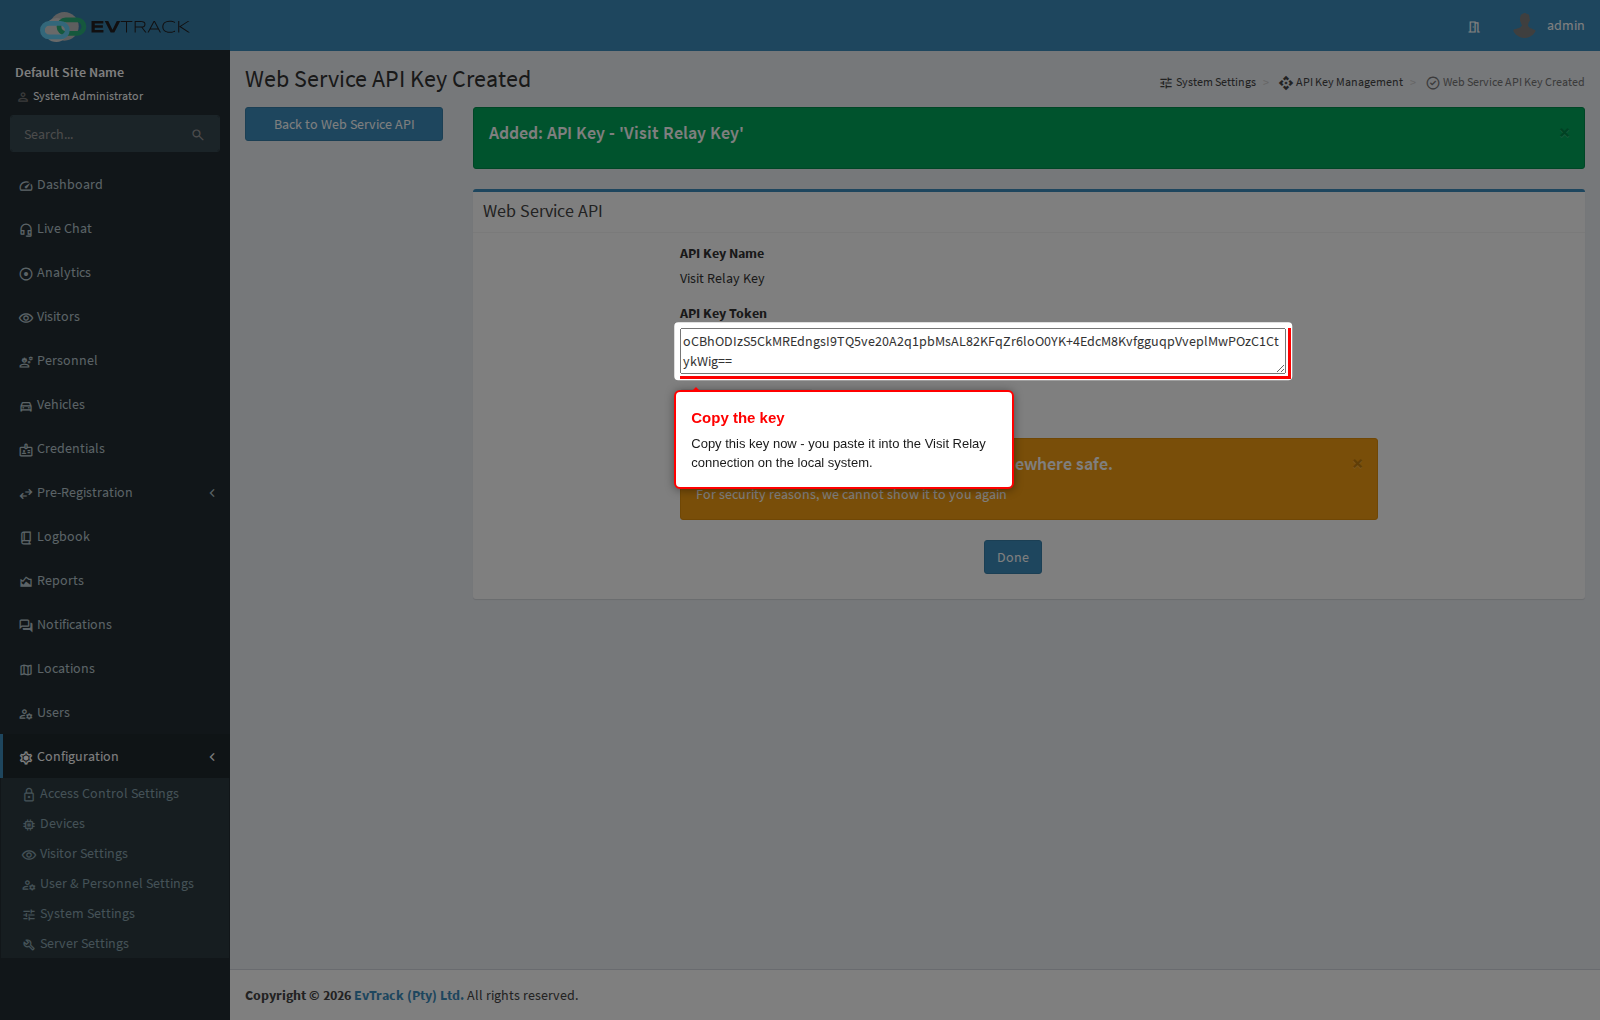
Save the key and copy the generated value - you will paste it into the Visit Relay connection on the local system. The key is shown only on this screen.
Confirm the target location and visit reason
Relayed invitations land at a location and visit reason on the remote system. Make sure the remote system has the location (s) and visit reason (s) you intend to map to - for example a “Cloud Campus” location and a “Deliveries” reason. If they already exist, nothing more is needed here.
Check the fields the remote system requires
A relayed invitation is created on the remote system through its Web Service API, so the remote system’s own rules for API invitations apply to it. Open Configuration > Visitor Settings > Web Service API > Fields on the remote system. Every field ticked there must be present on every relayed invitation, or the remote system refuses it with Missing Field and the visit never appears there.
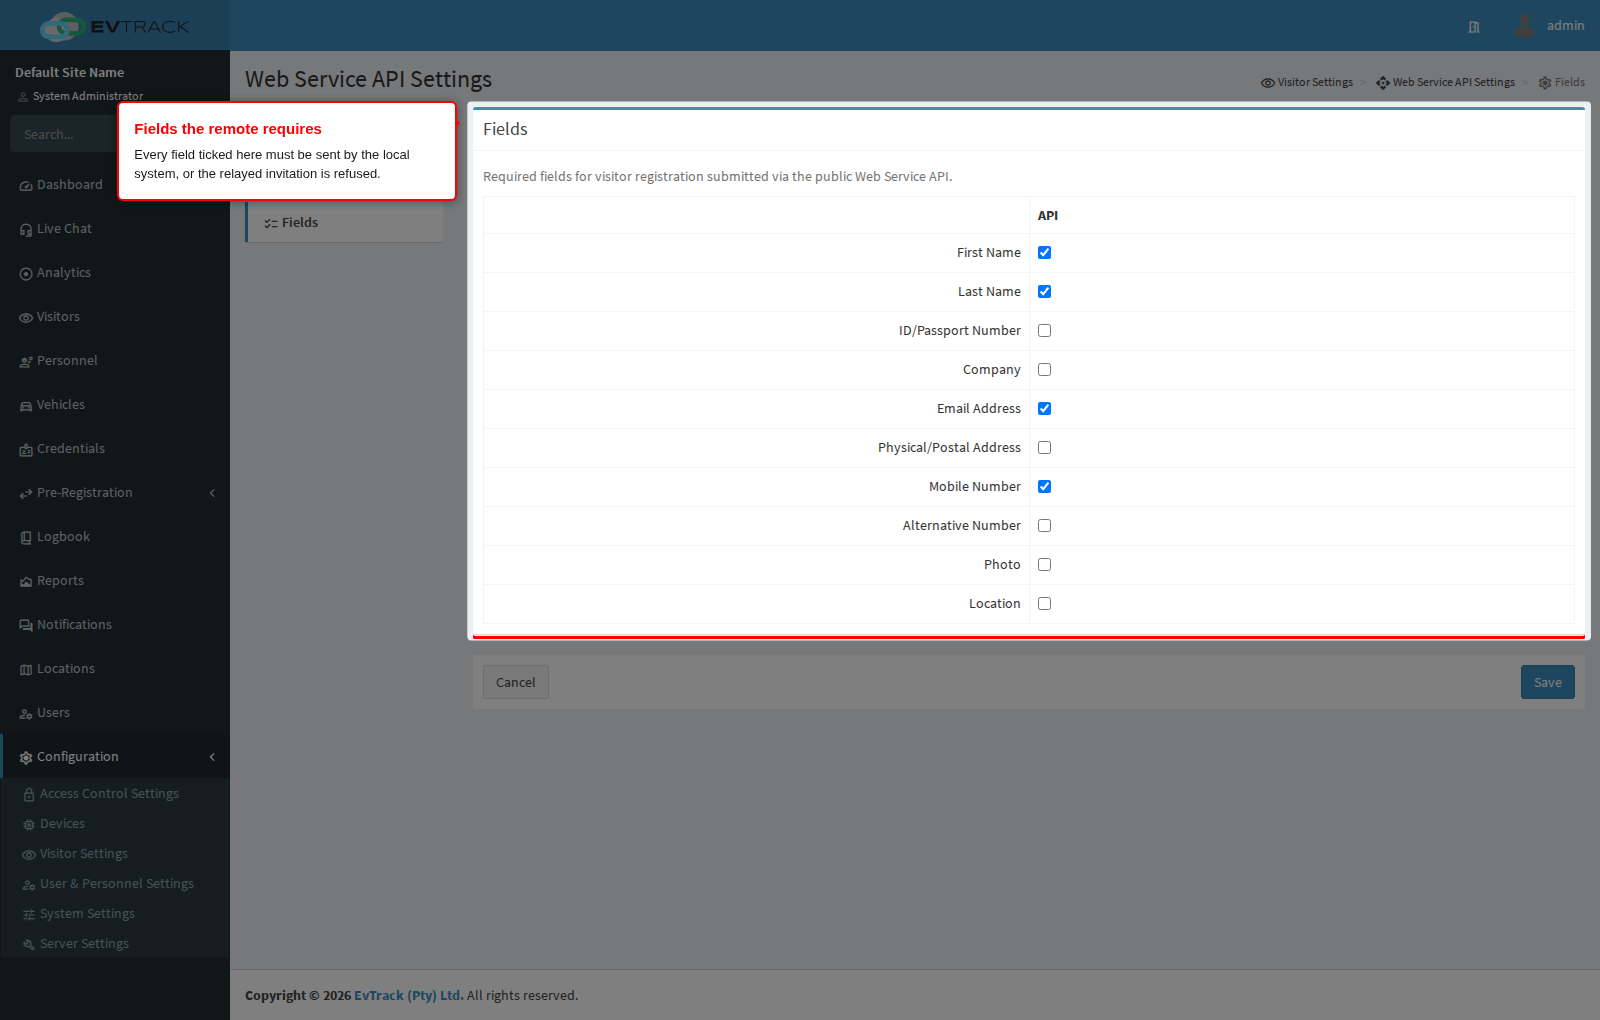
Line the two systems up field by field. For each field the remote system requires, do one of the following:
- Send it from the local system (preferred when the remote checkpoint needs it). Tick the matching box under Visitor fields sent to the remote system in Part 3: Send ID or passport number, Send email address, Send mobile number, Send company or Send visitor photo. The field must also be filled in on the local visit, because an empty value counts as missing.
- Or stop requiring it on the remote system. Untick it on the remote system’s Fields page. Choose this when the remote checkpoint does not need the field, so that personal data does not leave the local system just to satisfy a form rule.
Three fields need particular care:
- First Name and Last Name are always sent, so requiring them is always safe.
- Location: when the remote system requires it, tick Send visit location in Part 3 and make sure every visit resolves to a remote location, either through a mapping row or through the default remote location.
- Physical Address and Alternative Number are never relayed. A remote system that requires either of them refuses every relayed invitation, whatever the local system sends, so untick both on the remote system.
Part 2 - connect the local system
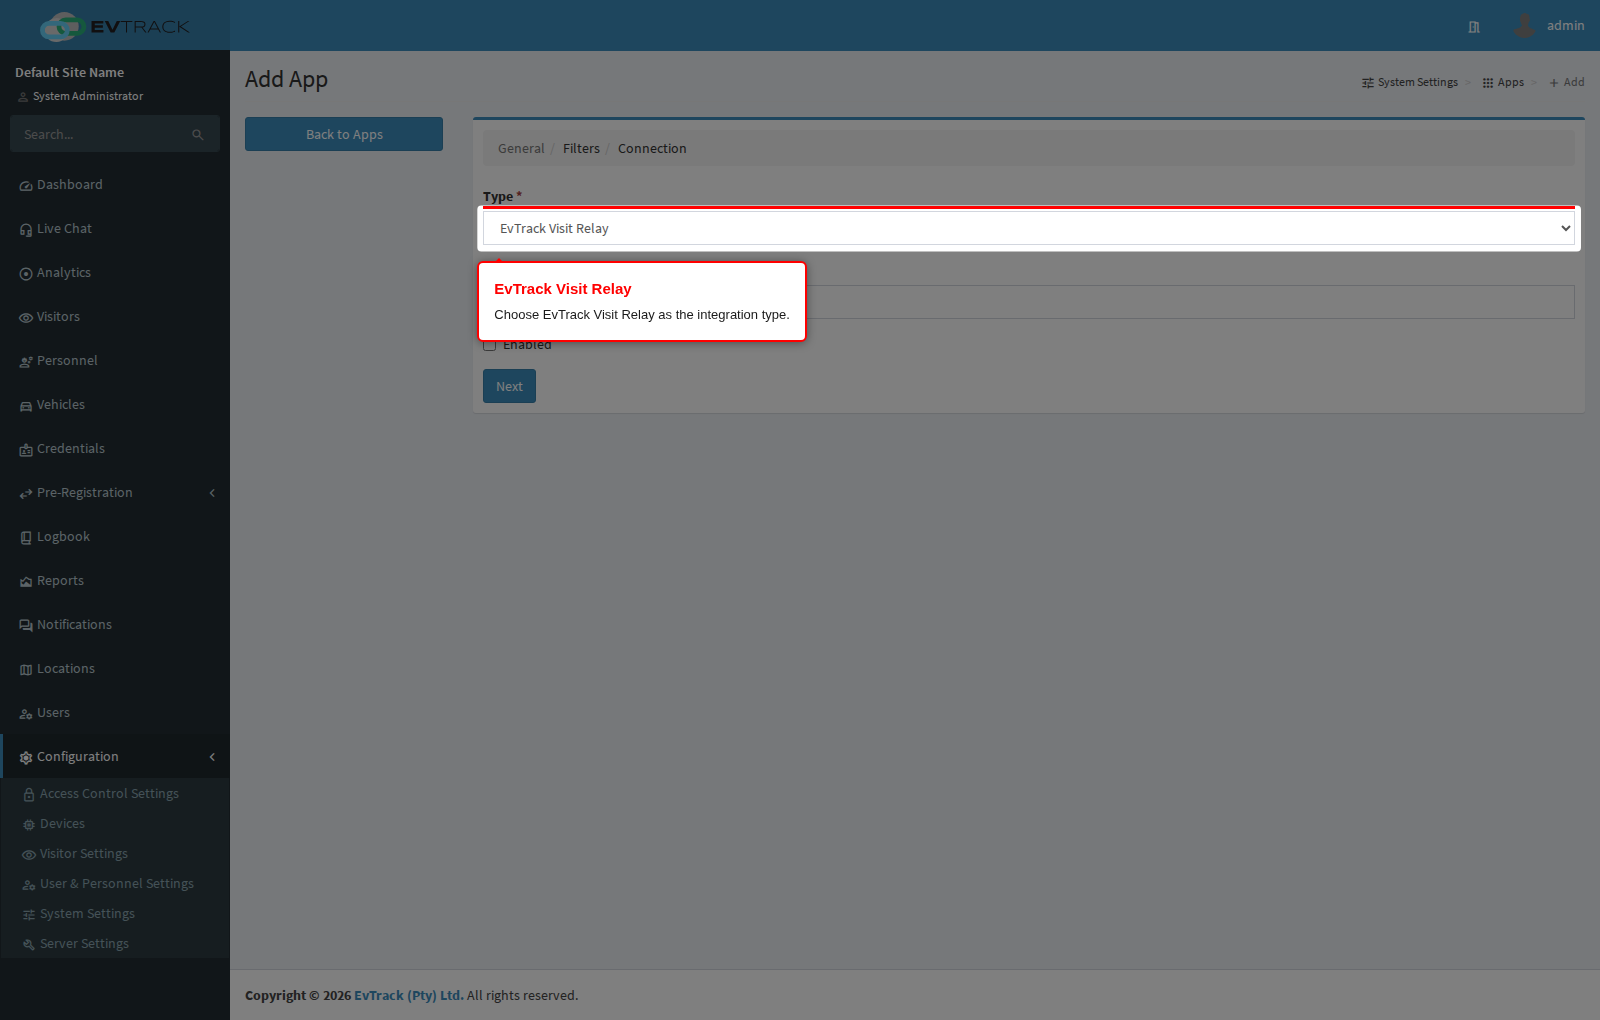
On this system, open Configuration > System Settings > Apps, click Add, and choose EvTrack Visit Relay as the integration type. Give the integration a name. You can leave Enabled off until the configuration is finished.
On the Connection step, enter:
- Remote EvTrack Base URL - the root URL of the remote system, for example
https://cloud.example.com. No path after the host. - Remote API Key - the key you copied in Part 1.
- TLS Certificate Verification - keep Strict for any production remote. Choose Do not verify only for a remote with a self-signed certificate, and understand that it removes protection against interception.
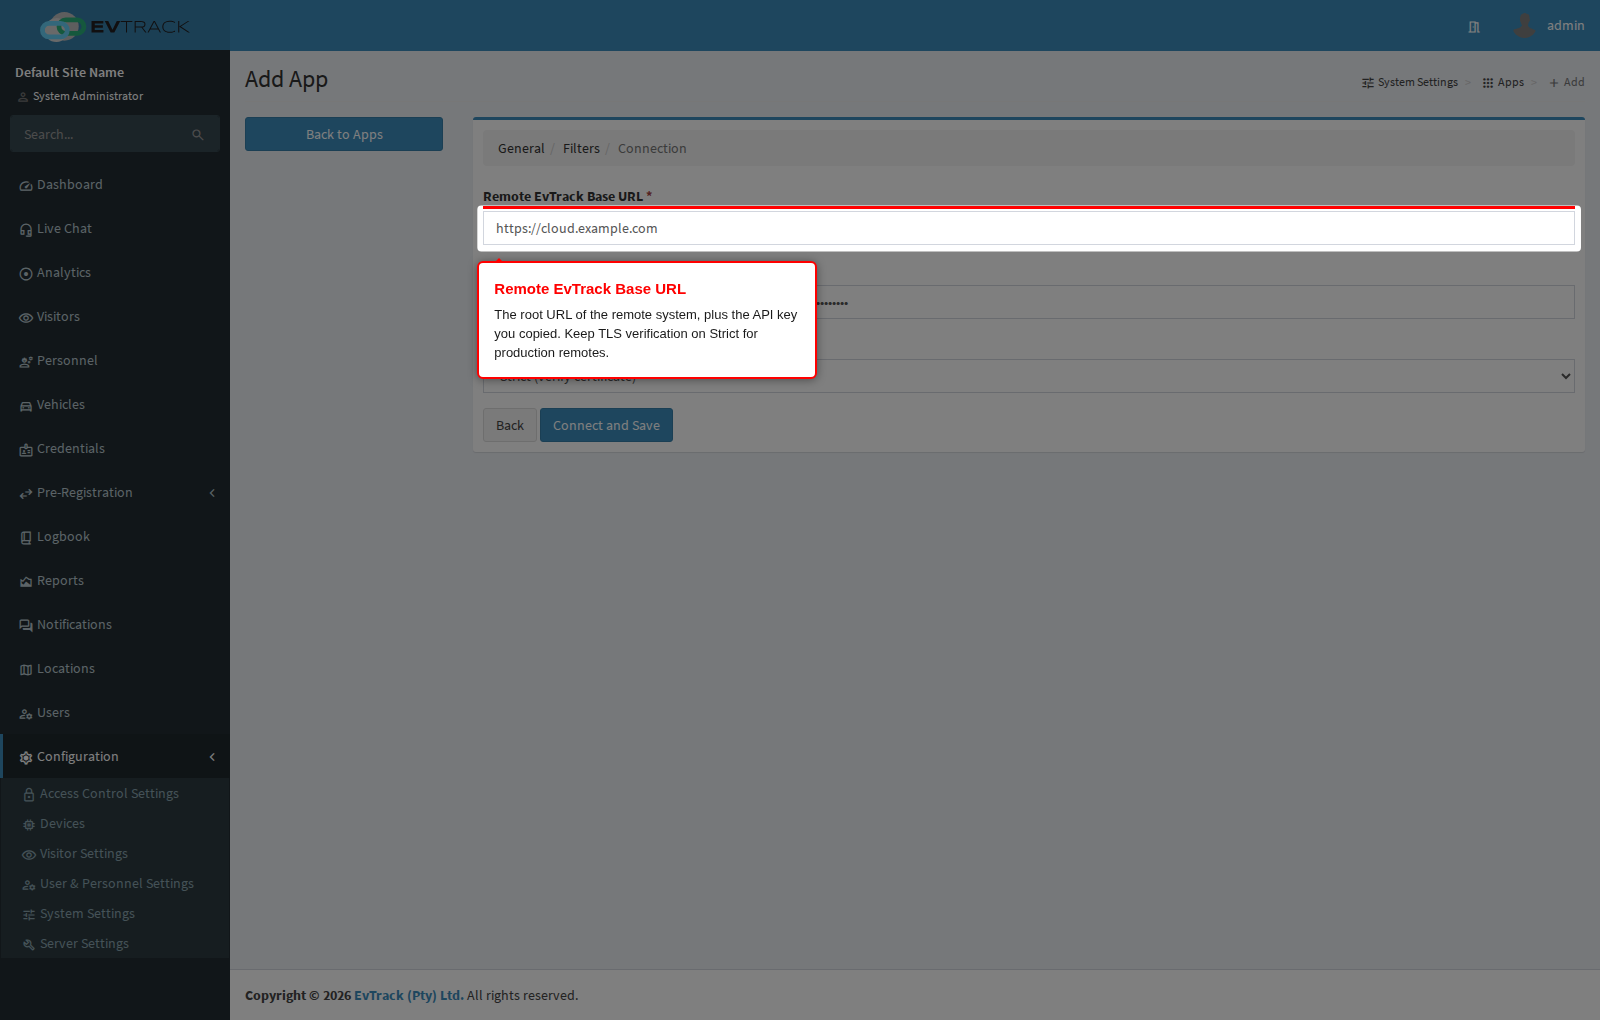
Click Connect and Save. Saving verifies the connection: it checks the URL, authenticates with the key, and fetches the remote system’s locations and visit reasons for the next part. If verification fails, see Troubleshooting.
Server operators who want a hard guarantee that relays can only target external systems can set the configuration property EVTRACK_APPS_DENY_PRIVATE_TARGETS=true on this system - connection verification then refuses private and local network addresses.
Part 3 - configure what is relayed
Open the saved integration and go to its Settings section.
Location and visit reason mapping
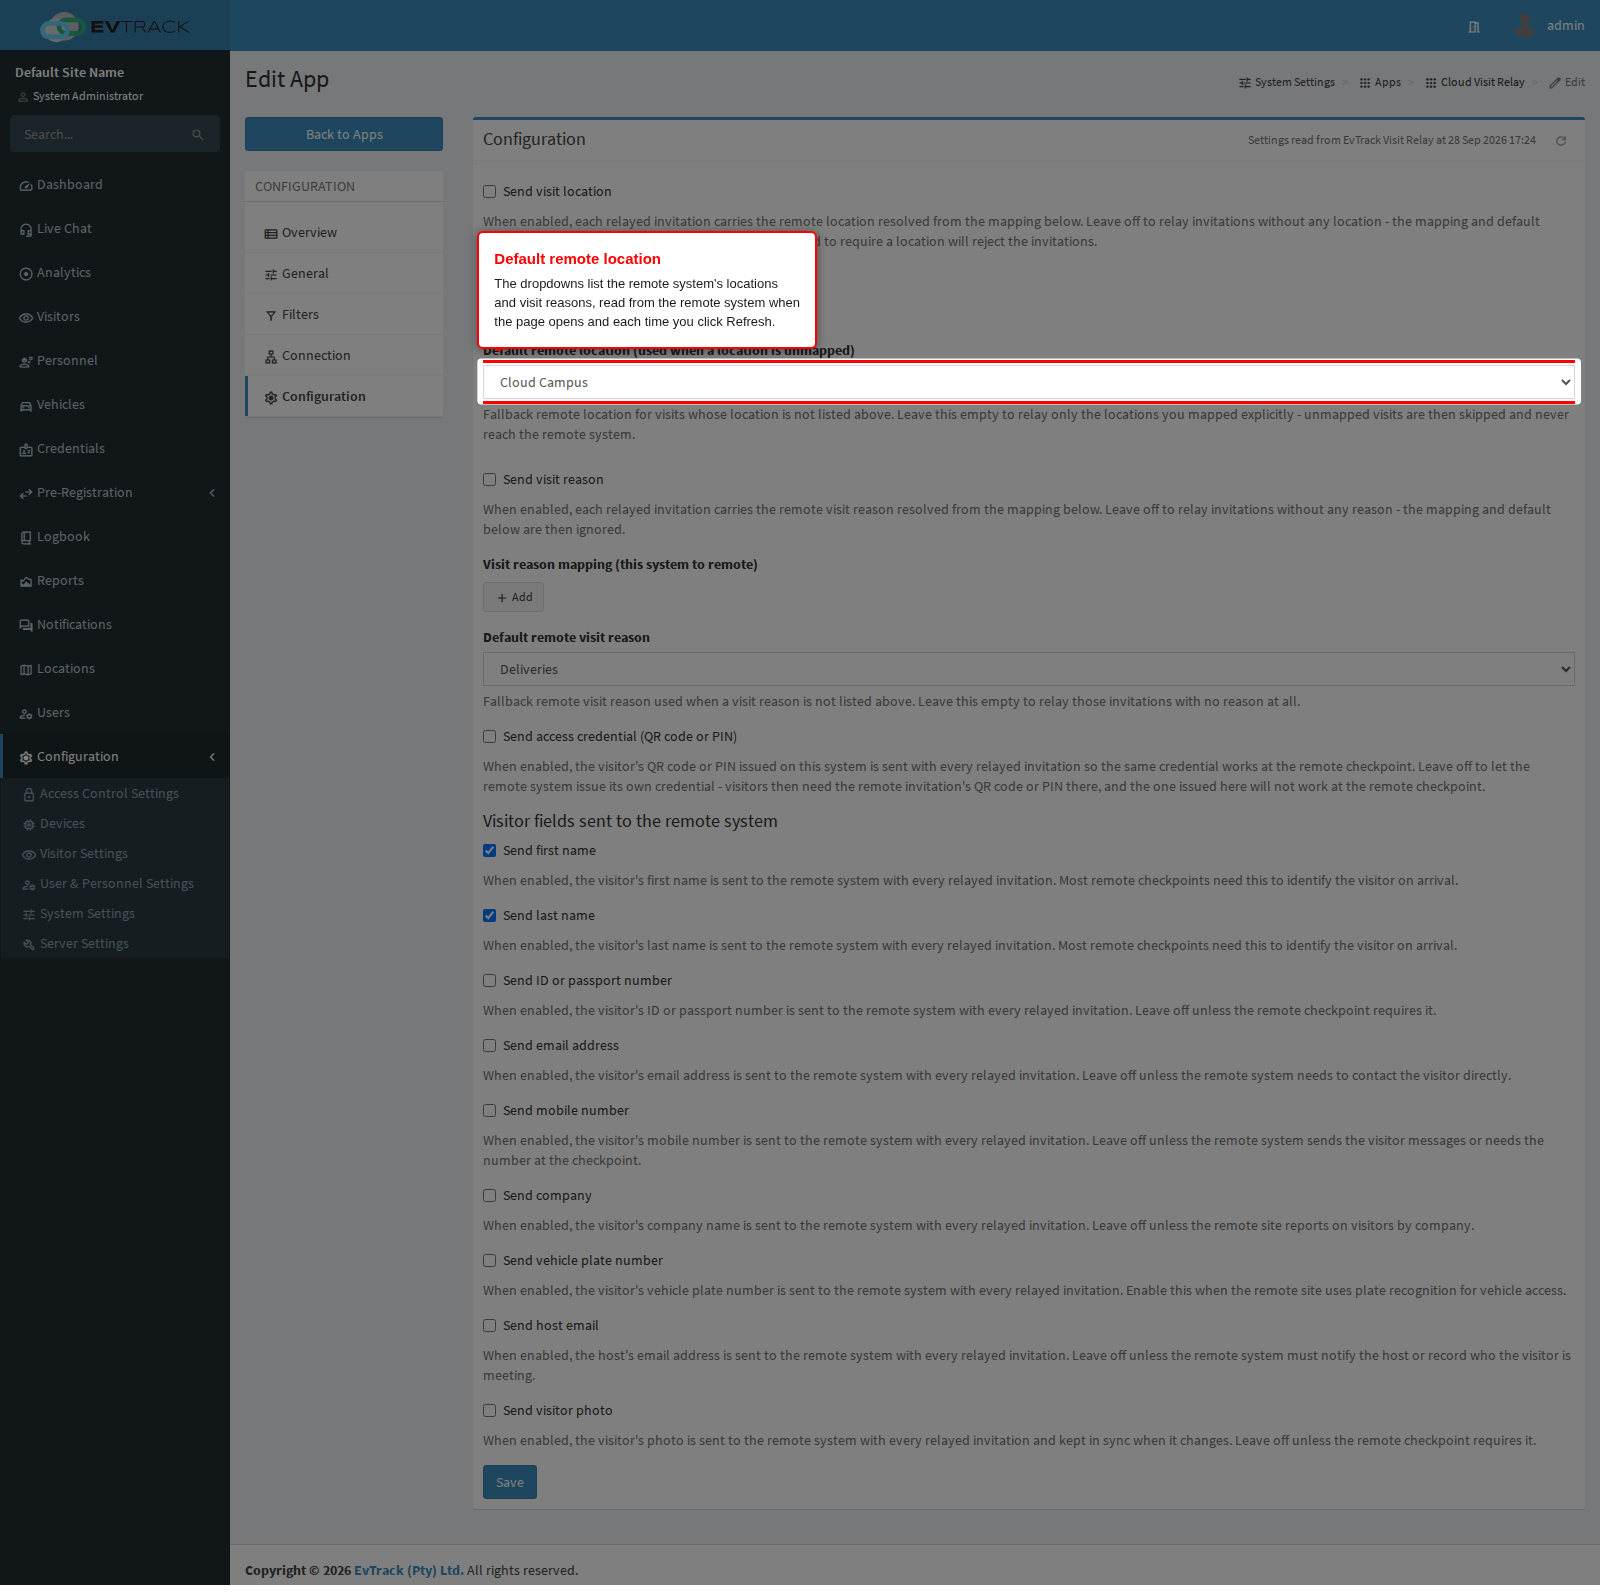
Sending the visit location and the visit reason are each an explicit opt-in: the Send visit location and Send visit reason checkboxes are off by default, and while a checkbox is off that field never leaves this system and its mapping rows and default below it are ignored. With location sending off, invitations are still relayed - just without a location; note that a remote system configured to require a location will reject them.
With sending enabled, each mapping row pairs a location name on this system with a location on the remote system, and likewise for visit reasons - the remote dropdowns are read from the remote system when the page opens (for an enabled integration) and each time you click Refresh in the Settings section. Visits at an unmapped location fall back to the default remote location; if no default is set either, those visits are skipped and are not relayed. The default remote visit reason works the same way, except an unmapped reason without a default simply relays the invitation with no reason.
Access credential
The Send access credential (QR code or PIN) checkbox is also off by default. Tick it to send the QR code or PIN issued on this system with every relayed invitation, so a visitor can present the same credential at the remote checkpoint. Leave it off to let the remote system issue its own credential - visitors then need the remote invitation’s QR code or PIN there, and the one issued here will not work at the remote checkpoint.
Visitor fields sent to the remote system
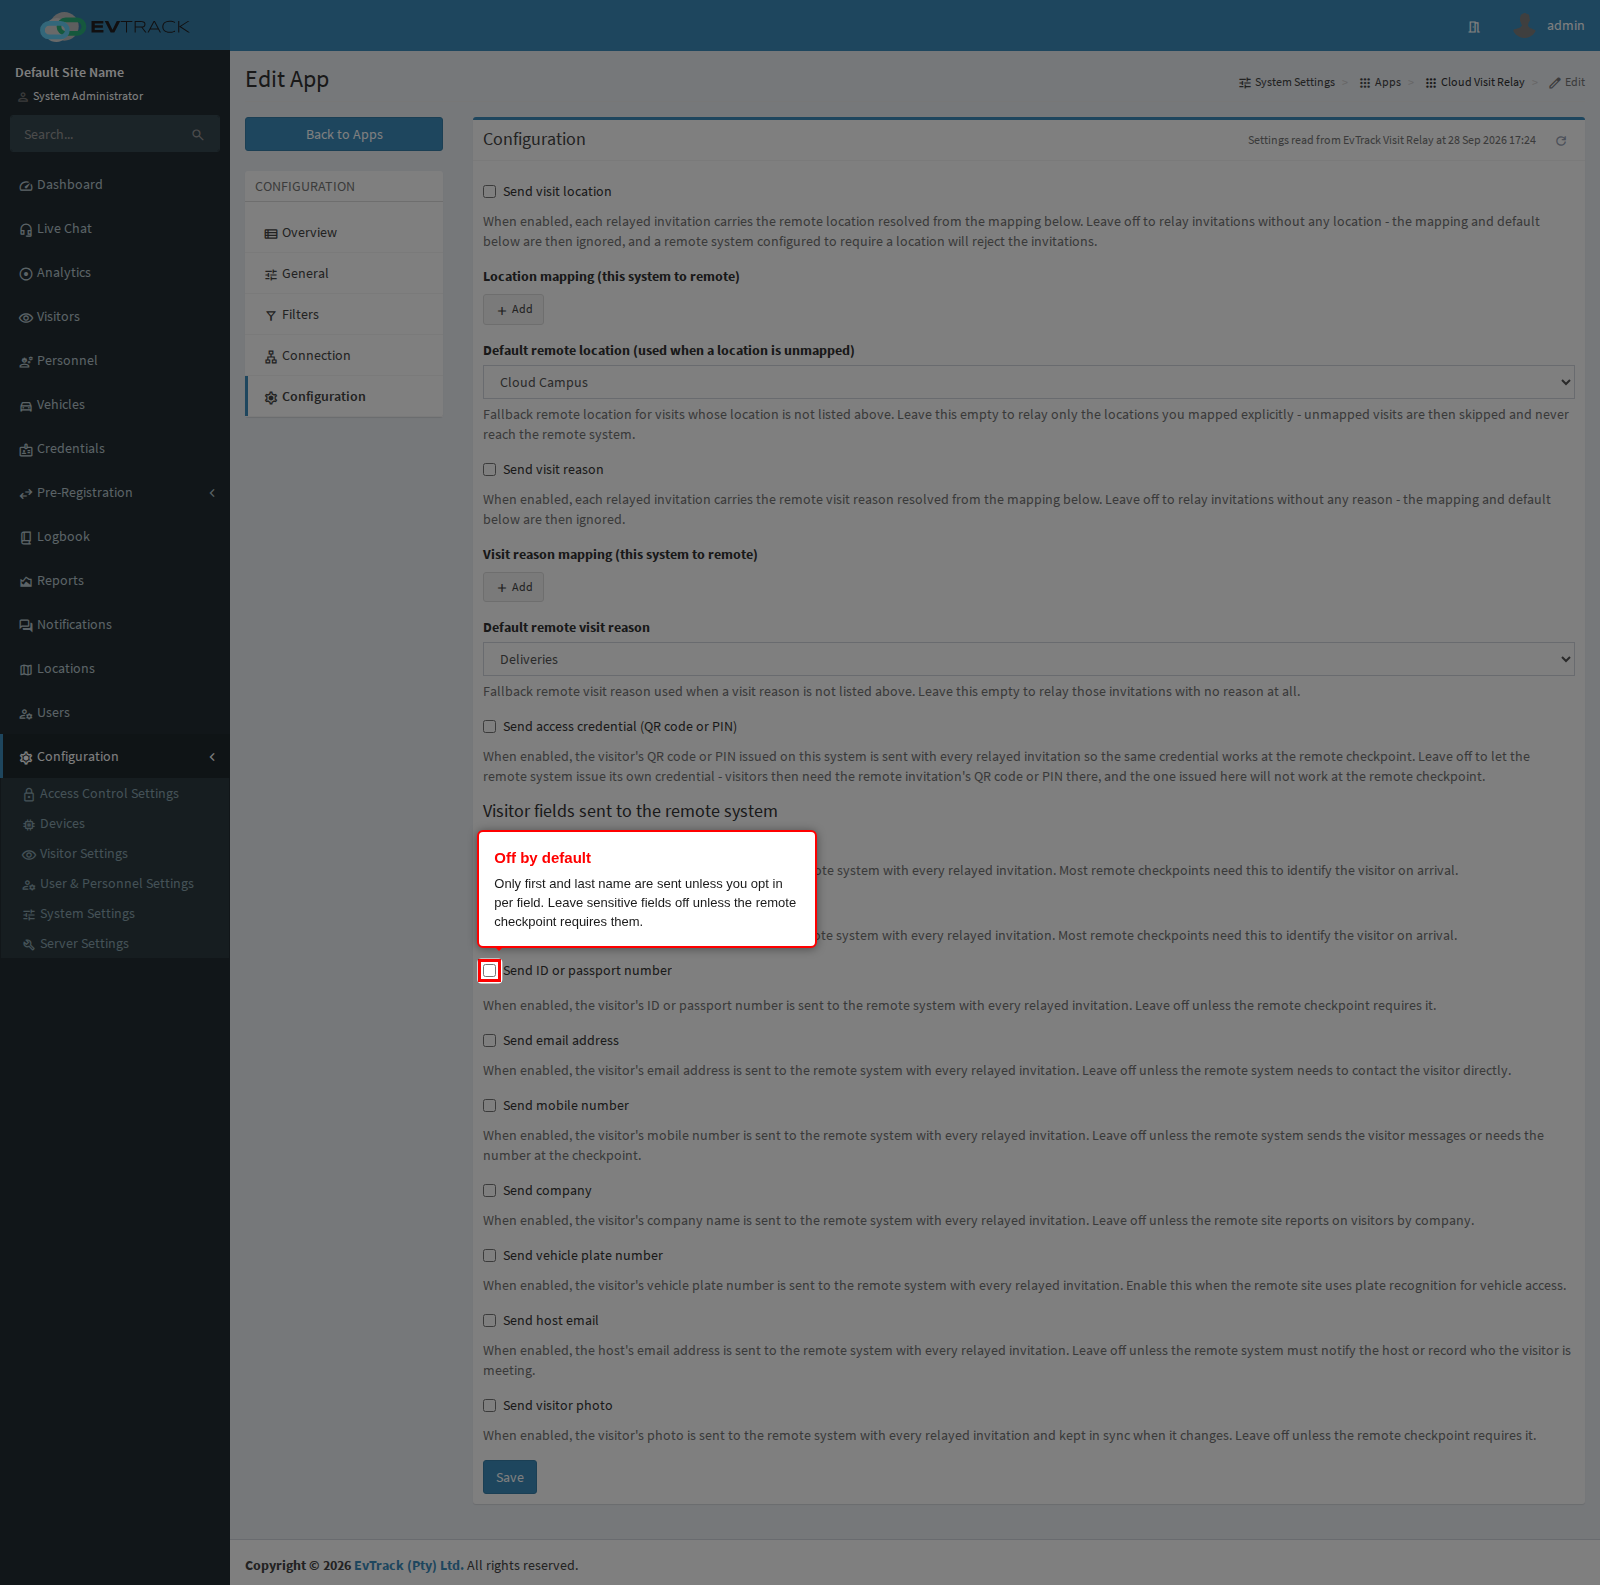
By default only the visitor’s first and last name are sent - enough for the remote system to create the invitation. Every other field (ID or passport number, email address, mobile number, company, vehicle plate, host email) is off by default and is only transmitted if you tick it. Send the minimum the remote checkpoint actually needs: everything you enable here leaves this system on every relayed invitation.
Tick at least the fields the remote system requires (see Check the fields the remote system requires in Part 1), or the remote system refuses the invitations.
Visitor photo
The visitor’s photo follows the same opt-in rule as the fields above, on its own Send visitor photo checkbox: off by default. Tick it only when the remote checkpoint needs the photo, for example to show it on a guard screen or print it on a badge.
- What is sent. The photo already on file for the visitor on this system - the same image shown on this system’s visitor profile and badge.
- The 1MB cap. A photo larger than 1MB (as the encoded value sent over the API) is skipped for that relay - the rest of the invitation is still relayed, just without a photo. Nothing is resized or recompressed to fit; if your visitor photos are consistently oversized, reduce the capture resolution on this system rather than relying on the relay to shrink them.
- Kept in sync automatically. A photo added or changed after the invitation was first relayed is picked up the same way any other change is: by the automatic status pushes and the periodic reconcile described under Ongoing operations below. You do not need to re-save the invitation for a photo update to reach the remote system.
Save the Settings section.
Part 4 - verify and operate
- Enable the integration (General section, Enabled, save).
- Create a test invitation on this system for a mapped location.
- On the remote system, the invitation appears in the visitor list within a few seconds. With Send access credential enabled it carries the same access code and PIN issued here - scan the local pass at the remote checkpoint to confirm end to end. With it off, verify with the remote invitation’s own credential instead.
- Check the visitor in and out on this system and confirm the status follows on the remote system.
Ongoing operations
- Status pushes are automatic. Every lifecycle transition on this system is pushed as it happens; a temporarily unreachable remote is retried.
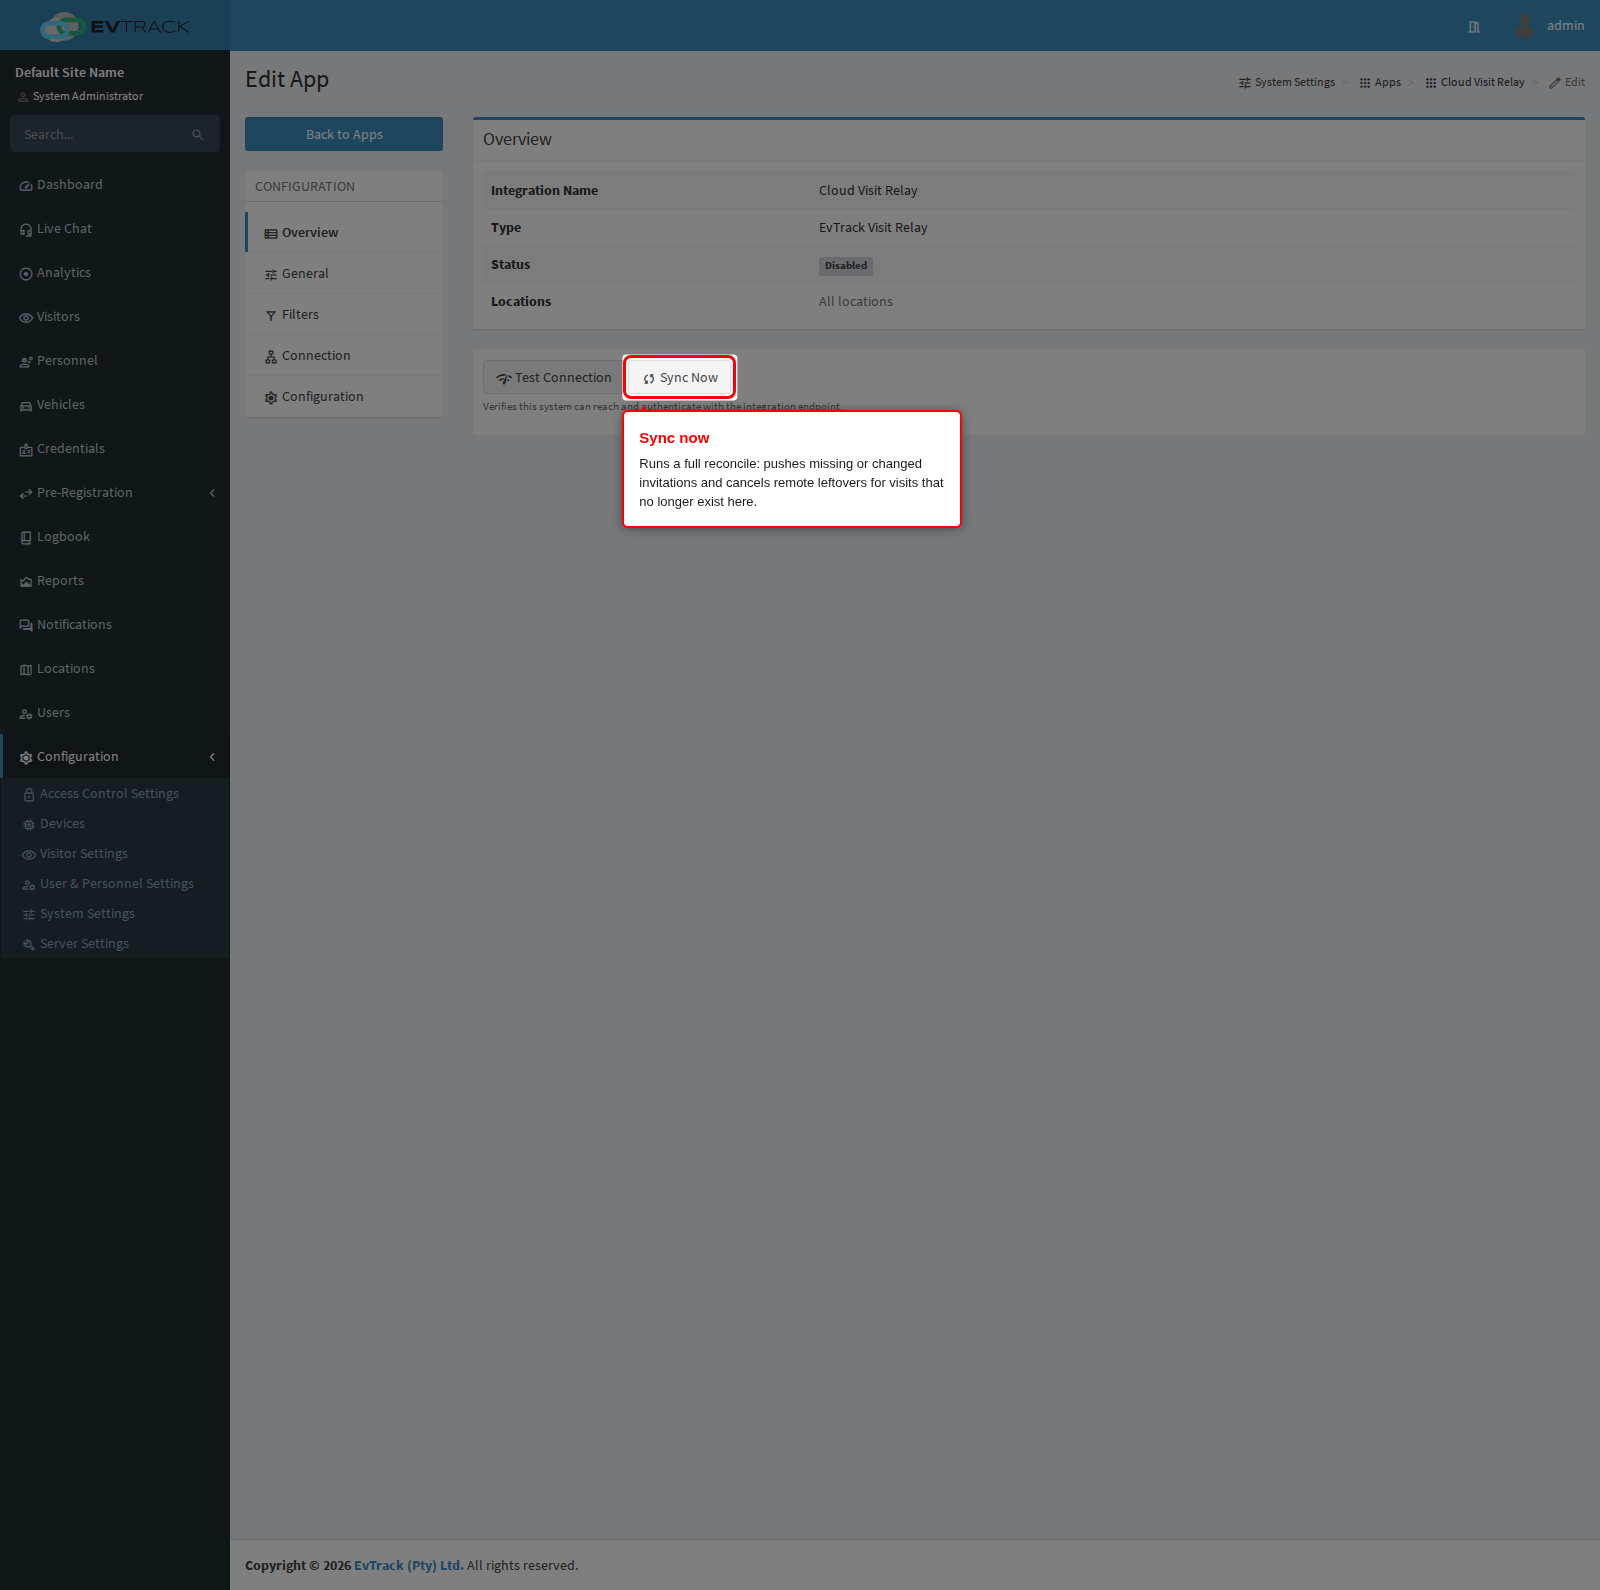
- Sync now (on the integration’s Overview section) runs a full reconcile at any time: it pushes invitations the remote is missing, updates ones whose validity window or access code drifted, and cancels remote invitations whose visits no longer exist on this system. The same reconcile also runs automatically to heal missed pushes.
- Reading the sync result. A sync reports failure only when the remote was unreachable or returned transient errors - it will retry. Invitations the remote permanently rejected (for example, invalid data for the remote’s validation rules) do not fail the sync; they are counted in the sync summary in the server log. If relayed invitations are missing on the remote despite green syncs, check the log summary for a non-zero permanent-rejection count.
- Upgrades: remote first. When upgrading a relay pair, upgrade the remote system before the local one. A newer local system relaying to an older remote fails loudly rather than issuing passes that would not scan (see Troubleshooting).
Troubleshooting
| Symptom | Likely cause and fix |
|---|---|
| Connection verification fails with an incomplete-connection message | Base URL or API key missing, or the URL has a path after the host. Enter the root URL only, for example https://cloud.example.com. |
| Connection verification fails against a valid URL | The remote key is disabled or missing a read permission - recreate it with the full permission set from Part 1. With Strict TLS, the remote’s certificate must be valid for its hostname. If EVTRACK_APPS_DENY_PRIVATE_TARGETS is set, private and local addresses are refused by design. |
| Deliveries fail with “Remote did not honour the predefined access code” (or the same for the PIN) | Occurs only with Send access credential enabled: the remote system runs an older product version that ignores relayed codes. Upgrade the remote system - this error is deliberate: without it, visitors would arrive with passes the remote checkpoint cannot scan. |
| Relayed invitations arrive on the remote system with no location or visit reason | Send visit location / Send visit reason are off (the default). Tick them in Part 3 - the mapping rows and defaults only apply while sending is enabled. |
| Some visits never appear on the remote system | Their location is unmapped and no default remote location is set - those visits are skipped. Add a mapping or a default, then run Sync now. Also check the sync summary for permanent rejections. |
| A relayed PIN does not work at the remote checkpoint | The remote system’s visitor credential type does not include PIN entry - the relayed PIN is stored but nothing at that checkpoint reads PINs. Enable a PIN-capable visitor credential type on the remote system, or rely on the QR code. |
| The same visit appears twice on the remote system | Normally prevented: a retried or repeated push of the same visit is recognised by its reference and updated instead of duplicated. If you see duplicates after heavy network trouble, run Sync now - the reconcile converges the mirror. |
| The remote visitor record is missing email, mobile or ID number | Those fields are off by default. Opt in under Visitor fields sent to the remote system (Part 3) - deliberately, they are personal data leaving this system. |
| Visits never appear on the remote system, and the event log shows Integration App Error with Missing Field | The remote system requires a field the local system does not send. The message names the field. Tick the matching send option in Part 3, or untick the field on the remote system’s Web Service API > Fields page (see Part 1). Physical Address and Alternative Number are never relayed, so they must not be required on the remote system. Sync now does not flag these refusals, so check the event log after changing the settings. |