The Document Scanning panel of the kiosk settings decides whether the FrontDesk kiosk reads a passport, ID card or driving licence with its camera, which reader it uses, and what it keeps or refuses afterwards. The settings apply to every kiosk.
Before you start:
- You can edit visitor settings.
- You know which documents your visitors arrive with: passports only, or national ID cards and driving licences as well. That decides which reader to switch on.
Step 1: Open Document Scanning
Go to Configuration > Visitor Settings, click the Kiosk tile (the Kiosk Settings page gives the overview), and choose Document Scanning in the kiosk menu on the left.
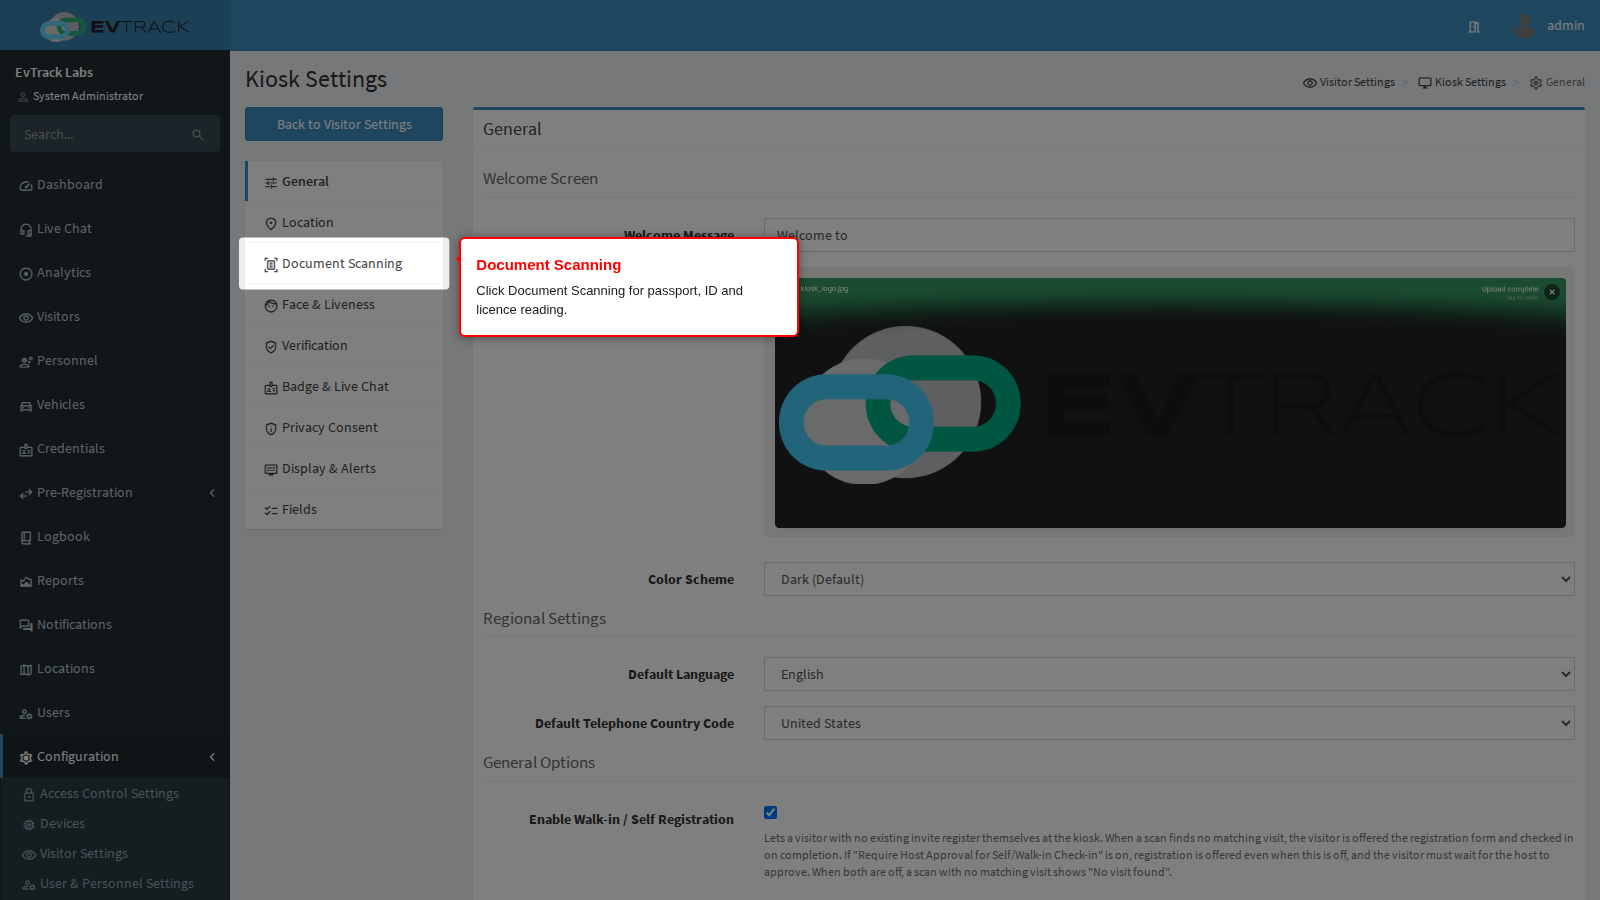
Check-in with ID/Passport Scanning
On by default. With it on, a visitor who touches the check-in or check-out button on the welcome screen first sees a choice of ways to identify themselves: the ID Card or Passport tile, a QR Code tile and an OTP tile for a PIN. Each tile appears only when its own setting is on, see Verification. A visitor who arrives with a QR code or PIN but has not yet scanned a document is offered the same choice before the registration form.
With it off, the kiosk skips the choice. It goes straight to the QR code screen, or to the PIN screen when only the PIN is on, or to the registration form.
The choice also needs Enable OCR Support (Passport/MRZ), below, or a 2D barcode scanner attached to the kiosk. With neither, the kiosk skips the choice even when this switch is on.
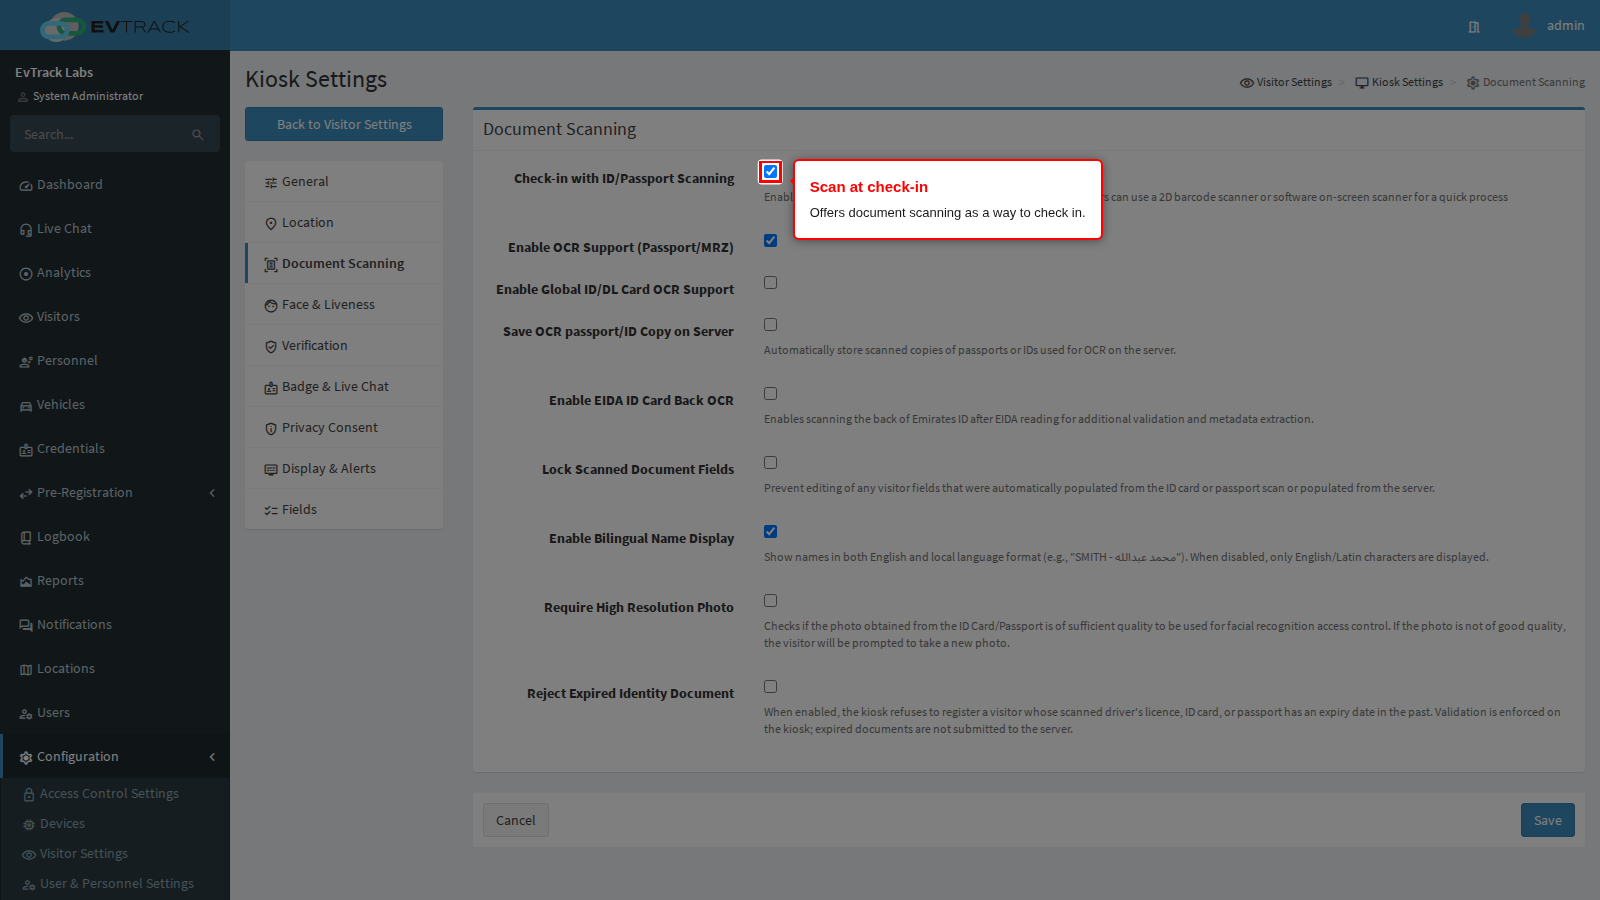
Enable OCR Support (Passport/MRZ)
On by default. It puts the ID Card or Passport tile on the choice screen. The visitor picks it, the kiosk opens a full-screen camera view that names the document type as it recognises it, then reads the details off the document and fills the registration form. There is always an escape route on that screen at check-in, I do not have a ID/Passport, which drops the visitor into the ordinary typed form, so nobody is trapped by a document the kiosk cannot read.
Three things decide whether it does anything:
- It needs Check-in with ID/Passport Scanning on as well. With document scanning off, the choice screen never appears, whatever this switch says. Turn both on.
- Enforce Same Document for Pre-Registration and Check-in narrows it. With that on, the document tile is offered on the way in only to visitors who pre-registered, and the escape button is removed. A walk-in gets no document tile at all. Check-out is unaffected. The setting is on the Face and Liveness panel, see Face and Liveness.
- Attached document hardware wins. If the kiosk has a dedicated document scanner plugged into it, that scanner reads the document and the reading options below make no difference. Only kiosks reading with their own camera are affected by Enable Global ID/DL Card OCR Support.
The camera reading is done on the tablet itself, so it does not depend on the network. Whatever a read supplies is used by Automatic Form Population, which has its own setting on the General panel.
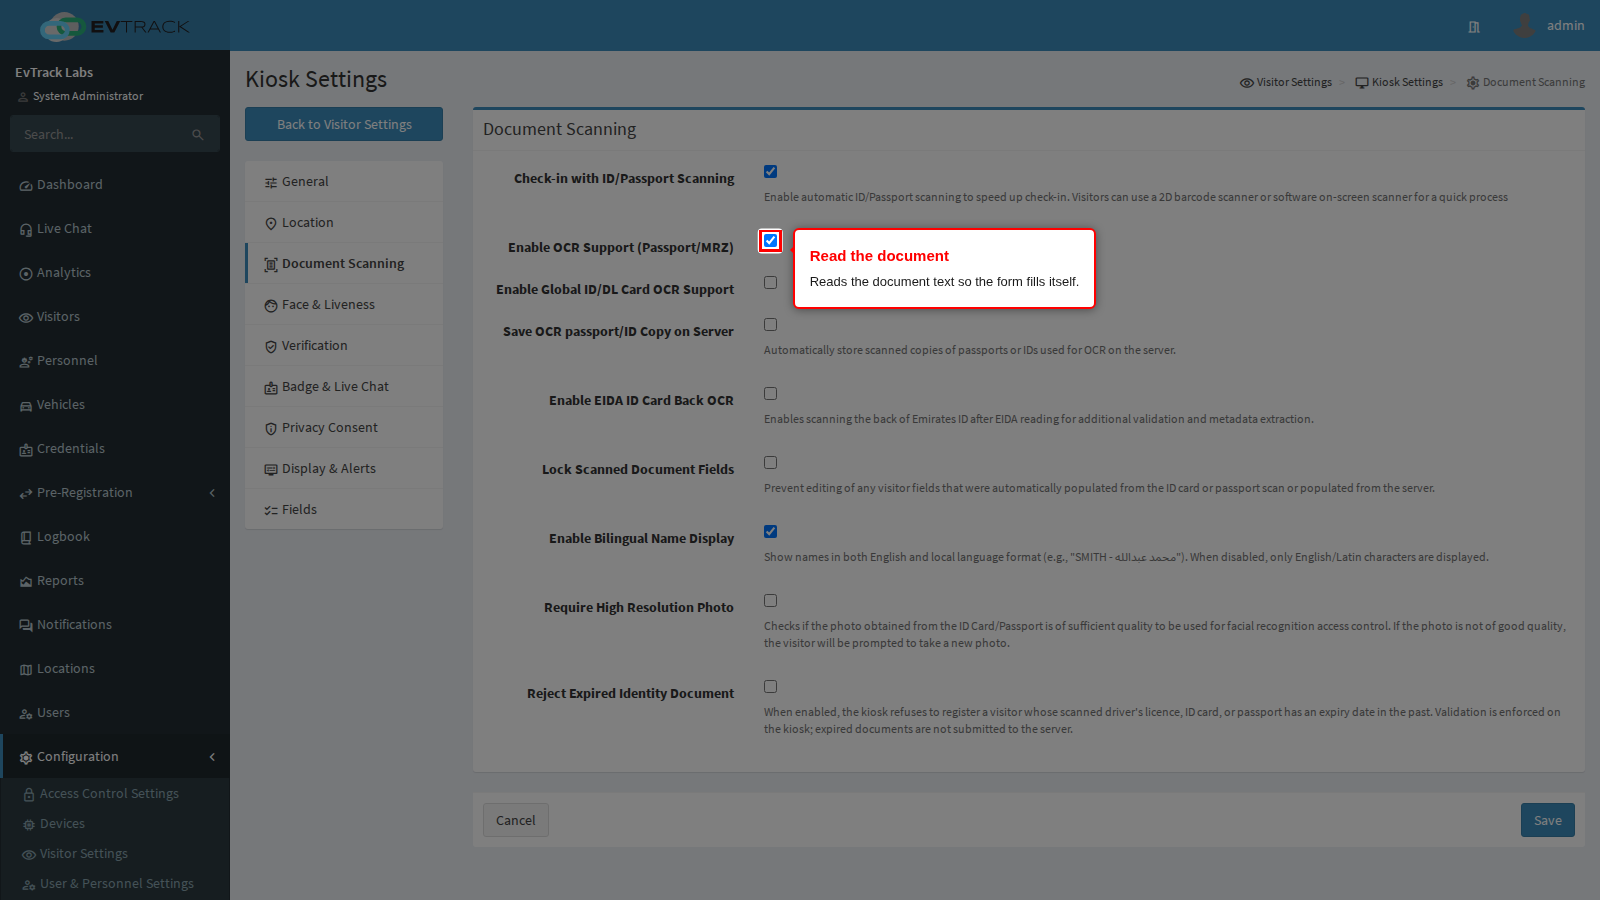
Enable Global ID/DL Card OCR Support
Off by default. This is the switch directly below Enable OCR Support (Passport/MRZ), and it swaps the built-in camera reader for a wider one. The built-in reader is aimed at passports and the machine-readable strip at the bottom of them. The global reader adds national identity cards and driving licences from a much larger set of countries.
Turn it on wherever your visitors arrive with something other than a passport. Leave it off if every visitor presents a passport, since the narrower reader is one less moving part.
Two limits are worth knowing before you rely on it:
- It is ignored on a kiosk with a document scanner attached. The setting only chooses between the two camera readers. A site that standardises on scanner hardware can turn this on and see no change.
- The wider reader is licensed, and it does not fall back. If its licence has lapsed or does not match the installed app, the visitor sees the message “Unable to initialize Global ID Card Document Processor. Please restart the device and try again.” followed by the reason (invalid licence key, licence expired and so on), and is returned to the welcome screen. The kiosk does not quietly drop back to the built-in reader. If document scanning suddenly fails on every kiosk on the same day, check the licence first.
Enable EIDA ID Card Back OCR
Off by default. It reads the back of an Emirates ID, after the card itself has been read, for extra validation and details. It belongs to the Emirates ID route and is not affected by the global reader switch above.
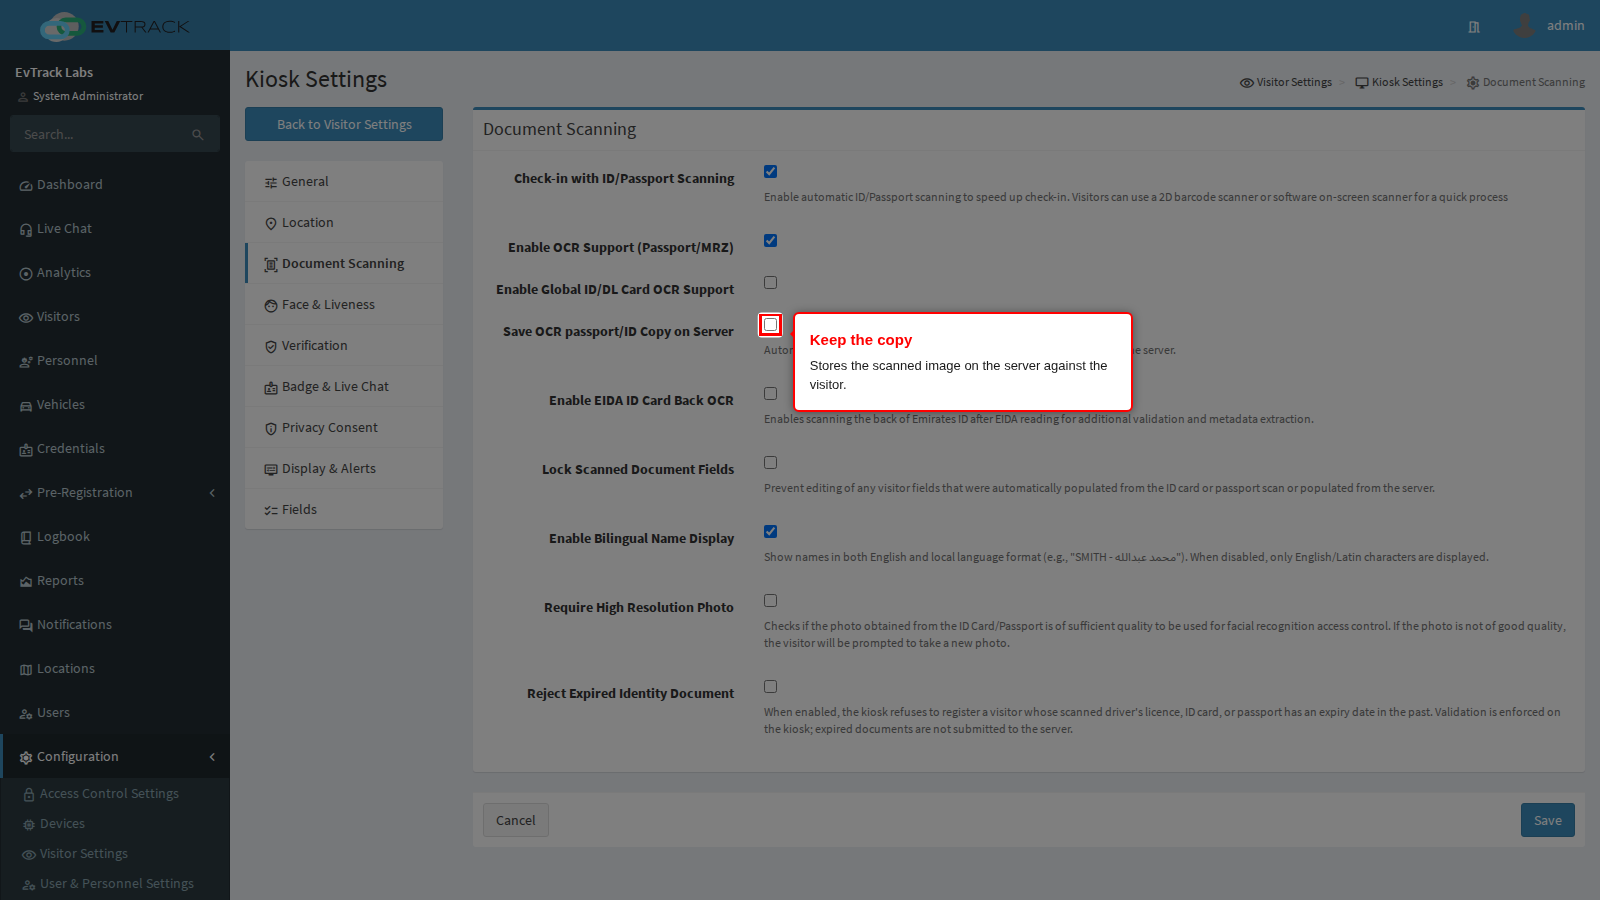
Save OCR passport/ID Copy on Server
Off by default. It stores a picture of the scanned document against the visitor record. It is useful evidence and it is personal data, so switch it on only where your privacy notice covers it, and pair it with the Privacy Consent panel of the kiosk settings. With it off, the kiosk discards the picture once the details have been read.
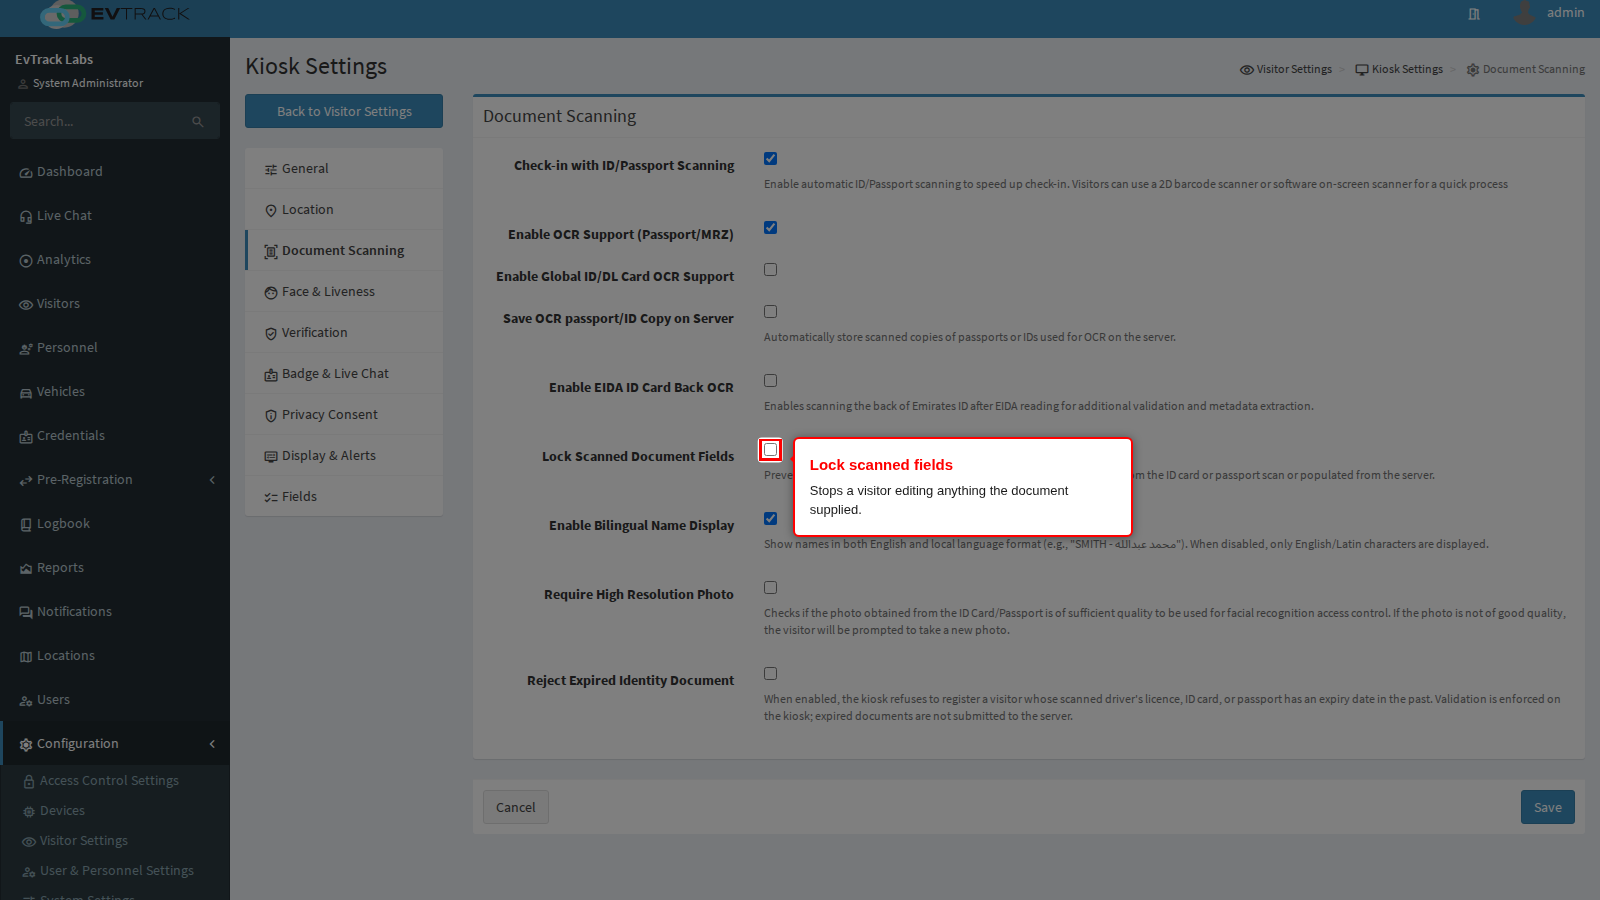
Lock Scanned Document Fields
Off by default. With it on, a registration question that the document supplied is shown read-only, so the visitor cannot change what the document says. A question the document left blank remains editable, and the Photo question is never locked. Turn it on where the point of scanning is that the visitor cannot invent a name.
Enable Bilingual Name Display
On by default. Names read from a document are shown in both English and the local script, for example “SMITH - محمد عبدالله”. With it off, only the English (Latin) characters are shown.
Require High Resolution Photo
Off by default. When a scanned document carried a portrait, the kiosk normally reuses it as the visitor’s photo. With this on, the kiosk discards that portrait and makes the visitor take a fresh photo with the camera instead. Use it where the photo feeds a face reader, or where the live photo is compared with the document, see Face and Liveness.
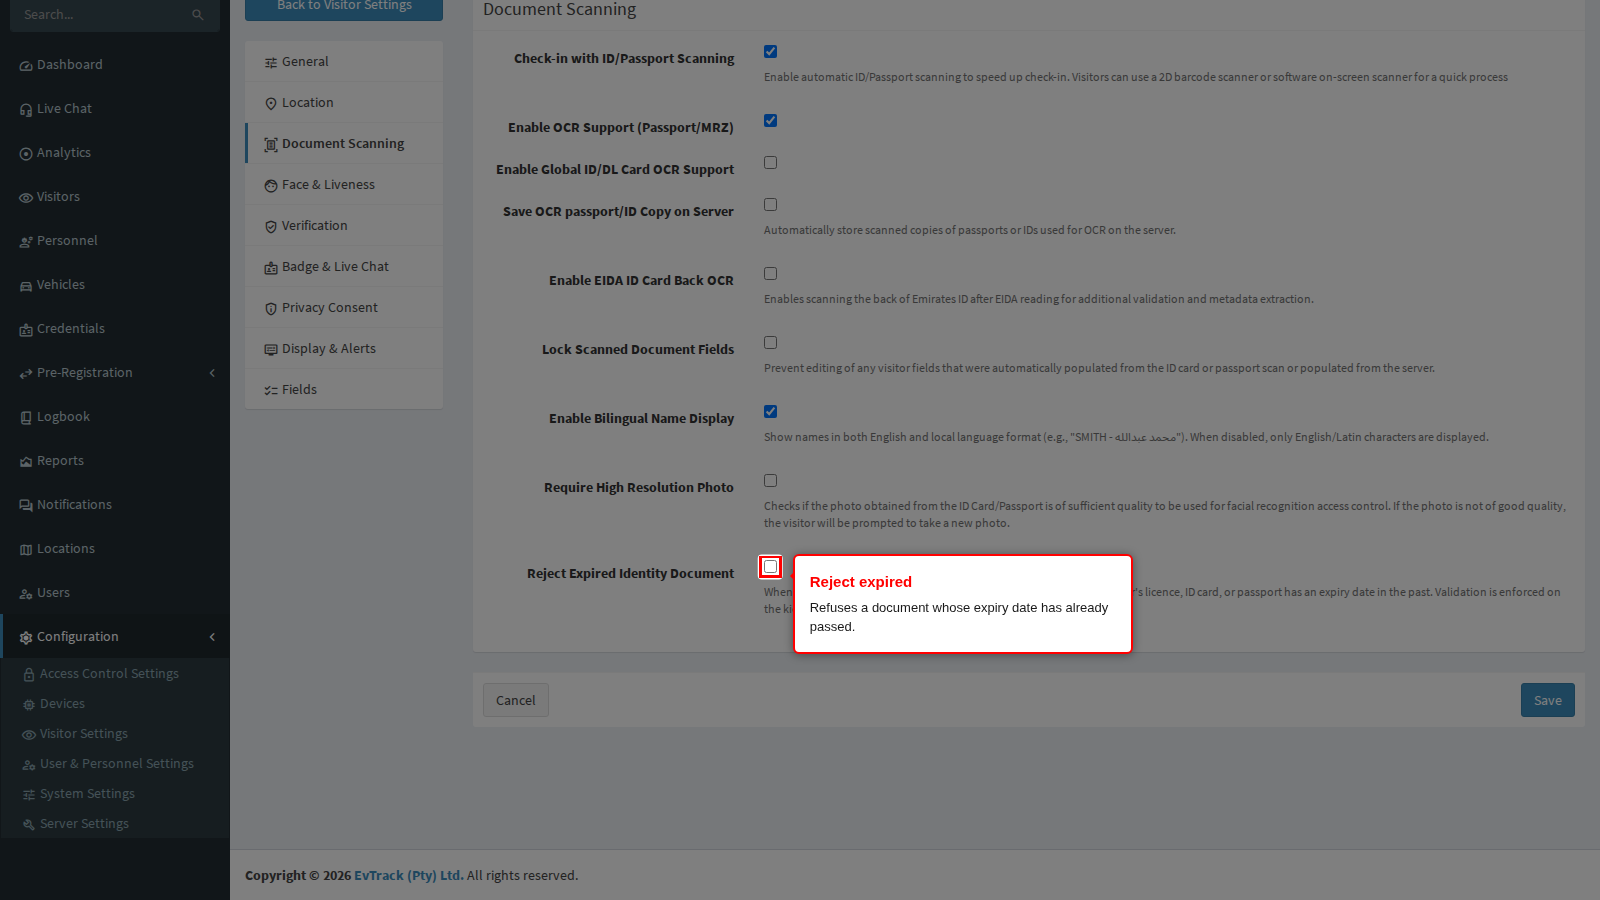
Reject Expired Identity Document
Off by default. With it on, the kiosk refuses a visitor whose scanned licence, ID card or passport has an expiry date in the past. The check is made on the kiosk, at check-in and at check-out, so an expired document is never sent to the server. The visitor sees the message “Identity Document Expired: The scanned identity document has expired. Please present a valid, non-expired document to continue.” for about ten seconds, and must then present another document or ask reception for help. A QR code or PIN is not a document and is never refused for this reason.
Save
Click Save at the bottom of the panel. Paired kiosks pick the change up within five minutes, or at once when the app restarts.