Use this page to put a new guard handset into service: create its device record, install the Guard app, match the handset to the record, and check the officer’s role. It takes about fifteen minutes per handset.
Before you start: an operator account that can manage devices and roles, the handset charged and on a network that reaches your EvTrack server, and the location the handset will be used at.
Step 1: Create the guard device
Go to Configuration > Access Control Settings > Devices, click Add and choose the EvTrack Guard App type. Give it a name the officers will recognise, for example “Checkpoint Guard”.
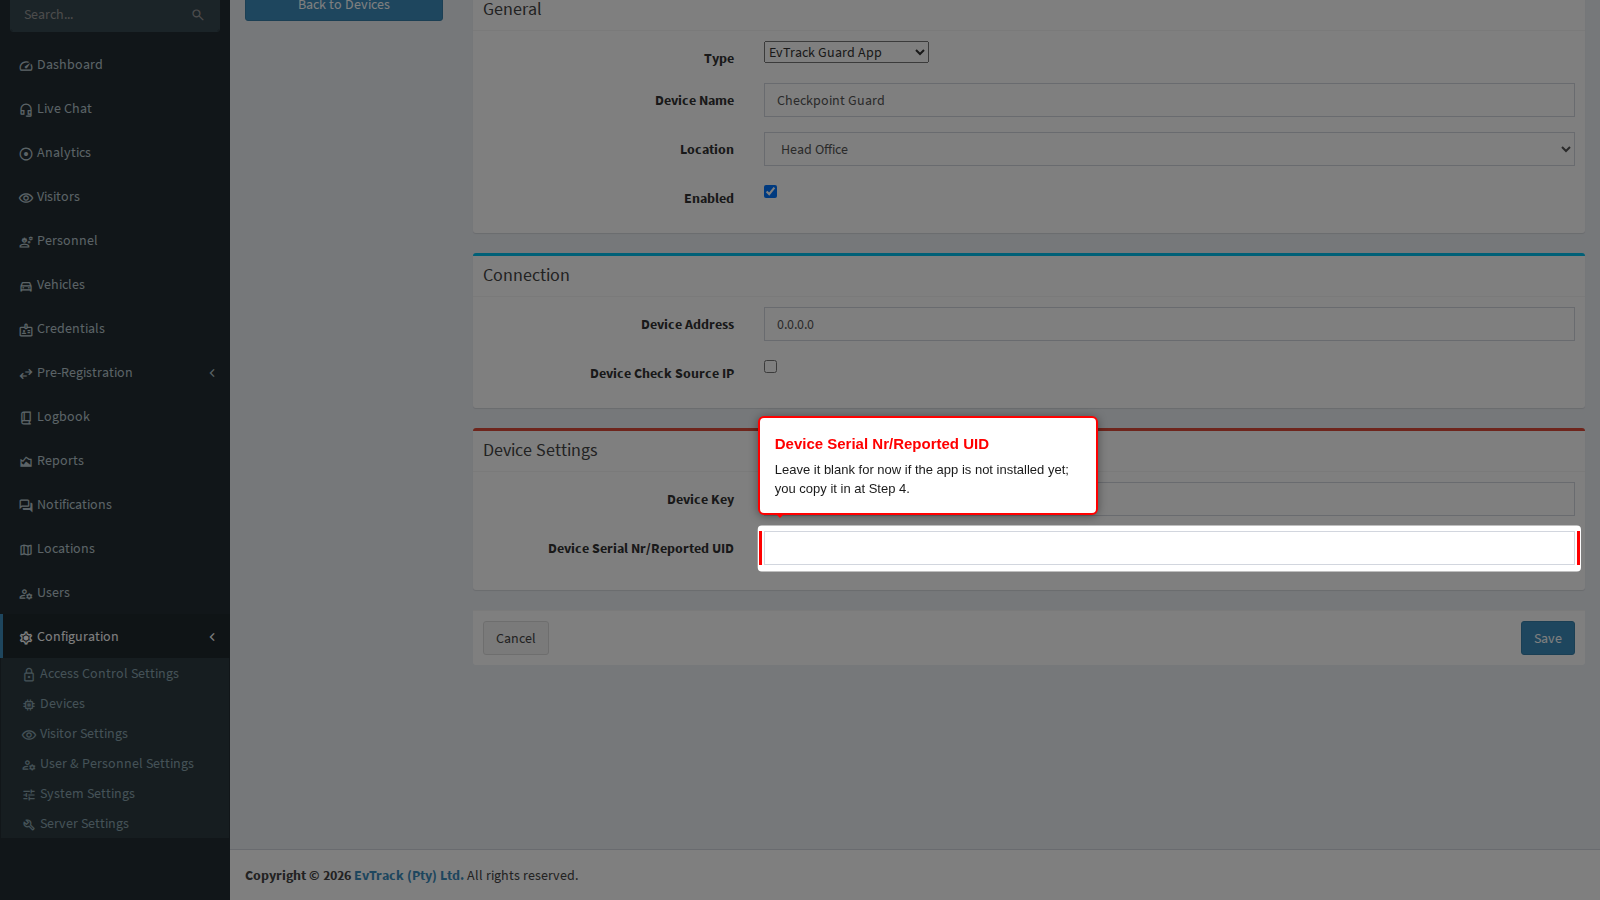
The form asks for the Device Serial Nr/Reported UID, the identifier the Guard app shows on the handset. If the app is not installed yet, leave it blank: you copy it in at Step 4.
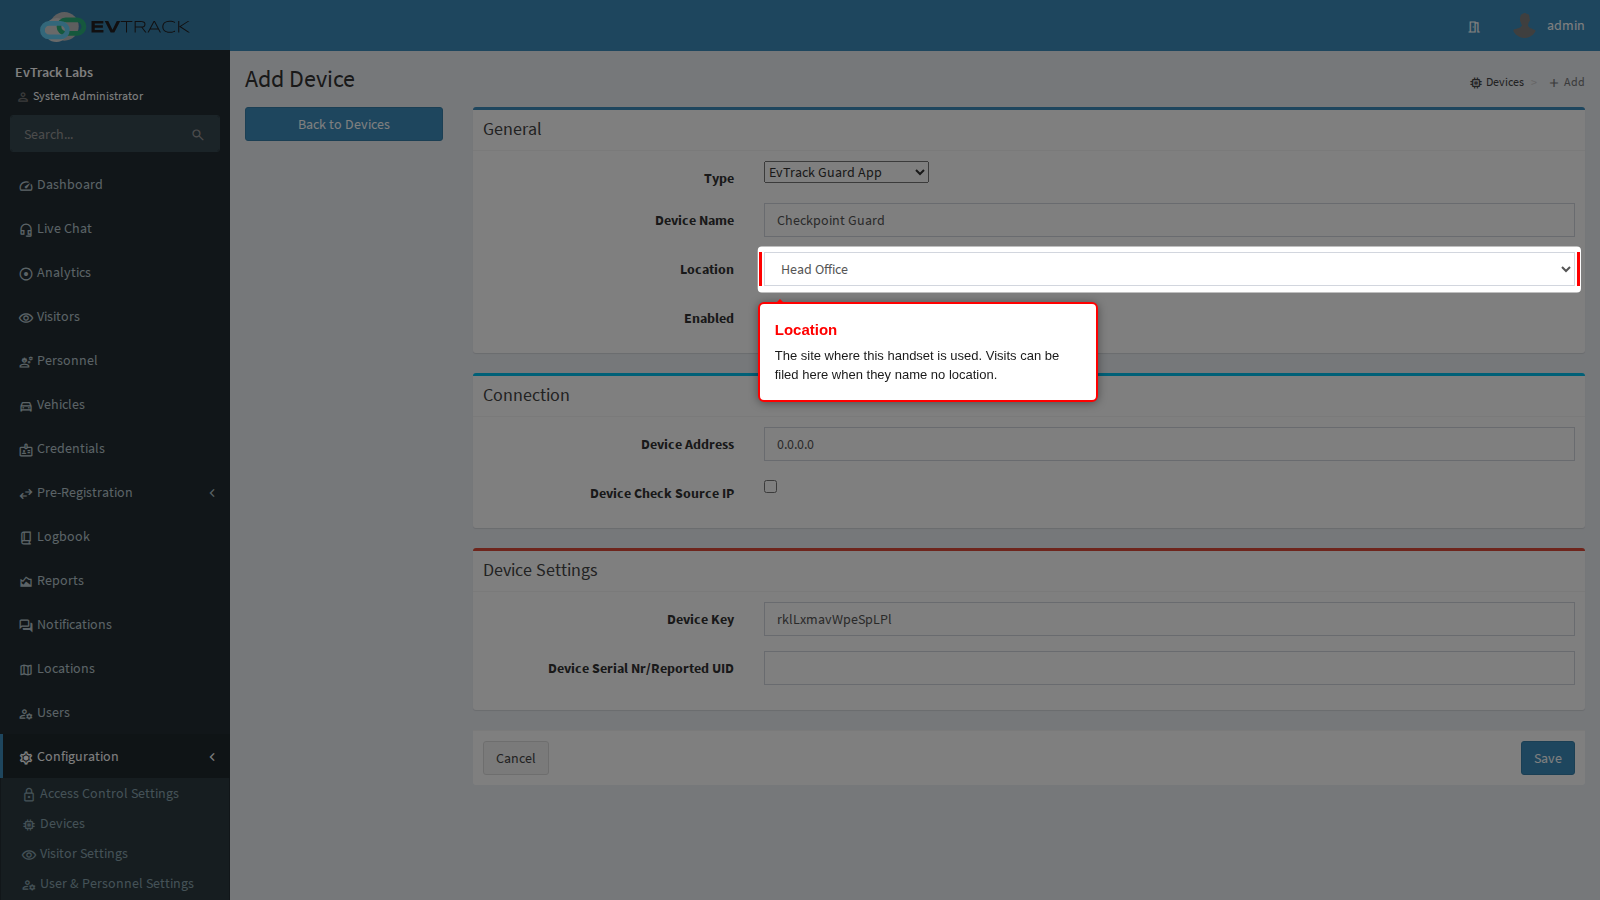
Choose the Location where the handset is used. Every Guard setting applies to the whole system, but the device’s location matters in two places: it can file a visit that names no location (see Visits Are Filed at the Wrong Location), and an access card handed out at this handset must come from that location’s card pool.
Click Save. A guard device saves without contacting the handset, so it can be created before the app is installed.
End state: the device is listed under Devices.
Step 2: Open the device record
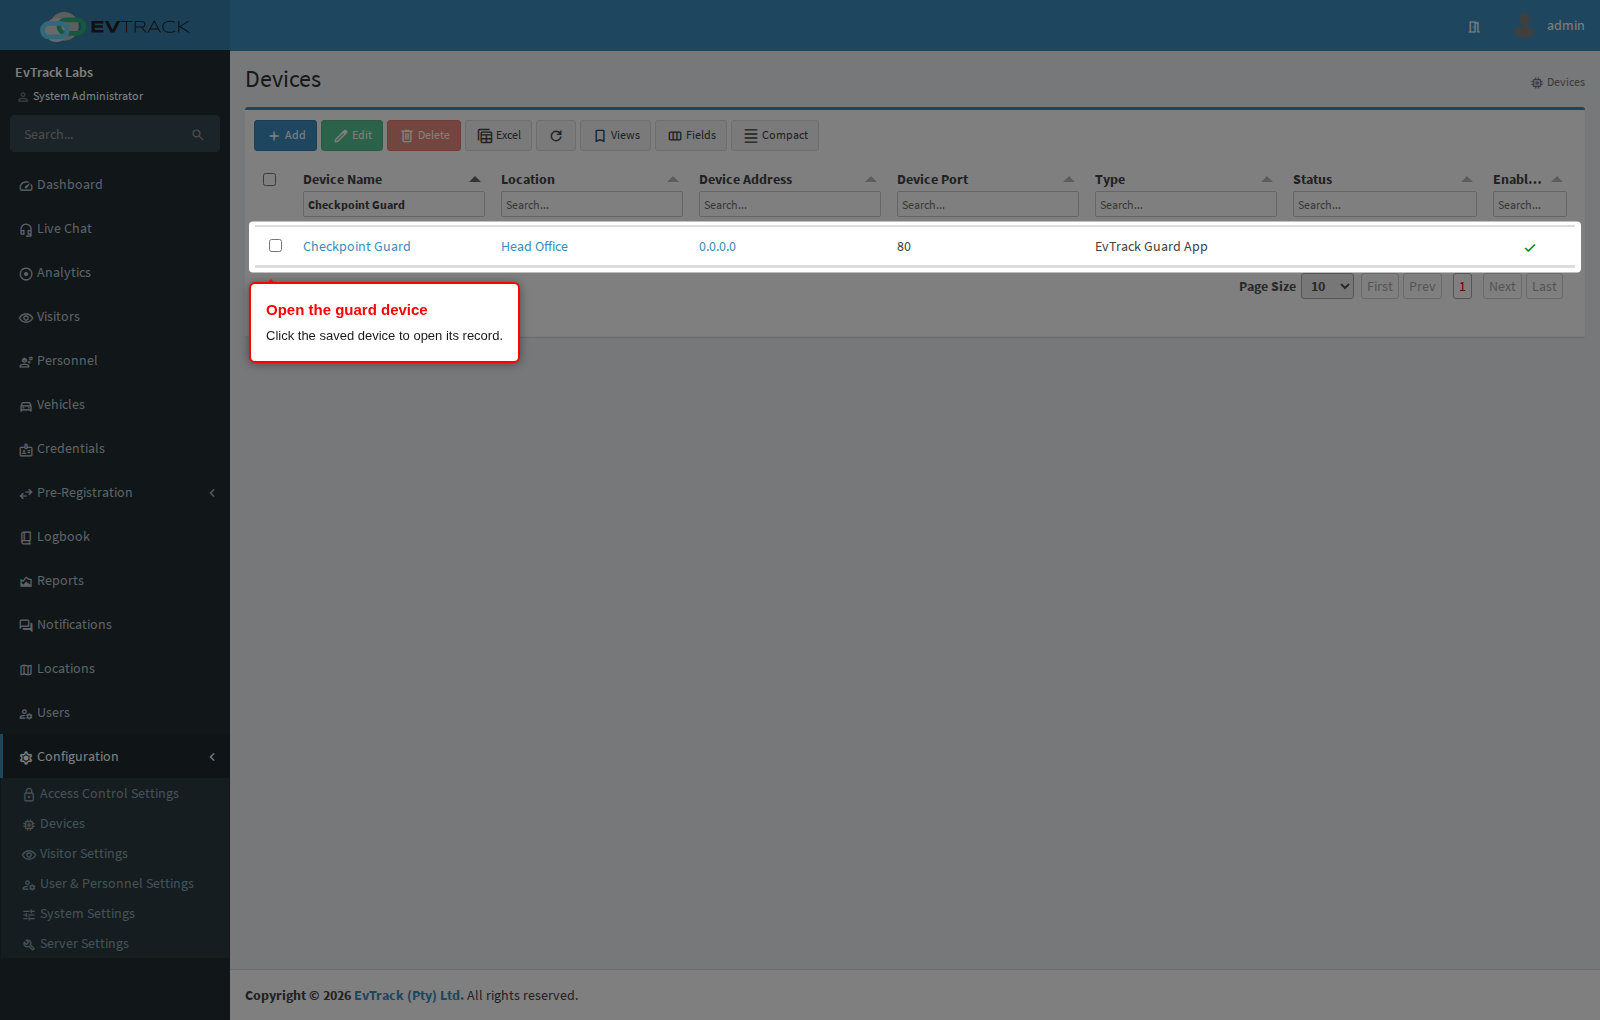
Find the device in the list and open it.
Step 3: Download and install the Guard app
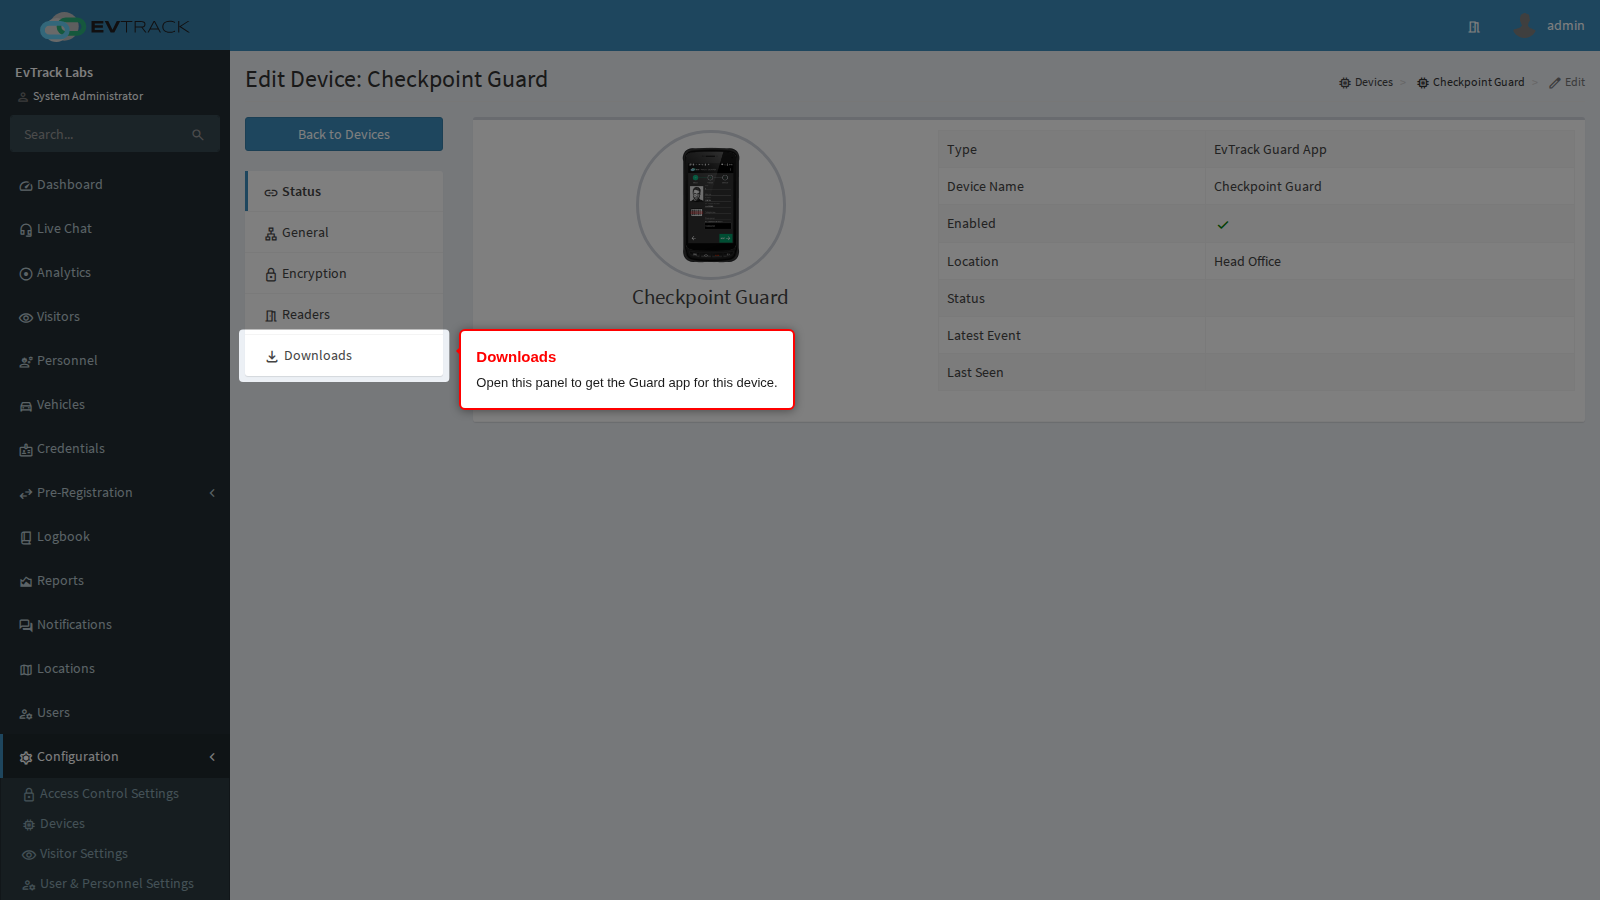
Click Downloads in the device’s menu.
A guard device offers two packages:
- EvTrack Guard - the app the officer uses to scan passes and verify visitors. This is the one you need.
- EvTrack EidaService - a companion package that reads Emirates ID cards. Install it only where the site uses those readers.
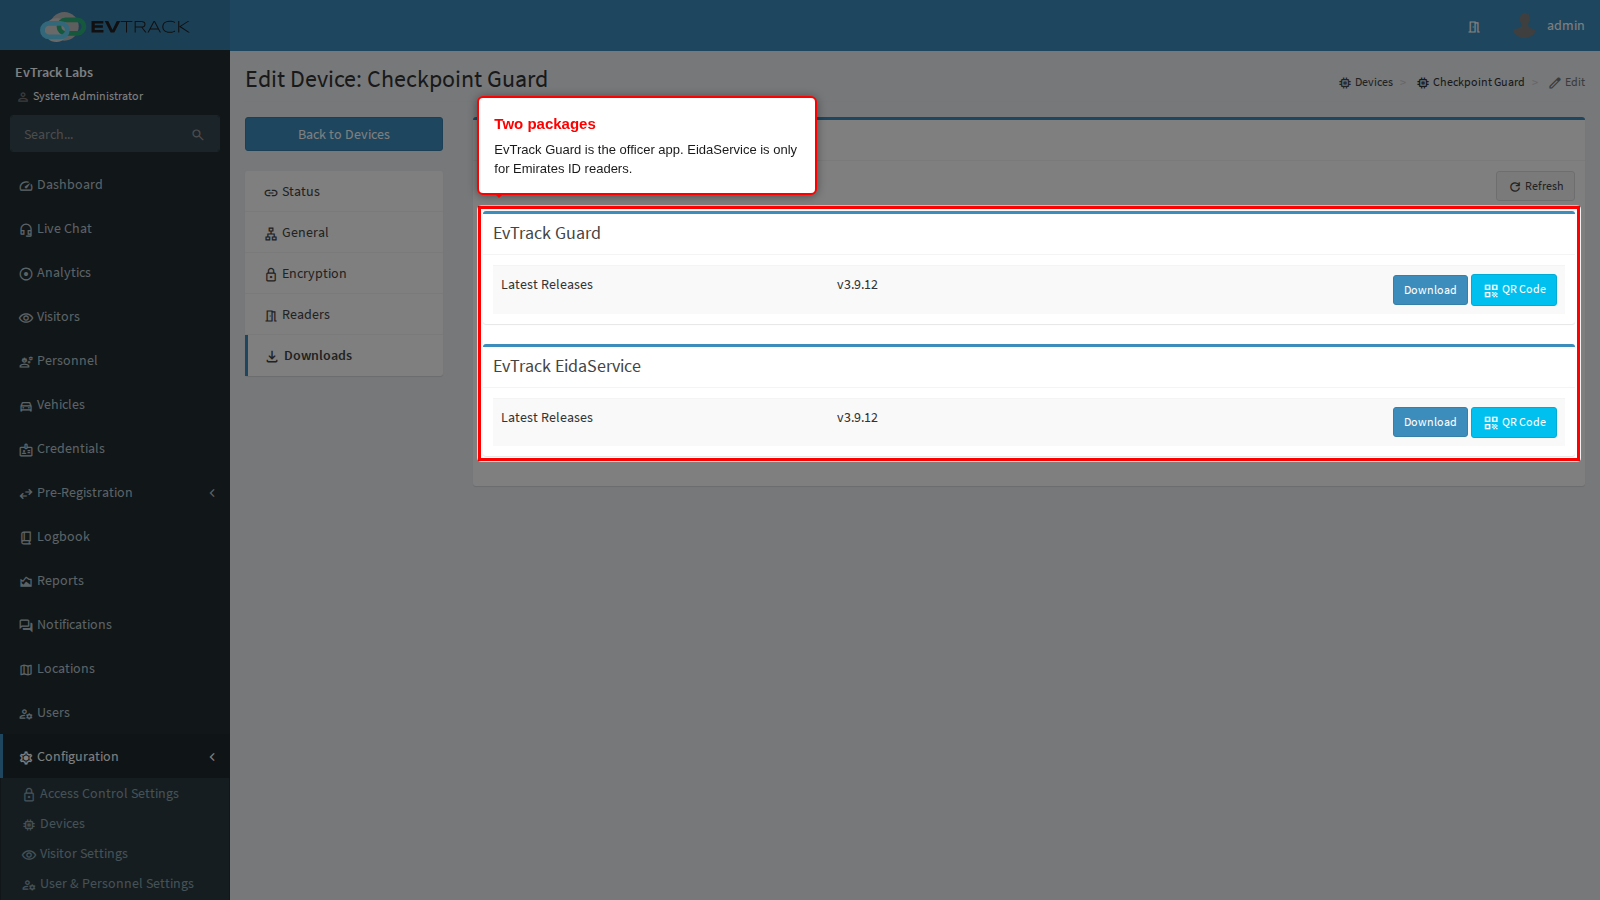
Use Download (or Beta, when a beta release is offered) to transfer the package by hand, or QR Code to show a code the handset can scan to download it directly. The version numbers in these screenshots are examples.
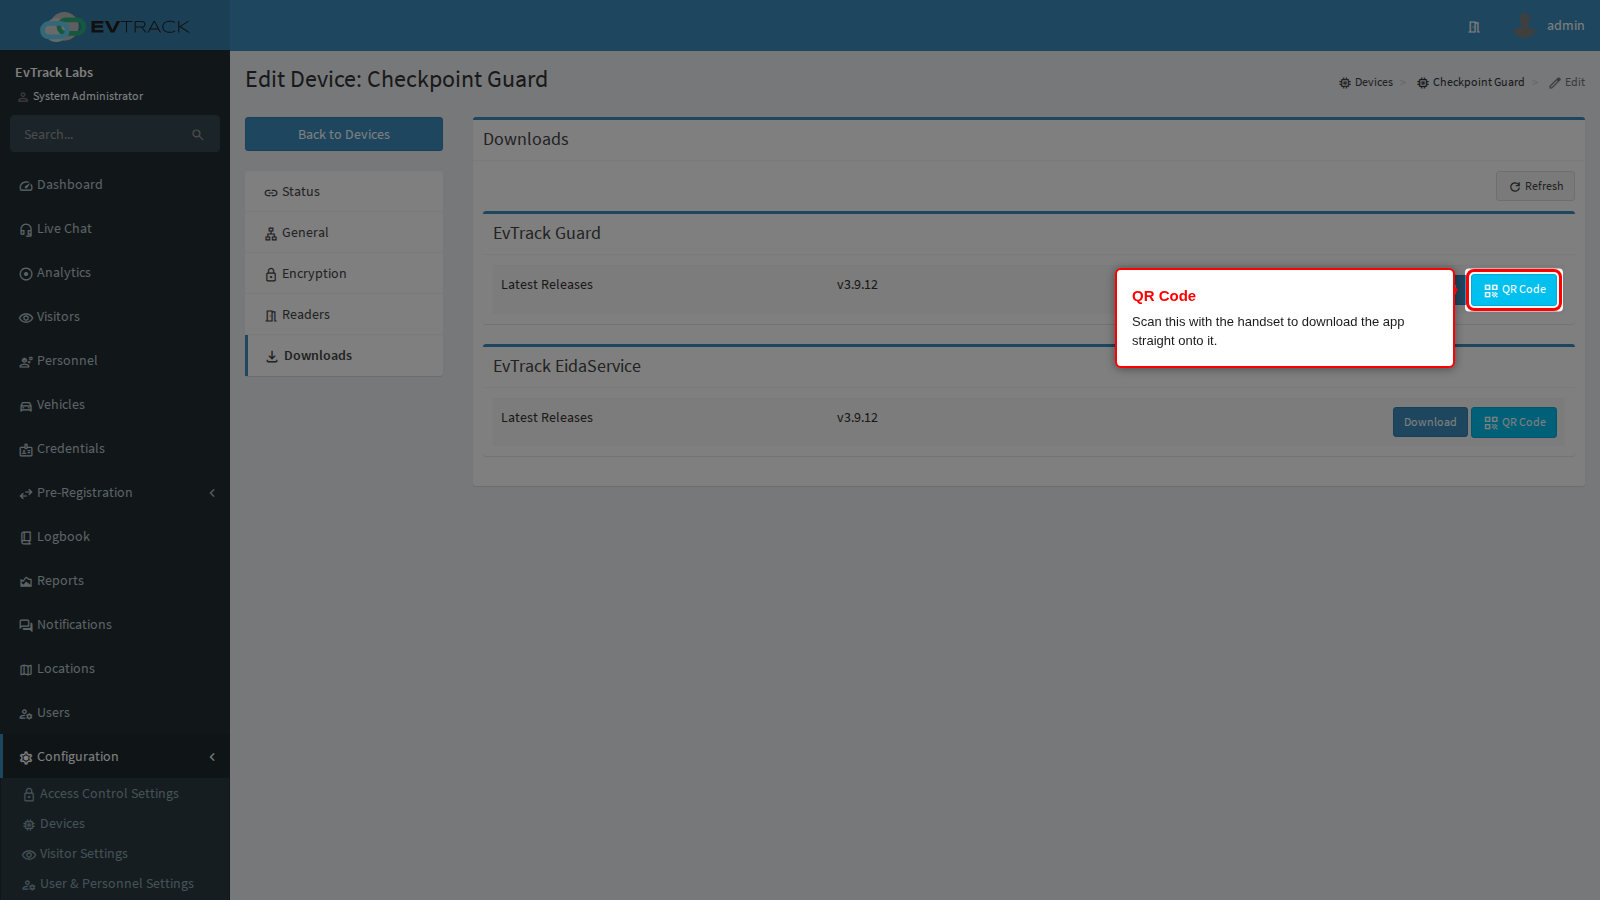
On the handset, allow installation from unknown sources when Android asks, then install EvTrack Guard and start it. On first start it shows its UID.
Step 4: Match the handset to the record
Open the device’s General panel and paste the UID into Device Serial Nr/Reported UID exactly as the app shows it. Copy it rather than retyping it: a single wrong character makes the server refuse the handset. Click Save.
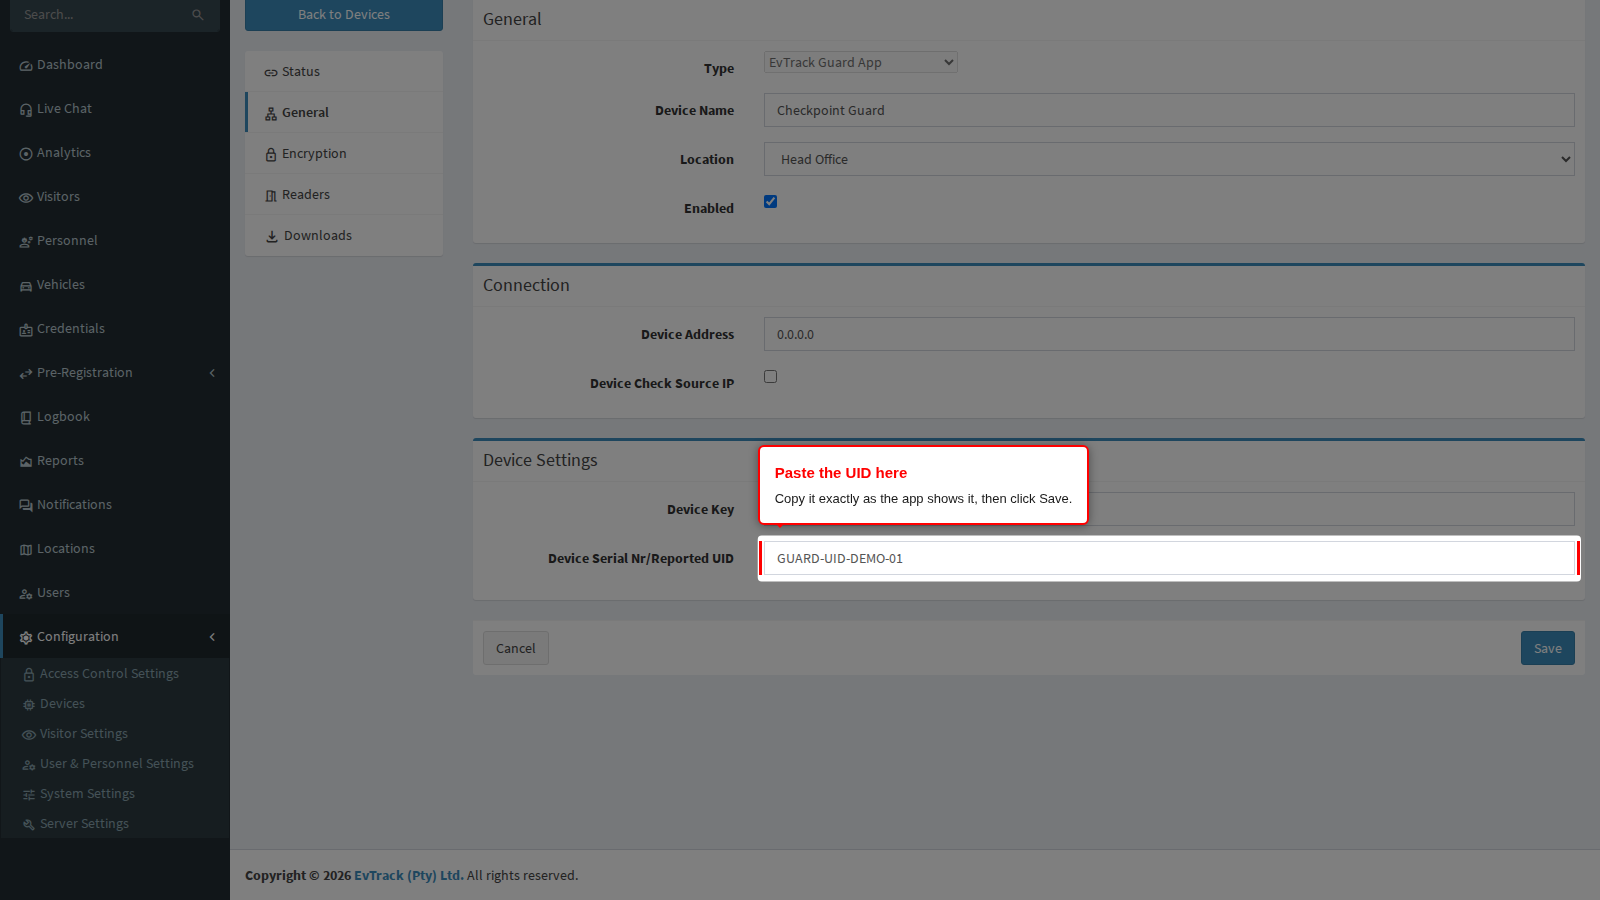
End state: the device record and the handset carry the same UID.
Step 5: Check the officer’s role
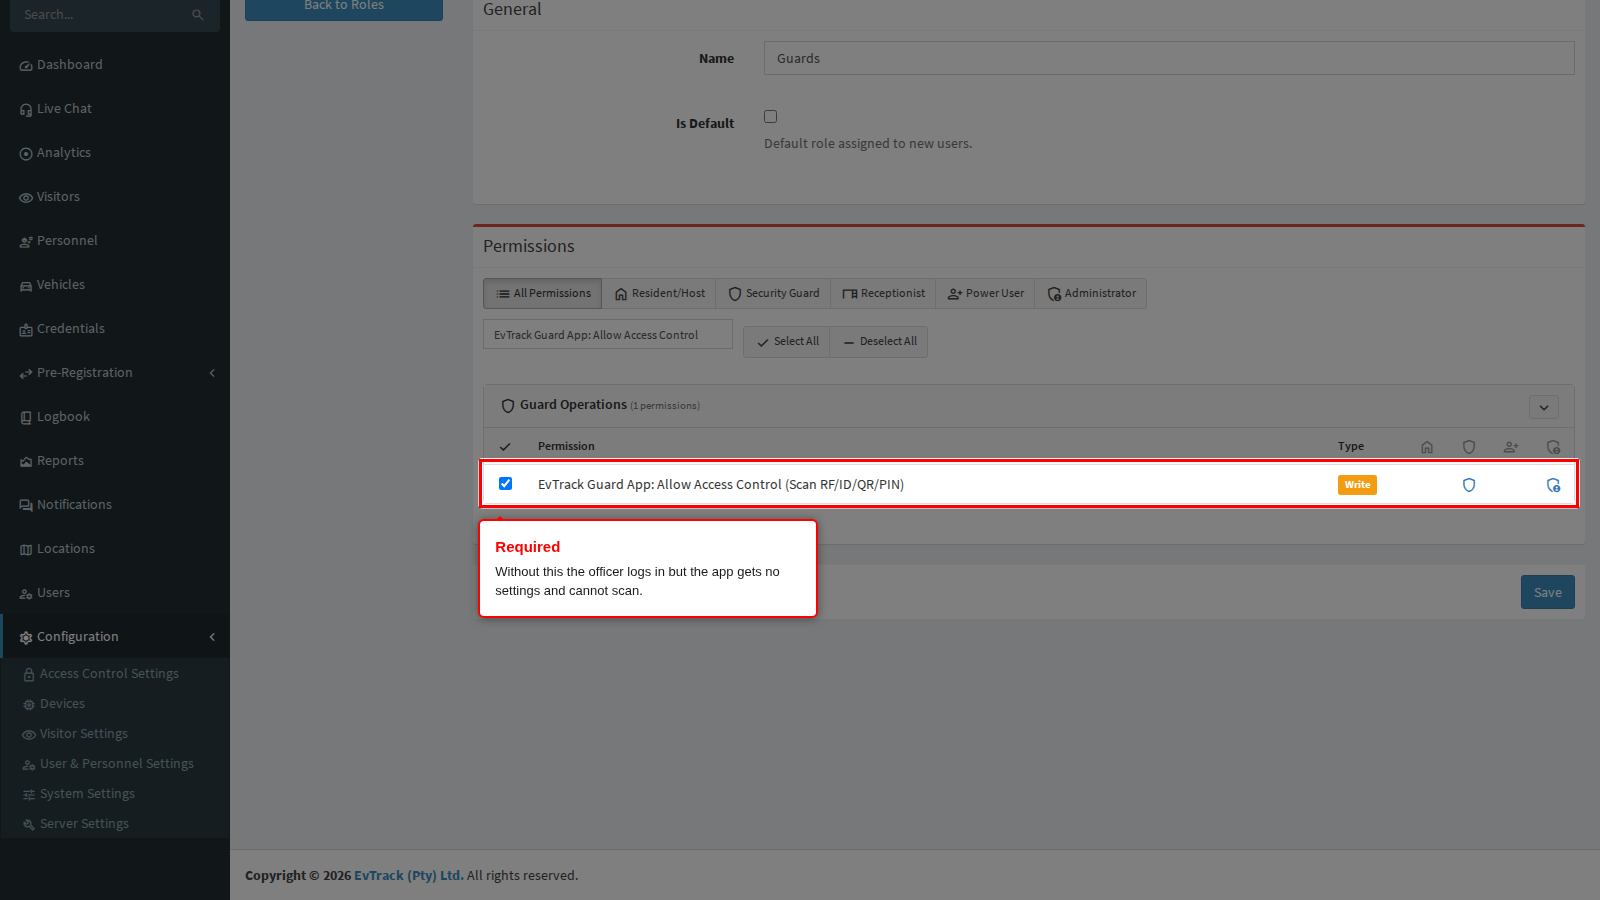
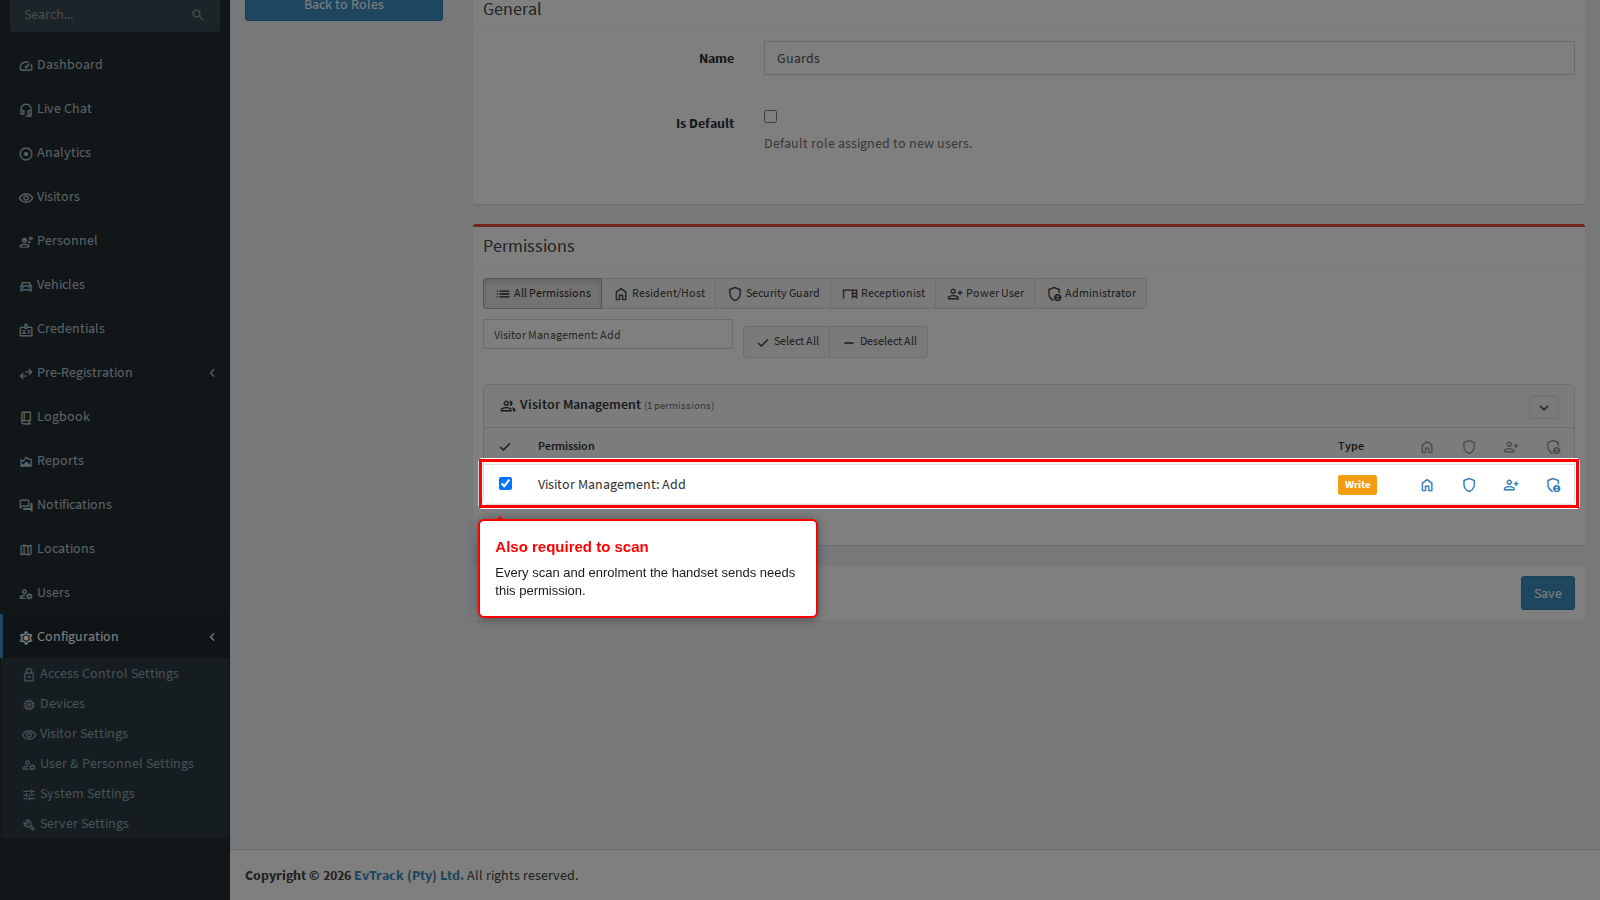
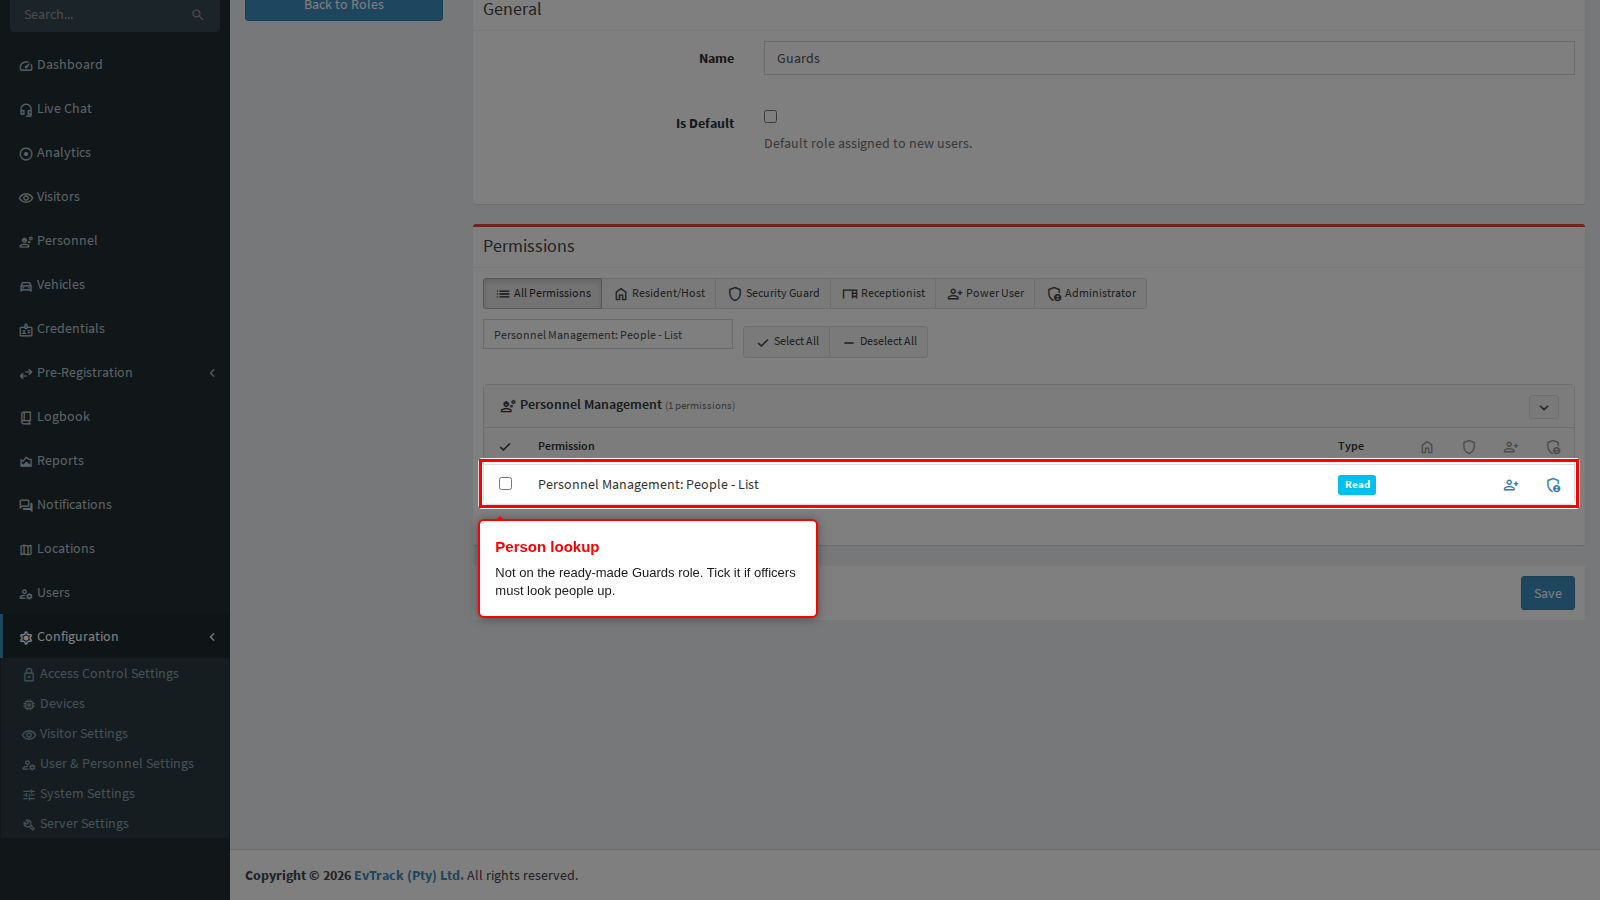
The officer logs in to the app with their own EvTrack account. Its role decides what the app lets them do. Open Configuration > User & Personnel Settings > Roles and edit the officer’s role (the ready-made Guards role is shown here). Type part of the permission name in the search box to find it.
EvTrack Guard App: Allow Access Control (Scan RF/ID/QR/PIN) is required. Without it the officer logs in, but the app receives no settings and cannot scan.
Visitor Management: Add is required to scan as well: every scan, entry, exit and walk-in enrolment the handset sends is checked against it. Without it the app loads its settings but every scan is refused.
Personnel Management: People - List lets the officer look people up on the handset. The ready-made Guards role does not include it; tick it and save if your officers need it.
See Roles for creating your own role.
End state: the officer logs in on the handset, the app loads its settings, and they can scan.
If it does not work
- The app refuses the handset after login: The Handset Is Refused After Login.
- A setting you changed does not reach the handset: Settings Do Not Take Effect.
Next
Configure what the officer is asked at the checkpoint: Configure the Guard.